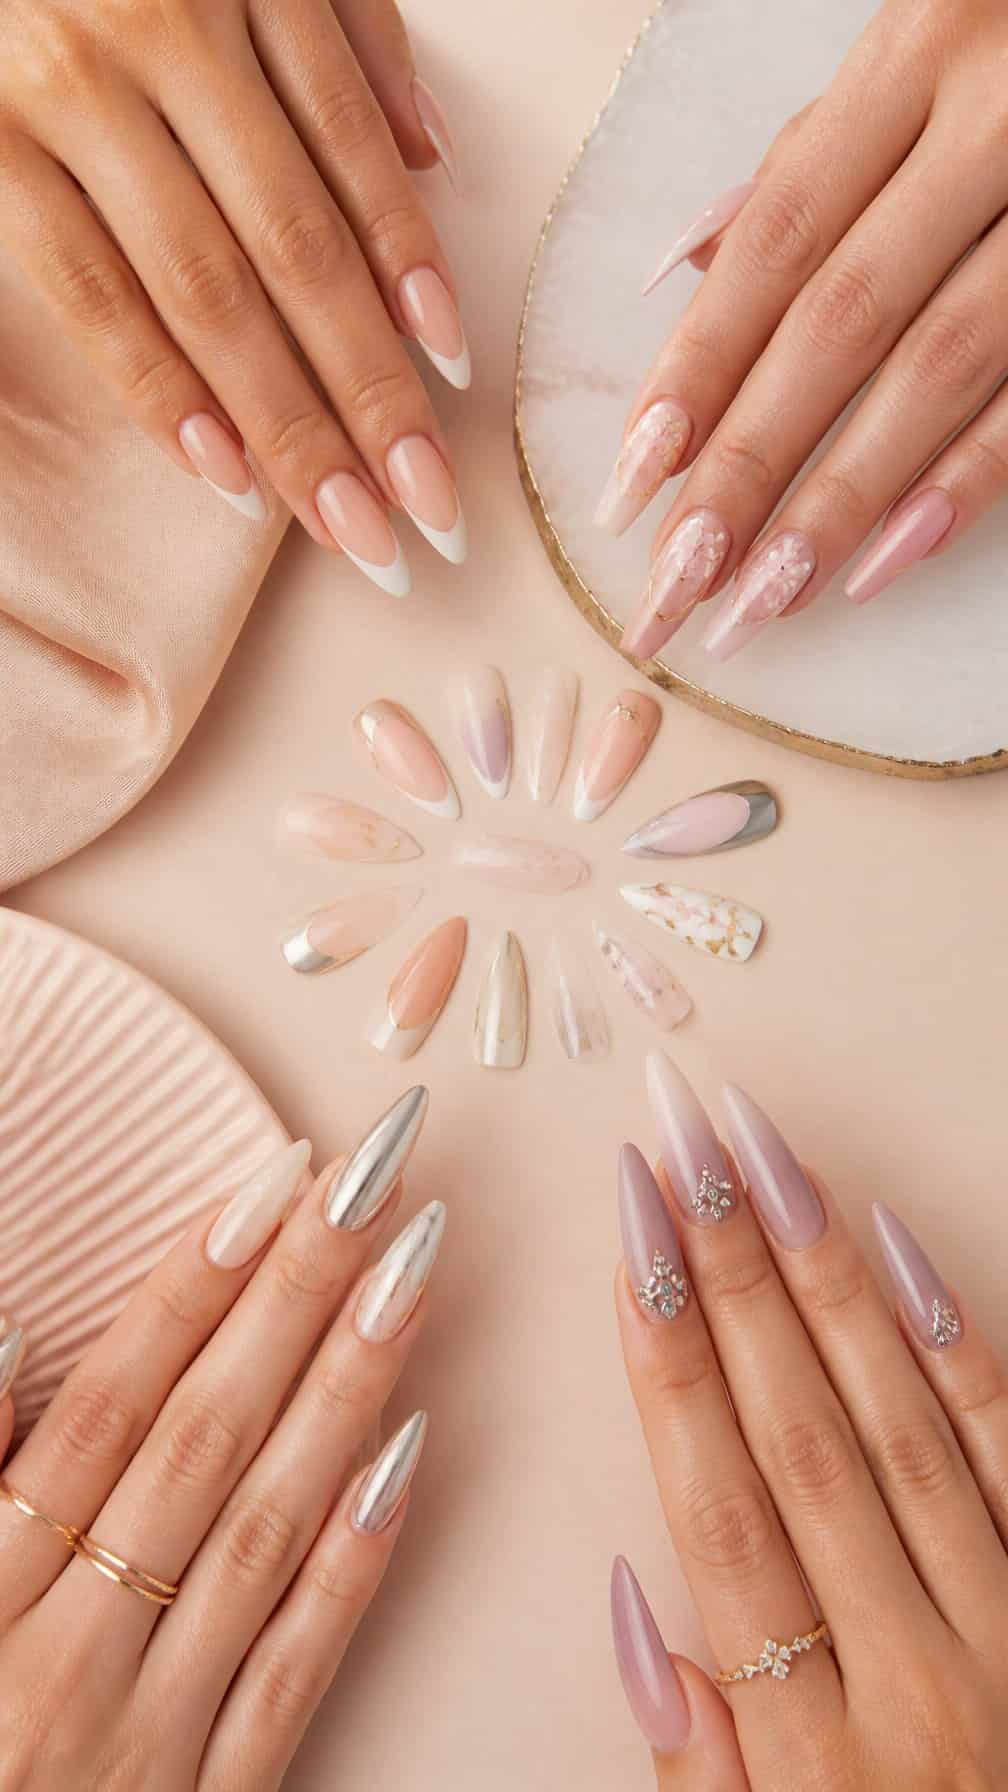
Long nails give me room to explore shape, color, texture, and decorative details that shorter styles cannot always accommodate. This collection brings together polished designs ranging from understated finishes to bold, artistic looks.
Save for later
Want to come back to this story? Save it with your email so it is easy to find again.
You can find a long nail design that suits your style by comparing the shapes, finishes, embellishments, and upkeep each option requires. I’ll also cover practical considerations for choosing materials and maintaining length, so you can decide whether the commitment fits your routine.
Table of Contents
- 1 1) Extra-Long French Tip Coffin Nails
- 2 2) Chrome Almond Nails with 3D Charms
- 3 3) Long Stiletto Nails with Red Ombre
- 4 4) Butterfly-Embellished Coffin Nails
- 5 5) Long Almond Nails with Aura Gradient
- 6 6) Black Lace Stiletto Nails
- 7 7) Long Coffin Nails with Gold Flakes
- 8 8) Marble Almond Nails in Emerald Green
- 9 9) Long Pink Nails with 3D Bows
- 10 10) Flame-Design Stiletto Nails
- 11 11) Long Square Nails with Rhinestone Cuticles
- 12 12) Tortoiseshell Almond Nails
- 13 13) Long Coffin Nails with Celestial Art
- 14 14) Milky White Stiletto Nails
- 15 15) Long Almond Nails with Velvet Cat-Eye Polish
- 16 16) Neon French Tip Coffin Nails
- 17 17) Long Chrome Nails with Mirror Finish
- 18 18) Floral-Print Almond Nails
- 19 19) Long Coffin Nails with Encapsulated Glitter
- 20 20) Red Jelly Stiletto Nails
- 21 21) Long Almond Nails with 3D Pearl Details
- 22 22) Black-and-White Graphic Coffin Nails
- 23 23) Long Square Nails with Gold Chrome Tips
- 24 24) Ocean-Inspired Stiletto Nails
- 25 25) Long Coffin Nails with Leopard Print
- 26 Choosing Length, Shape, And Materials
- 27 Matching Nail Shapes To Your Lifestyle
- 28 Selecting Gel, Acrylic, Or Builder Gel
- 29 Considering Natural Nail Health
- 30 Long Nail Care And Maintenance
- 31 Preventing Breakage And Lifting
- 32 Protecting Nails During Daily Tasks
- 33 Knowing When To Schedule Fills Or Removal
1) Extra-Long French Tip Coffin Nails
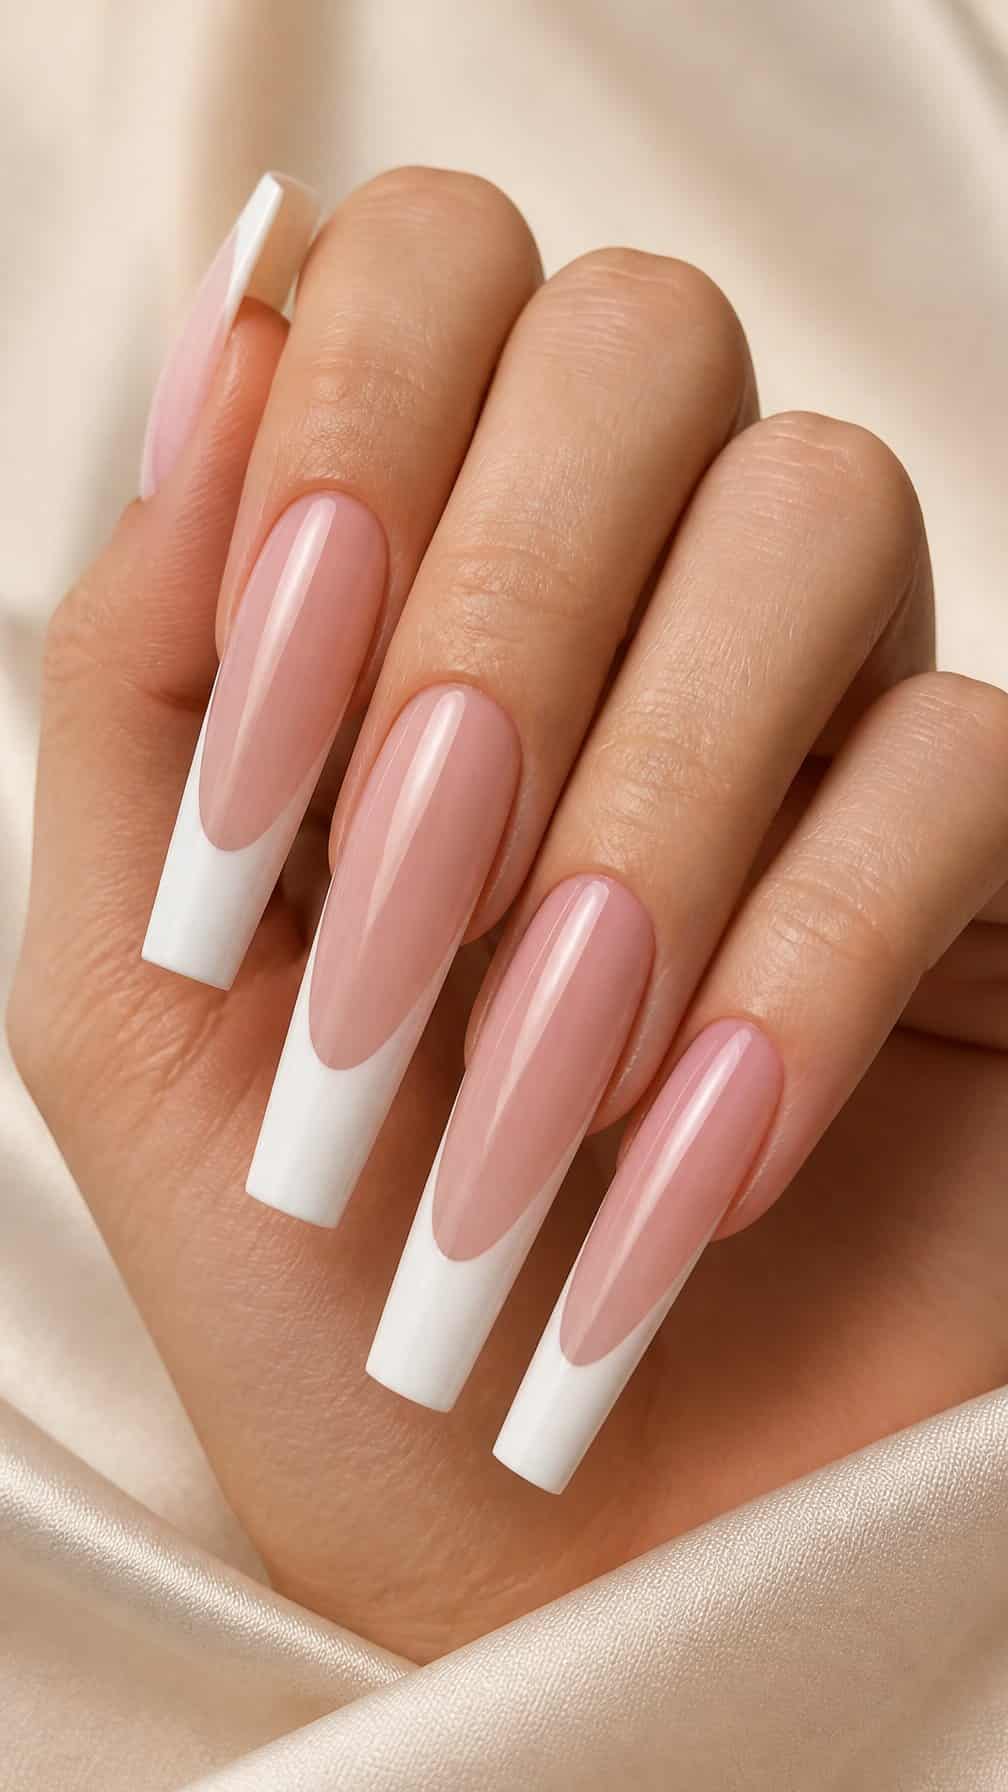
I like extra-long coffin nails when I want a clean, structured look with noticeable length. The tapered sides and squared ends create a balanced shape, while crisp white tips keep the design classic rather than busy.
I usually pair the French tips with a sheer pink, beige, or milky nude base to make the manicure look polished. A thin smile line feels refined, while a deeper tip adds stronger contrast and emphasizes the coffin shape.
The added length requires practical care. I keep the edges evenly filed, avoid using the nails as tools, and choose a strong gel or acrylic overlay to support the design.
2) Chrome Almond Nails with 3D Charms
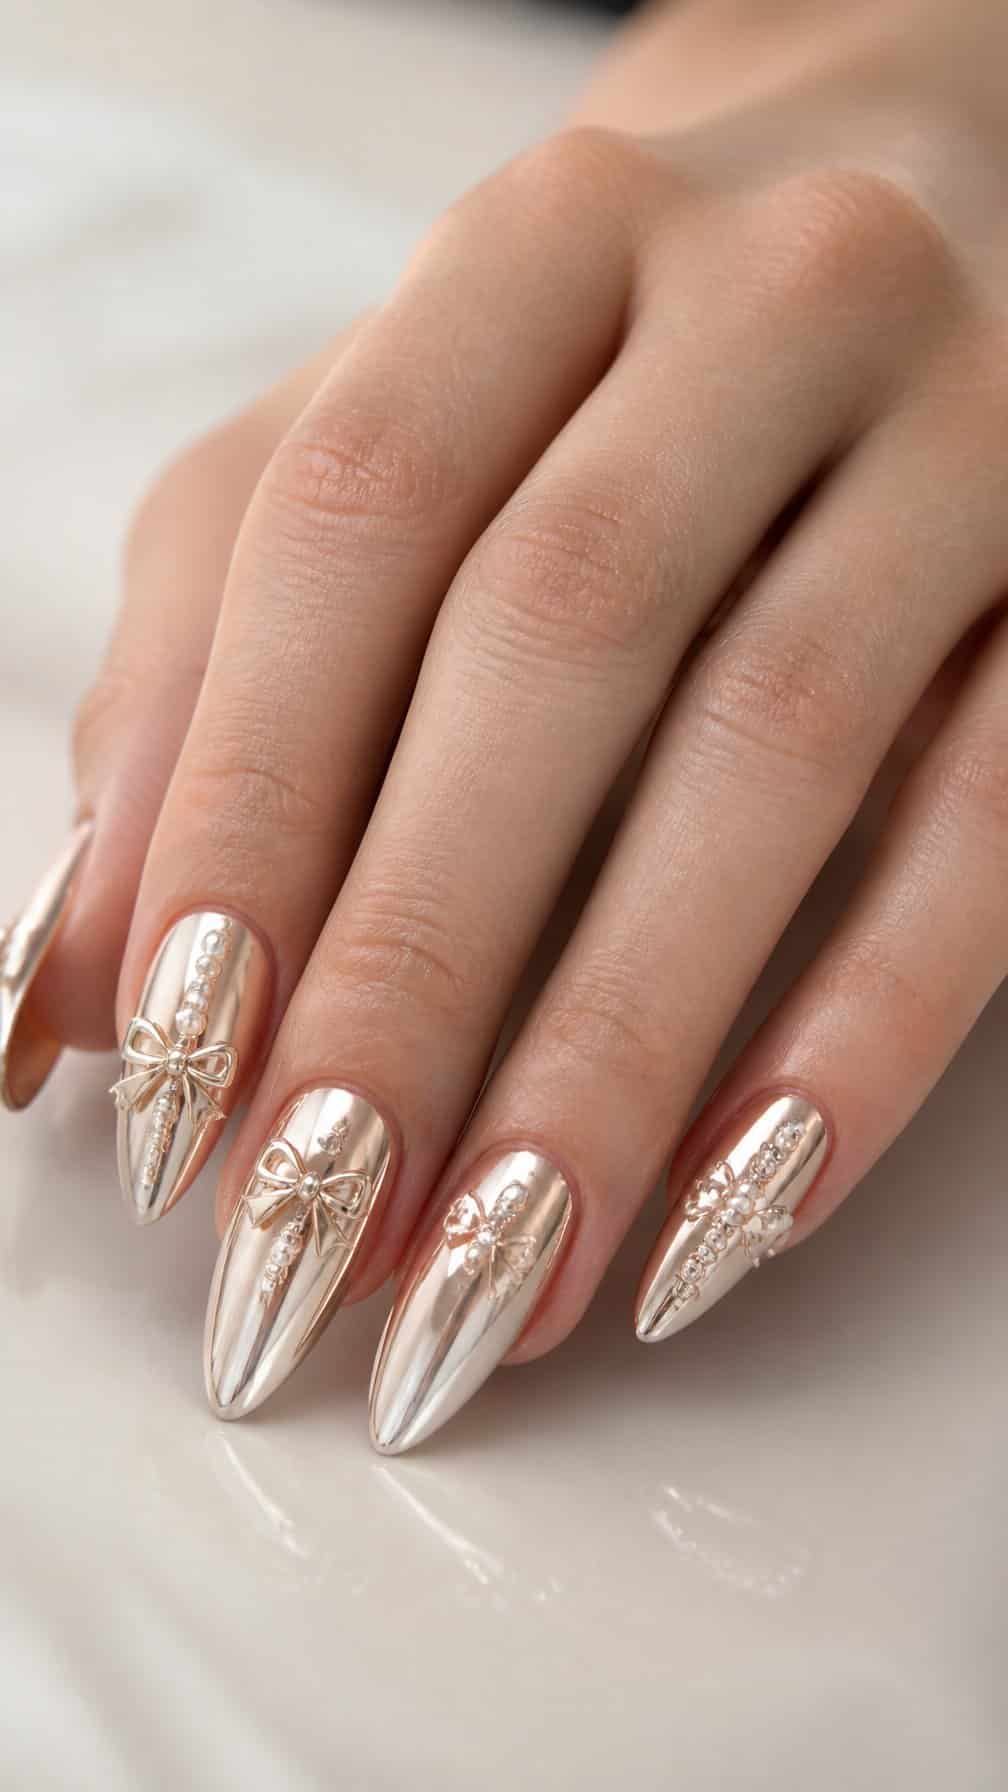
I like this design for its balance of sleek shine and sculptural detail. The almond shape keeps long nails looking refined, while chrome powder creates a reflective finish in silver, champagne, or soft pink.
I usually place 3D charms on one or two accent nails rather than covering every tip. Small bows, metallic studs, pearls, or raised florals add dimension without competing with the chrome surface. I also prefer a smooth, secure finish around each charm to reduce snagging.
This look works best when I match the charm color to the chrome or use one contrasting accent. I keep the length practical enough for daily tasks and schedule maintenance as the natural nail grows.
3) Long Stiletto Nails with Red Ombre
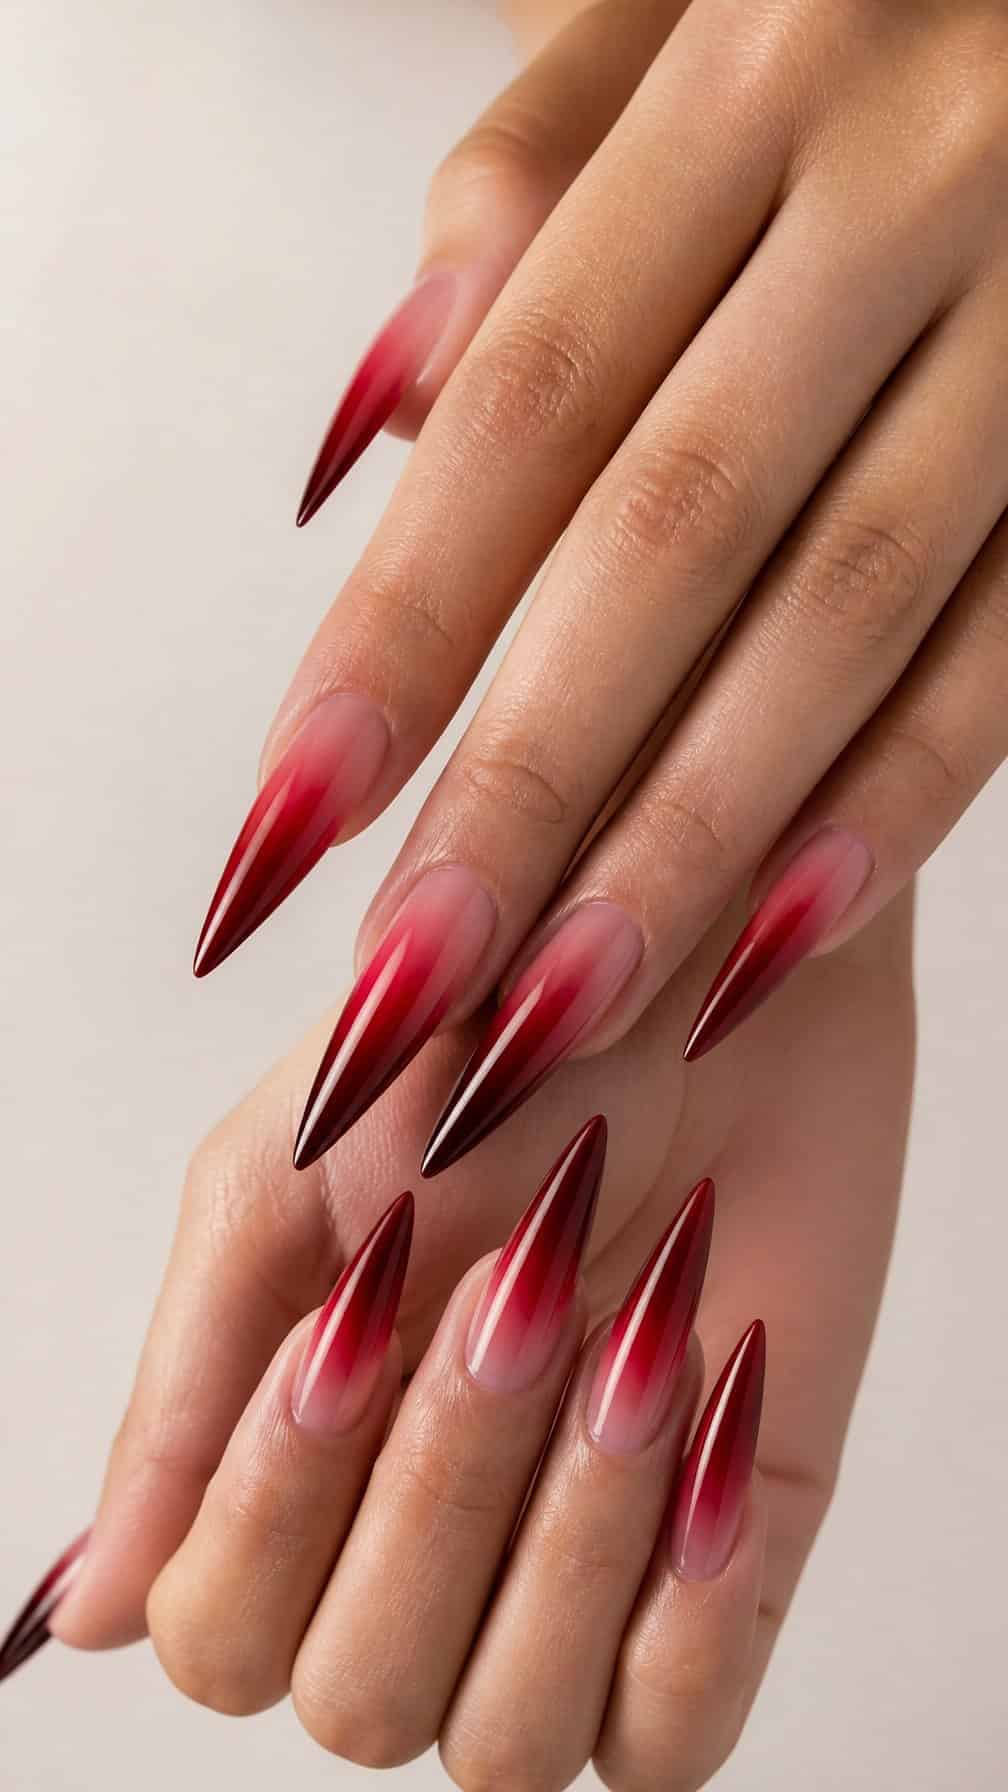
I like this design for its sharp silhouette and gradual color shift. A deep red tip fading into a soft pink or nude base keeps the length visually balanced, while the pointed shape creates a polished, dramatic finish.
I would pair the ombre with a high-gloss topcoat to emphasize the transition between shades. The tapered form suits almond-shaped hands, but its length requires practical adjustments, especially when typing, opening containers, or handling small objects.
4) Butterfly-Embellished Coffin Nails
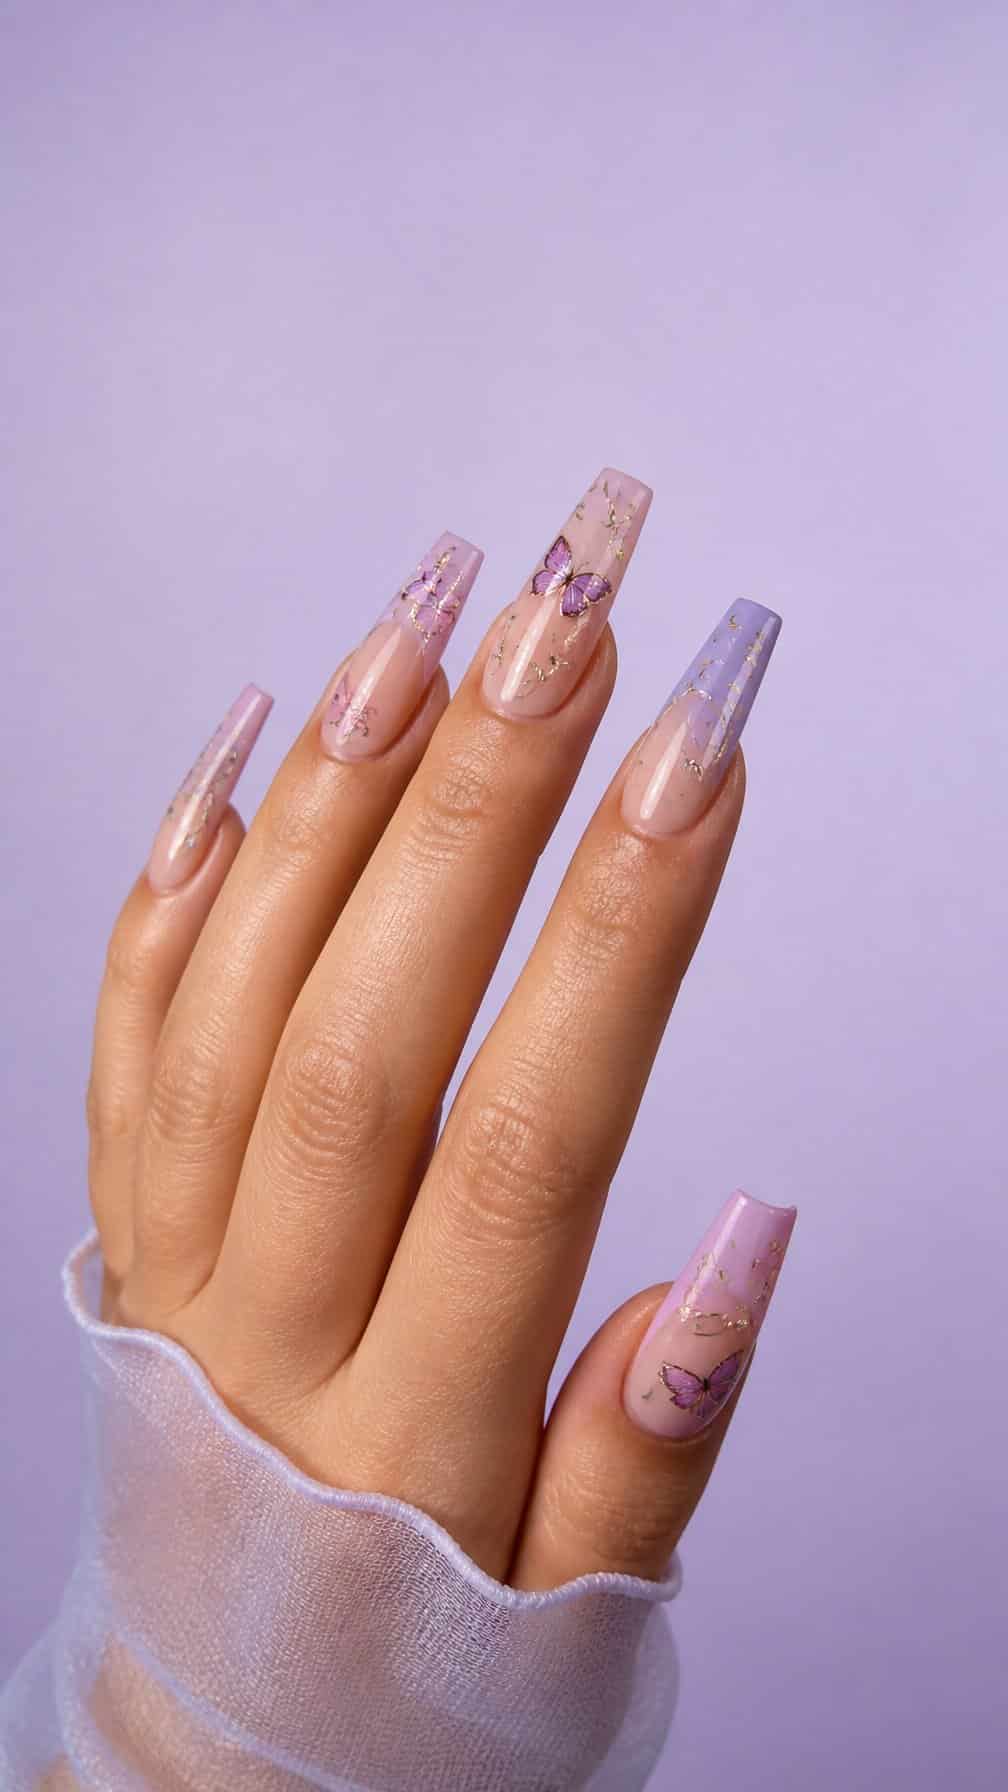
I like coffin nails with a sheer pink or nude base, delicate butterfly decals, and a few small crystals near the cuticle. The tapered shape gives the design a clean frame, while metallic outlines or translucent wings add detail without making every nail look crowded.
For a more coordinated set, I would place butterflies on two accent nails and use fine white lines or chrome details on the others. Long lengths provide enough space for layered wings, but I would keep the embellishments flat and secure them with builder gel to reduce snagging.
5) Long Almond Nails with Aura Gradient
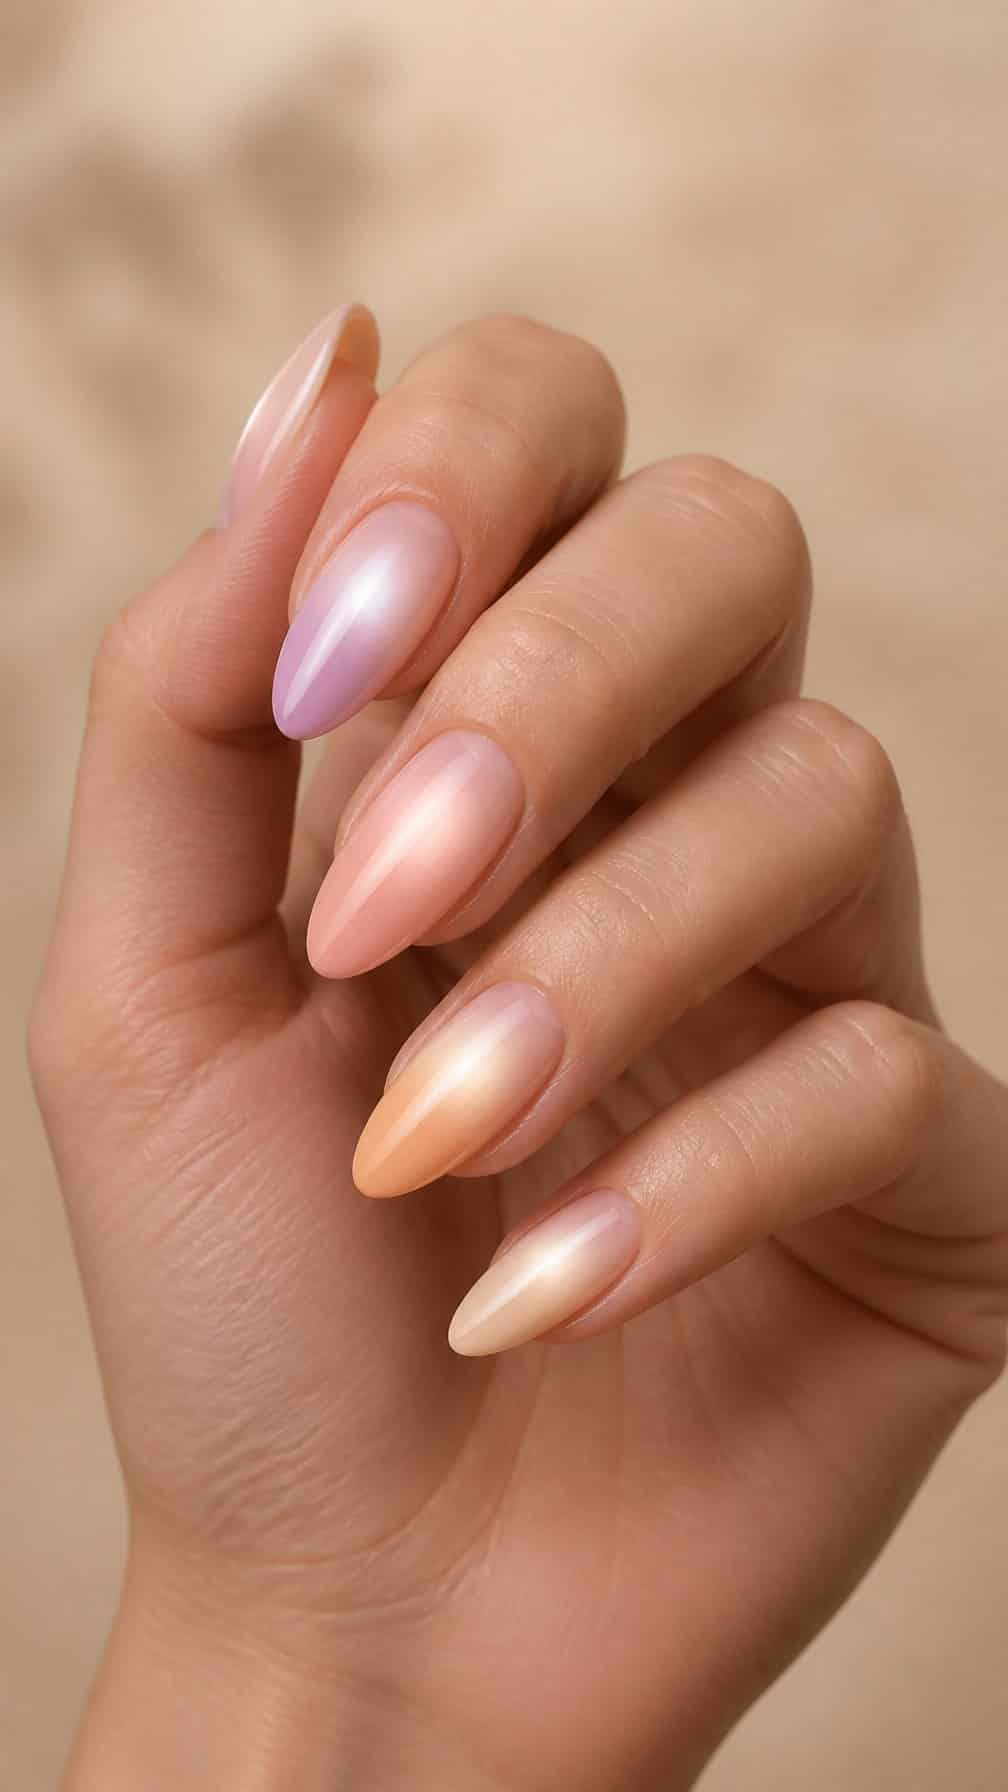
I like this design for its soft, diffused color transition and tapered silhouette. I would start with a sheer nude or milky base, then blend a concentrated shade near the center of each nail so the color fades gently toward the edges.
I find almond tips especially effective because they give the gradient a smooth, elongated frame. Lavender, peach, blue, and pink create different effects without changing the technique. A glossy top coat keeps the surface reflective and helps the blurred center look seamless.
I would keep the decoration minimal, since glitter or crystals can interrupt the aura effect. These nails require careful shaping and regular maintenance, particularly at longer lengths where the tips may catch on clothing or surfaces.
6) Black Lace Stiletto Nails
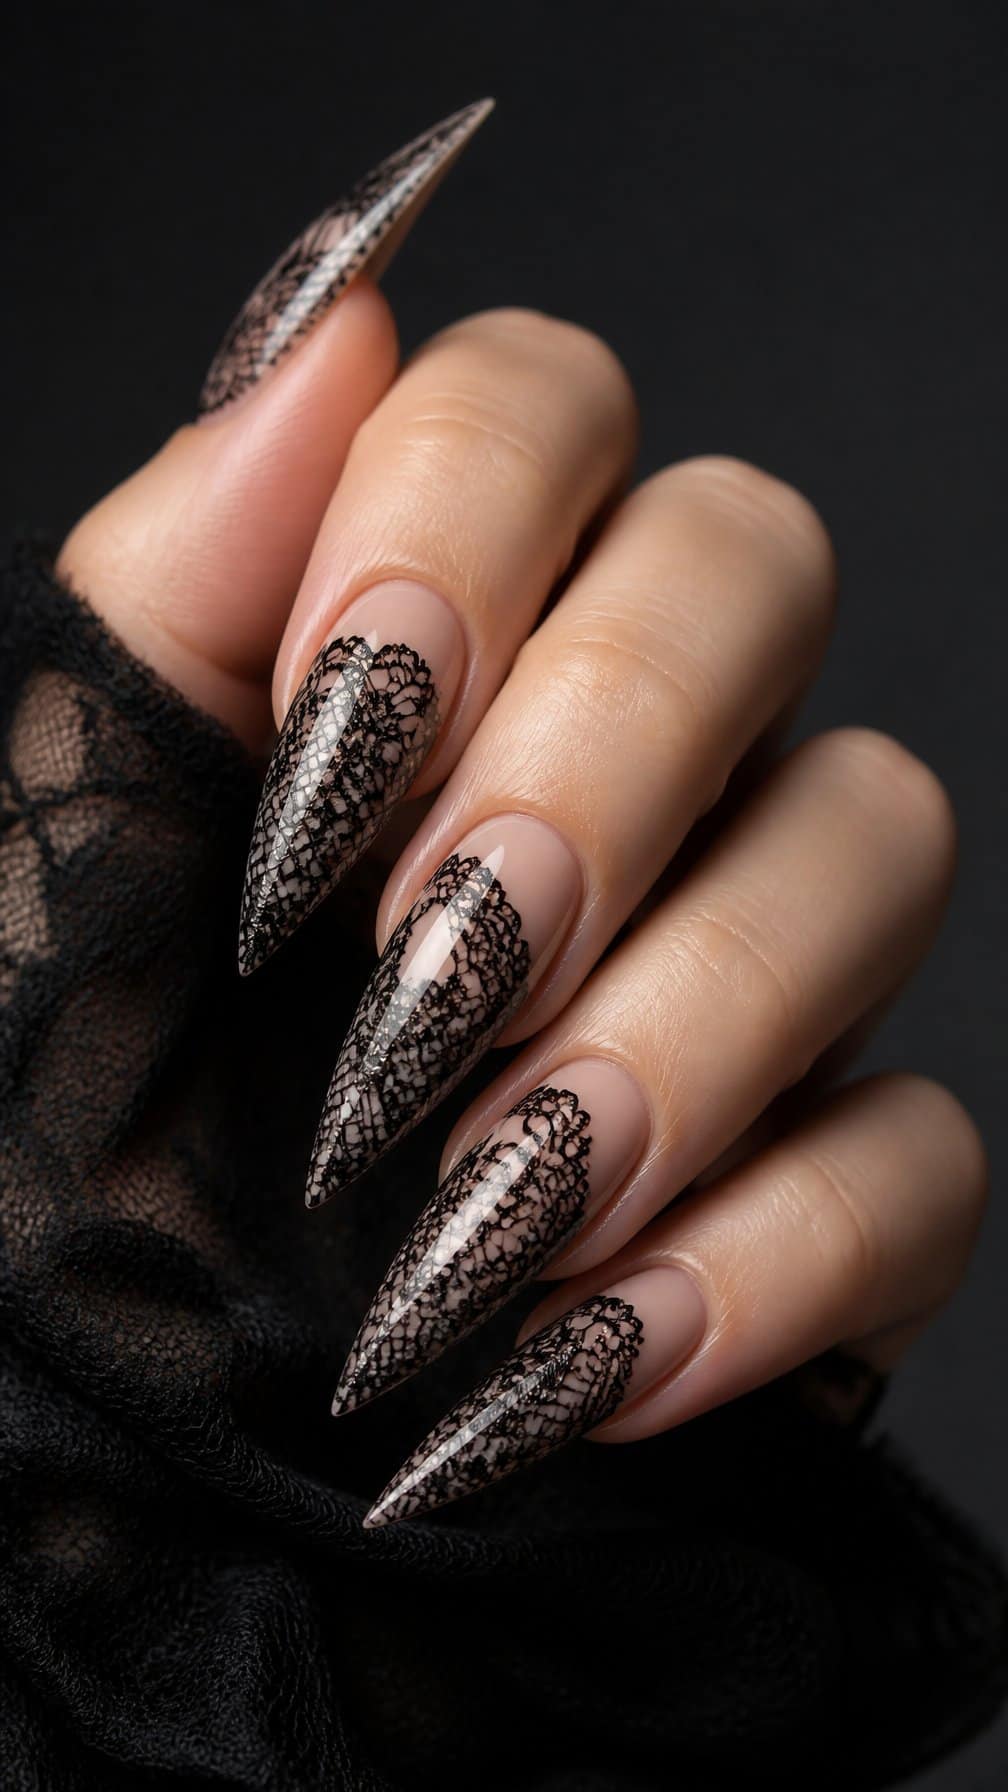
I like black lace stiletto nails for their sharp silhouette and detailed contrast. A sheer nude or soft pink base keeps the design balanced, while black lace accents create a delicate pattern across the pointed tips.
I would use fine linework, stamping, or lace decals to build the pattern without covering the entire nail. Adding a small amount of glossy black polish can define the edges, while a matte base gives the design a softer finish.
The length requires careful handling, especially during everyday tasks. I would reserve this style for occasions when I can maintain the pointed shape and protect the lace details from lifting or wearing away.
7) Long Coffin Nails with Gold Flakes
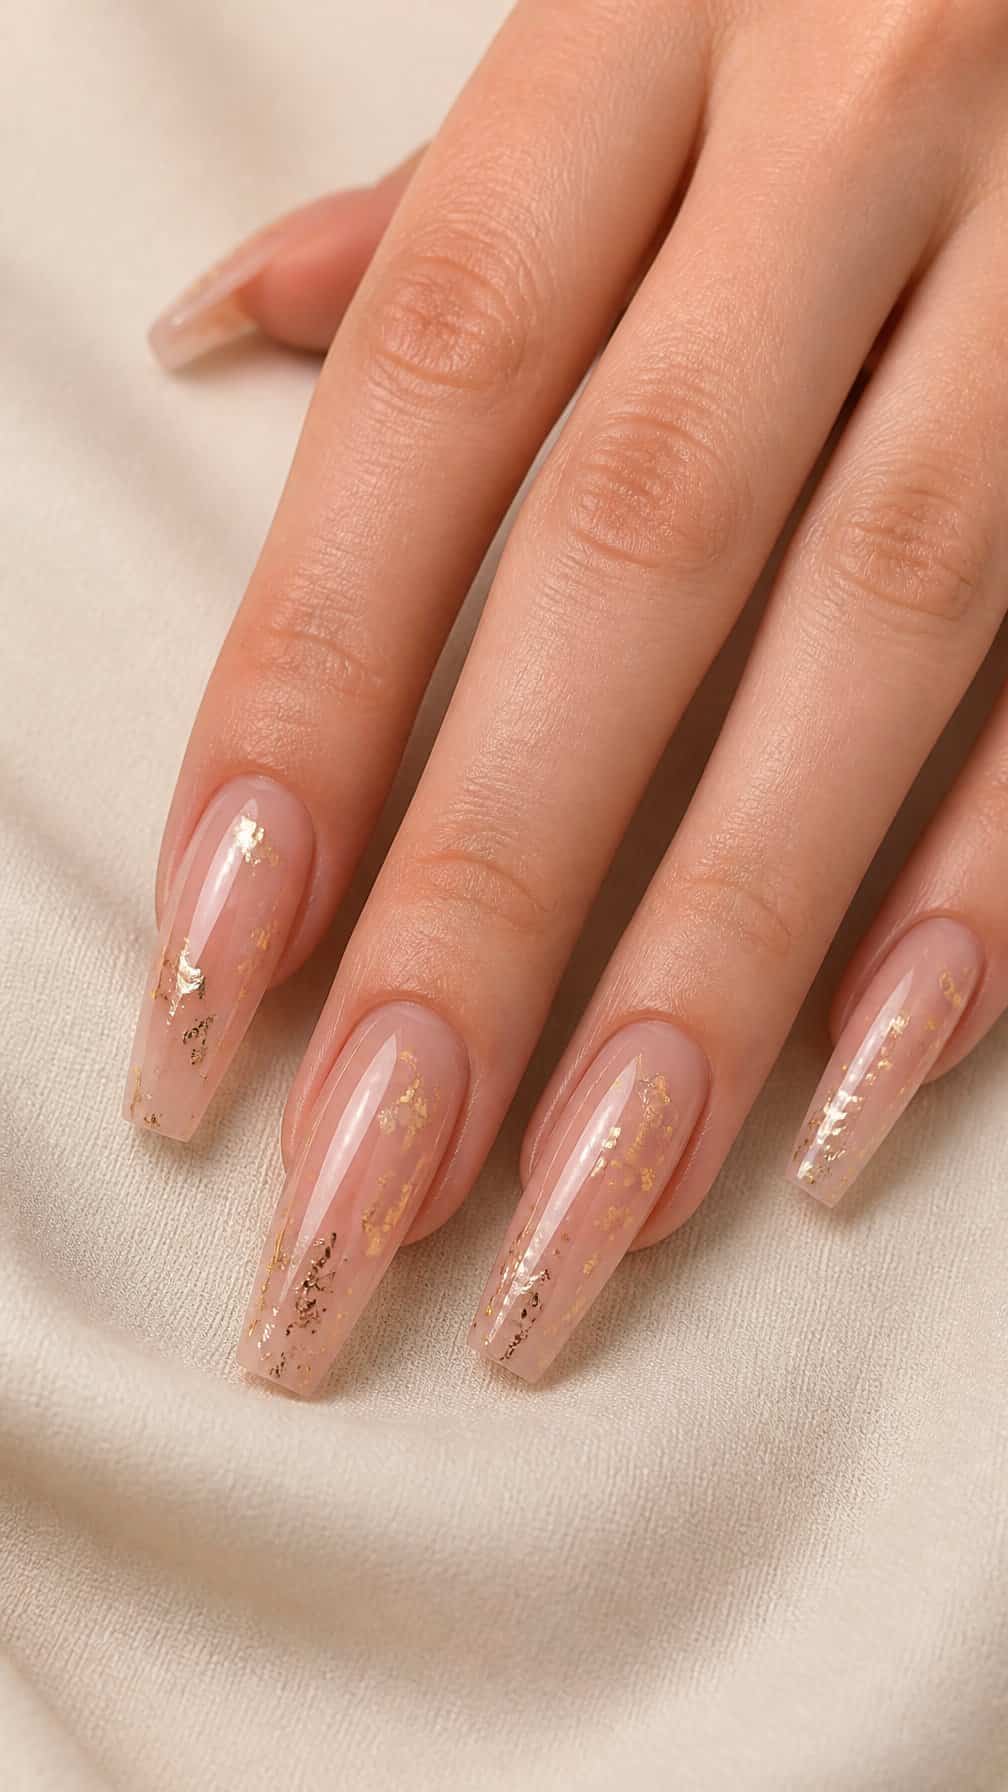
I like this design for its clean contrast between the structured coffin shape and irregular gold accents. I usually pair a neutral base, such as sheer beige, milky white, or soft pink, with small flakes placed near the tips or scattered across one or two nails.
The flakes add detail without covering the entire surface, while the tapered shape keeps the manicure polished. I would choose a glossy topcoat to smooth the texture and protect the metallic pieces, especially on longer nails that need extra durability.
8) Marble Almond Nails in Emerald Green
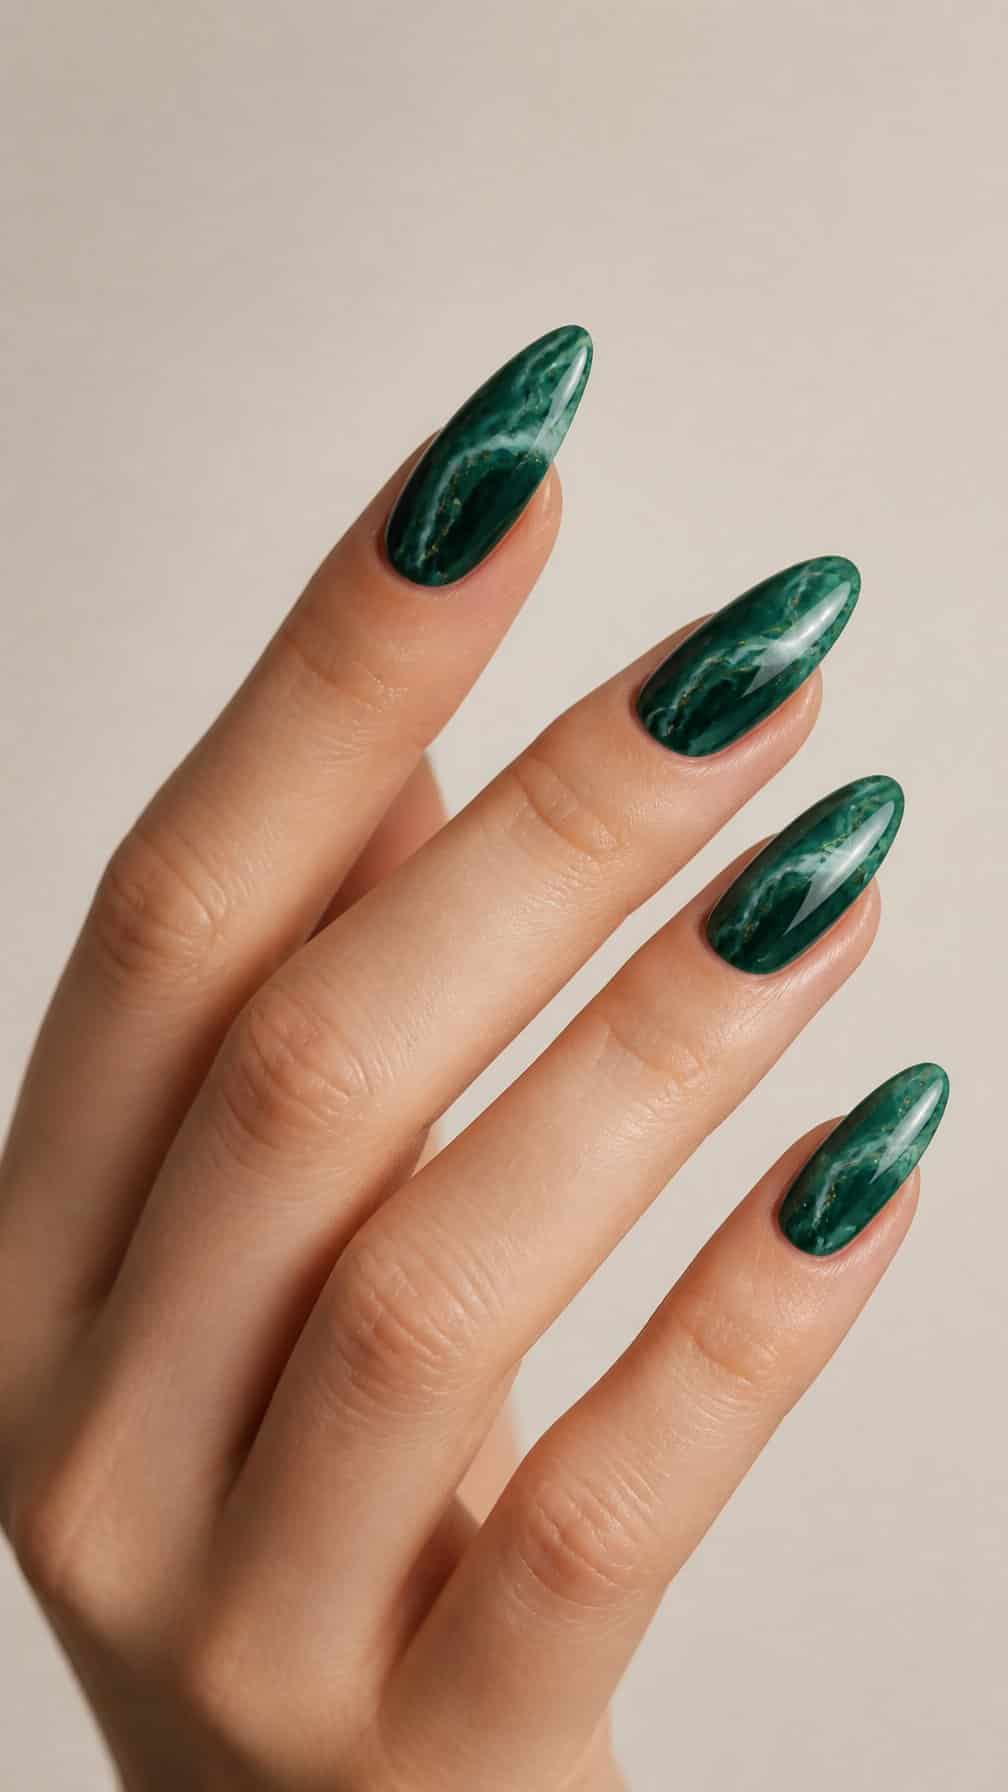
I like this design for its balance of rich color and soft movement. The almond shape elongates my nails, while emerald polish creates a polished base for thin white and lighter green marble veins.
I would keep the marbling uneven rather than matching every nail. That variation makes the set look more natural, and a glossy topcoat helps the layered lines stand out without adding extra decoration.
I find this style works best when I limit the accent details and maintain consistent shaping. The length supports the flowing pattern, but it still leaves enough room for practical movement and routine maintenance.
9) Long Pink Nails with 3D Bows
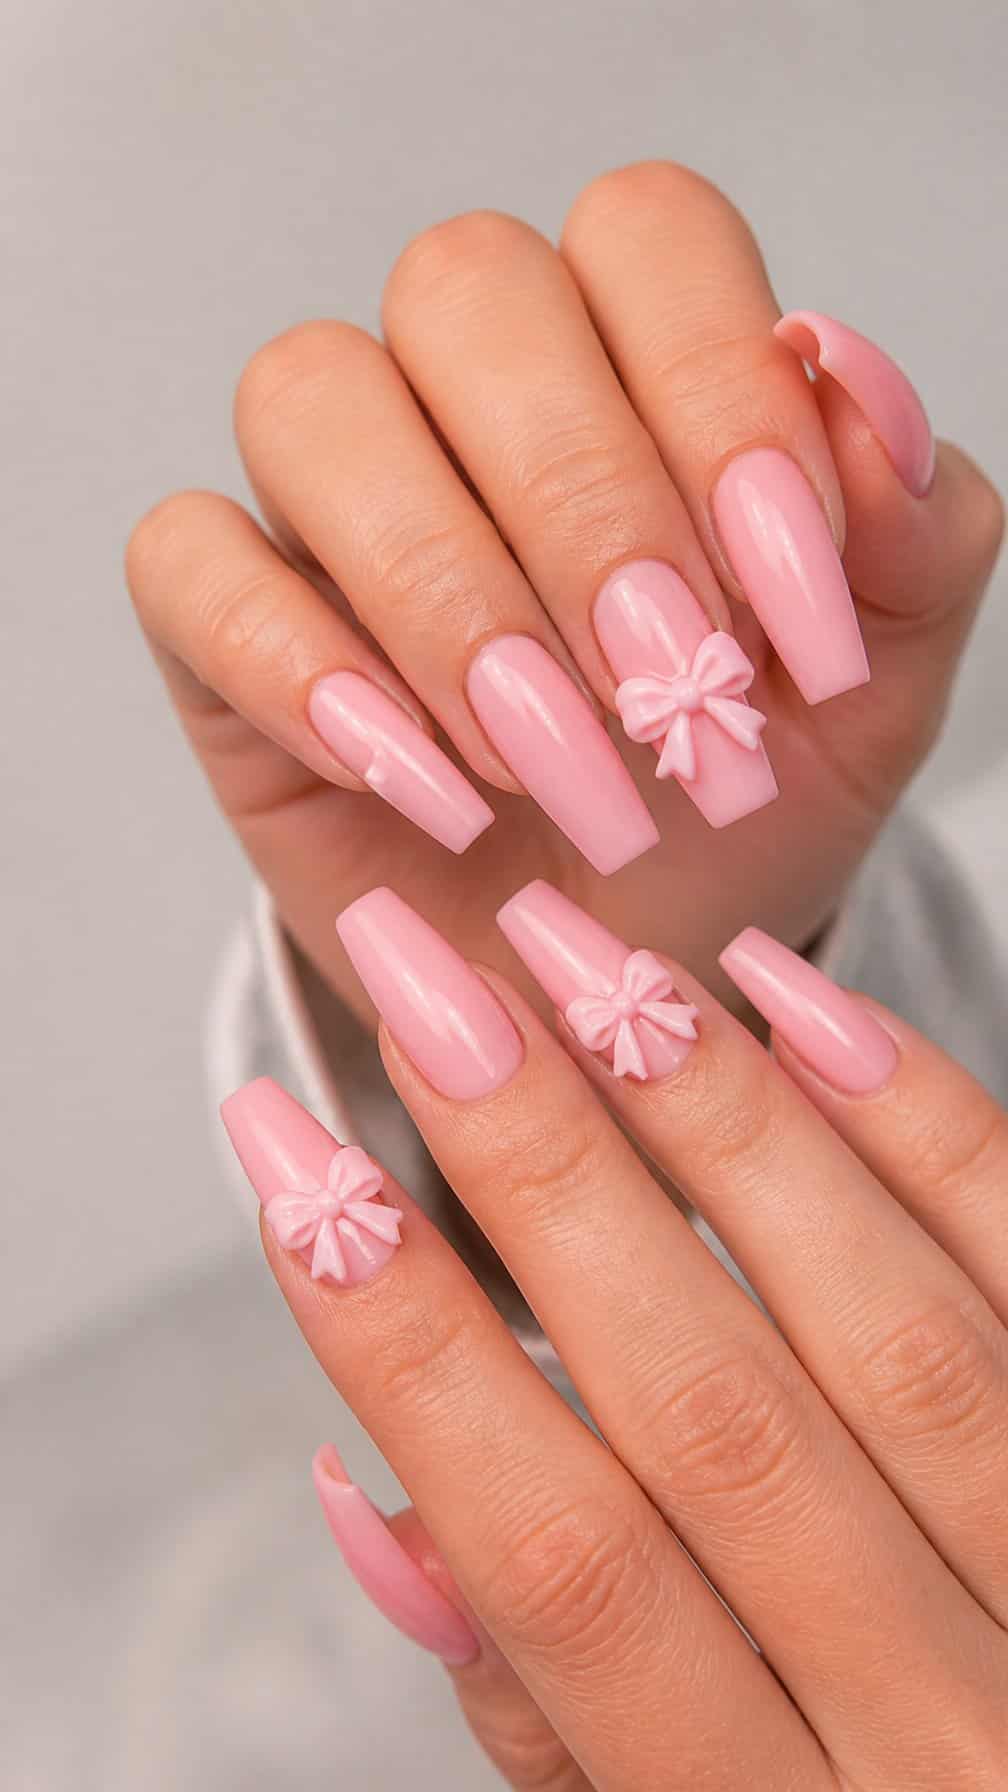
I like this design for its polished, feminine finish. A sheer or blush-pink base keeps the long shape looking clean, while raised bows add texture without covering the entire nail.
I would place one bow on an accent nail or repeat smaller versions across several nails for a coordinated look. Soft pink bows blend subtly with the base, while white or pearl details create clearer contrast.
Because 3D embellishments can catch on clothing and hair, I would ask for secure placement and a smooth finish around each bow. An almond or coffin shape gives the decorations enough space without making the design look crowded.
10) Flame-Design Stiletto Nails
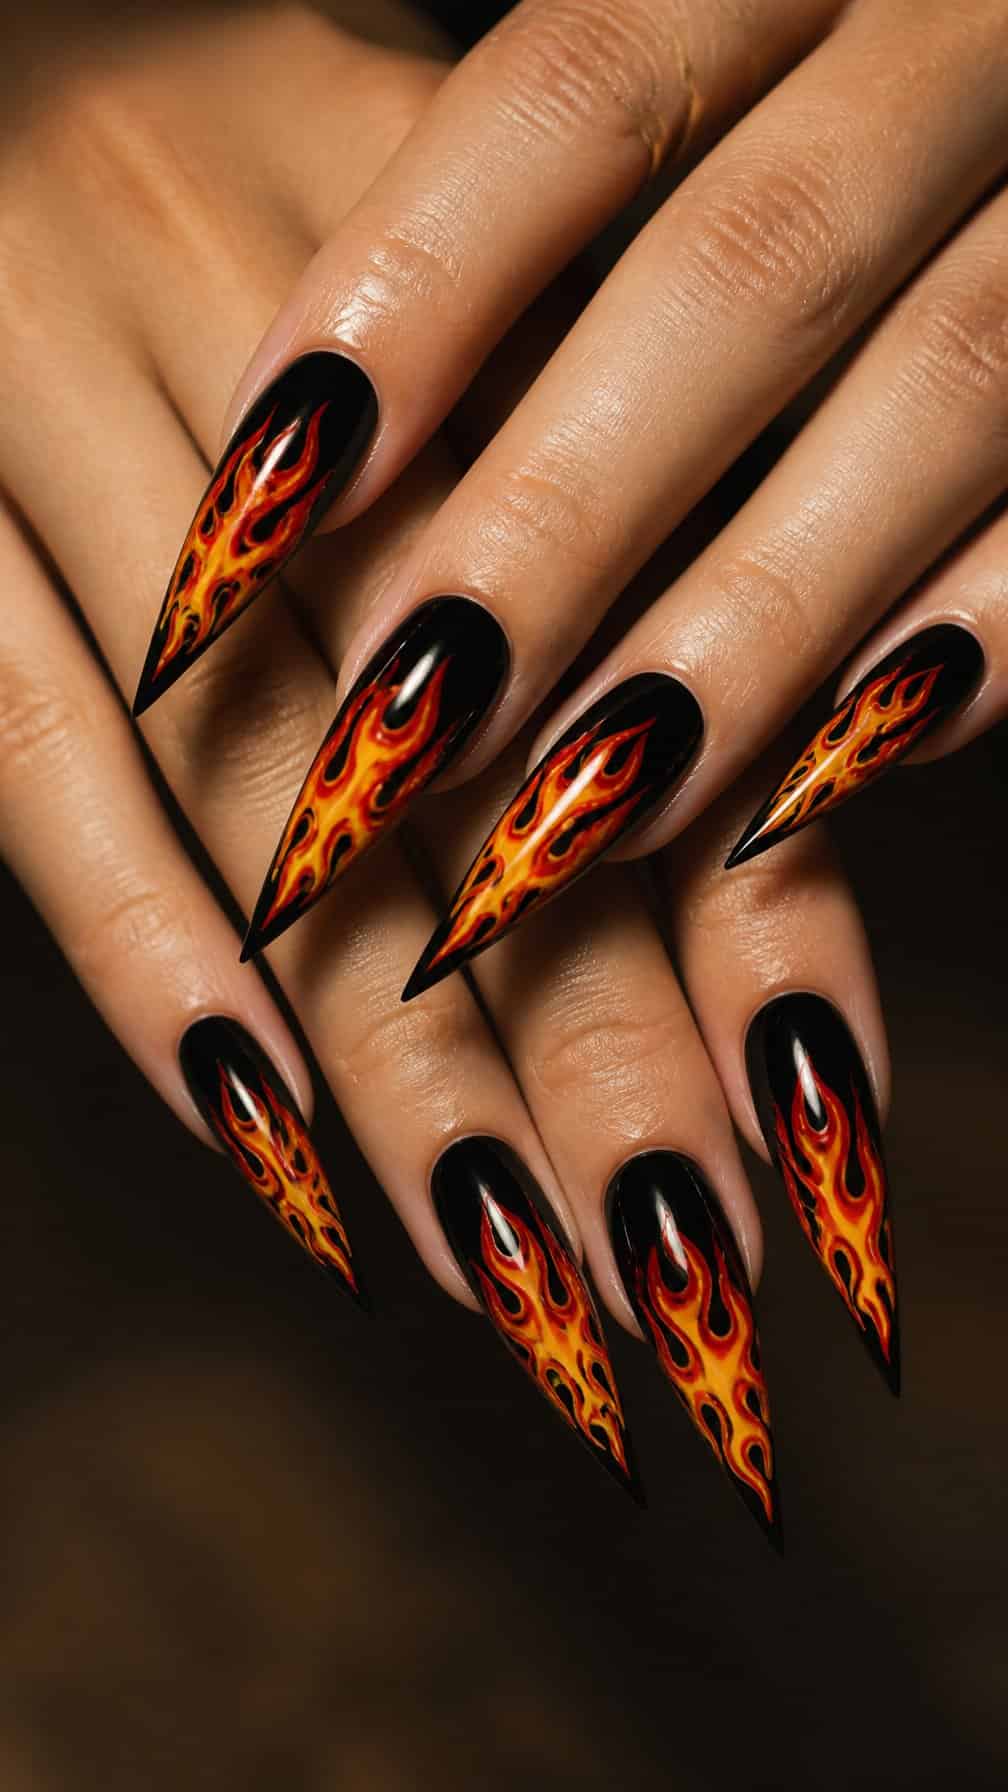
I like flame designs on stiletto nails because the tapered shape gives each detail a clear direction. I would pair a black or deep-red base with orange, yellow, or metallic flames for strong contrast without adding extra embellishments.
The pointed tips already create a sharp silhouette, so I would keep the flame lines clean and moderately spaced. A glossy finish makes the colors stand out, while a matte base with glossy flames adds subtle contrast.
I would choose this design for occasions that suit a bold manicure and allow careful maintenance. The length requires attention during everyday tasks, and the pointed shape can snag more easily than shorter styles.
11) Long Square Nails with Rhinestone Cuticles
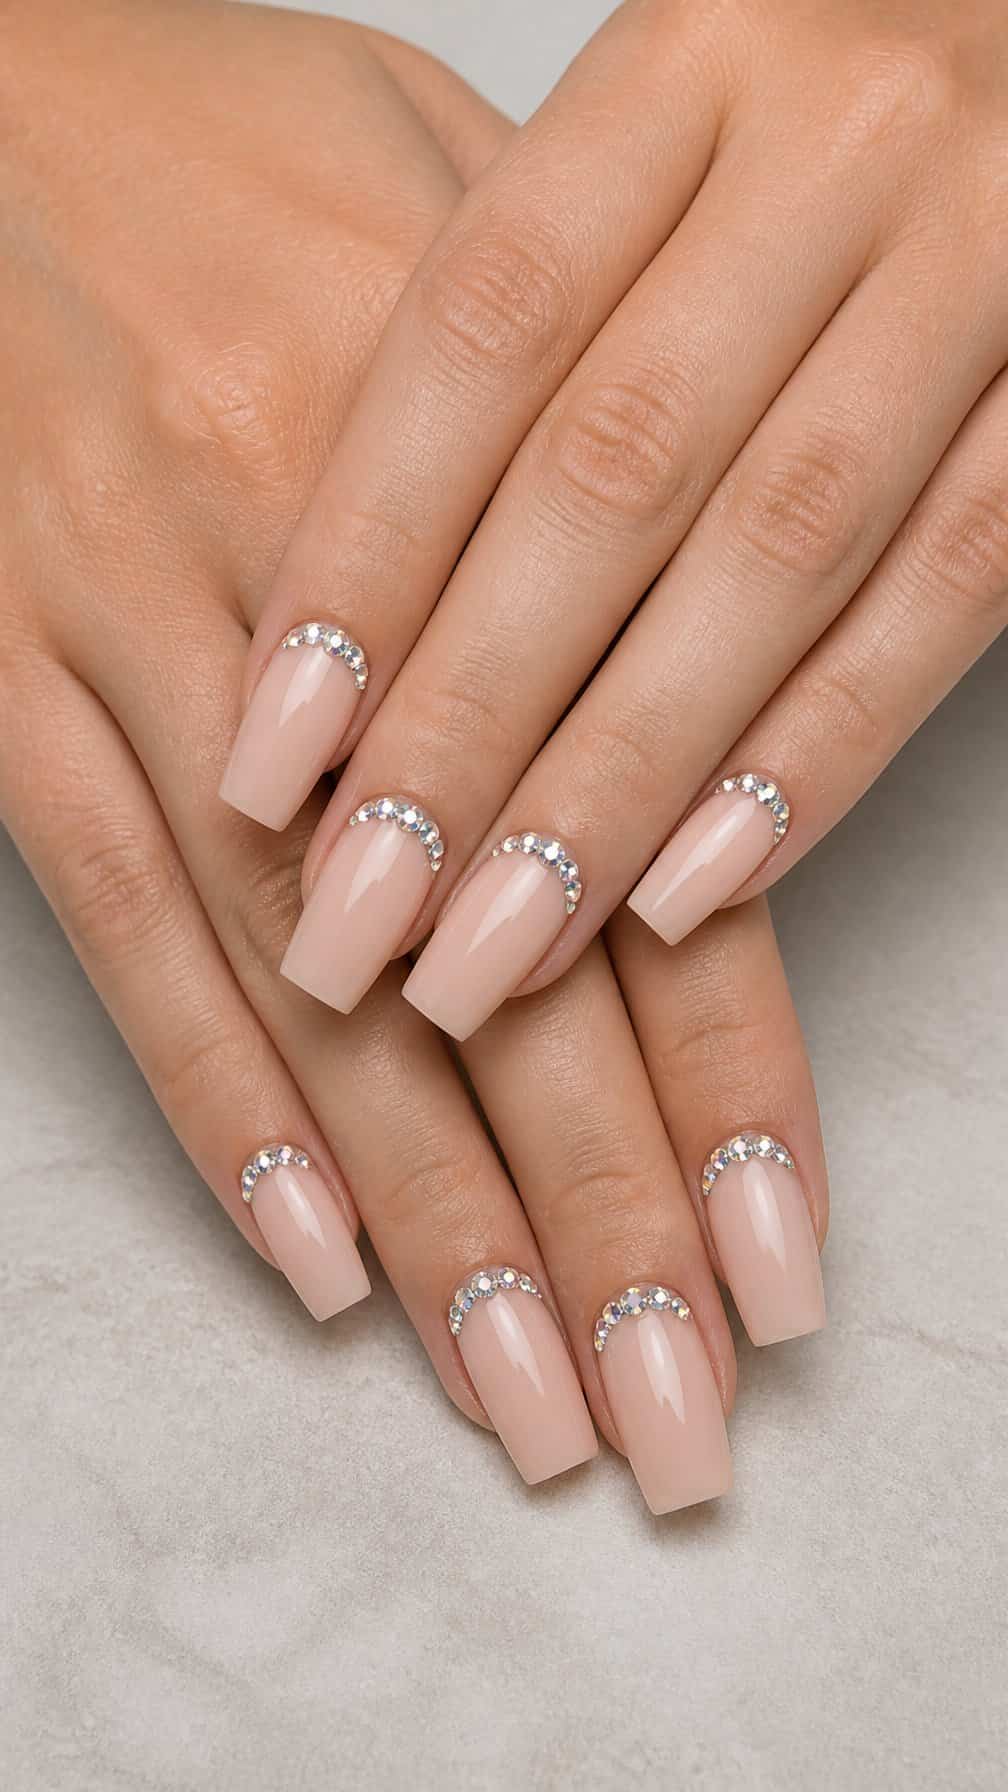
I like this design for its clean geometry and precise detail. The long square shape creates a broad canvas, while small rhinestones placed along the cuticles add controlled sparkle without covering the entire nail.
I would pair a sheer pink, nude, or milky base with silver stones for a polished finish. A crisp white French tip can add contrast, while a plain accent nail keeps the set from looking too busy.
This style requires careful shaping and secure stone placement. I would use a structured gel overlay for added support, especially because the sharp corners and extra length need regular maintenance to prevent chips or breaks.
12) Tortoiseshell Almond Nails
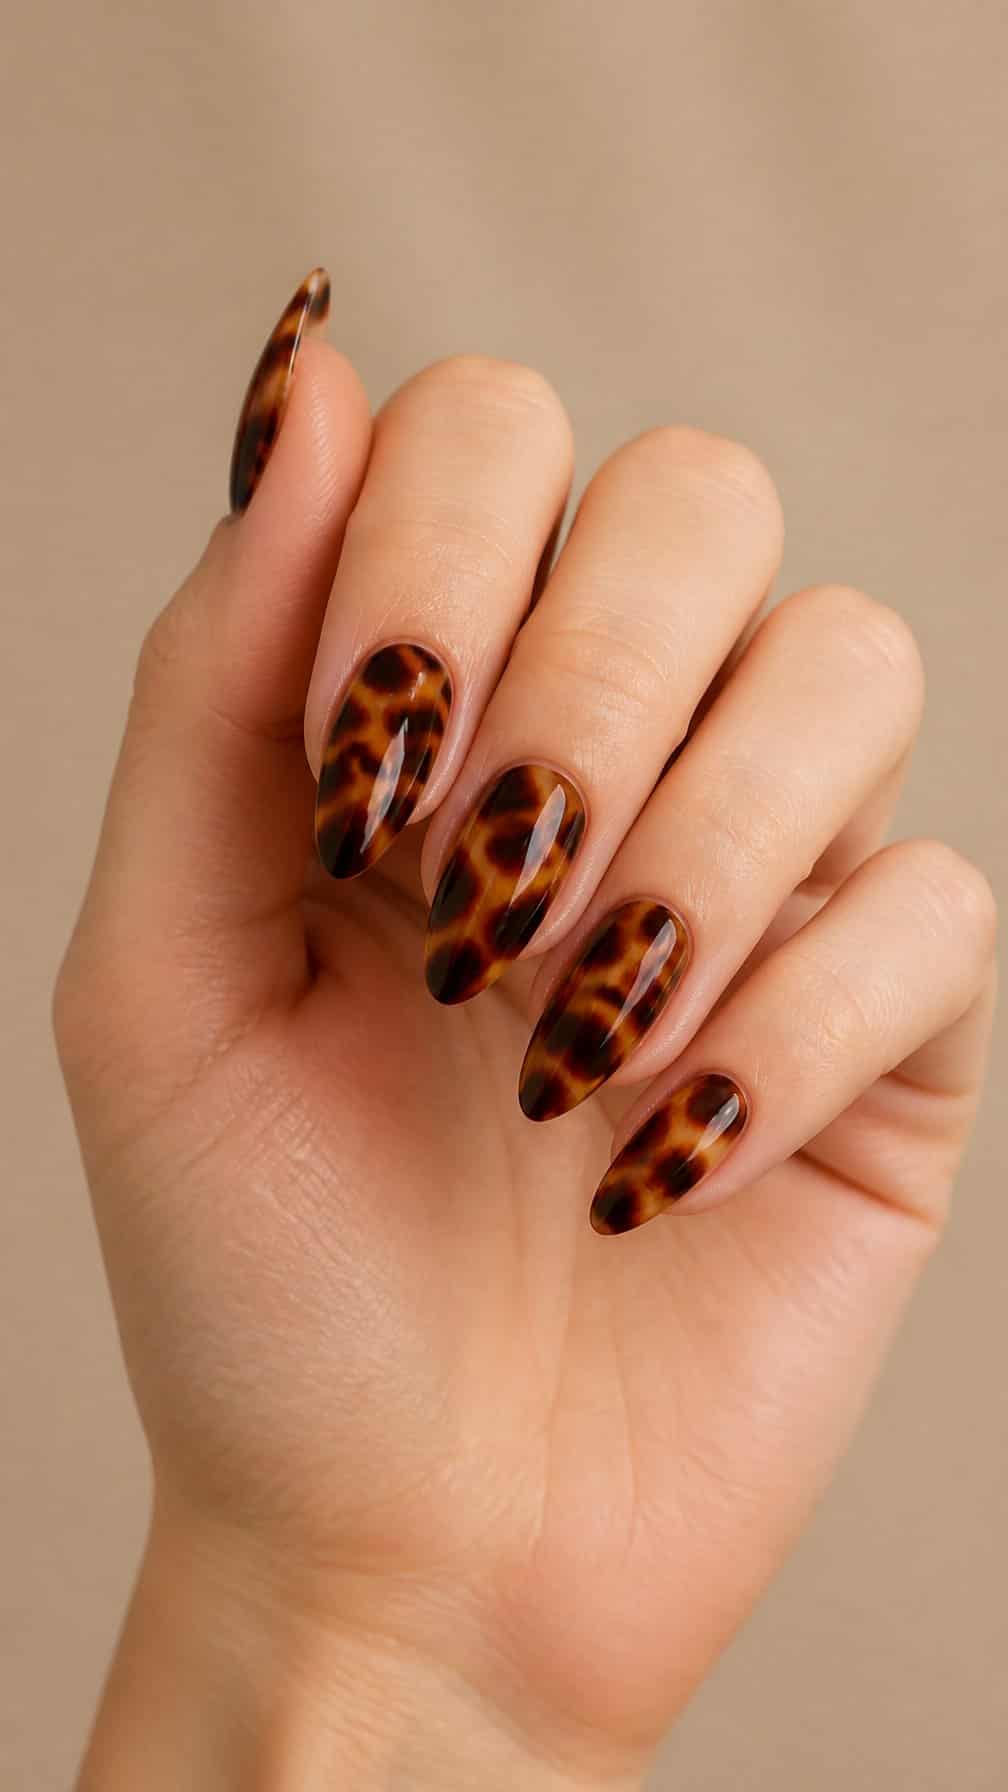
I like tortoiseshell almond nails for their warm, layered appearance and gently tapered shape. Amber, caramel, brown, and black patches create a natural pattern, while the almond silhouette keeps the design polished rather than heavy.
I would choose a sheer beige or translucent honey base to let the mottled details show through. Adding a glossy top coat enhances the depth, while a matte finish gives the pattern a softer, more understated look.
Because the design covers the full nail, I would keep jewelry and other nail details simple. I also recommend regular fills, since the almond shape looks most balanced when the edges stay smooth and even.
13) Long Coffin Nails with Celestial Art
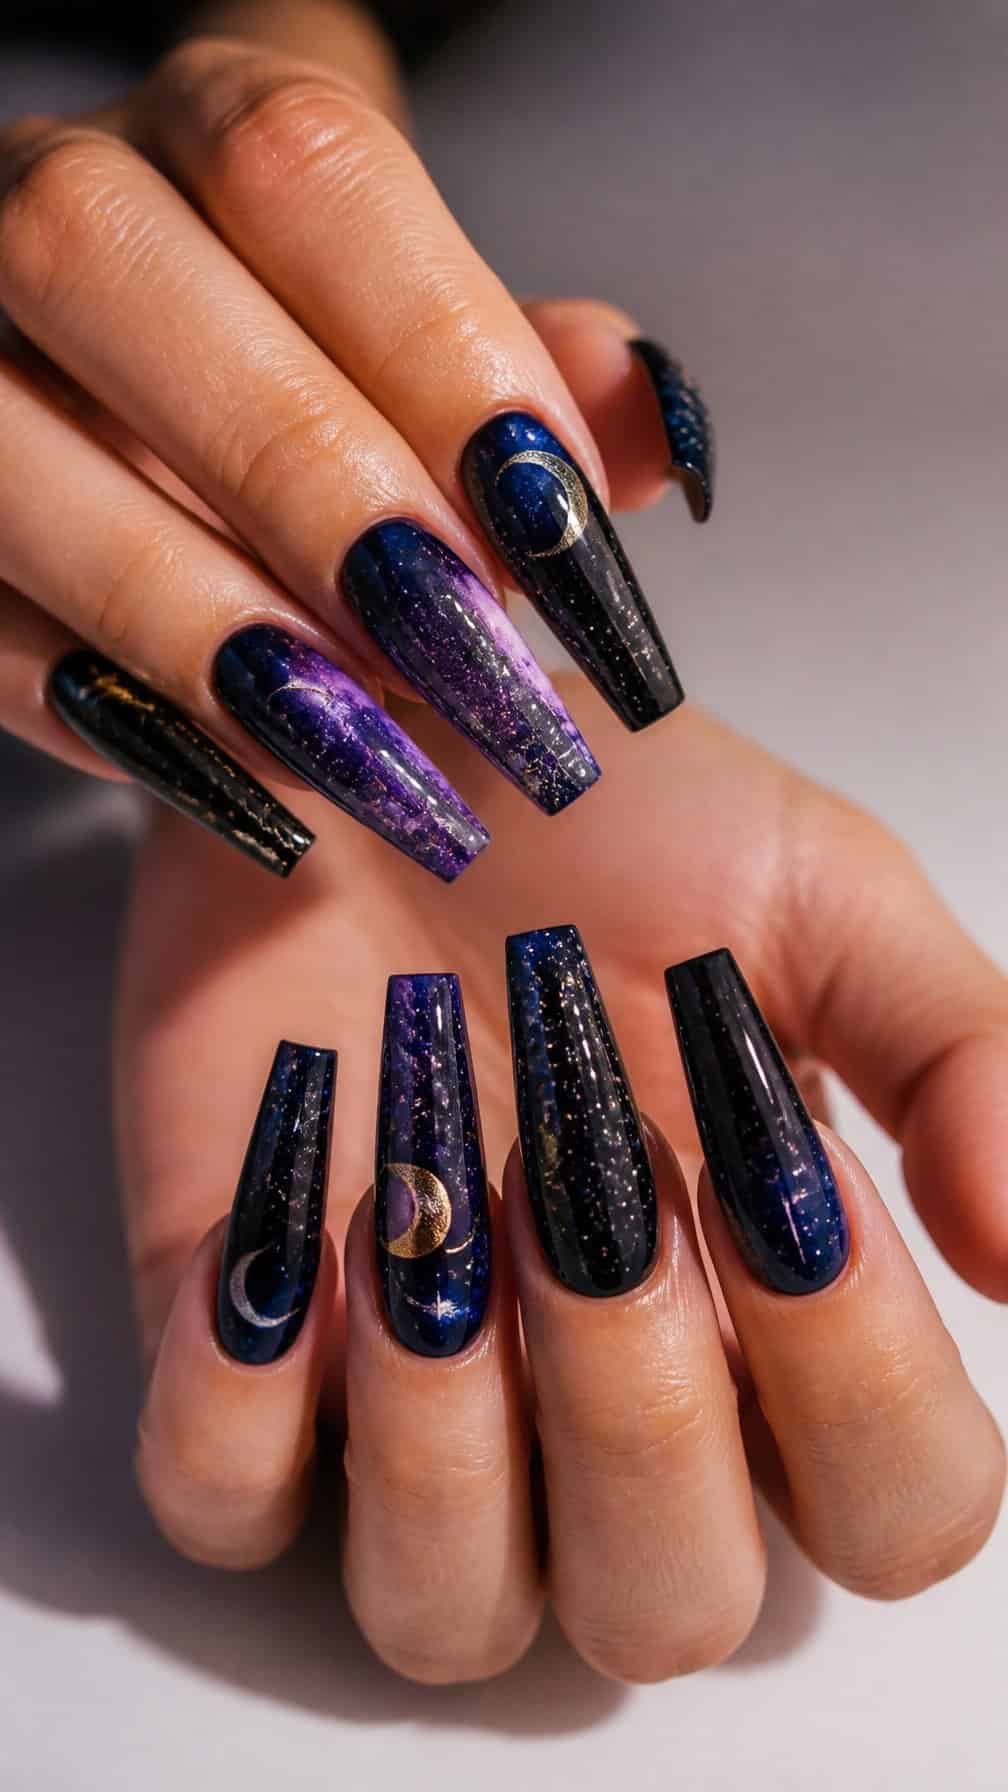
I like how the tapered coffin shape gives celestial details a defined, balanced canvas. I would pair a deep navy or black base with small moons, stars, and fine constellation lines in silver or white. The contrast keeps the design clear without making each nail look crowded.
For a more polished finish, I would place the artwork selectively rather than repeat the same pattern across every nail. A cluster of stars on two accent nails can complement solid-color nails, while a subtle chrome glaze adds dimension. I would also choose a durable gel structure to support the added length and protect the detailed artwork.
14) Milky White Stiletto Nails
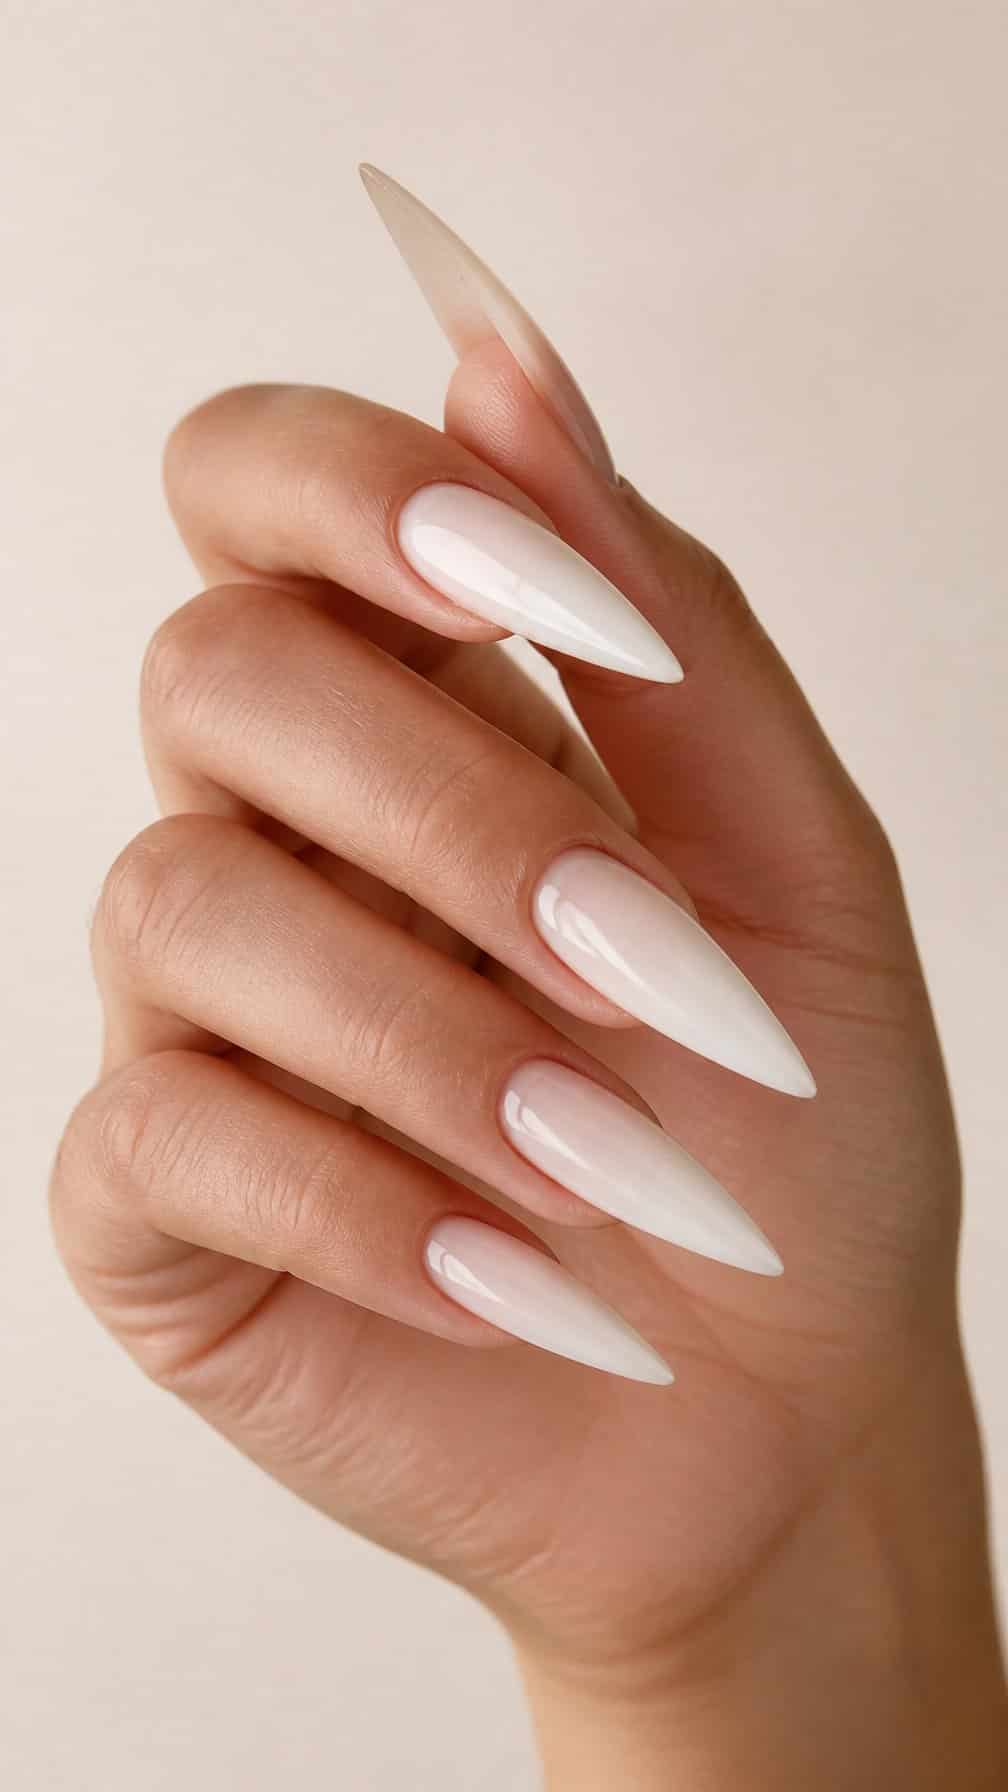
I like milky white polish on stiletto nails because the soft color balances the sharp silhouette. The semi-sheer finish lets the natural nail tone show through, creating a clean look without appearing stark.
I would keep the surface glossy and the shape evenly tapered from the sidewalls to the tips. This design works well with minimal jewelry, satin clothing, or neutral outfits because it adds length while keeping the color understated.
For extra detail, I might add a thin chrome line near the cuticle or place one small crystal on each accent nail. I would also use a strong base and regular maintenance, since long pointed nails need careful handling during daily tasks.
15) Long Almond Nails with Velvet Cat-Eye Polish
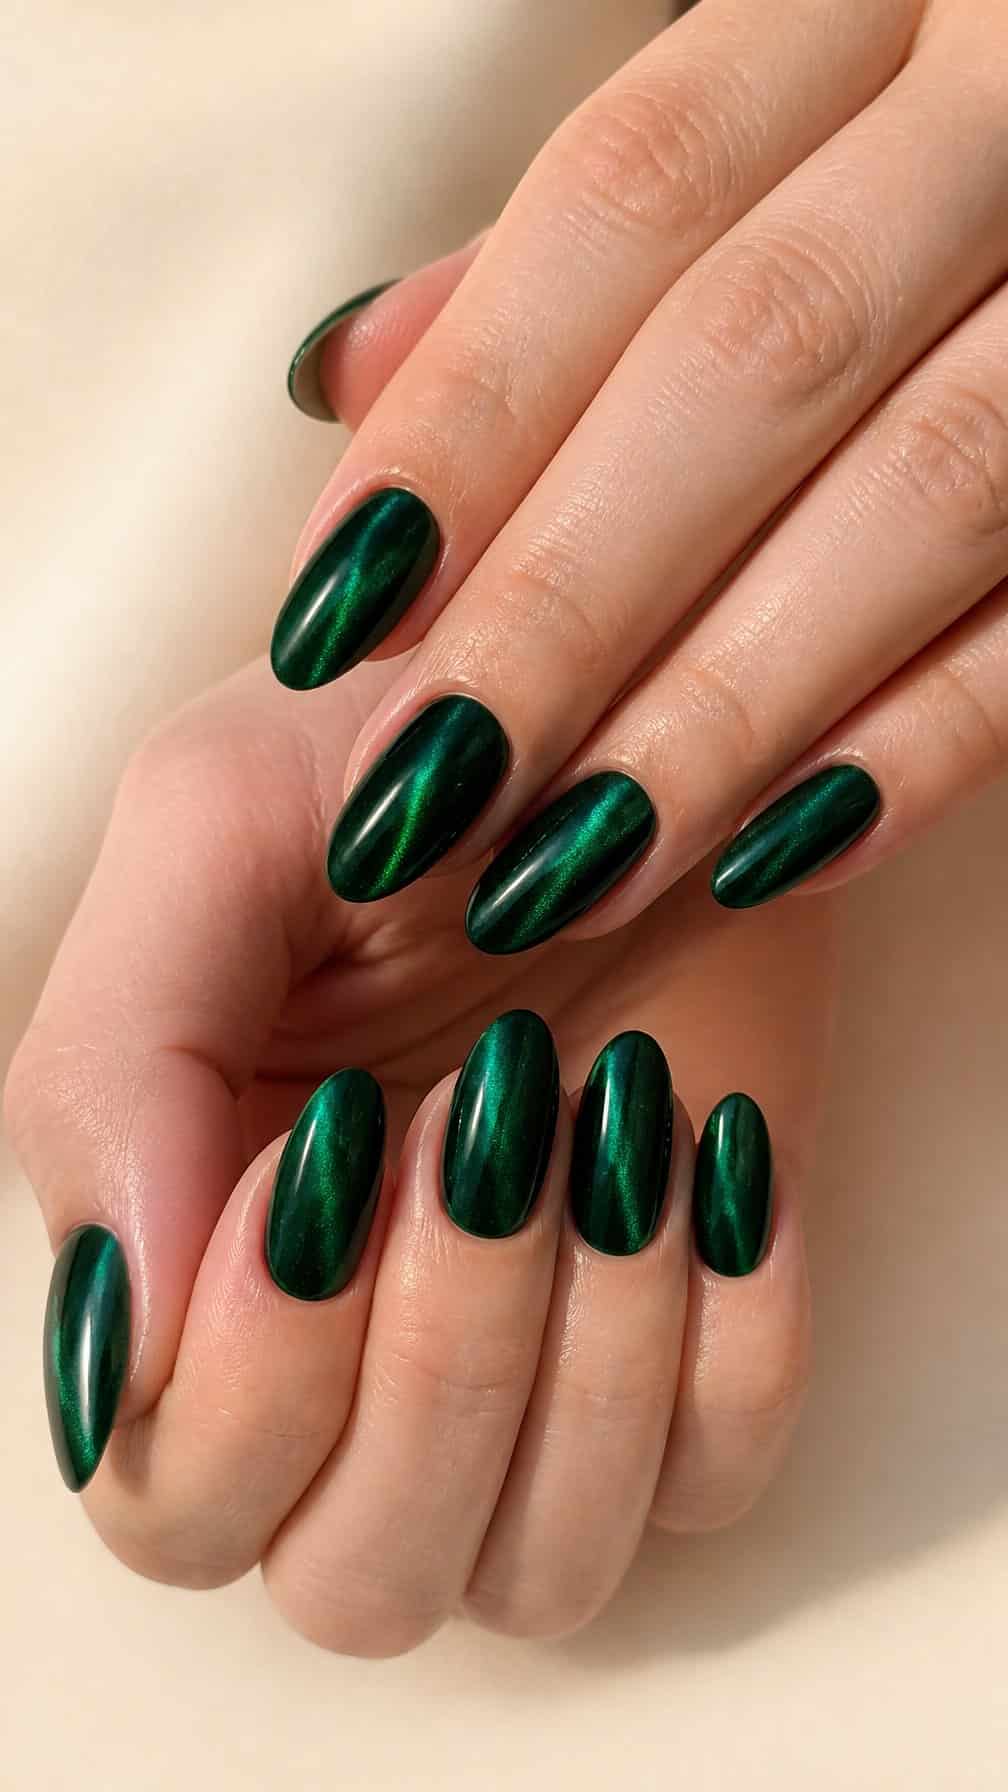
I like this design for the way its tapered almond shape balances the reflective depth of velvet cat-eye polish. The elongated silhouette gives the magnetic shimmer room to shift across each nail without making the finish look crowded.
I would choose deep shades such as espresso, navy, forest green, or burgundy for a richer effect. I also keep the surface smooth and the cuticle area neat, since uneven shaping can distract from the moving light pattern.
Because long almond nails need careful maintenance, I would schedule regular fills and avoid using the tips as tools. A glossy topcoat helps preserve the velvet effect, while subtle gold or silver accents can add detail without competing with the polish.
16) Neon French Tip Coffin Nails
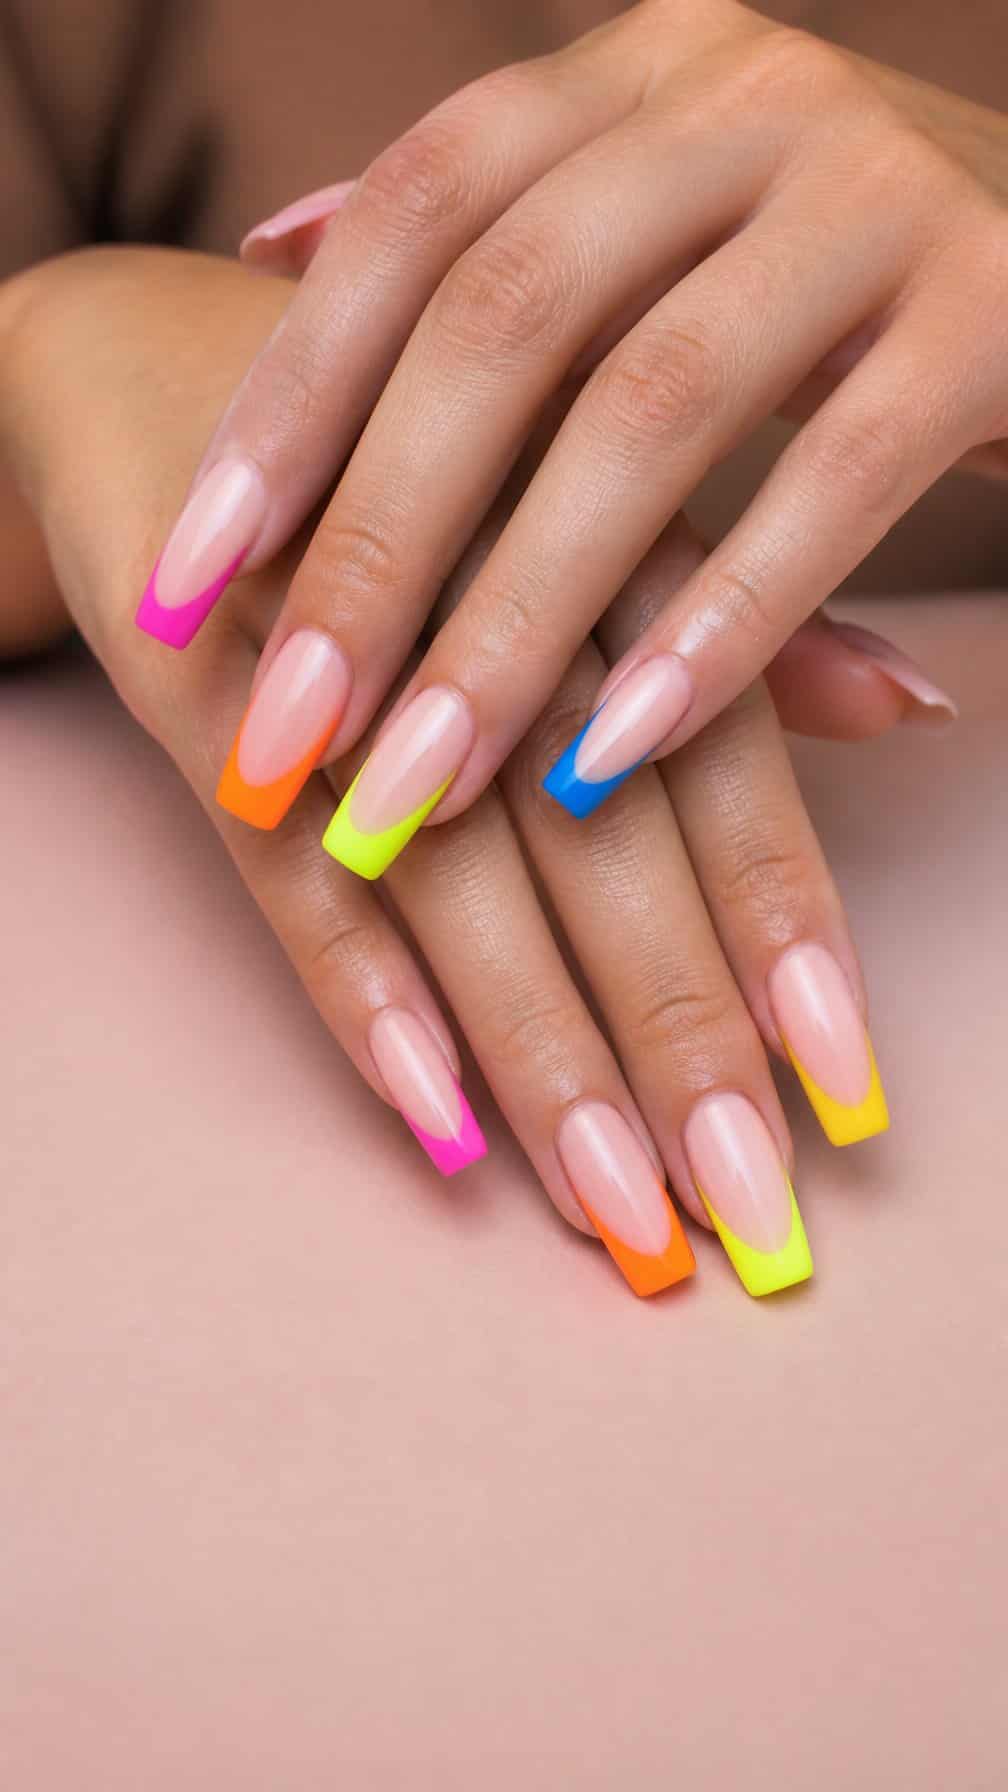
I like this design for the way it pairs a clean nude base with vivid color at the tips. The tapered coffin shape gives each neon line a defined frame, while shades such as lime, orange, pink, or electric blue create a bright finish without covering the entire nail.
I would keep the tip width consistent across all ten nails for a polished look. A glossy topcoat makes the colors appear sharper, while a matte base can create subtle contrast. Because the length draws attention to the hands, I would choose a balanced shape and allow enough time for regular maintenance.
17) Long Chrome Nails with Mirror Finish
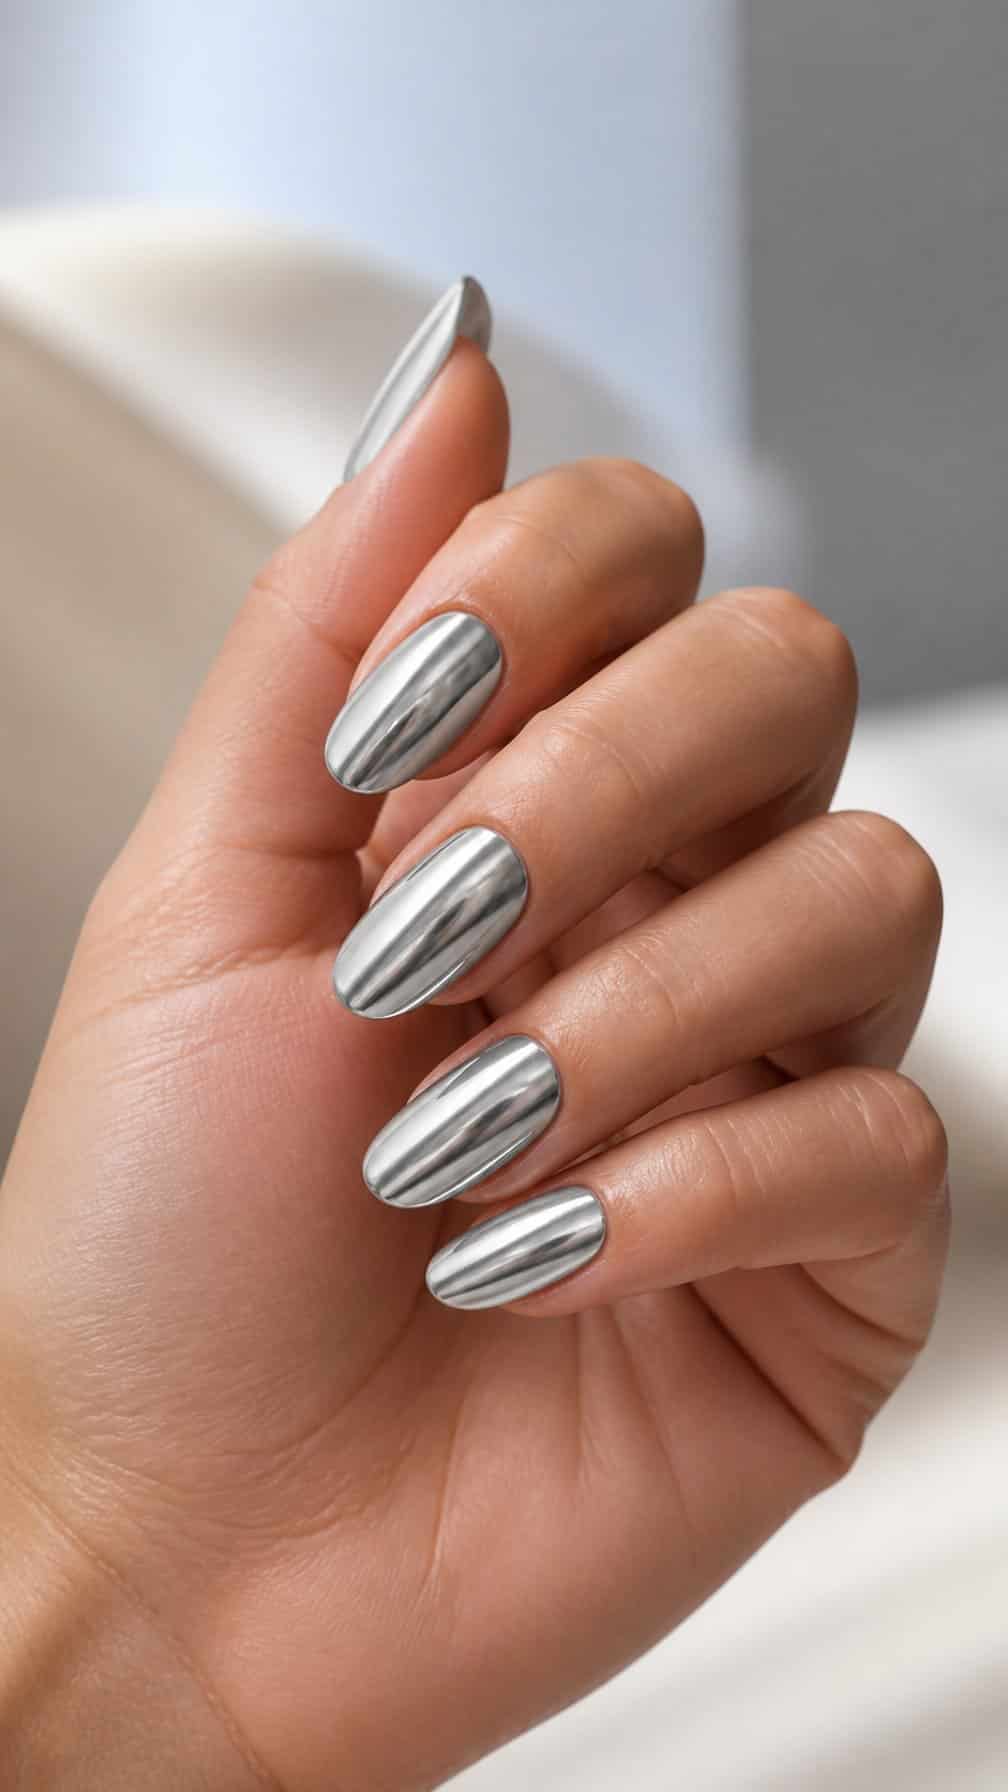
I use a smooth, reflective chrome finish to give long nails a clean, futuristic look. The metallic surface catches light across the entire tip, so I keep the shape simple—almond or coffin works especially well.
I prefer a neutral base beneath the chrome when I want a polished, versatile result. Careful application matters because ridges, uneven edges, and excess product show clearly under the mirror effect.
For contrast, I sometimes pair silver chrome with a single clear or translucent accent nail. I also keep the surrounding design minimal, allowing the reflective finish to remain the main detail.
18) Floral-Print Almond Nails
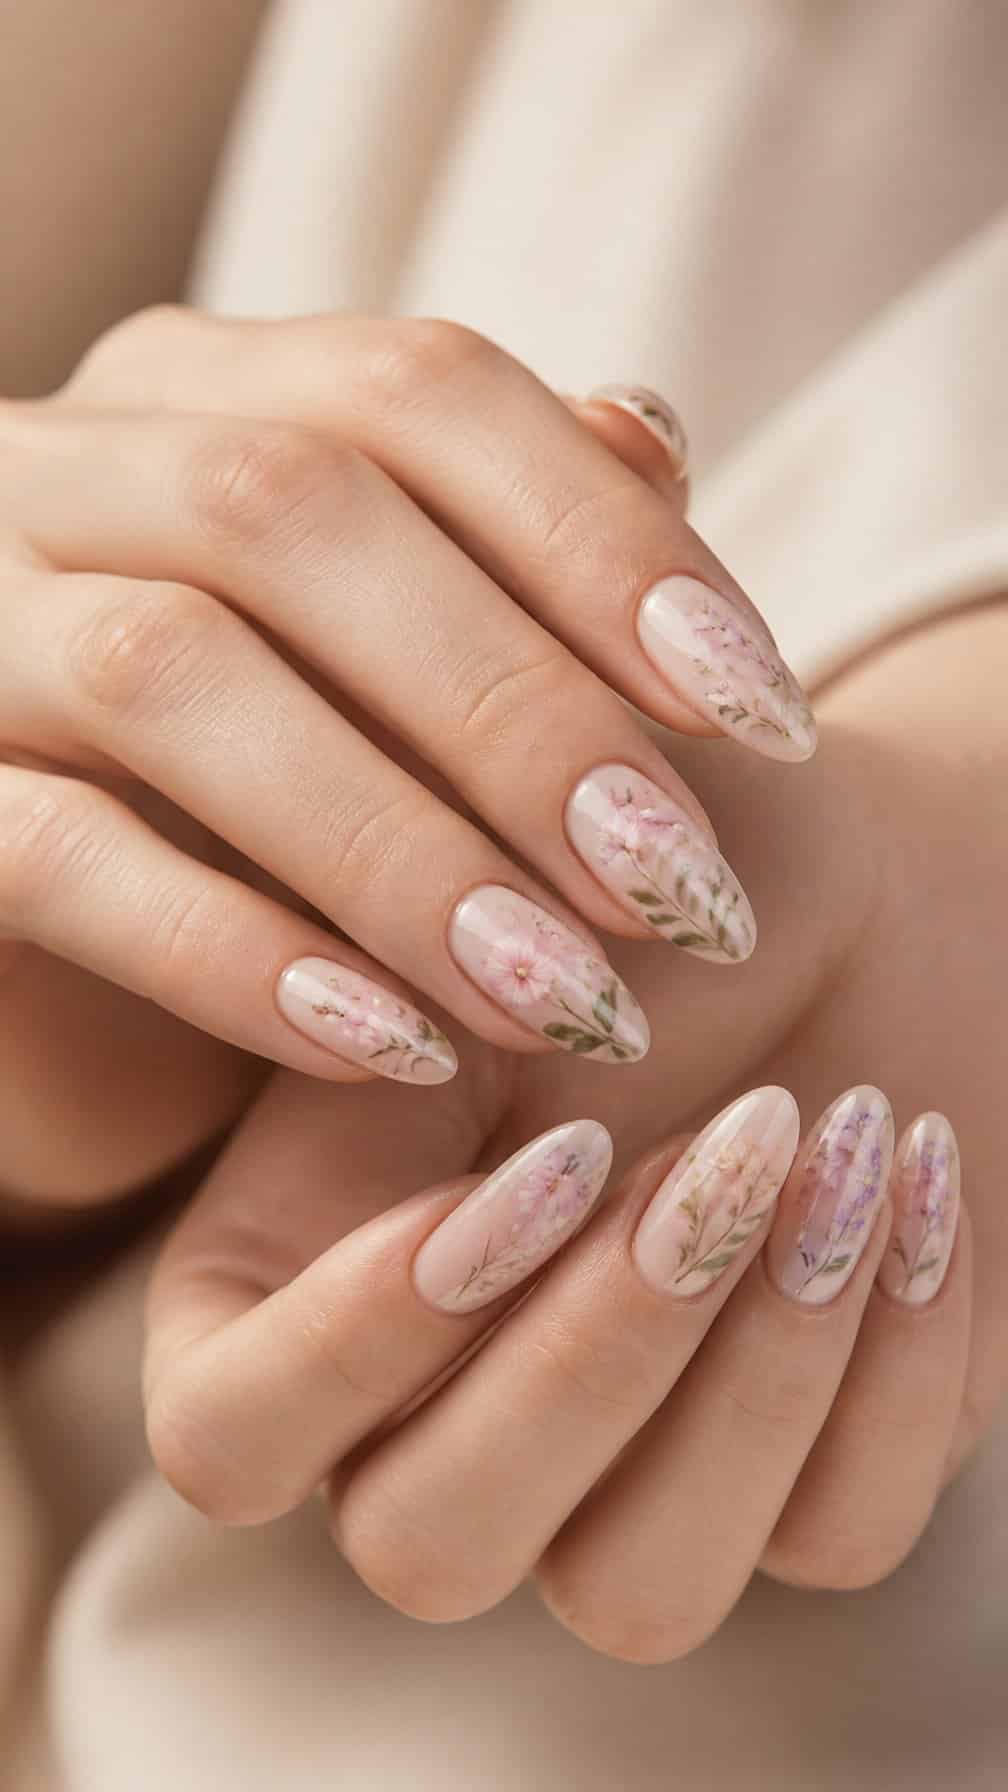
I like floral-print almond nails for the way their tapered shape balances detailed artwork. I would choose a soft base in cream, blush, or pale blue, then add small flowers across selected nails instead of covering every surface. Fine green stems and leaves can give the design more structure without making it look crowded.
I would keep the remaining nails lightly polished or finished with a sheer tint to let the floral pattern stand out. A glossy topcoat protects the artwork and emphasizes the almond silhouette, while a matte finish creates a quieter, fabric-like effect. This design works well when I want long nails that feel decorative but remain coordinated.
19) Long Coffin Nails with Encapsulated Glitter
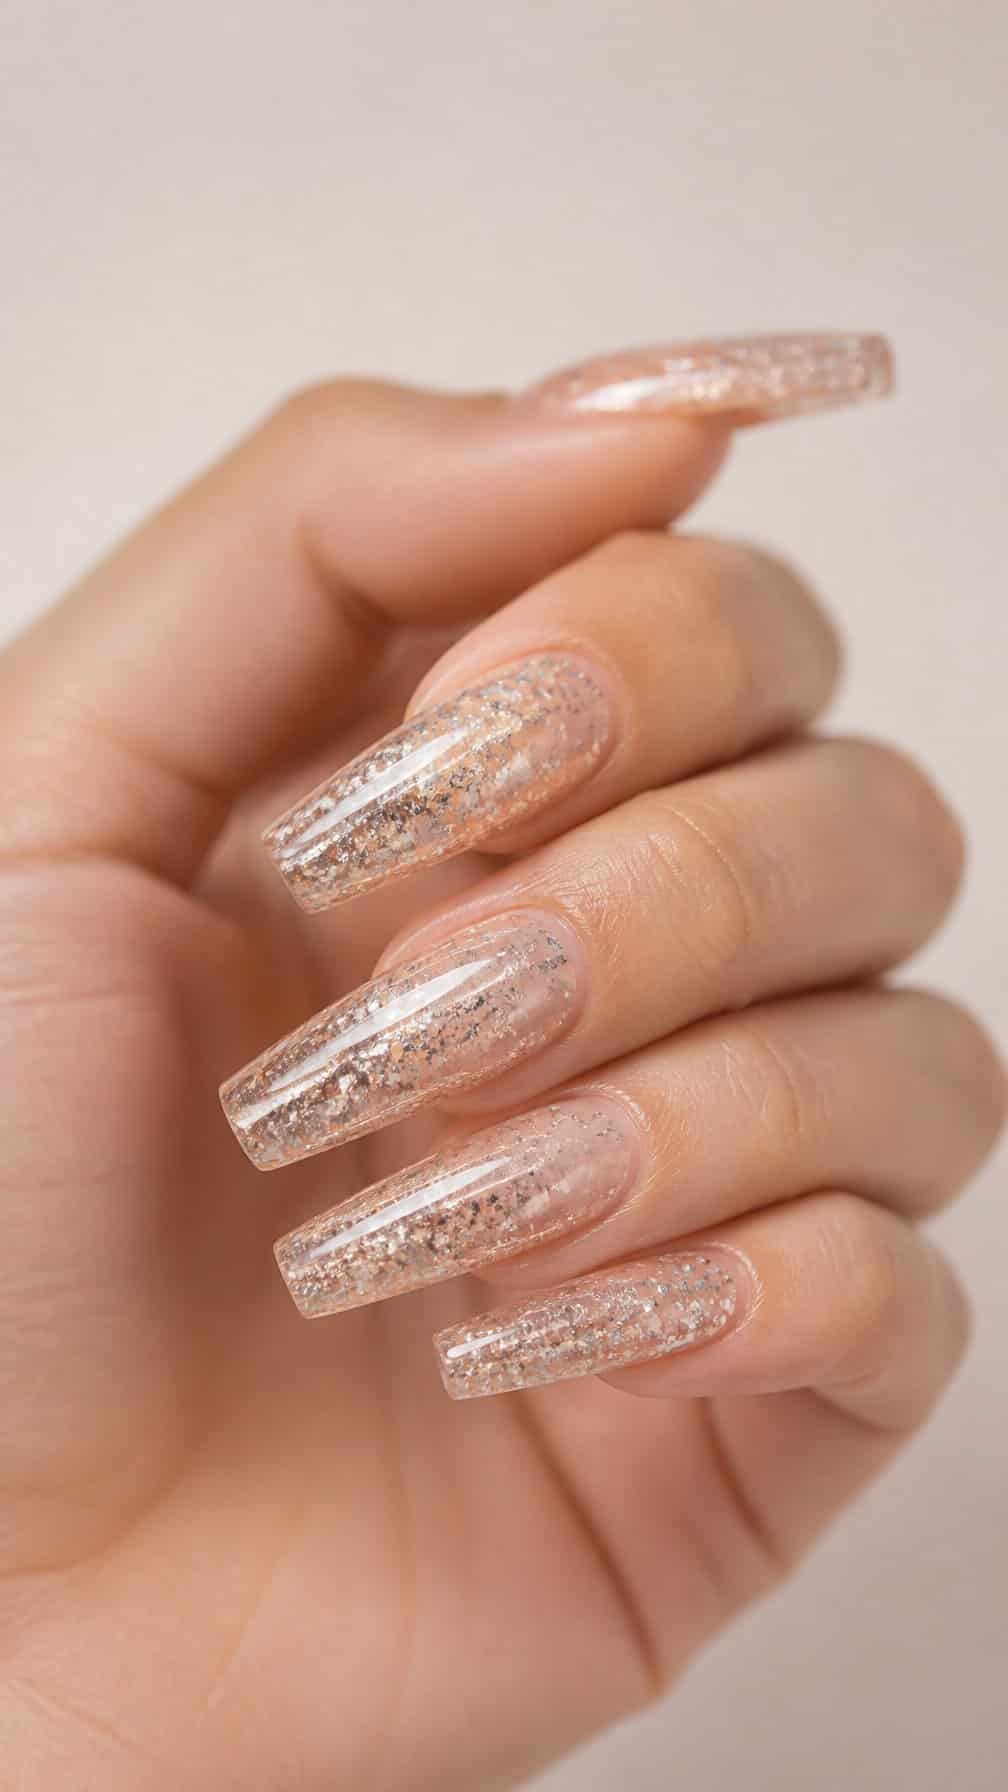
I like this design because the tapered coffin shape gives the glitter a clean, structured setting. I would layer fine and chunky glitter between clear or translucent acrylic, creating depth without placing texture on the surface. The finished nails catch light from different angles while keeping the shape polished.
I would pair silver glitter with a sheer pink base for a soft effect, or use gold and bronze for warmer contrast. Clear tips can reveal scattered flakes, stars, or foil pieces, while a solid accent nail keeps the set from looking too busy.
The length provides enough space to arrange several glitter sizes, but it also requires careful maintenance. I would keep the cuticles neat and protect the free edges to help preserve the encapsulated detail.
20) Red Jelly Stiletto Nails
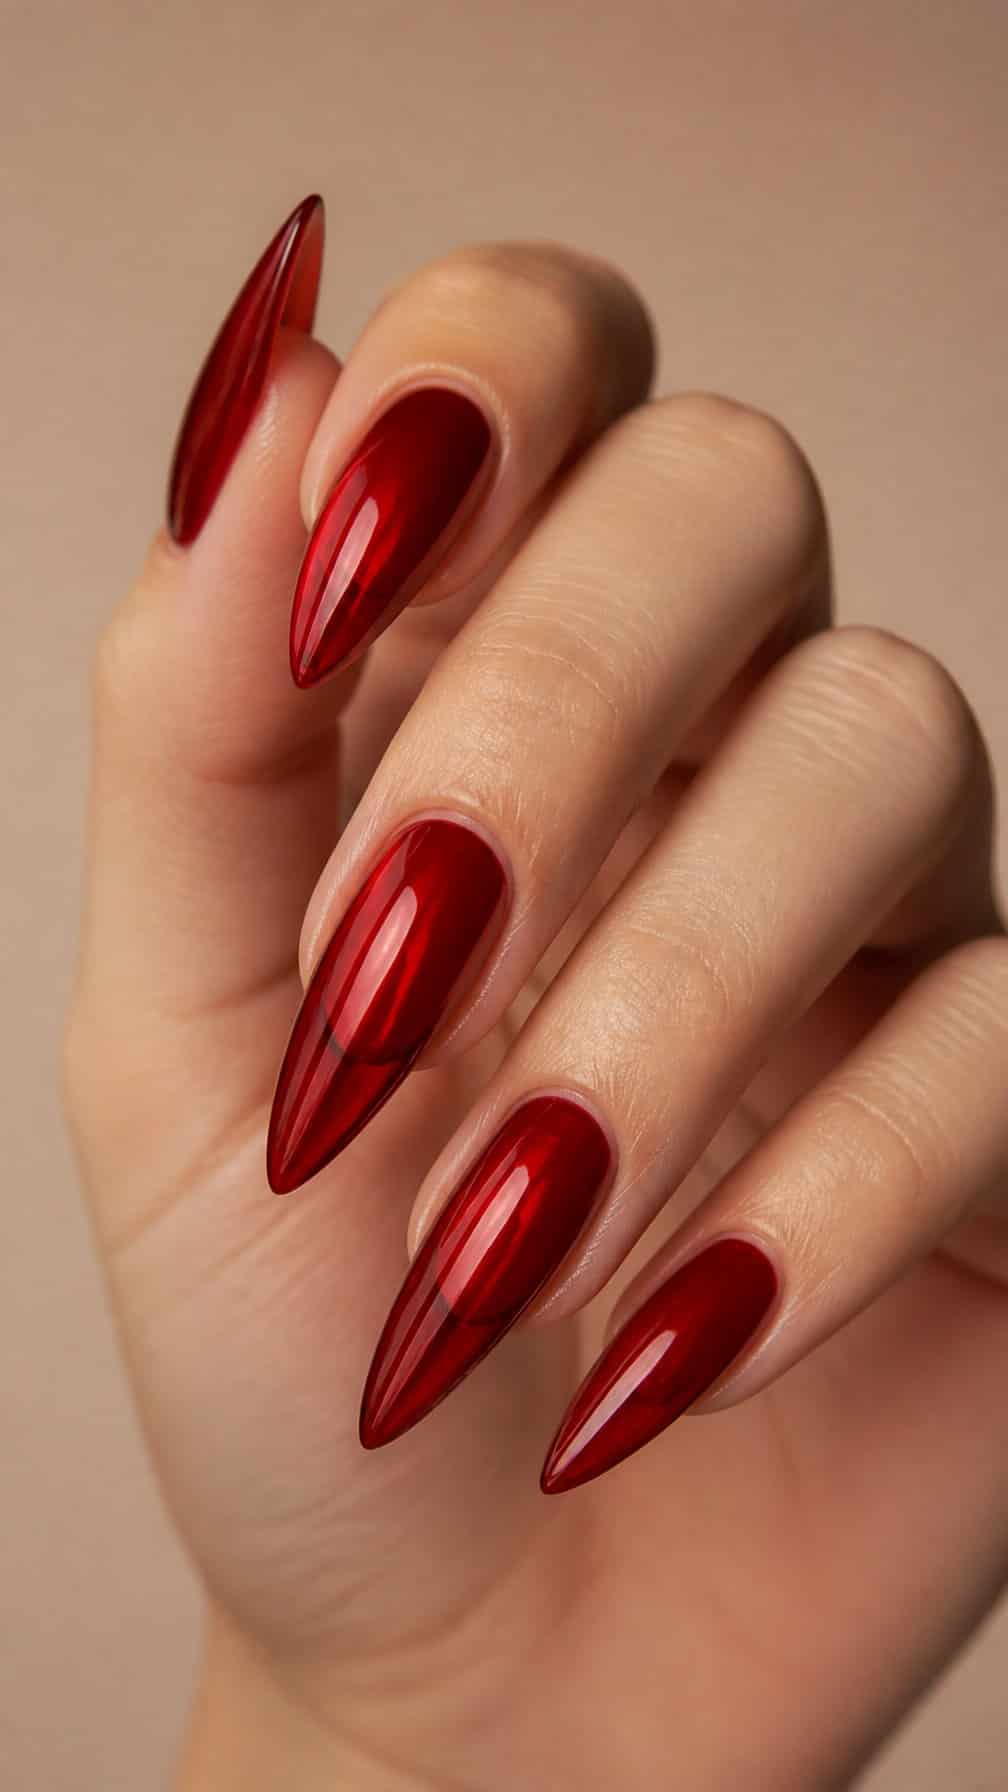
I like red jelly stiletto nails for their translucent color and sharply tapered shape. The sheer finish lets light pass through the polish, creating depth without making the red appear heavy. Their long points give the design a defined, fashion-forward profile.
I would keep the surface glossy and the decoration minimal so the jelly effect stays visible. A fine chrome outline, tiny rhinestones near the cuticles, or a clear negative-space detail can add interest without covering the color. Because stiletto tips can catch on fabrics, I would choose a durable enhancement and smooth, carefully sealed edges.
21) Long Almond Nails with 3D Pearl Details
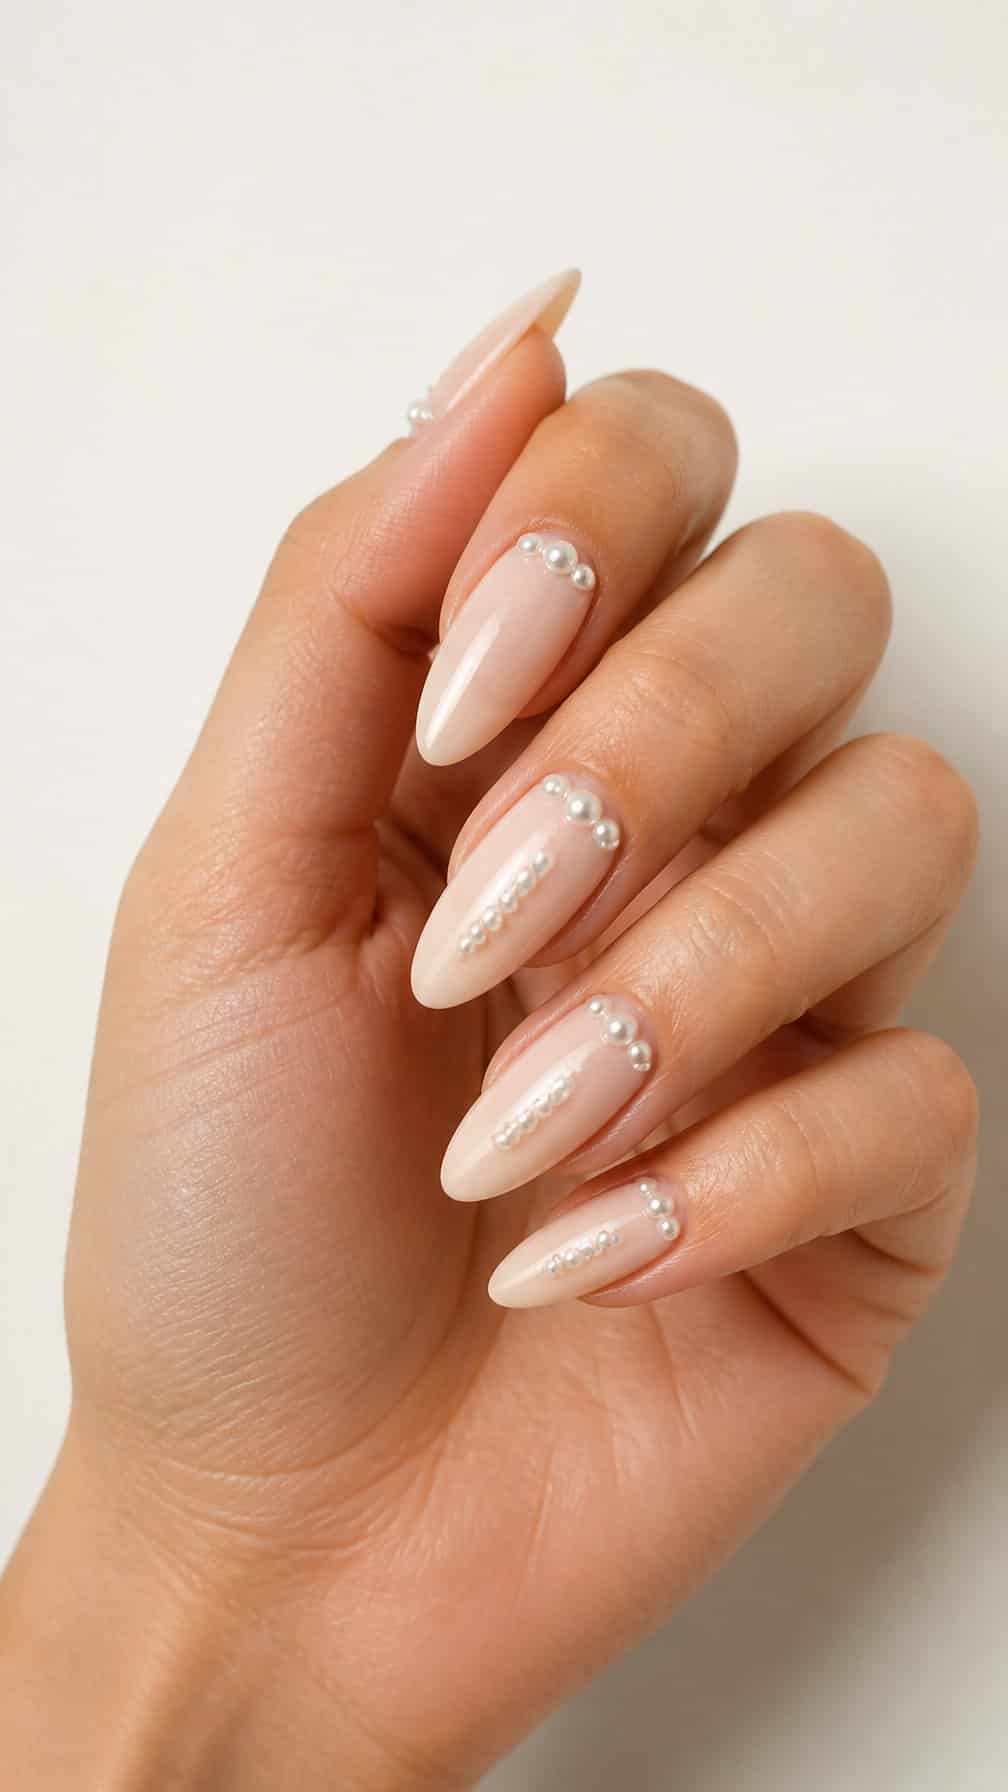
I like how the tapered almond shape gives this long manicure a refined outline without looking too sharp. A sheer pink, ivory, or nude base keeps the design balanced while allowing each pearl to stand out.
I would place small 3D pearls near the cuticles, along one side of the nail, or in a simple clustered accent. Mixing pearl sizes adds dimension, while a glossy finish helps the details look polished. Because raised embellishments can catch on clothing, I would secure them carefully with strong nail adhesive and avoid placing too many on every nail.
22) Black-and-White Graphic Coffin Nails
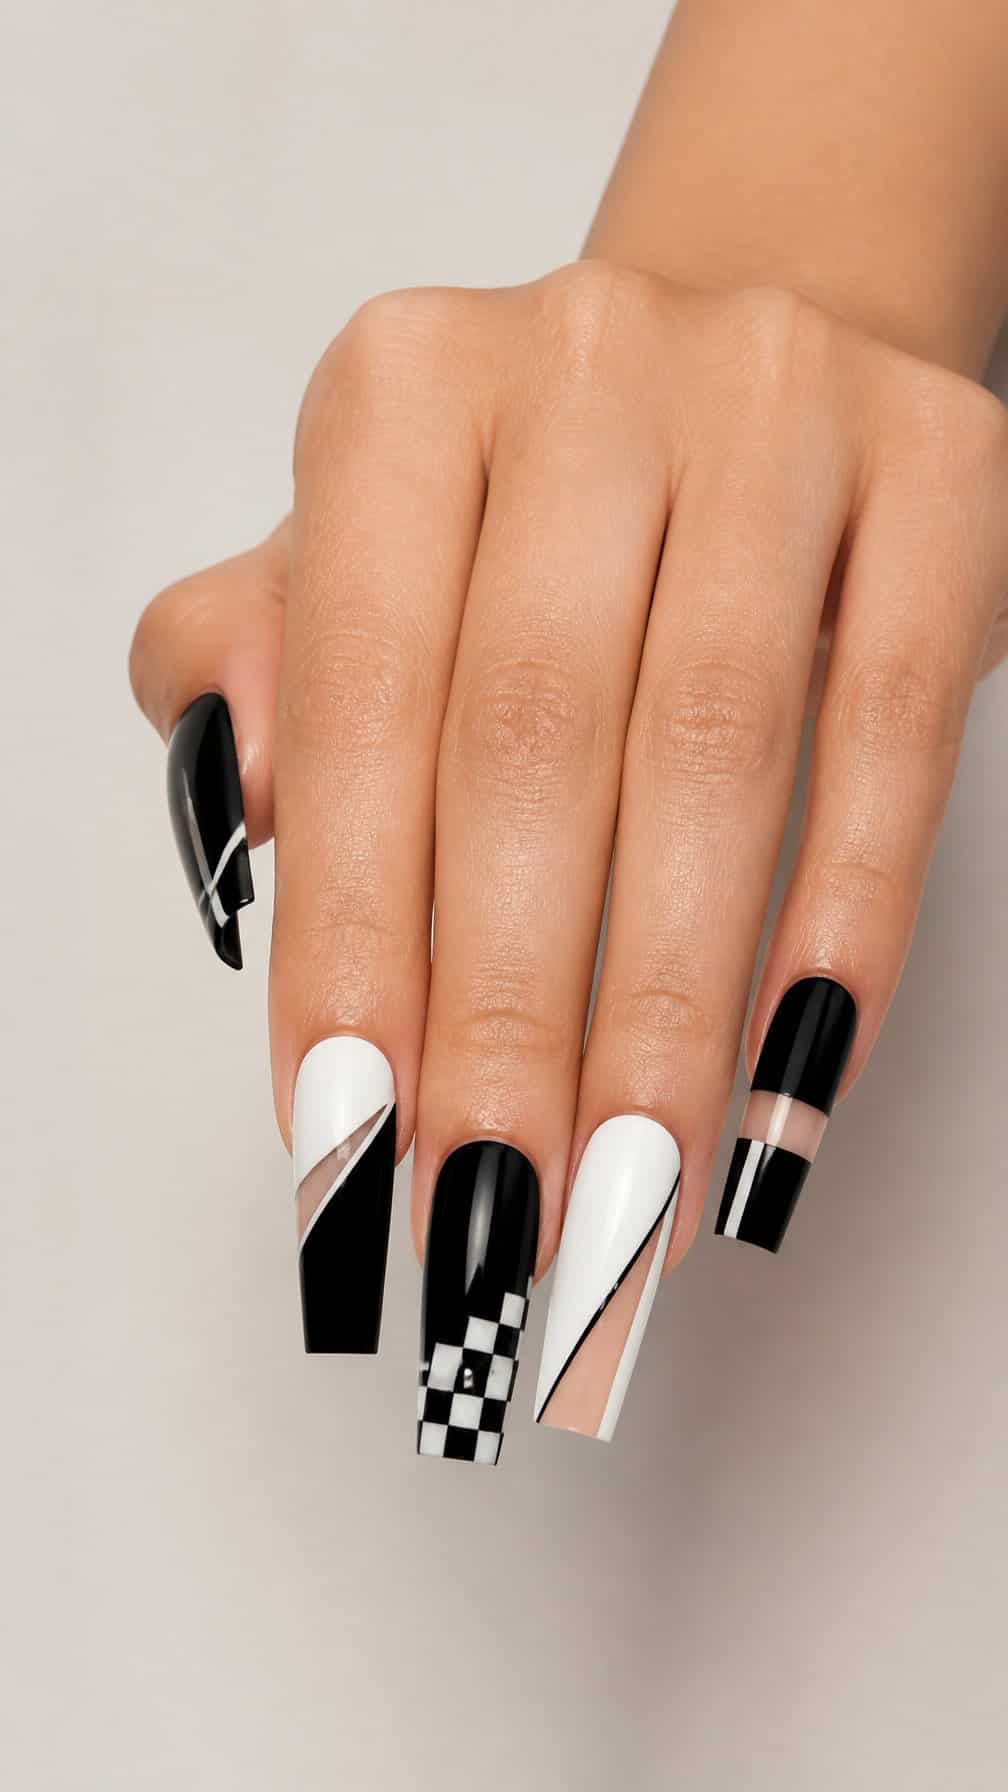
I like this design for its crisp contrast and structured shape. I pair a matte black base with white checkerboards, curved lines, or angular blocks to create a graphic look across the coffin tips. The long surface gives each pattern enough space to remain clear rather than crowded.
I usually keep the palette limited to black and white, then vary the finishes for more dimension. Glossy details over matte polish, thin outlining, and alternating accent nails help balance the bold pattern. I would choose this style when I want a polished design that suits monochrome outfits and modern accessories.
23) Long Square Nails with Gold Chrome Tips
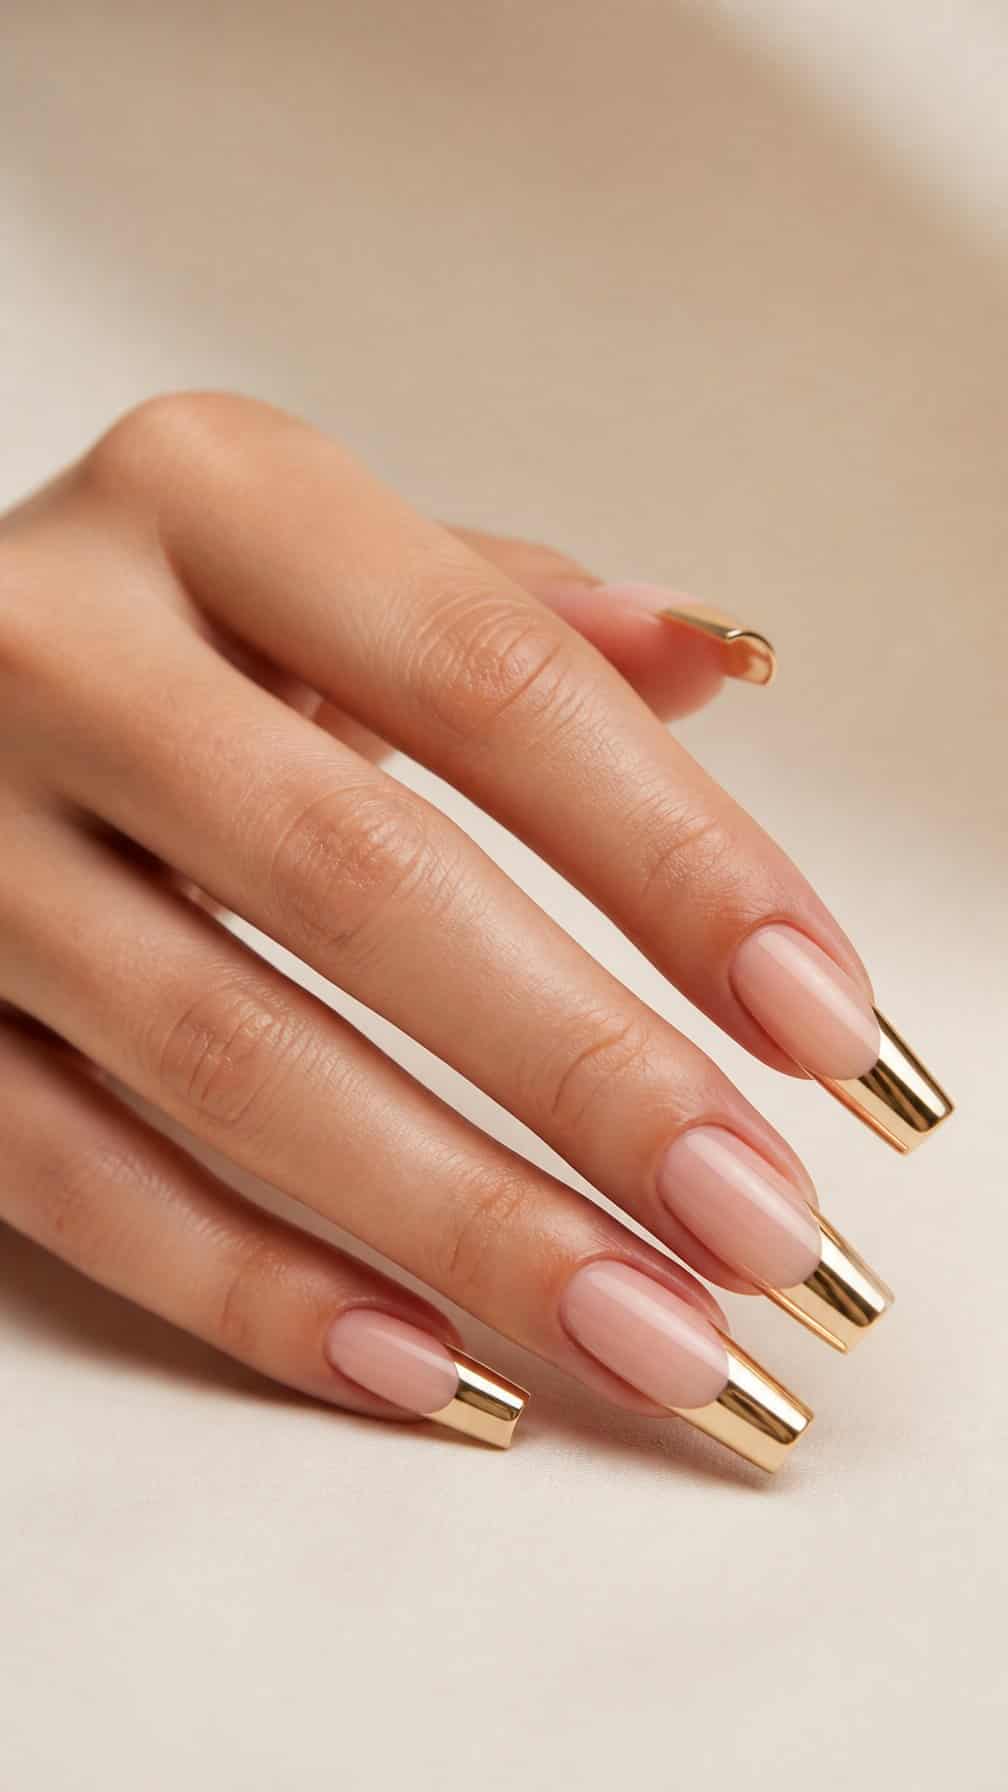
I like this design for its clean structure and controlled shine. The long square shape creates a broad canvas, while gold chrome tips add a metallic accent without covering the entire nail. I would pair the tips with a sheer nude, milky beige, or soft pink base to keep the contrast polished.
I find this style works especially well when every tip follows the same width and angle. A high-gloss finish sharpens the chrome effect, while a thin gold outline can define the edge if I want a more detailed look. The squared length also suits geometric jewelry and simple outfits.
24) Ocean-Inspired Stiletto Nails
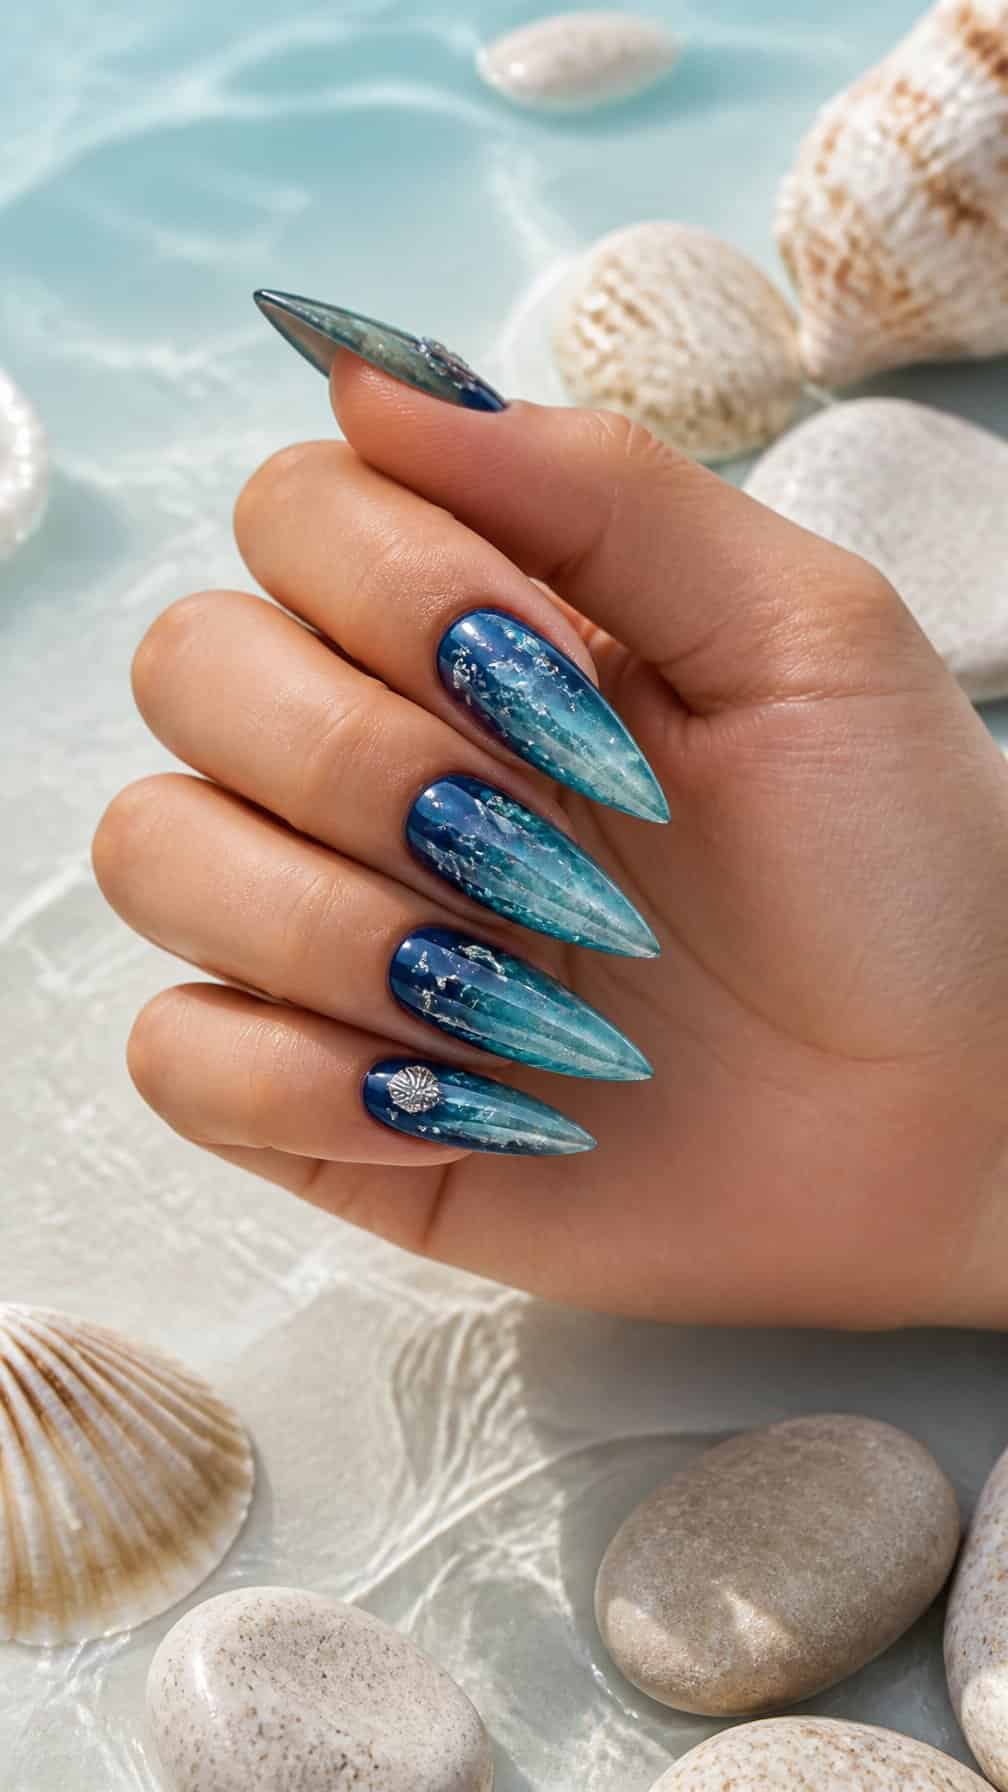
I like this design for its sharp silhouette and layered blue palette. I would combine navy, turquoise, and sea-glass green across the nails, then add thin white lines to suggest waves or foam. A glossy finish strengthens the watery effect without making the colors look heavy.
For extra detail, I might place small pearl accents or scattered silver foil near the cuticles. I would keep the decorations sparse because the stiletto shape already draws attention and needs enough open space to maintain a clean, balanced look.
25) Long Coffin Nails with Leopard Print
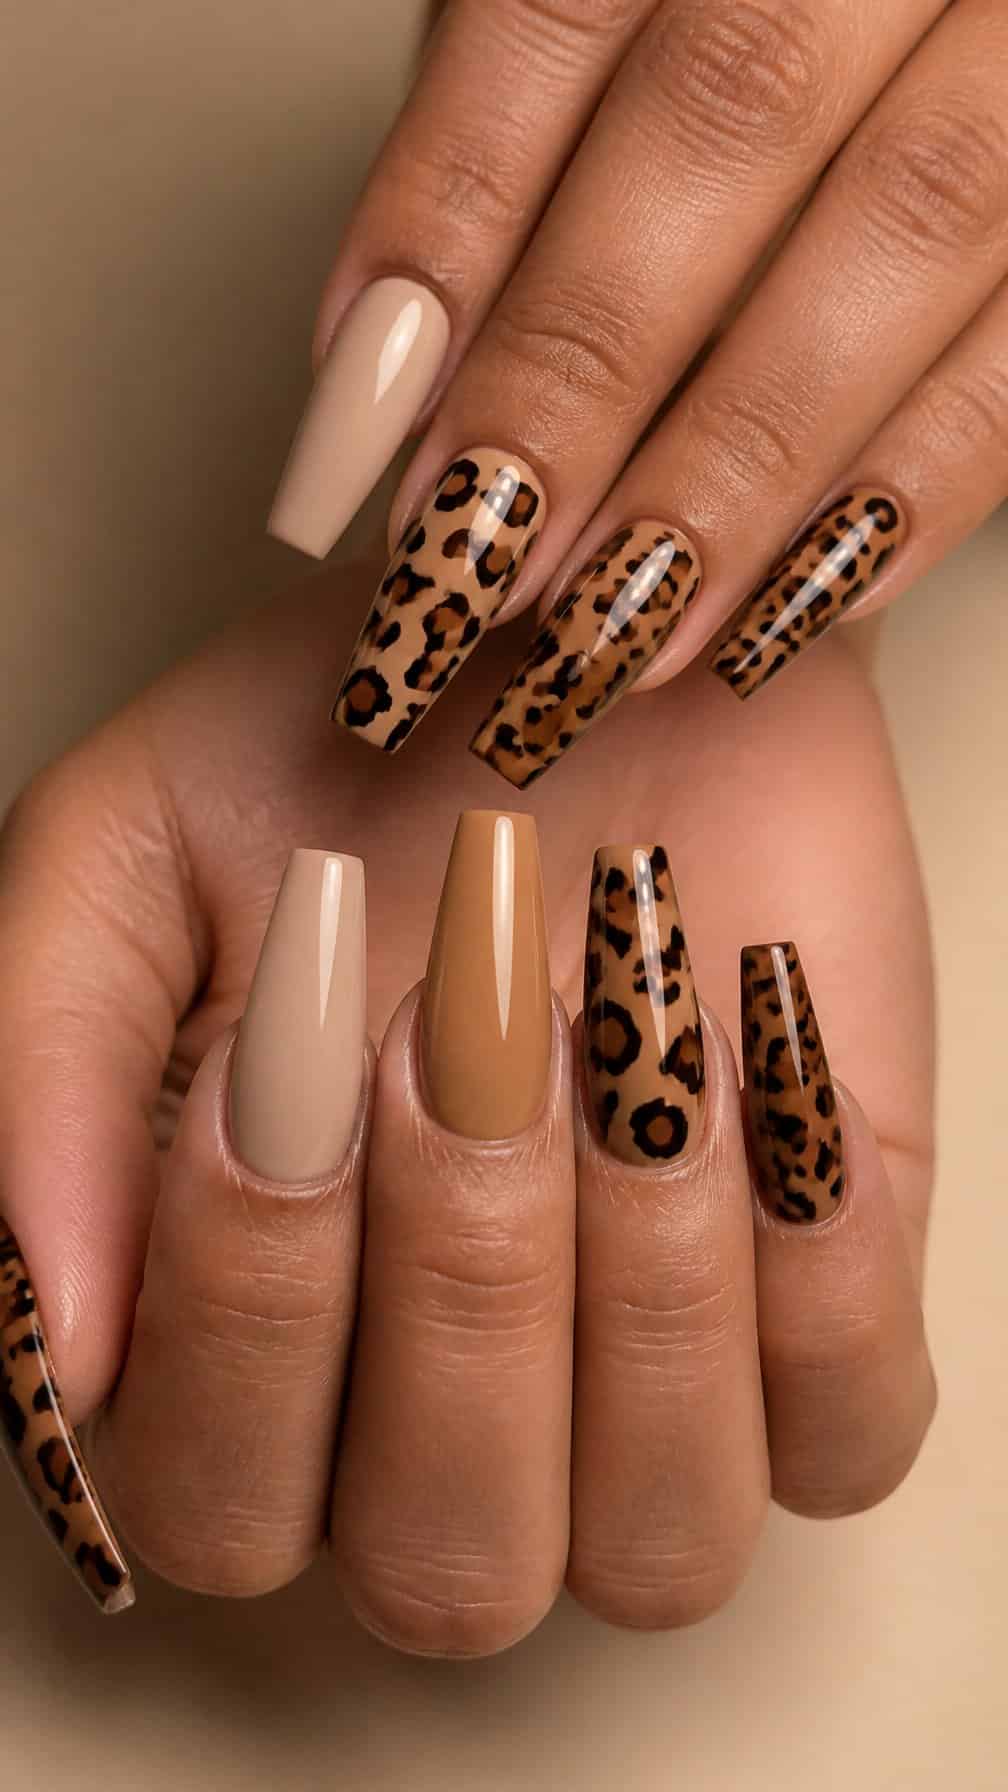
I like how the tapered coffin shape gives leopard print a structured base. I would use a warm nude or beige background, then add irregular brown and black spots across each nail. The extended length leaves enough space for the pattern without making it look crowded.
I would keep the finish glossy to sharpen the contrast between the neutral base and dark markings. For a more balanced set, I might cover two or three nails fully with leopard print and leave the others nude with small spotted accents near the tips.
Choosing Length, Shape, And Materials
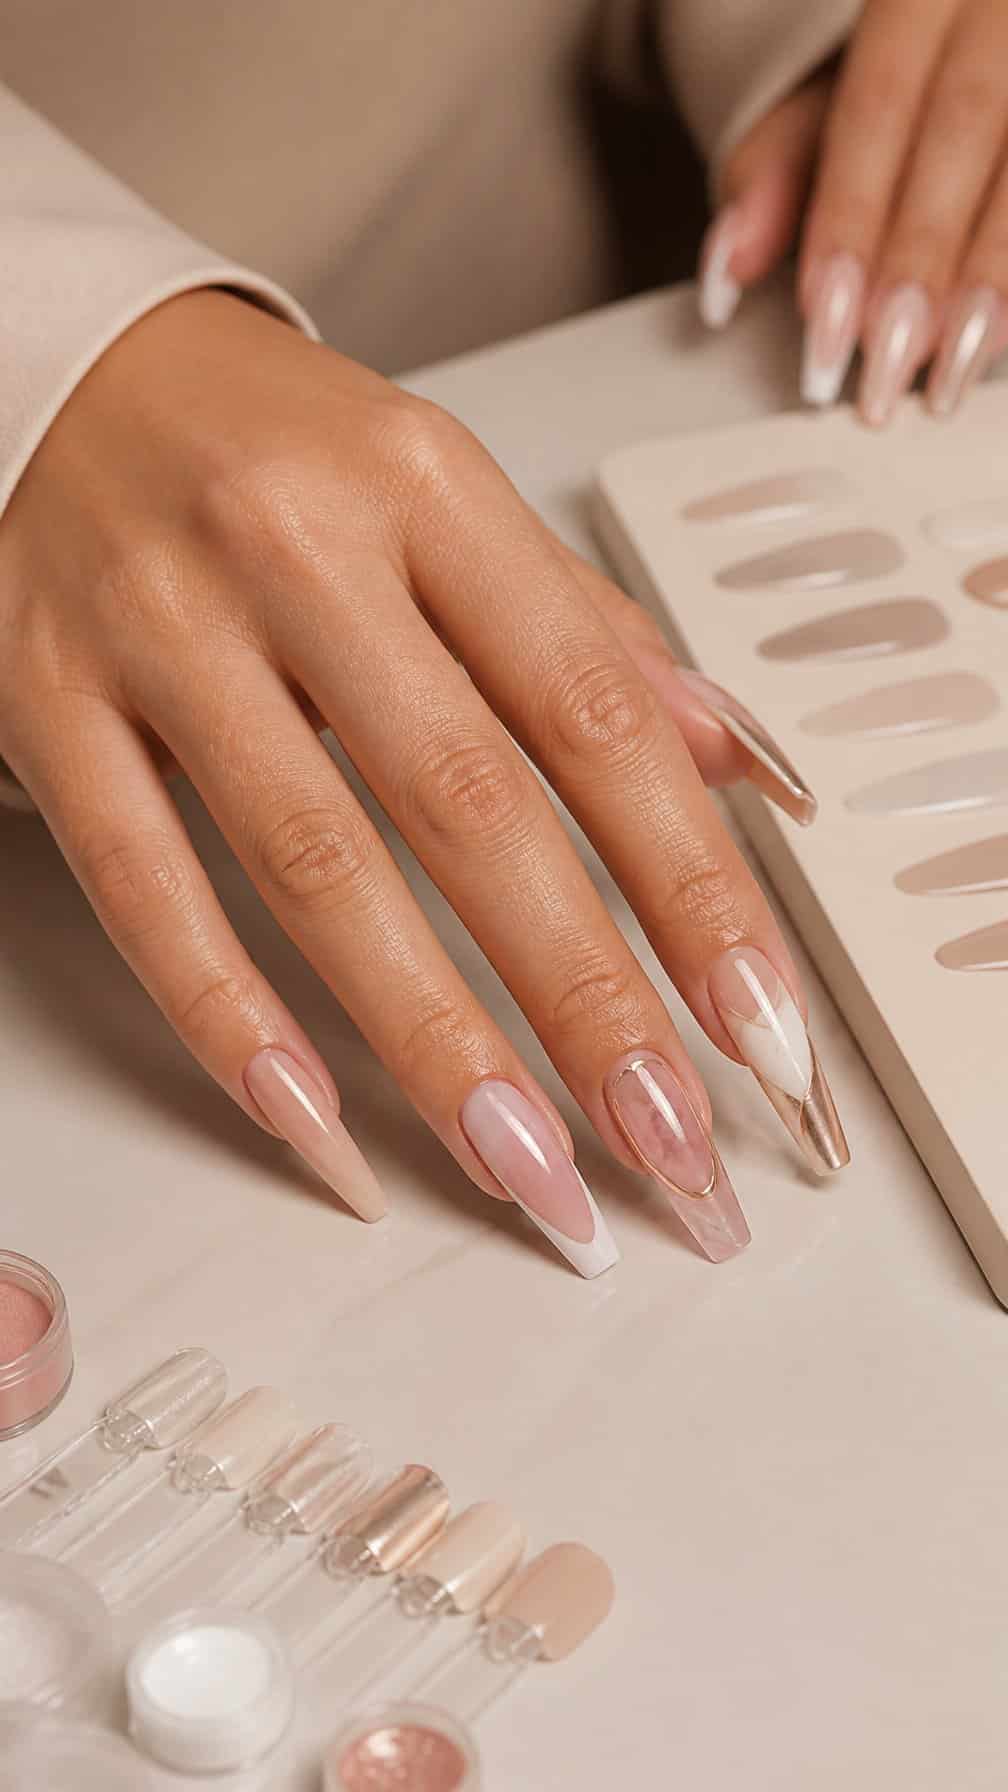
I choose nail length and shape based on daily tasks, hand proportions, and the amount of maintenance I can manage. Material selection also matters because each option affects durability, removal, flexibility, and natural nail health.
Matching Nail Shapes To Your Lifestyle
I match the shape to how I use my hands. Short square or squoval nails suit frequent typing, cooking, childcare, and contact-lens use because their edges stay practical and easy to control. Squoval corners also reduce snagging compared with a sharp square shape.
Almond and oval nails create a longer appearance while tapering away from the fingertips. I find them more comfortable for everyday wear than stiletto nails, especially when I need to fasten jewelry or handle small objects. Their rounded edges catch less often on fabric.
I reserve coffin and stiletto shapes for periods when I can accept more maintenance. Long, narrow tips require careful filing and may interfere with sports, manual work, or tight clothing. I also keep the length proportional to the nail bed so the design looks balanced rather than oversized.
Selecting Gel, Acrylic, Or Builder Gel
I select gel polish when I want color over my natural nails with a thinner finish. It cures under an LED or UV lamp and usually works best on shorter lengths, since it does not provide the same structural support as an extension system.
Acrylic combines liquid monomer and powder to create a firm extension. I consider it for significant length or shapes that need stronger support, but removal requires professional filing and soaking. Picking or peeling it away can remove surface layers from the natural nail.
Builder gel offers more structure than gel polish and often feels lighter than acrylic. I use it to reinforce natural nails or create moderate extensions, depending on the formula. The technician should match the product to my nail flexibility, apply it without touching the skin, and maintain the apex as the nail grows.
Considering Natural Nail Health
I check my nails before adding length. Splitting, pain, green or dark discoloration, lifted product, and inflamed skin call for a break and professional assessment rather than immediate coverage. I avoid placing enhancements over suspected infections because product can trap moisture and conceal changes.
I keep added length moderate when my nails feel thin or flexible. Excessive length increases leverage at the free edge, making accidental breaks more likely. I also choose a technician who prepares the surface gently instead of aggressively thinning the natural nail with a file or drill.
For maintenance, I schedule fills according to growth and never lift or pry off product. I use cuticle oil regularly, wear gloves during prolonged water or cleaning exposure, and ask for removal when the enhancement begins separating. These habits help me monitor the natural nail instead of masking problems.
Long Nail Care And Maintenance
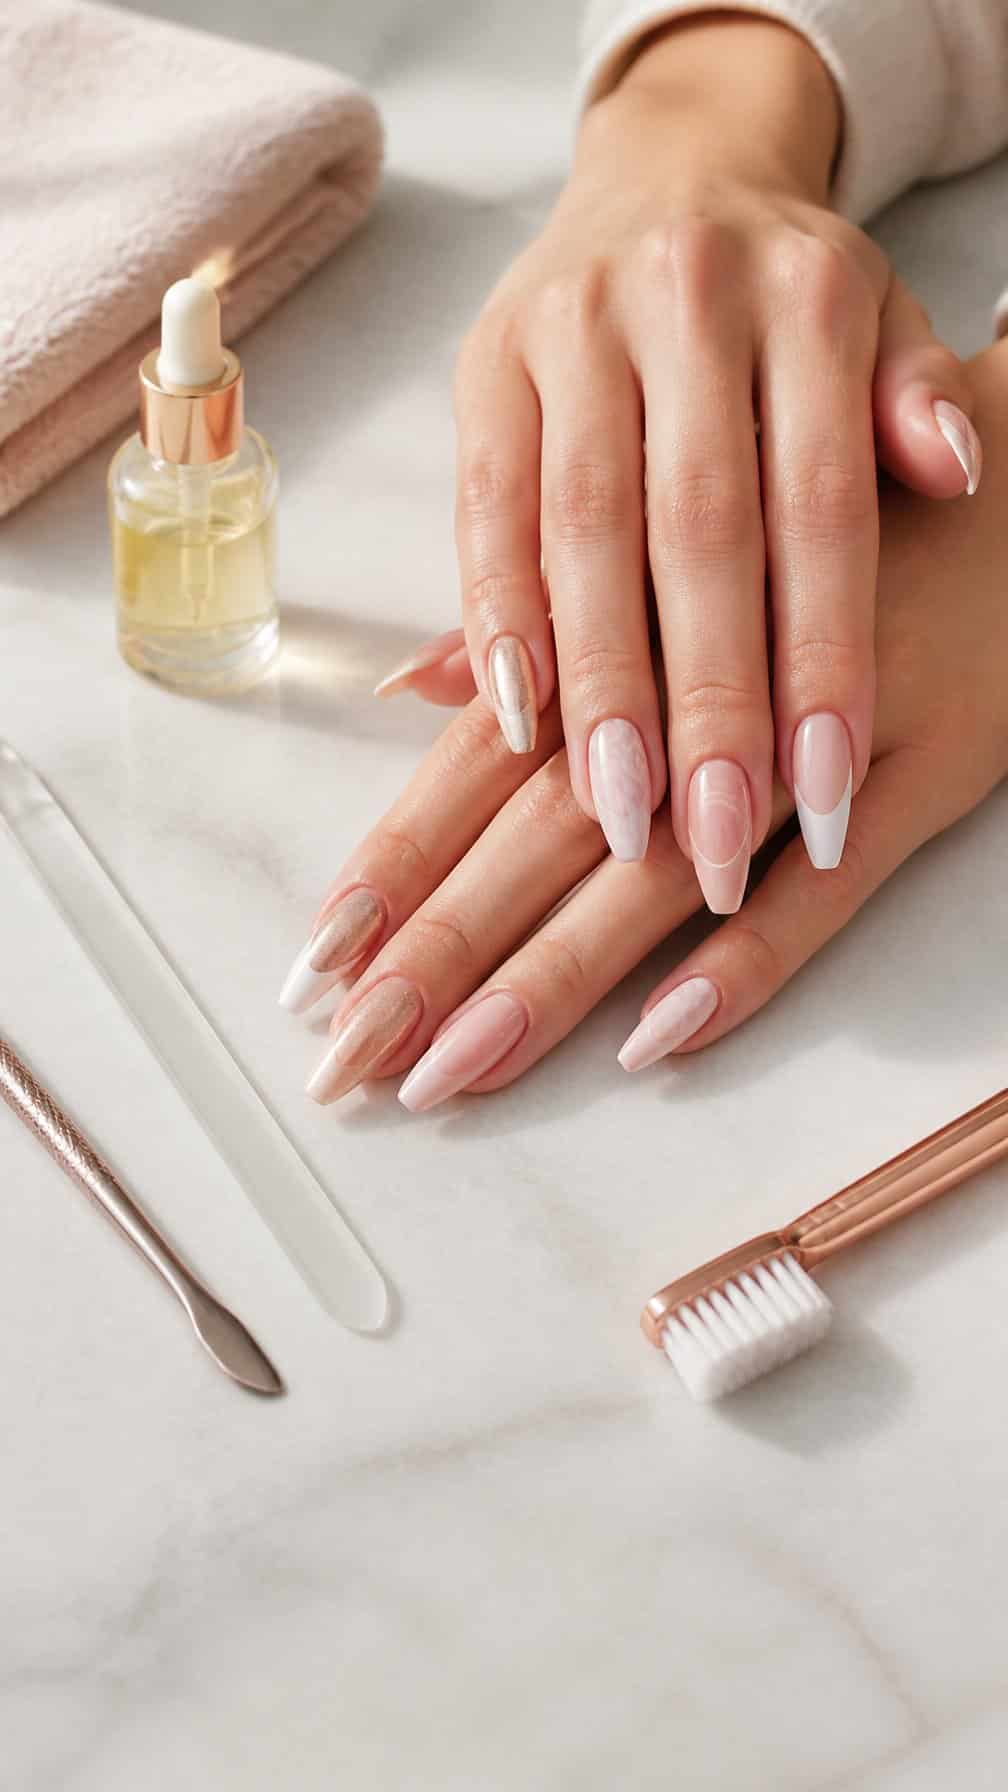
I protect long nails by reducing pressure on the tips, keeping product edges sealed, and watching for changes that signal needed maintenance. My routine focuses on preventing breakage, avoiding unnecessary leverage, and scheduling professional care before lifting or damage worsens.
Preventing Breakage And Lifting
I keep my natural nails and extensions at a practical length that suits my daily routine. When I type, open containers, or handle small objects, I use my fingertips rather than the nail tips to reduce leverage.
I apply cuticle oil at least once daily, especially around the sidewalls and near the product edge. Moisturized skin stays more flexible, while regular oil use can reduce dryness that contributes to snagging. I also avoid picking at lifted gel, acrylic, or builder product because removal can pull away layers of the natural nail.
I wear gloves during dishwashing and cleaning. Prolonged water exposure can weaken the bond between the product and nail, while cleaning chemicals may dry the surrounding skin.
Protecting Nails During Daily Tasks
I use the pads of my fingers for buttons, phone controls, and similar tasks instead of pressing with the nail tips. For stubborn lids or packages, I choose a tool rather than forcing the nail into the opening.
I wear rubber gloves for household chores and protective gloves for gardening, moving boxes, or other activities that can catch or strike the nails. I also avoid using long nails to scrape labels, remove adhesive, or separate tightly joined objects.
If a nail snags, I stop and file the rough area with a fine-grit file. I file in one direction and avoid sawing aggressively across the edge, which can create additional splitting. I keep a small file in my bag for quick repairs.
Knowing When To Schedule Fills Or Removal
I schedule a fill according to the product and the visible gap near the cuticle, usually before the grown-out area becomes large enough to shift the balance of the enhancement. A nail technician can assess lifting, cracks, and uneven stress before they lead to breakage.
I do not cover active lifting with polish or another layer of product. Moisture can become trapped beneath the lifted area, so I arrange professional repair or removal promptly. I also seek removal when an extension cracks, feels painful, changes color, or separates from the natural nail.
I never pry off enhancements. Professional soaking or filing protects the natural nail from unnecessary peeling and thinning.