

A helix piercing can shape your ear’s profile while adding a small, personal detail to your style. You can explore understated hoops, delicate studs, stacked jewelry, and mixed-metal combinations that suit different placements and preferences.
Save for later
Want to come back to this story? Save it with your email so it is easy to find again.
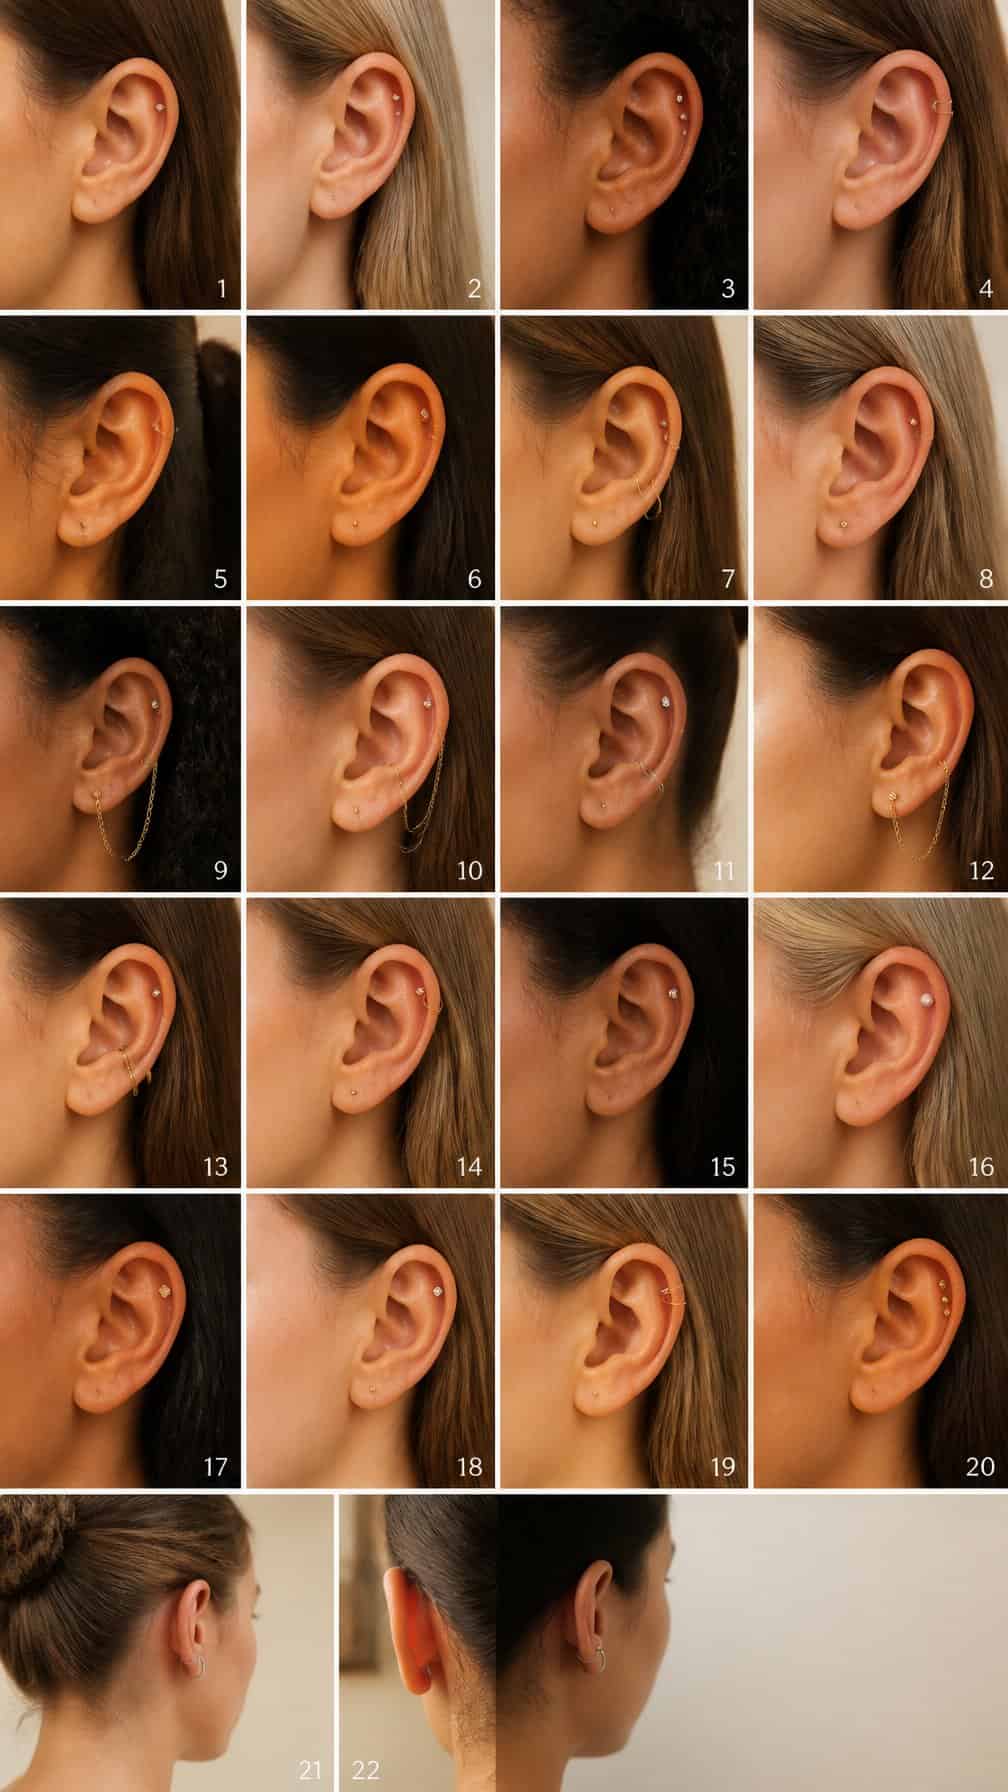
These 22 helix piercing ideas help you choose jewelry that complements your ear from every angle, while placement, materials, healing, and aftercare guide a comfortable result. I’ll also cover how different designs work with cartilage anatomy, so you can compare options before deciding on a look.
Table of Contents
- 1 1) Classic titanium helix hoop
- 2 2) Double helix with graduated hoops
- 3 3) Tiny diamond helix stud
- 4 4) Curved barbell helix piercing
- 5 5) Opal helix stud with flat back
- 6 6) Minimalist gold helix hoop
- 7 7) Triple helix constellation
- 8 8) Mixed-metal helix stack
- 9 9) Forward helix and outer helix pairing
- 10 10) Pearl helix hoop
- 11 11) Small huggie helix ring
- 12 12) Celestial star helix stud
- 13 13) Moonstone helix piercing
- 14 14) Beaded helix hoop
- 15 15) Layered cartilage chain
- 16 16) Emerald-cut helix stud
- 17 17) Rose-gold helix combination
- 18 18) Lightning-bolt helix earring
- 19 19) Threadless flower helix stud
- 20 20) Black titanium helix hoop
- 21 21) Snake-chain helix accent
- 22 22) Birthstone helix stud
1) Classic titanium helix hoop
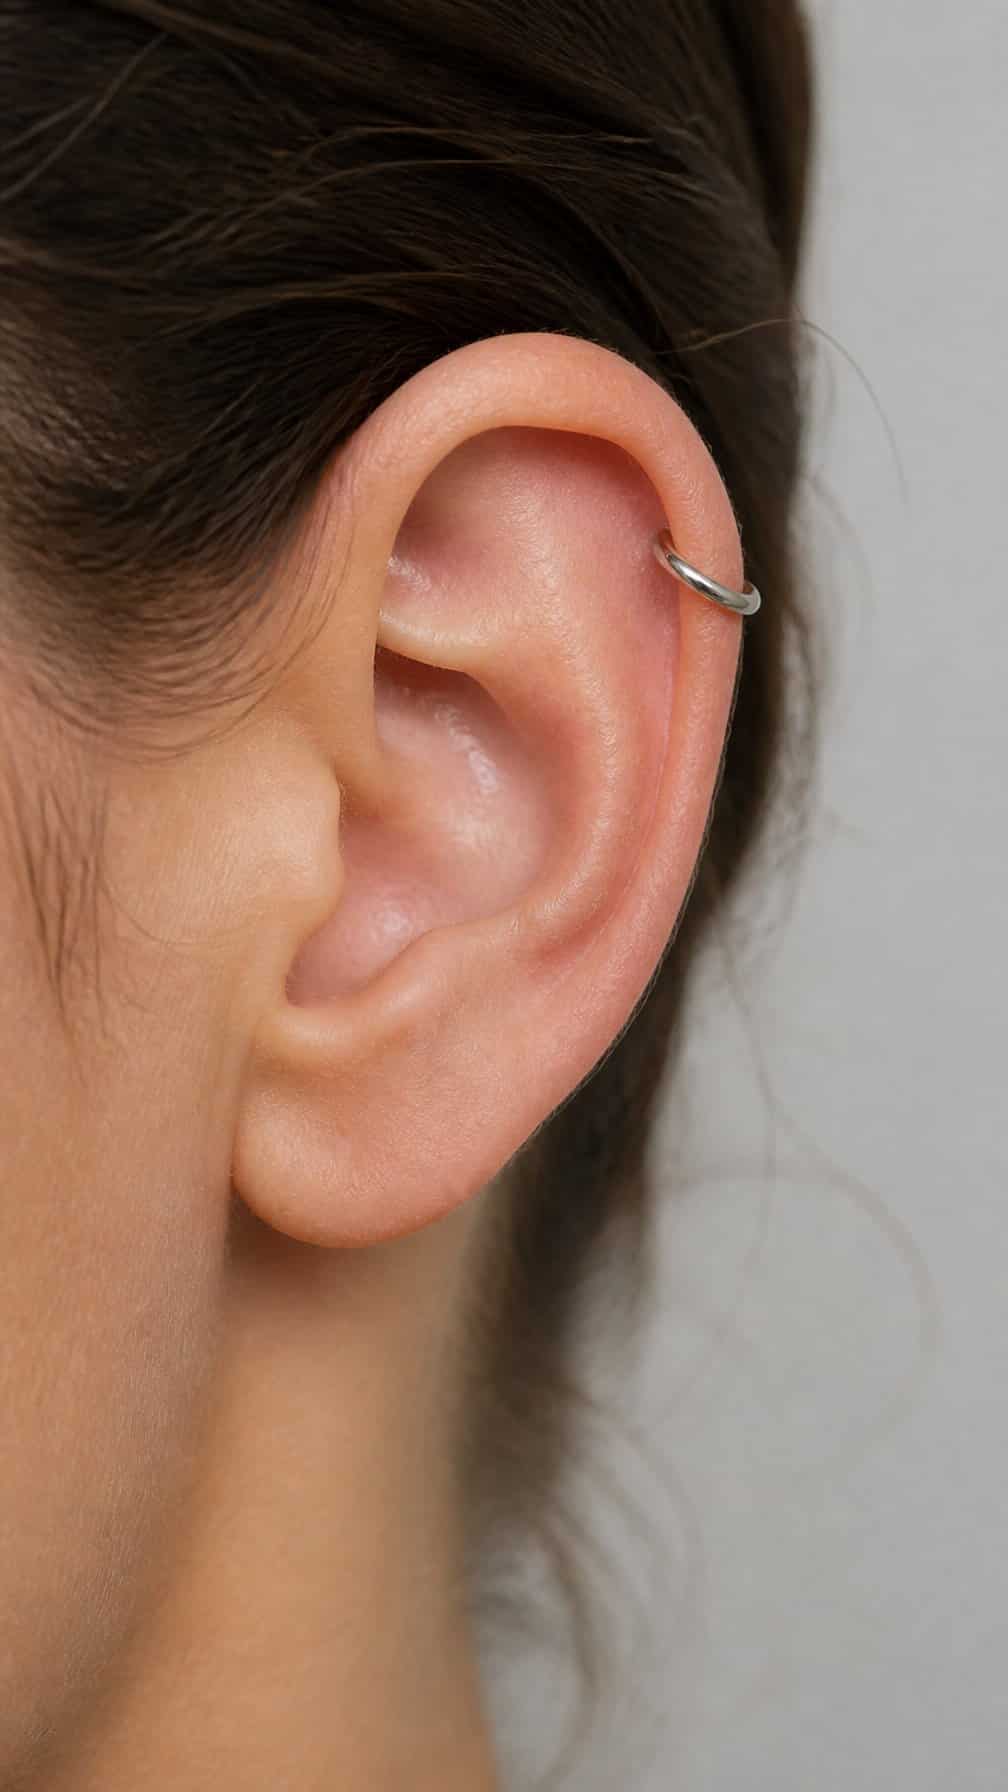
I like a classic titanium hoop for its clean profile and balanced shape. Its slim circular form follows the ear’s outer curve, so it looks polished from the front, side, and rear without competing with other jewelry.
I would choose implant-grade titanium with a smooth, polished finish and an appropriate diameter for the wearer’s anatomy. A hinged or clicker closure keeps the design simple, while a snug but comfortable fit helps prevent unnecessary movement during healing.
I find this style especially versatile because it suits minimalist outfits and layered ear stacks equally well. It also offers a neutral starting point for adding a second helix piece later.
2) Double helix with graduated hoops
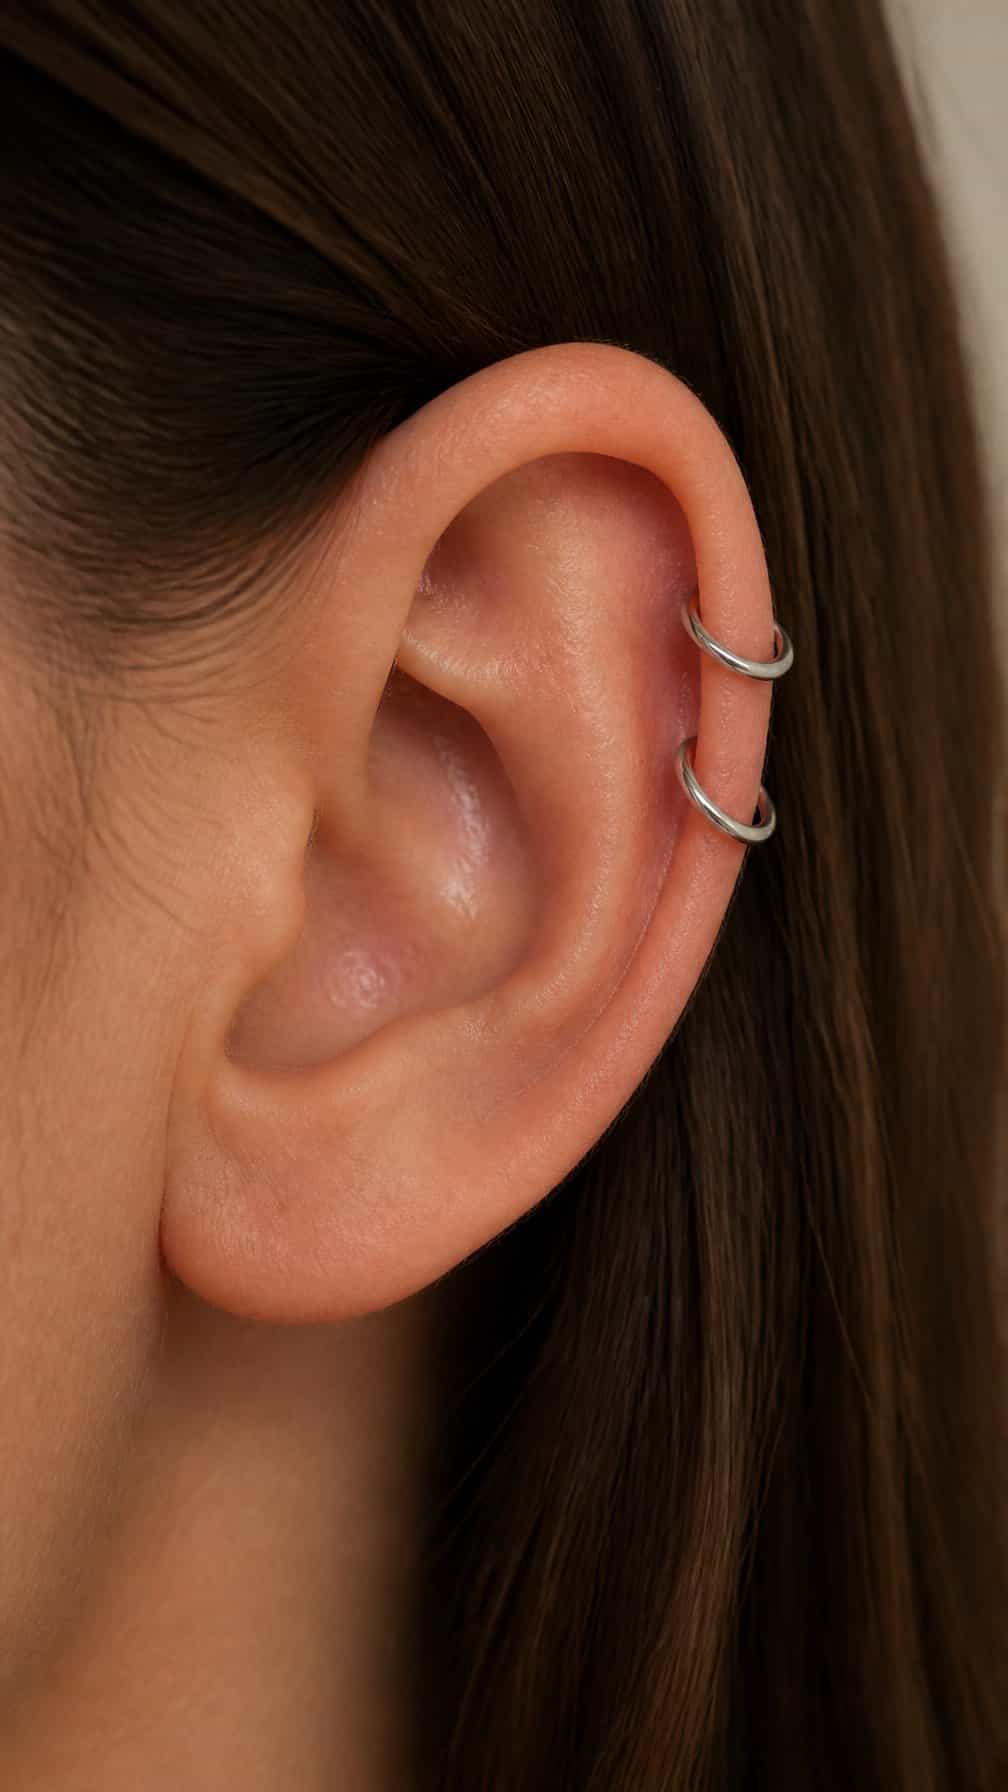
I like graduated hoops for a double helix because their different diameters create a deliberate size change along the ear. I usually place the smaller hoop in the upper piercing and the larger one below, allowing each ring to remain visible without competing for space.
I would choose slim, lightweight hoops with a smooth finish for a clean profile from the front and side. The spacing, hoop thickness, and ear shape matter, so I recommend testing the arrangement with temporary rings before selecting final jewelry.
3) Tiny diamond helix stud
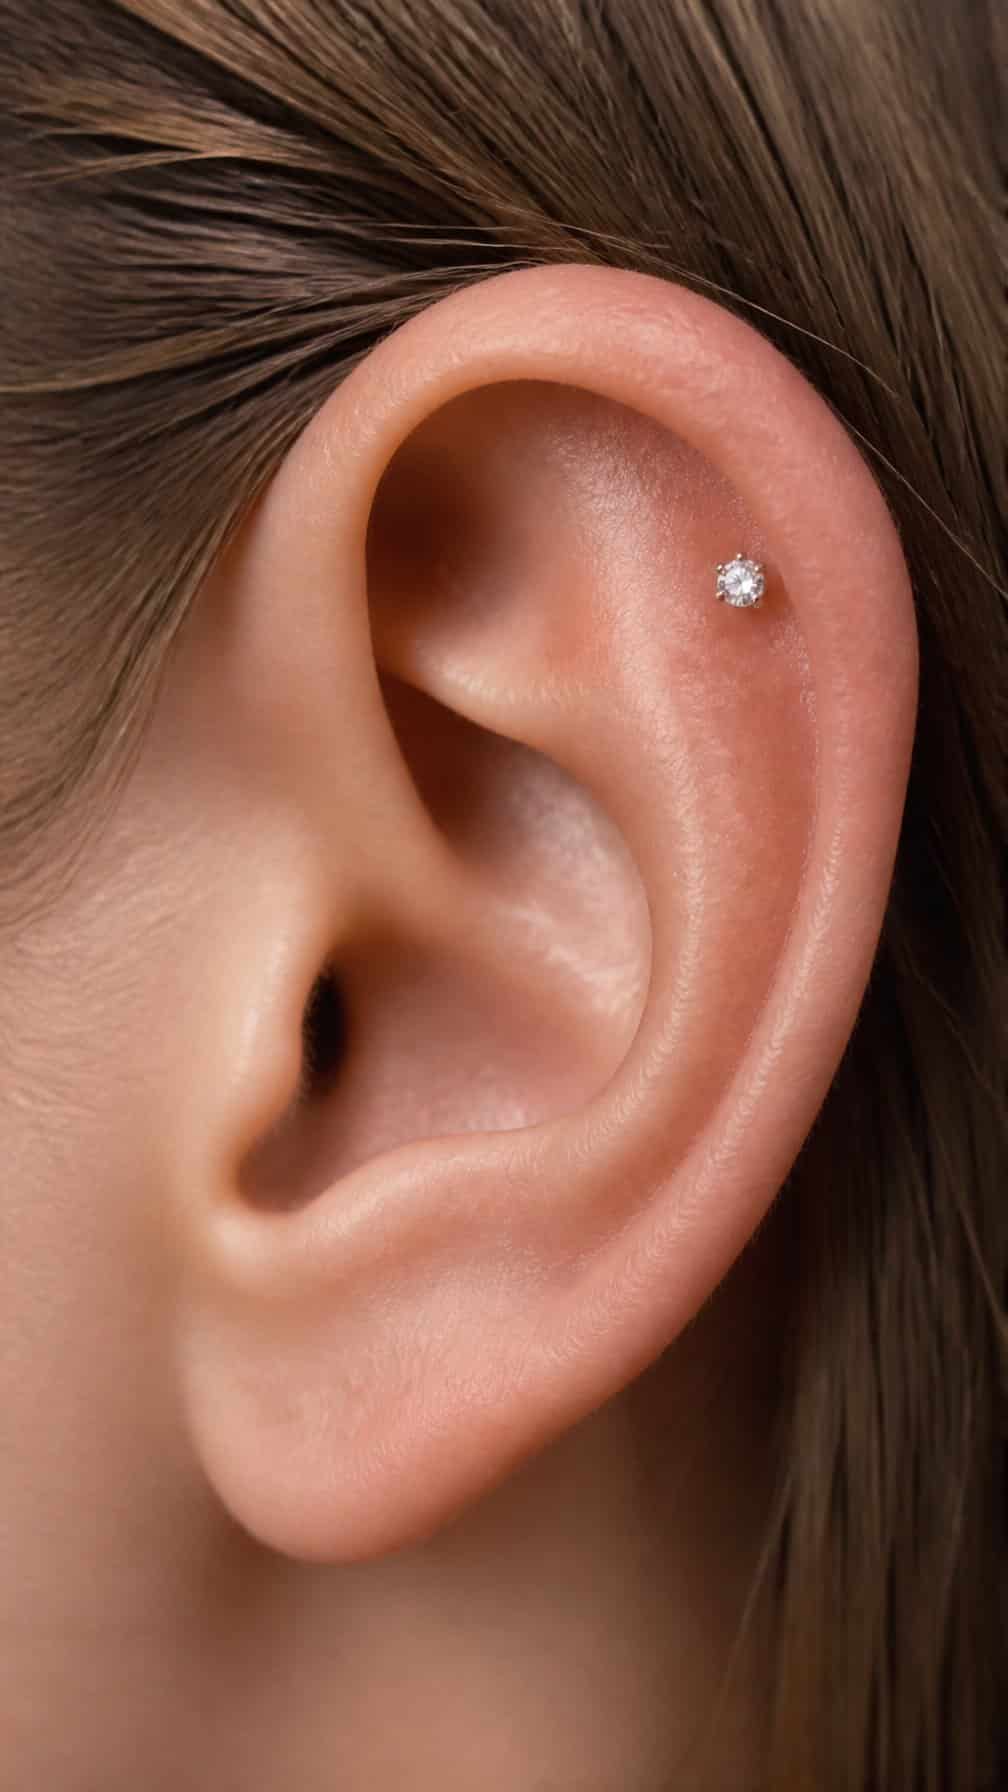
I like a tiny diamond helix stud for its clean, understated finish. Its small profile keeps the upper ear looking balanced, while the stone adds a precise point of light without dominating other piercings.
From the front, it creates a subtle sparkle along the ear’s outer curve. From the side, its low-set design stays neat and comfortable, especially when paired with simple lobe studs or a slim hoop. I would choose a secure flat-back setting and a size suited to the ear’s anatomy.
4) Curved barbell helix piercing

I like a curved barbell for its smooth shape and balanced profile. The jewelry follows the ear’s natural contour, so both ends remain visible without creating the straight, horizontal look of a standard barbell.
I would choose a small, lightweight style for a clean appearance and easier healing. Titanium works well for sensitive skin, while polished steel or gold can add a different finish once the piercing has healed.
From the front, the bead or ball adds a subtle focal point. From the side, the curve gives the piercing more dimension and pairs neatly with lobe studs, a conch hoop, or a second helix piercing.
5) Opal helix stud with flat back

I like an opal stud when I want a small touch of color without adding visual weight to the upper ear. Its shifting blue, green, or pink tones catch light from different angles, while the flat back sits smoothly against the ear and feels less bulky than a traditional butterfly closure.
I would pair it with simple lobe jewelry or another slim helix piece to keep the arrangement balanced. I recommend choosing implant-grade titanium or solid gold and checking that the post length allows room for swelling without pressing into the ear.
6) Minimalist gold helix hoop

I like a slim gold hoop for its clean profile and subtle shine. Its rounded shape follows the ear’s curve, so it looks balanced from the front, side, and back without competing with other jewelry.
I would choose a diameter that sits close to the cartilage without pressing against it. A polished finish creates a brighter look, while a matte finish feels more understated. I also prefer implant-grade titanium or solid gold to reduce irritation, especially for a newer piercing. Pairing it with small gold studs keeps the arrangement coordinated.
7) Triple helix constellation

I like three small studs arranged along the upper ear’s curve, with spacing that follows the natural anatomy rather than forming a rigid line. Matching metals create a clean constellation effect, while varied shapes—such as a bead, star, and tiny hoop—add controlled contrast.
I would place the smallest piece at the highest point or near the center, depending on the ear’s structure. This arrangement keeps each piercing visible from the front, side, and back, but healing time and individual anatomy should guide the final placement.
8) Mixed-metal helix stack

I combine gold, silver, and titanium pieces to create contrast without making the ear look crowded. I usually keep the smallest hoop or stud in the upper helix, then add slightly larger shapes below it for balanced spacing.
I choose one repeating detail, such as a bead, smooth finish, or tiny gemstone, to connect the different metals. This keeps the stack coordinated from the front, side, and back rather than making each piece compete for attention.
I also check each jewelry piece for comfort and material quality, especially when I wear the stack daily. Implant-grade titanium and solid gold can suit healed piercings, while properly sized jewelry helps prevent pressure on the ear.
9) Forward helix and outer helix pairing

I like this pairing because it creates a balanced arrangement along the upper ear without looking crowded. I place the smaller forward helix stud near the front cartilage, then use an outer helix hoop or gemstone stud to add visual length.
This setup looks polished from the front and side, especially when both pieces share a metal tone. I would choose flat-back jewelry for the forward helix and select an outer helix piece that matches its scale. Because cartilage piercings can swell during healing, I would have a professional piercer assess spacing and jewelry fit.
10) Pearl helix hoop

I like a pearl helix hoop for the way it combines the clean curve of a ring with the softer look of a single pearl. The pearl can sit at the front or lower edge of the hoop, depending on its design and how the jewelry rests on my ear.
I would choose a small, lightweight style to reduce pressure on the upper cartilage. A gold or silver finish changes the overall effect, while a smooth, secure clasp helps the hoop stay comfortable during daily wear. I can wear it alone for a simple look or pair it with small studs along the lobe.
11) Small huggie helix ring

I like a small huggie ring for its neat, close-fitting profile. Its hinged or clicker closure wraps around the upper ear without leaving much extra space, which helps the piercing look tidy from the front and side.
I would choose a slim band in gold, silver, or titanium to keep the focus on the ear’s shape. A lightly textured finish adds detail without making the jewelry appear bulky, while a plain polished band suits minimalist styling.
This design works well alone or beside a small lobe stud. I would check the inner diameter carefully, since a ring that fits too tightly can press against the ear, while one that is too large may rotate and change the intended look.
12) Celestial star helix stud

I like a small star stud for its clean shape and subtle celestial detail. Its pointed silhouette adds definition to the upper ear without making the piercing look crowded. I find it especially effective in polished gold, silver, or titanium, depending on the rest of my jewelry.
From the front, the star creates a neat focal point above the ear’s curve. From the side, its low profile keeps the jewelry comfortable and less likely to catch on hair or clothing. I would pair it with a tiny moon, a plain hoop, or matching metal studs for a coordinated arrangement.
13) Moonstone helix piercing

I like moonstone for its soft blue or white sheen, which adds subtle color without overpowering the ear. Its rounded shape suits a helix placement, especially when I pair it with a small titanium or gold setting.
From the front, the stone creates a clean focal point along the upper ear. From the side, its reflective surface catches changing light and adds dimension. I would choose a low-profile setting to reduce snagging on hair, glasses, or clothing.
Moonstone can complement simple lobe studs, thin hoops, or other cool-toned jewelry. I would confirm the stone’s setting and the piercer’s recommended jewelry material before wearing it in a fresh piercing.
14) Beaded helix hoop

I like a beaded hoop for the way it adds texture without covering the ear. Small beads spaced around the ring create subtle detail, while a slim profile keeps the piercing looking neat from the front, side, and back.
I would choose beads that match the rest of my jewelry, such as silver, gold, or black, for a coordinated look. A hinged or clicker closure can make insertion easier, but I would check that the hoop fits the ear’s curve without pressing against nearby piercings.
15) Layered cartilage chain

I like a layered cartilage chain because it adds movement without requiring multiple separate jewelry styles. I would connect two or three upper-ear piercings with a fine chain, keeping the links small so the design follows the ear’s natural curve.
From the front, the chain creates a subtle line between the piercings. From the side, it adds depth against the ear’s edge, while the metal catches light as I move. I would choose matching studs or small hoops to keep the arrangement visually balanced.
I would leave enough slack for comfortable movement and avoid placing the chain where it can snag on hair, masks, or clothing. A professional piercer can check the spacing, jewelry weight, and healing stage before adding the chain.
16) Emerald-cut helix stud

I like an emerald-cut stud for its clean, architectural shape. The long rectangular stone follows the ear’s curve while adding a crisp, polished detail that looks balanced from the front, side, and back.
I would choose a low-profile setting to keep the jewelry comfortable and prevent it from catching on hair or clothing. A bezel setting offers a smooth edge, while four prongs create a lighter appearance and let more light reach the stone.
I find this style especially effective in white gold or platinum, which emphasizes the cut’s sharp lines. For a warmer look, yellow gold frames the emerald neatly without competing with its geometric shape.
17) Rose-gold helix combination

I like rose-gold jewelry for a helix combination because its warm tone adds softness without overpowering the ear. I would pair a slim rose-gold hoop with two small studs, keeping the shapes simple so each piercing remains visible from the front and side.
A flat-back stud near the upper cartilage can create a clean focal point, while a smaller bead below it adds balance. I prefer matching metal across the set, although a single white-gold or silver accent can create subtle contrast.
For a coordinated finish, I would choose pieces with similar surfaces, such as polished metal throughout or a mix of polished and lightly textured details. Flat-back designs also help reduce snagging during daily wear.
18) Lightning-bolt helix earring

I like a lightning-bolt stud for its sharp, graphic shape and compact profile. Its angled edges catch light as the ear moves, while the slim design keeps the upper cartilage from looking crowded.
I would pair it with a small hoop in the lobe or a plain second helix stud for balanced contrast. I would also check that the bolt’s point faces a comfortable direction and that its backing sits securely without pressing against the ear.
19) Threadless flower helix stud

I like a threadless flower stud for its clean shape and comfortable profile. Its smooth backing sits inside the ear without visible threading, while the small floral face adds detail without making the upper ear look crowded.
I would choose a polished finish for a simple look or a stone-set center for subtle sparkle. I also find this style easy to pair with plain lobe hoops or a second helix stud, especially when the flower remains small enough to follow the ear’s natural curve.
The press-fit design can make jewelry changes straightforward, but I would still have a professional piercer check the fit before switching pieces. Implant-grade titanium or solid gold offers suitable material options for a healed piercing.
20) Black titanium helix hoop

I like a black titanium hoop for its clean, understated finish and smooth circular shape. The dark color frames the upper ear without competing with other jewelry, while the hoop remains visible from front, side, and back angles.
I would choose an implant-grade titanium option with a secure hinged or seamless closure. Its lightweight construction can feel comfortable for daily wear, but I would wait until the piercing fully heals before switching to a hoop, since its movement may irritate fresh tissue.
21) Snake-chain helix accent

I like a snake-chain accent because its smooth, flexible surface catches light without adding visual bulk. I would place it through a single upper-helix piercing, where the close-fitting design follows the ear’s curve and remains visible from front and side angles.
I would pair it with a small stud or plain hoop in nearby piercings to keep the arrangement balanced. Silver creates a crisp, understated look, while gold adds warmth. I would check the chain’s length and fastening style carefully so it sits securely without pulling on the piercing.
22) Birthstone helix stud

I like a birthstone helix stud because it adds personal meaning without making the piercing look busy. I would choose a small bezel-set stone for a clean profile that catches light from the side.
My preferred placement sits slightly above the ear’s outer curve, leaving enough space for the jewelry to remain visible with my hair down. A titanium or solid-gold setting can suit sensitive skin, while a flat-back post keeps the interior comfortable.


