

Halloween makeup can feel festive without relying on fake blood or disturbing details. I can create a polished look with color, texture, shimmer, and carefully placed lines that suit everything from a playful party to an elegant evening event.
Save for later
Want to come back to this story? Save it with your email so it is easy to find again.
You can find a striking Halloween look by choosing makeup that matches your style, skill level, and desired mood. I’ll explore creative options inspired by animals, fantasy, vintage beauty, celestial themes, and pop culture, along with practical guidance for applying and removing each look safely.
Table of Contents
- 1 1) Classic Black Cat Makeup
- 2 2) Soft Glam Vampire Makeup
- 3 3) Enchanting Fairy Makeup
- 4 4) Celestial Moon and Stars Makeup
- 5 5) Mystical Mermaid Makeup
- 6 6) Elegant Sugar Skull Makeup
- 7 7) Vintage Flapper Makeup
- 8 8) Enchanted Woodland Nymph Makeup
- 9 9) Pretty Porcelain Doll Makeup
- 10 10) Retro Pin-Up Halloween Makeup
- 11 11) Dreamy Unicorn Makeup
- 12 12) Magical Galaxy Makeup
- 13 13) Charming Scarecrow Makeup
- 14 14) Glamorous Witch Makeup
- 15 15) Whimsical Butterfly Makeup
- 16 16) Ice Queen Makeup
- 17 17) Ethereal Angel Makeup
- 18 18) Classic Mime Makeup
- 19 19) Colorful Rainbow Makeup
- 20 20) Victorian Ghost Makeup
- 21 21) Pop Art Comic Book Makeup
- 22 22) Chic Leopard Makeup
- 23 23) Romantic Renaissance Makeup
- 24 24) Neon Cyberpunk Makeup
- 25 25) Gothic Lace Makeup
1) Classic Black Cat Makeup
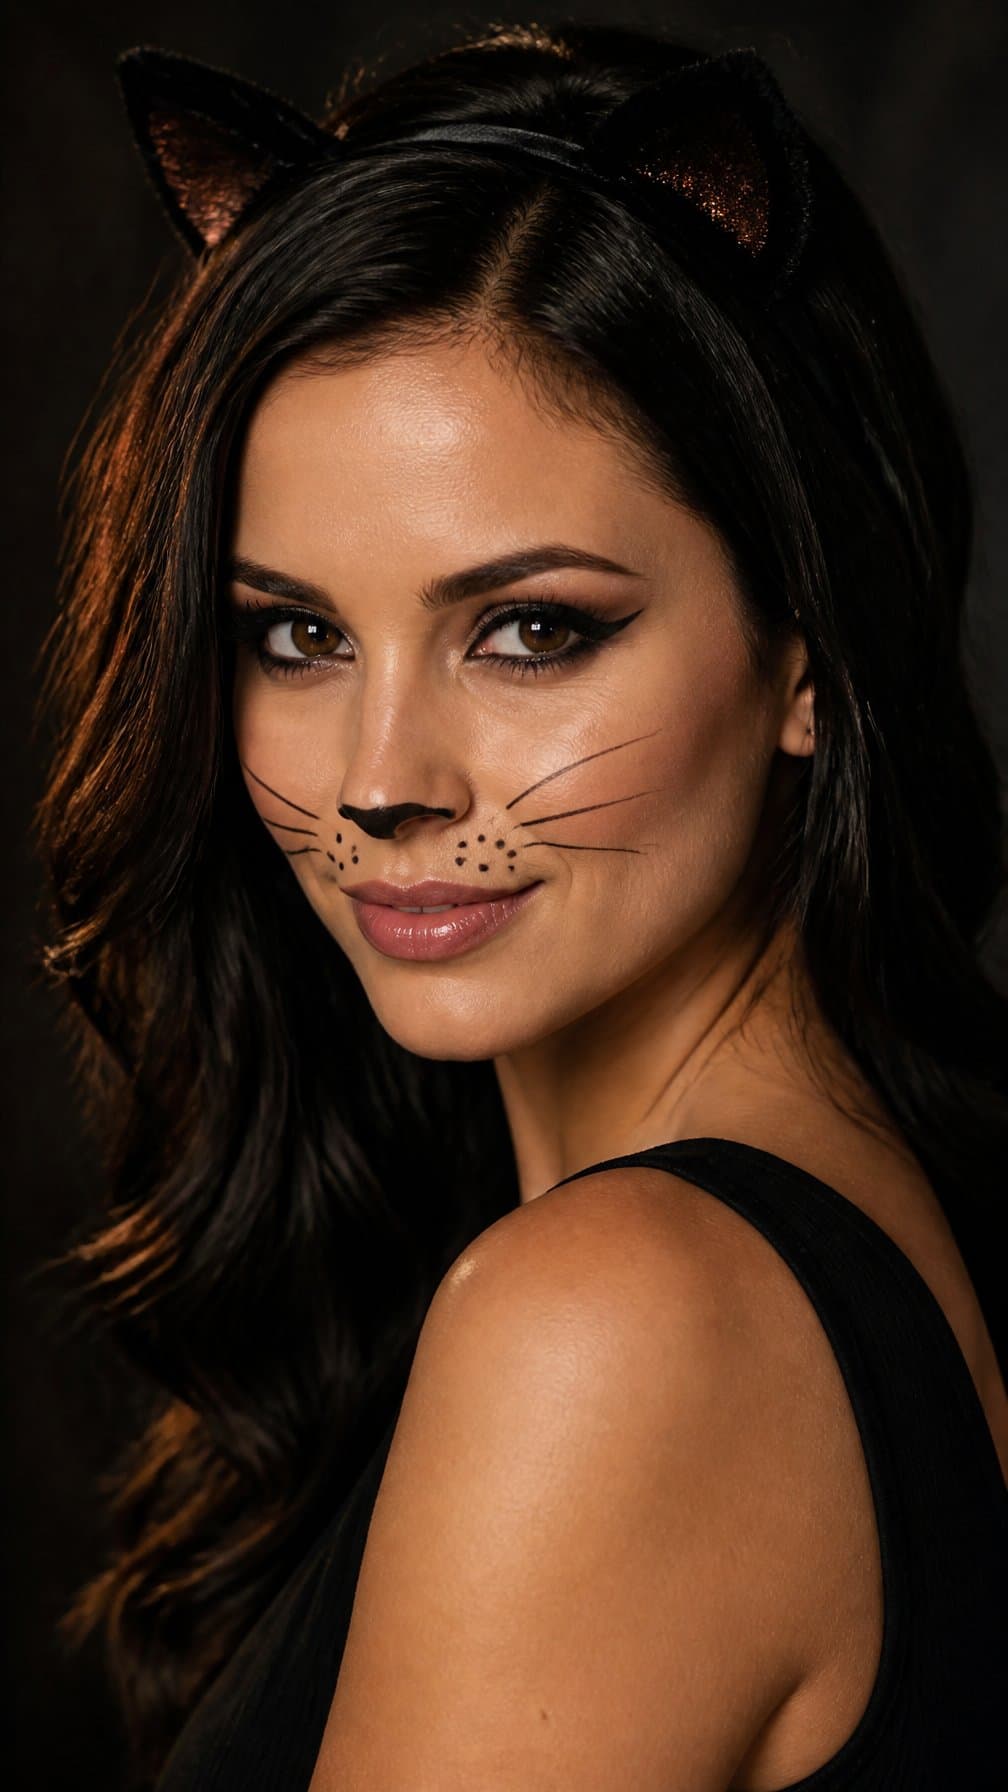
I create this look with a clean winged liner, a small black nose, and three fine whisker lines on each cheek. I extend the outer corners slightly upward to suggest feline shape without making the makeup look harsh.
I keep the rest of my face simple with soft contour, neutral eyeshadow, and a muted pink or nude lip. A thin headband with cat ears completes the look, while black clothing keeps the focus on the face.
For a more polished finish, I use waterproof eyeliner and set the nose and whiskers with translucent powder. I can adjust the intensity by making the lines delicate for a subtle costume or thicker for a graphic effect.
2) Soft Glam Vampire Makeup
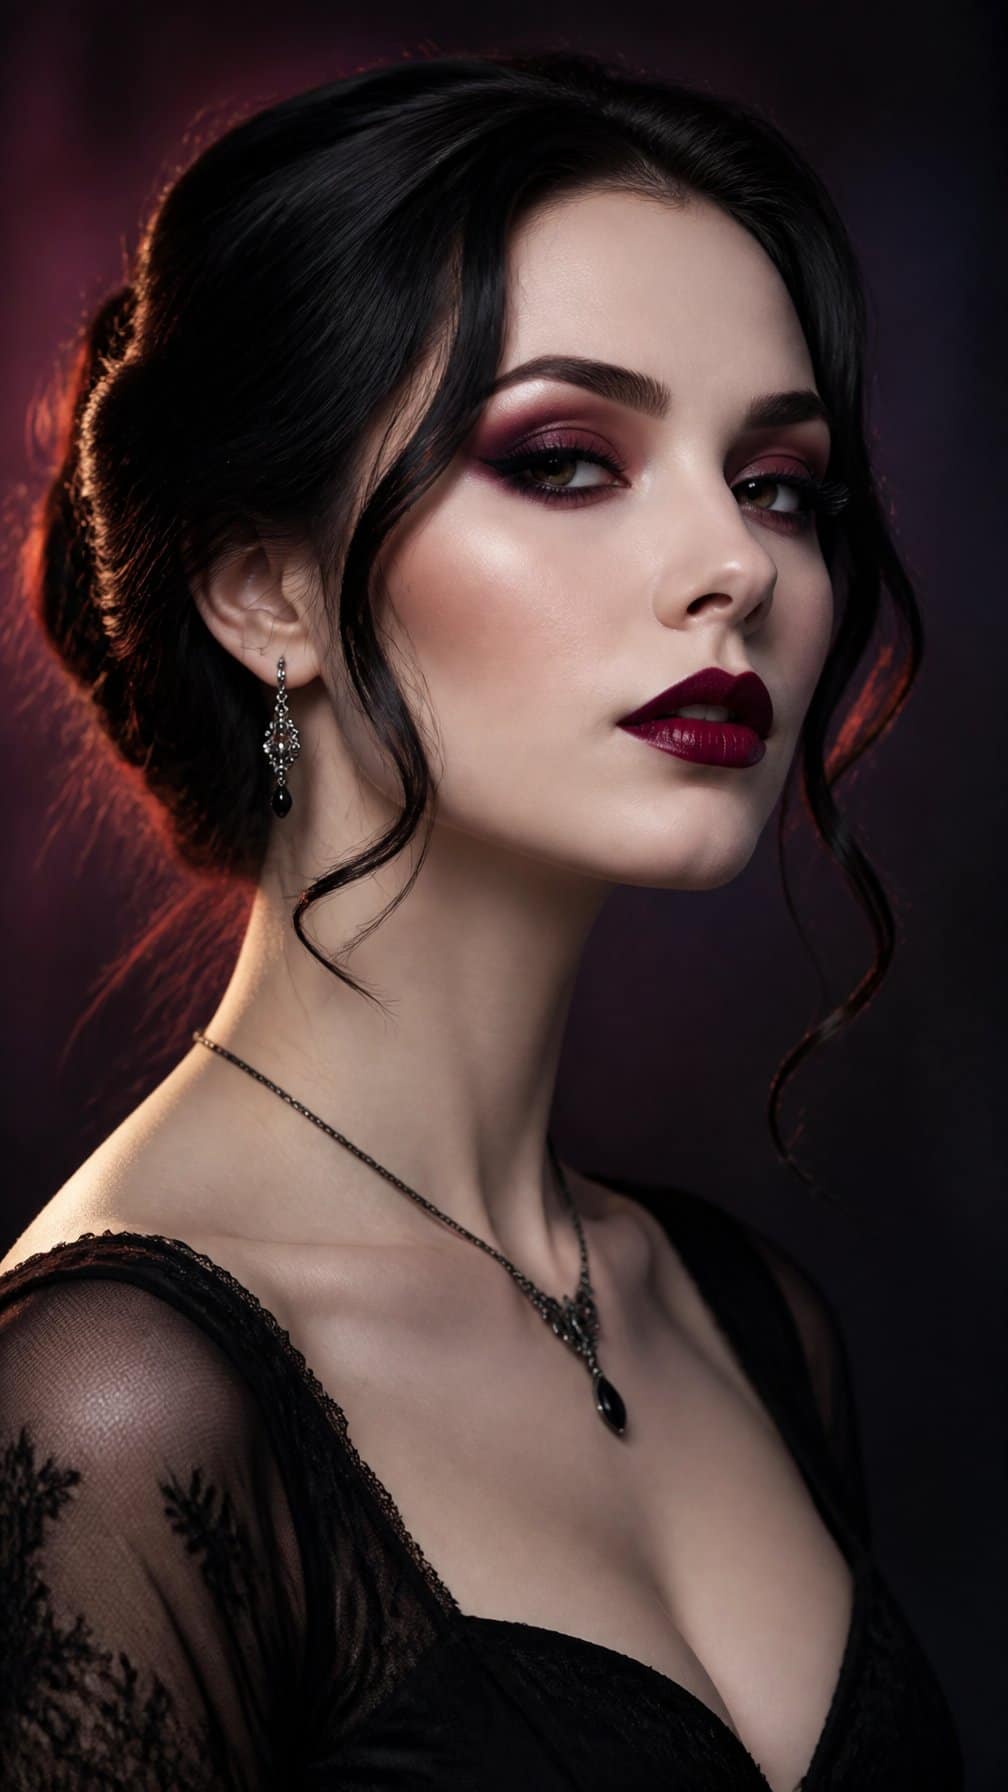
I create the vampire look with cool-toned foundation, softly sculpted cheekbones, and a muted berry blush. I blend plum or taupe shadow across my lids, then add a thin black wing for definition without making the style harsh.
I keep the lips polished with deep red, wine, or blackberry lipstick. A touch of clear gloss at the center adds dimension, while softly brushed brows and subtle highlighter maintain the glam finish.
I complete the look with small faux fangs, dark nails, or a black ribbon choker. These details suggest a vampire theme without relying on blood or special-effects makeup.
3) Enchanting Fairy Makeup
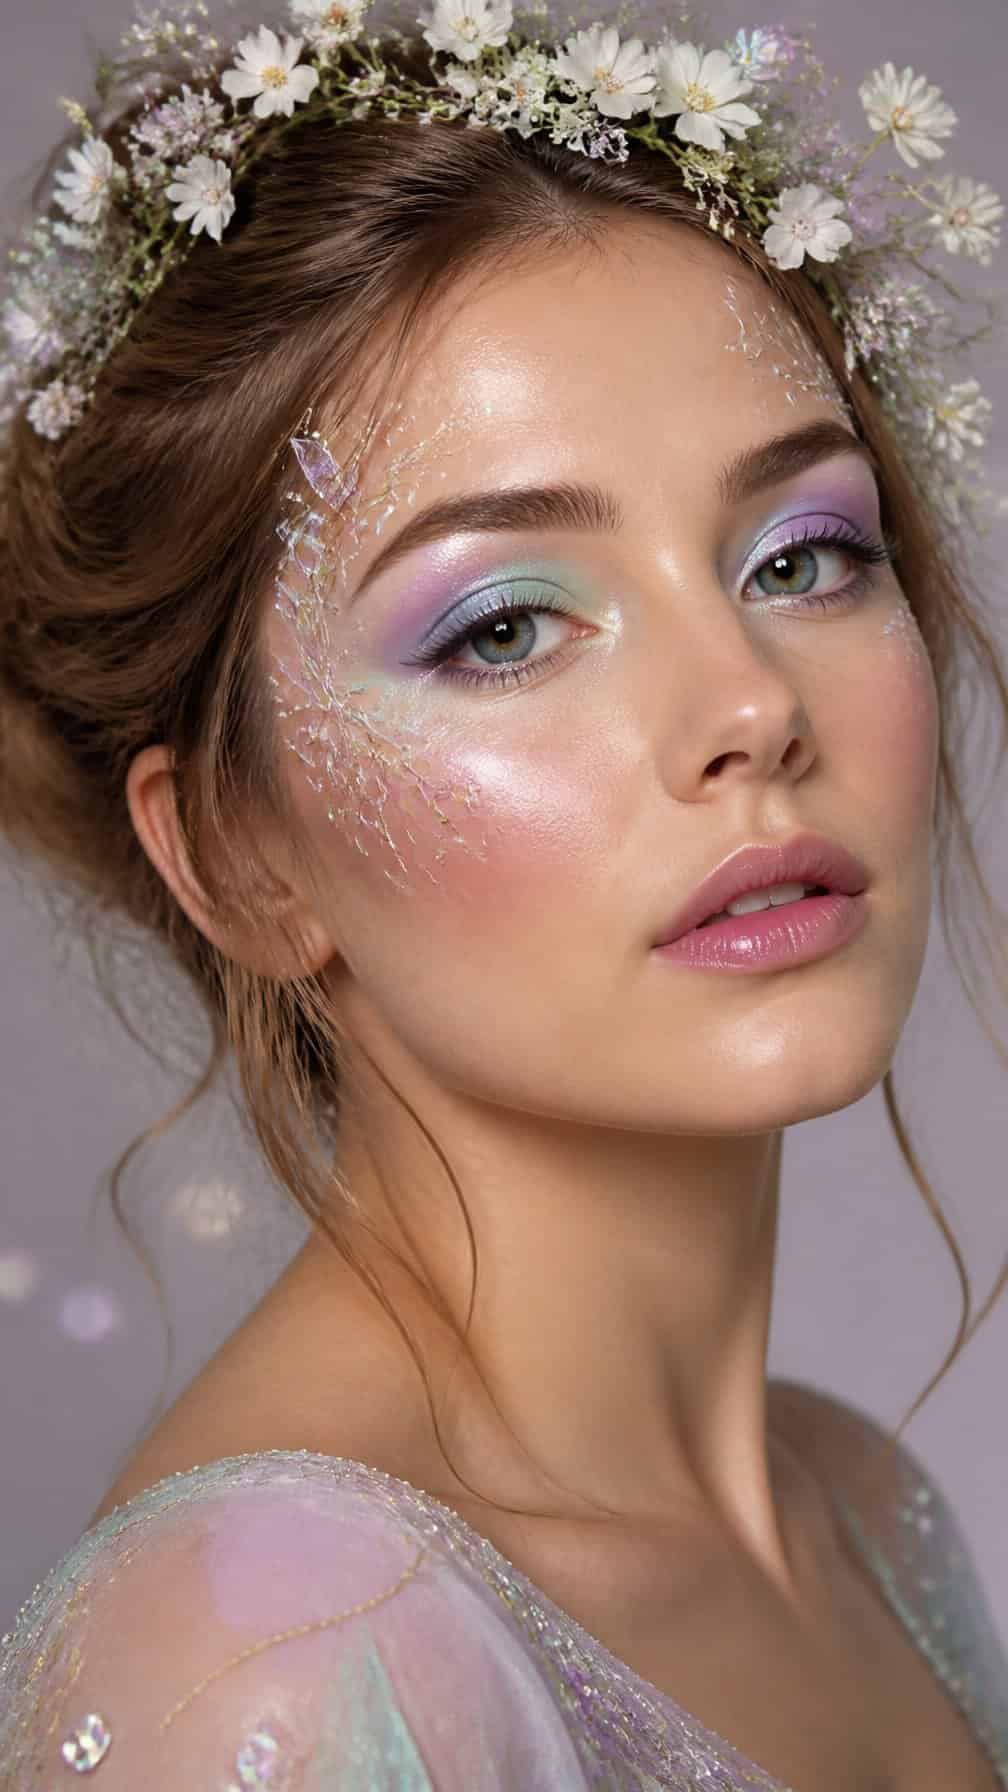
I create a soft fairy look with pearly eyeshadow, rosy blush, and a subtle shimmer across my cheekbones. I use lavender, mint, or champagne tones around my eyes, then add a thin line of white eyeliner to suggest delicate detail without making the look dramatic.
I finish with small dots near my temples and a few adhesive gems placed along my brow bone. A glossy lip tint keeps the makeup comfortable, while a touch of shimmer on my collarbones connects the face to a pastel dress, floral accessories, or translucent wings.
4) Celestial Moon and Stars Makeup
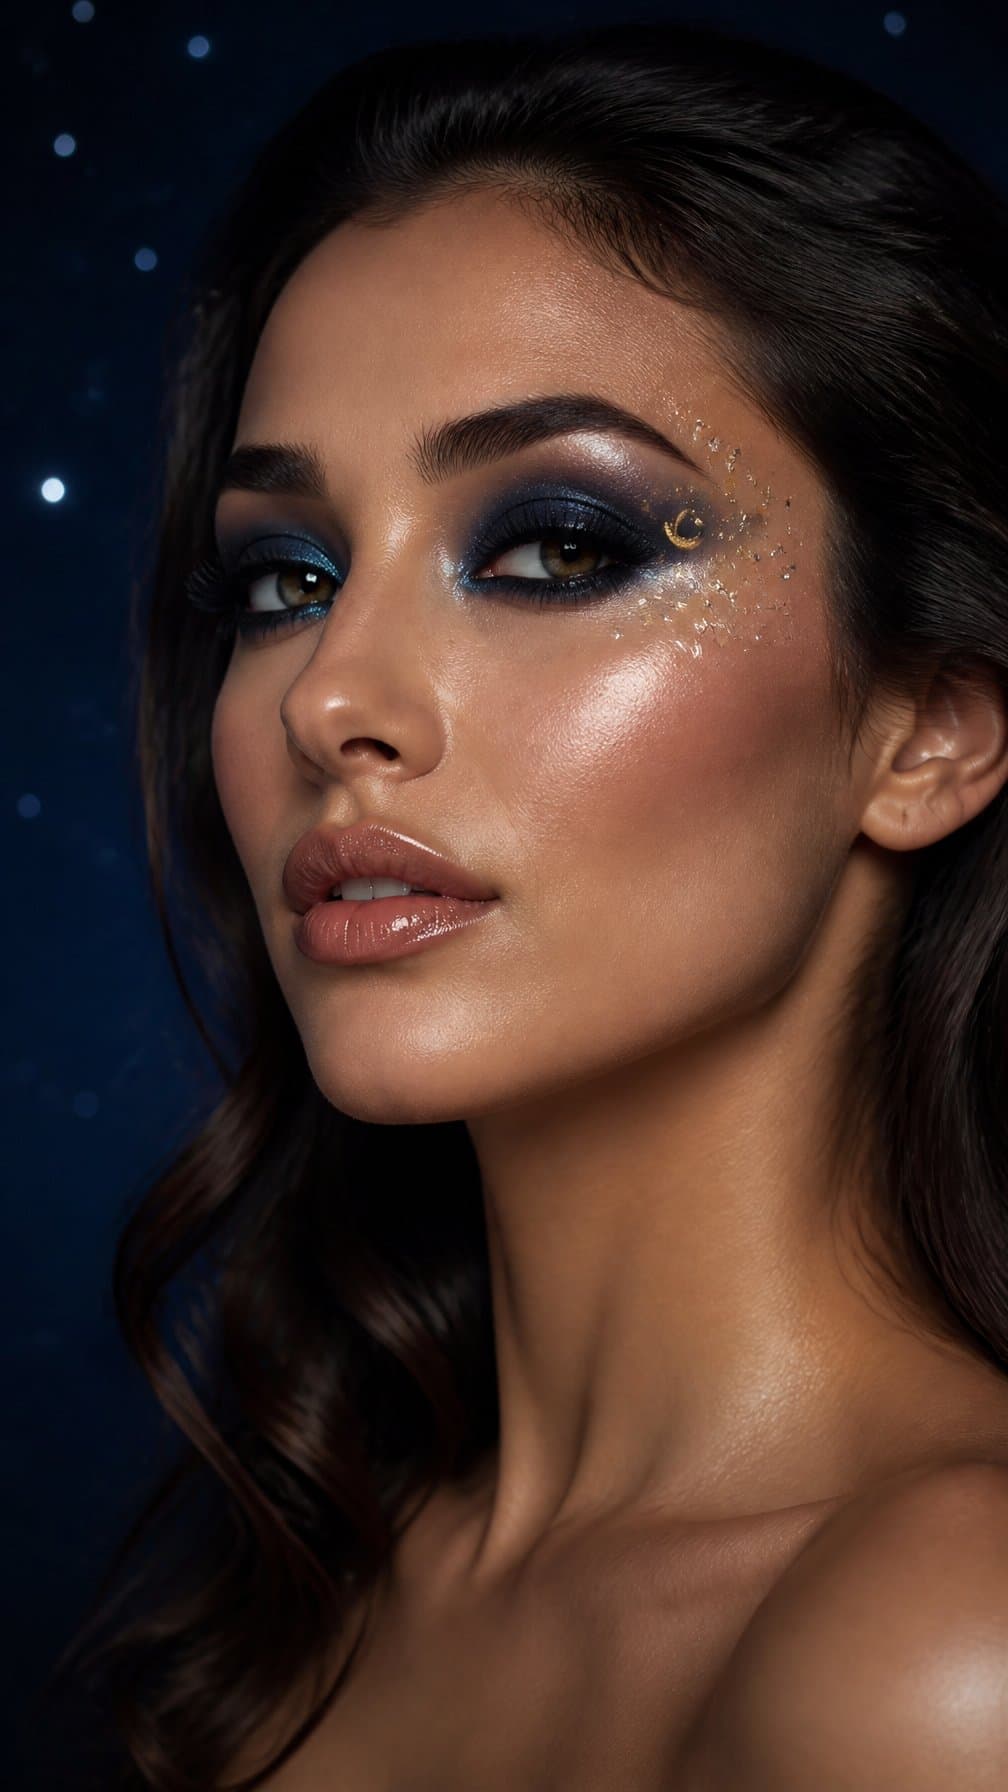
I create a soft celestial look with navy, silver, and pearl-white shades. I blend the darker color across my lids and outer corners, then add a small crescent moon beneath one eye using a fine brush or metallic face pencil.
I place tiny stars and dots around the moon to suggest a simple night-sky pattern. I keep the shapes varied but evenly spaced, which makes the design look intentional without requiring advanced painting skills.
I finish with silver shimmer on my eyelids and the inner corners of my eyes. Black mascara, softly defined brows, and a neutral lip keep the makeup balanced while letting the celestial details stand out.
5) Mystical Mermaid Makeup
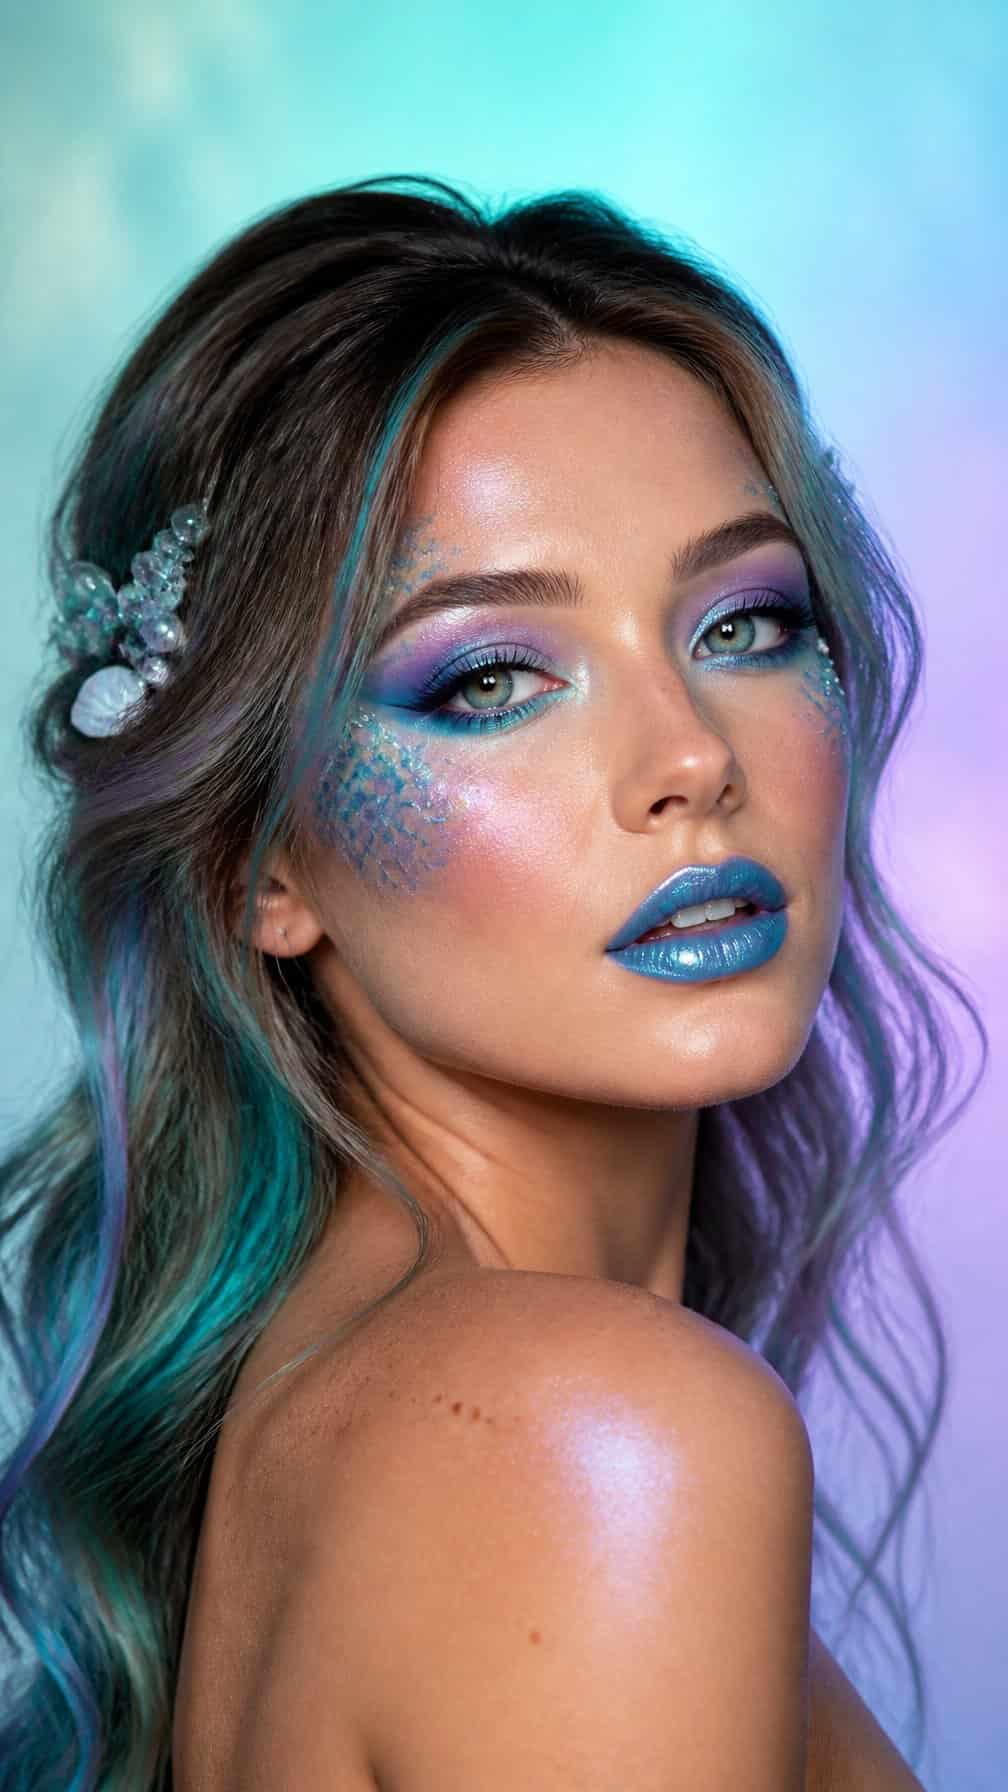
I create a shimmering mermaid look with pearly blue, lavender, and sea-green eyeshadow. I place a piece of fishnet over my temples and cheeks, then dust metallic shadow across it to form subtle scale shapes. I keep the pattern light so the makeup looks polished rather than costume-heavy.
I add iridescent highlighter to my cheekbones, brow bones, and the bridge of my nose. A glossy teal or violet lip color completes the palette, while small pearl accents near the outer corners add detail without making the look difficult to wear.
For a softer finish, I use a fine eyeliner wing in deep blue instead of black. I pair the makeup with loose waves, shell-inspired hair clips, or a sea-colored outfit.
6) Elegant Sugar Skull Makeup
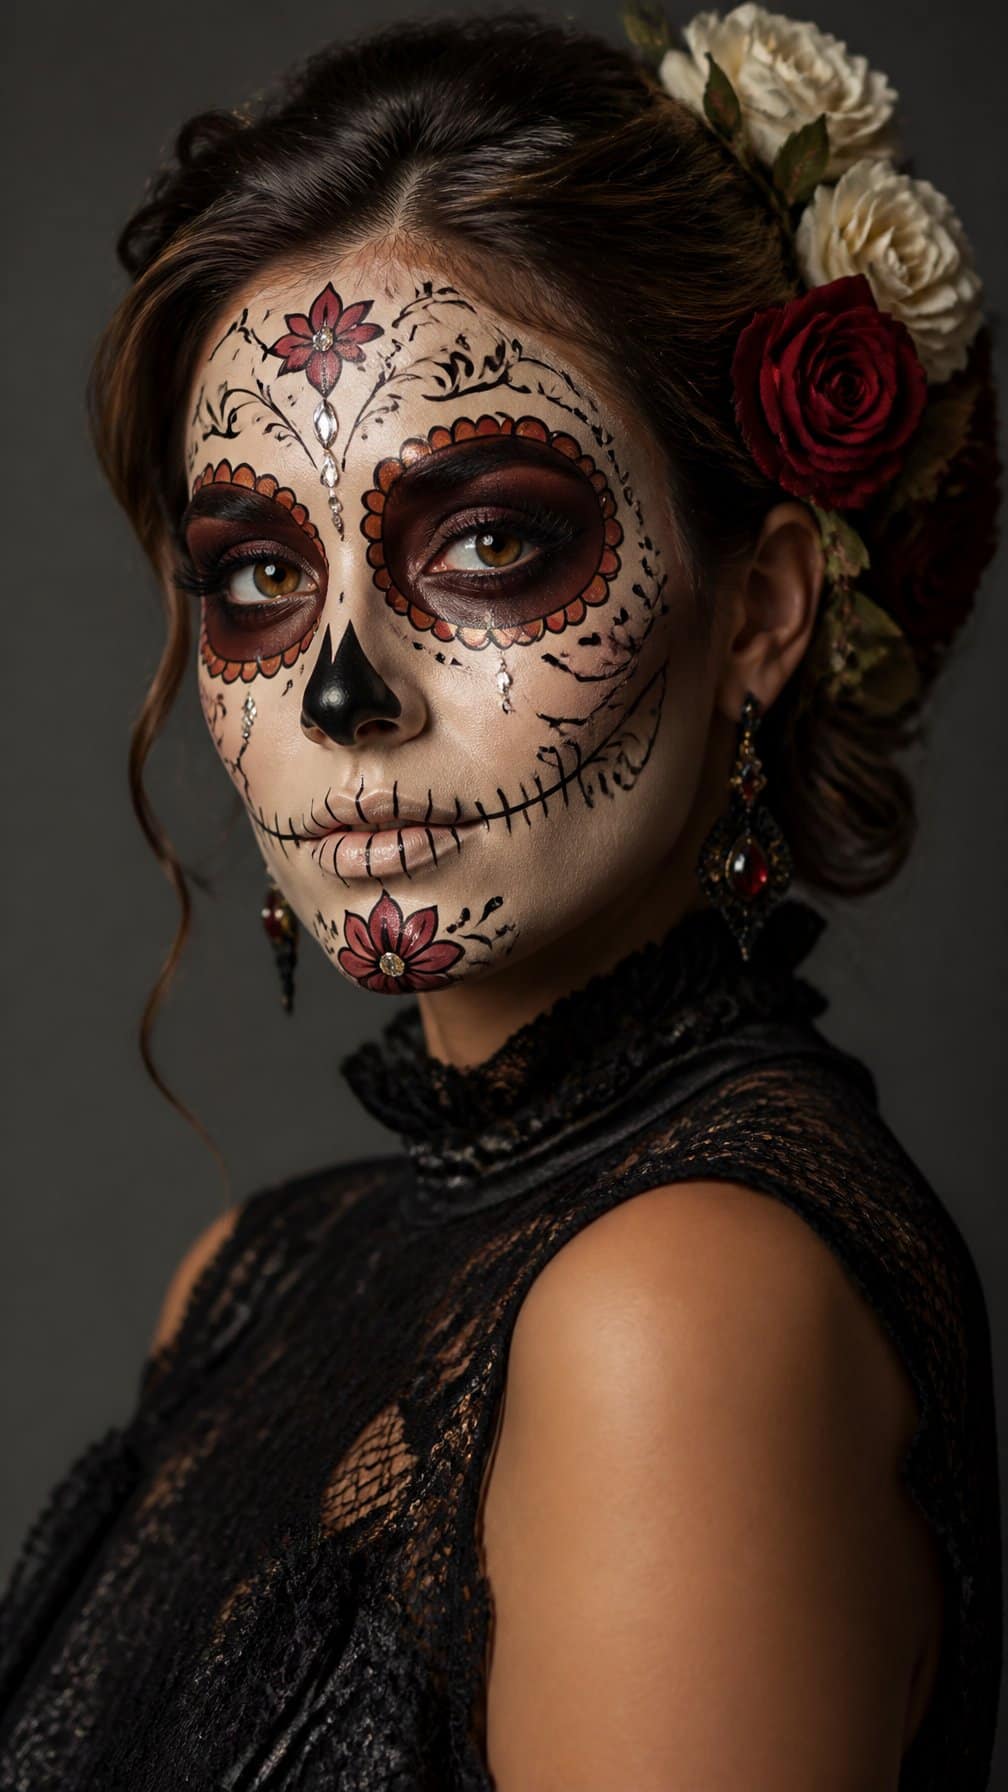
I create a refined sugar skull look with a pale base, softly defined eyes, and symmetrical floral details. I use black liner to outline the eye sockets, then add jewel-toned accents such as burgundy, teal, or gold for controlled contrast.
I keep the design polished by limiting the decoration to the forehead, cheekbones, and chin. Small dots, curved lines, and petal shapes add structure without making the makeup appear busy.
I finish with a deep berry or neutral lip and a light touch of shimmer on the high points of my face. This approach keeps the traditional skull-inspired elements recognizable while giving the look an elegant, wearable finish.
7) Vintage Flapper Makeup
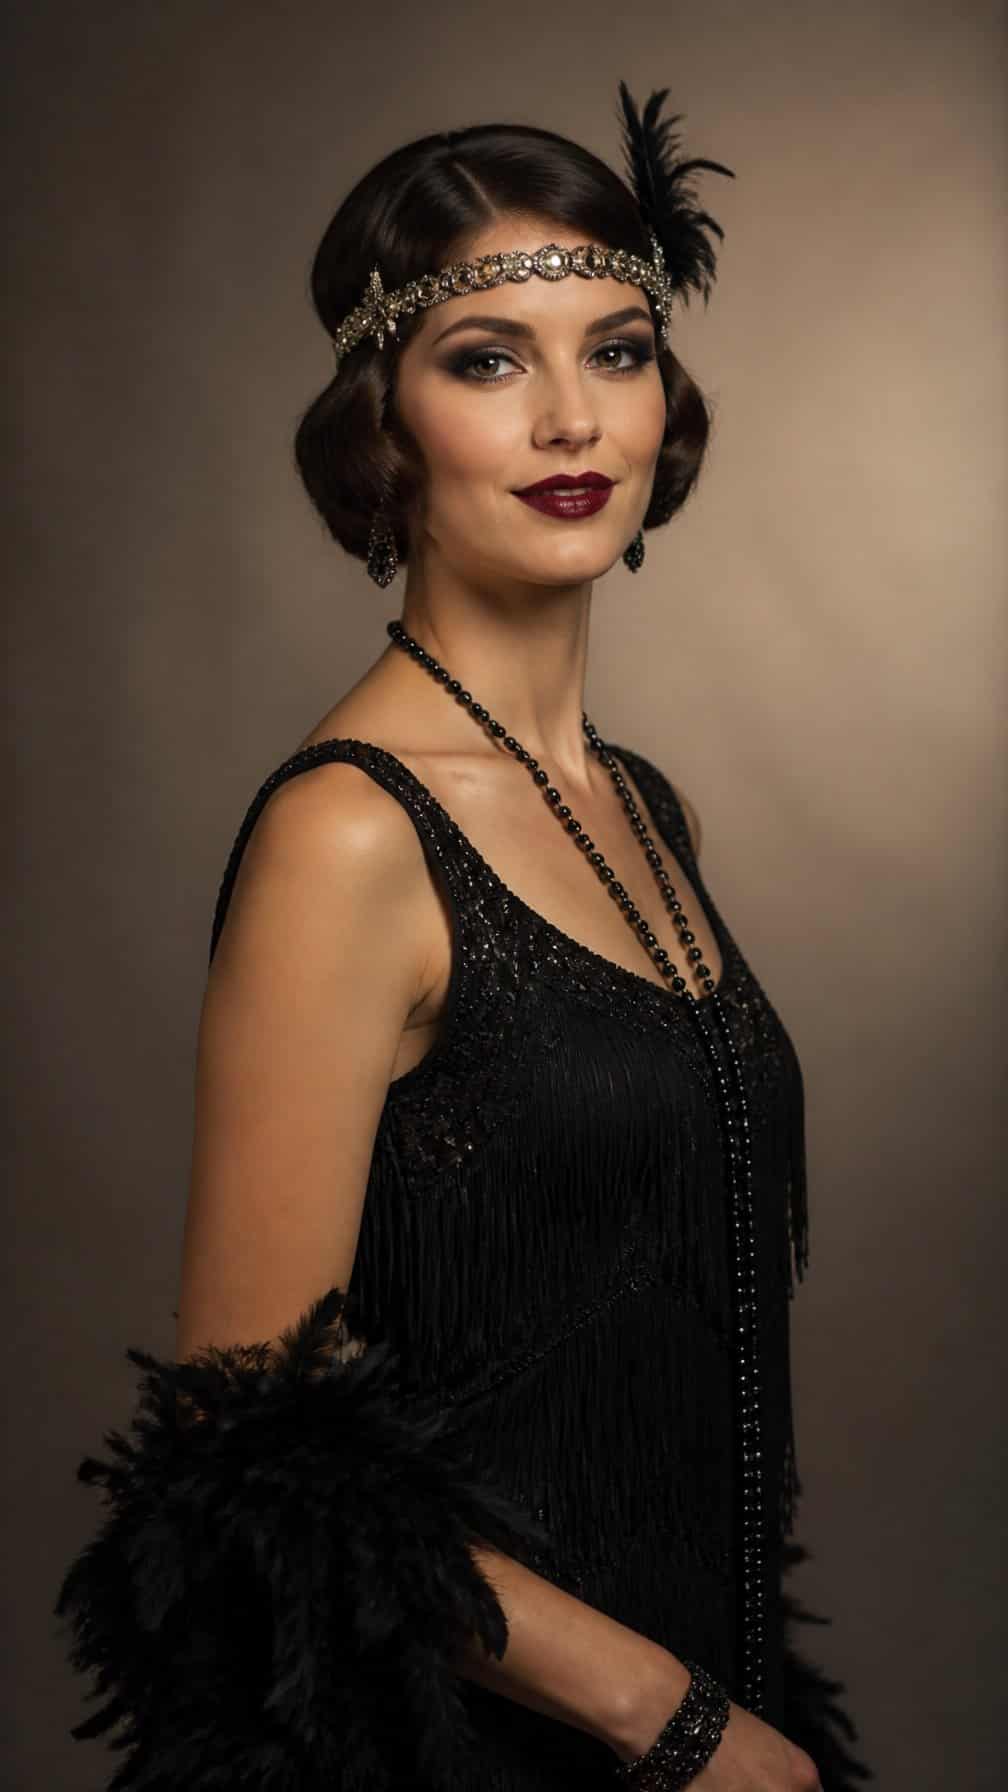
I create a vintage flapper look with a matte base, softly shaped brows, and charcoal shadow blended around the eyes. I keep the outer corners rounded rather than sharply winged, then add mascara or short false lashes for definition.
For the lips, I choose a deep berry or brick-red shade and draw a small, defined cupid’s bow. A touch of matching blush placed high on the cheeks adds structure without making the look appear harsh.
I finish with a side-parted bob, a simple headband, or a decorative hair clip. This makeup pairs well with pearls, a fringed dress, or black-and-gold accessories while remaining polished instead of gory.
8) Enchanted Woodland Nymph Makeup
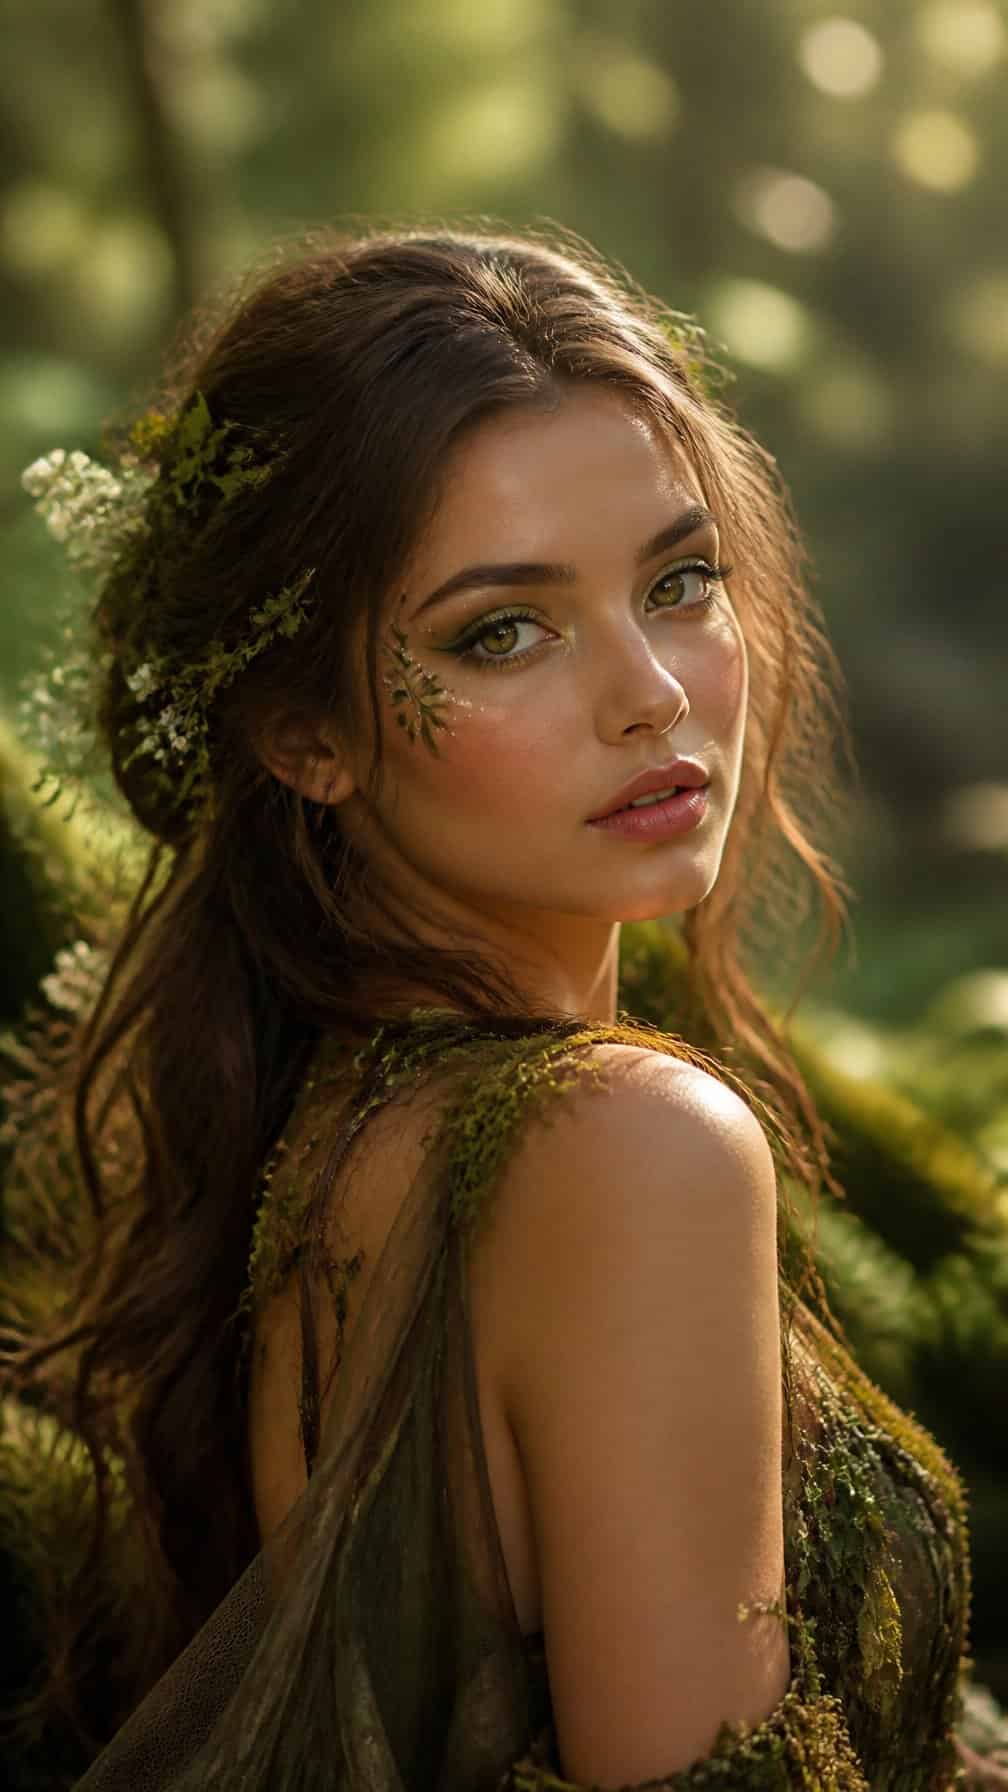
I create a soft woodland look with mossy green, warm brown, and muted gold eyeshadows. I blend the colors outward toward my temples, then add tiny leaf shapes near one eye with a fine brush.
I keep the base fresh and lightly dewy rather than heavily covered. A touch of cream blush across my cheeks adds a natural flush, while gold shimmer on my cheekbones suggests filtered forest light.
I finish with brown mascara, a tinted balm, and a few small faux freckles across my nose. For extra detail, I attach delicate vine or leaf accents beside my hairline using cosmetic-safe adhesive.
9) Pretty Porcelain Doll Makeup
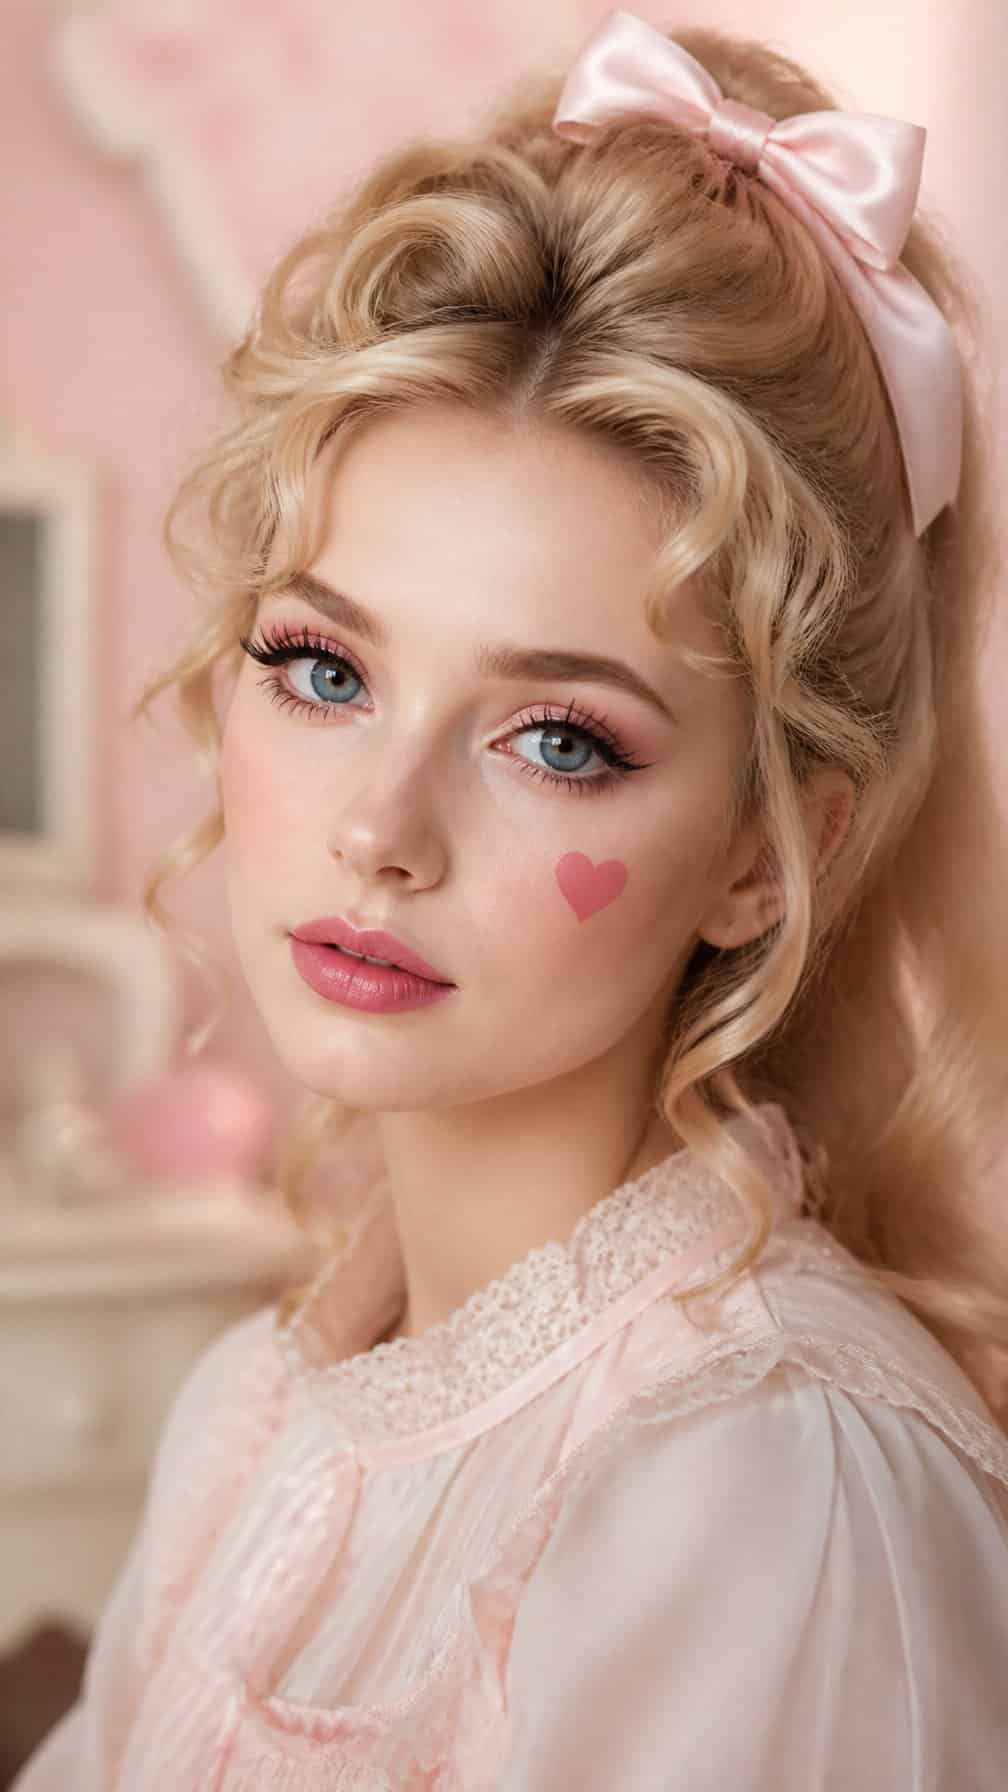
I create a porcelain-doll look with a smooth, pale base, softly rounded blush, and delicate pink lips. I add thin, arched brows and subtle shading beneath the cheekbones to give my face a painted, dimensional effect without using harsh colors.
I define my eyes with black liner, extended lower lashes, and small white accents near the inner corners. A few drawn lower lashes can suggest a vintage doll style, while rose-toned eyeshadow keeps the look soft rather than severe.
I finish with a curled hairstyle, ribbon, lace collar, or vintage dress. I can add fine crack lines around one temple for extra detail, but I keep them minimal so the makeup remains pretty and polished.
10) Retro Pin-Up Halloween Makeup
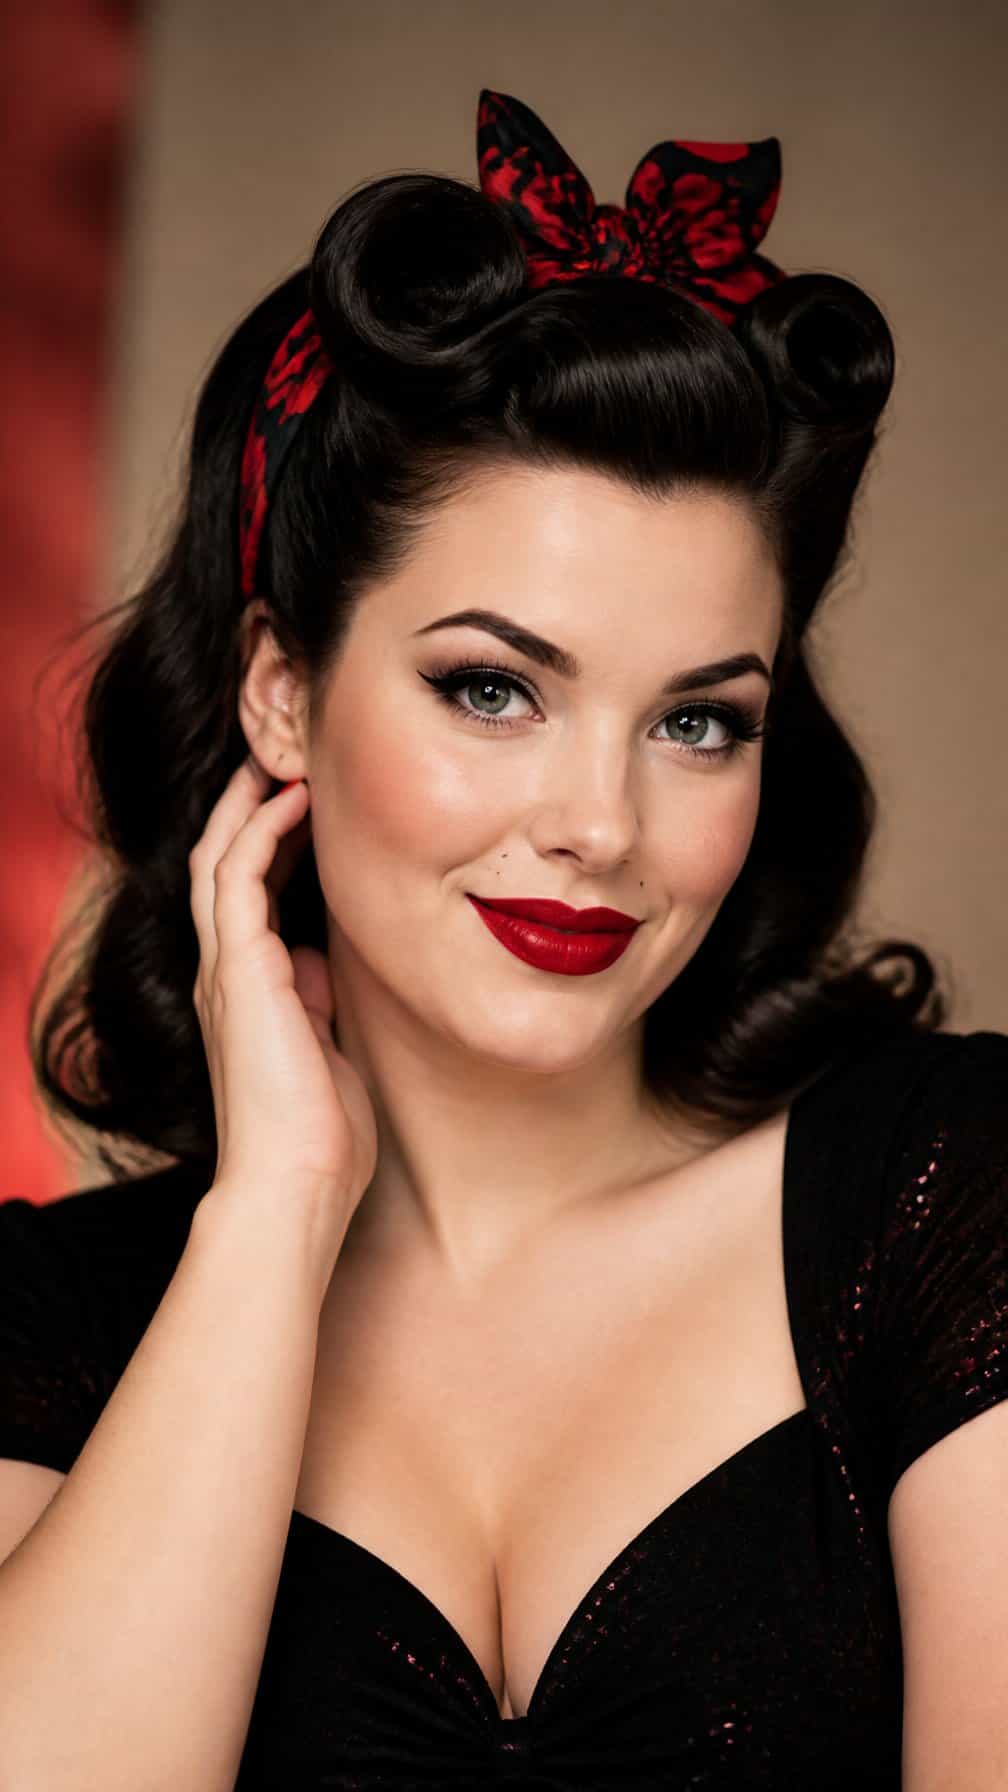
I create a polished 1940s-inspired look with a smooth base, softly arched brows, black winged liner, and a defined red lip. I add a small beauty mark near my cheek or upper lip for a recognizable vintage detail without using special effects makeup.
I keep the eyeshadow neutral, using beige or warm brown shades to frame the liner rather than compete with it. Rolled hair, a scarf, pearl earrings, or a fitted dress can reinforce the theme while keeping the costume comfortable and wearable.
11) Dreamy Unicorn Makeup
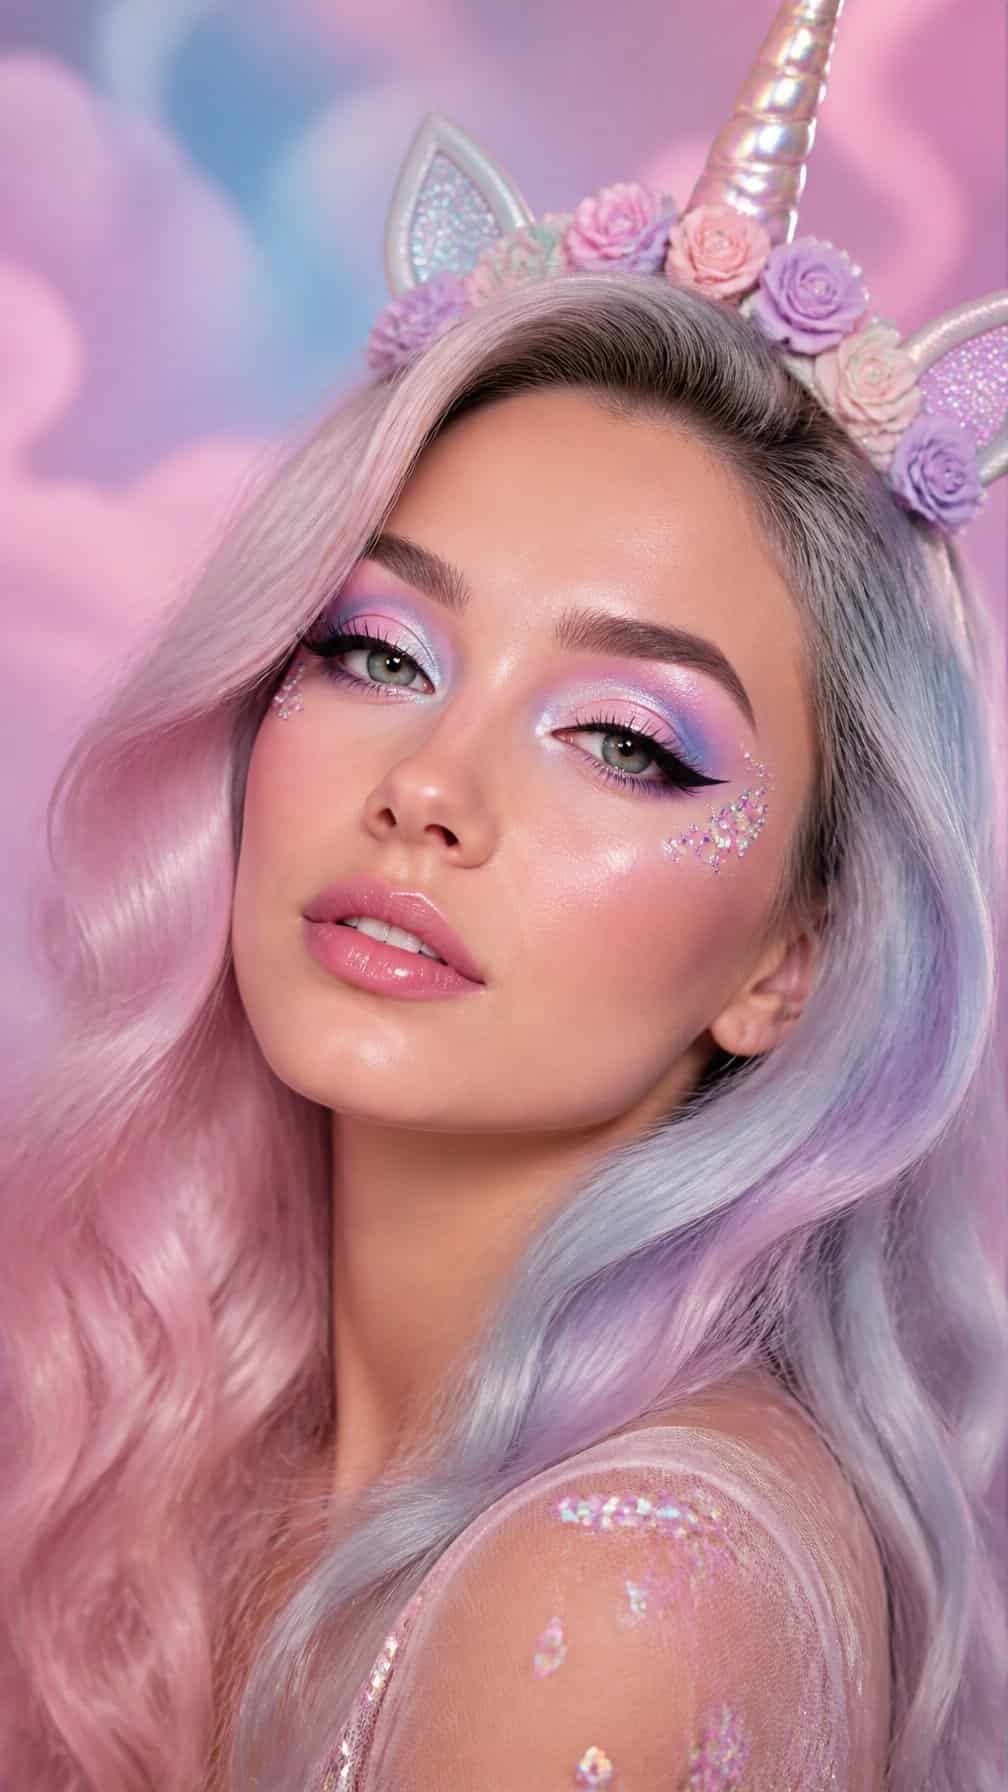
I create a soft unicorn look with pearly white foundation, pastel pink eyeshadow, and lavender accents. I blend the colors across my lids and extend them slightly toward my temples for a smooth, airy effect.
I add shimmer to my cheekbones, the bridge of my nose, and the inner corners of my eyes. A few small star or heart details near one eye make the design playful without looking crowded.
I finish with black or white eyeliner, fluttery lashes, and glossy pink lips. For the horn effect, I style my hair into a high twist or use a simple pastel headband, keeping the makeup comfortable for longer wear.
12) Magical Galaxy Makeup
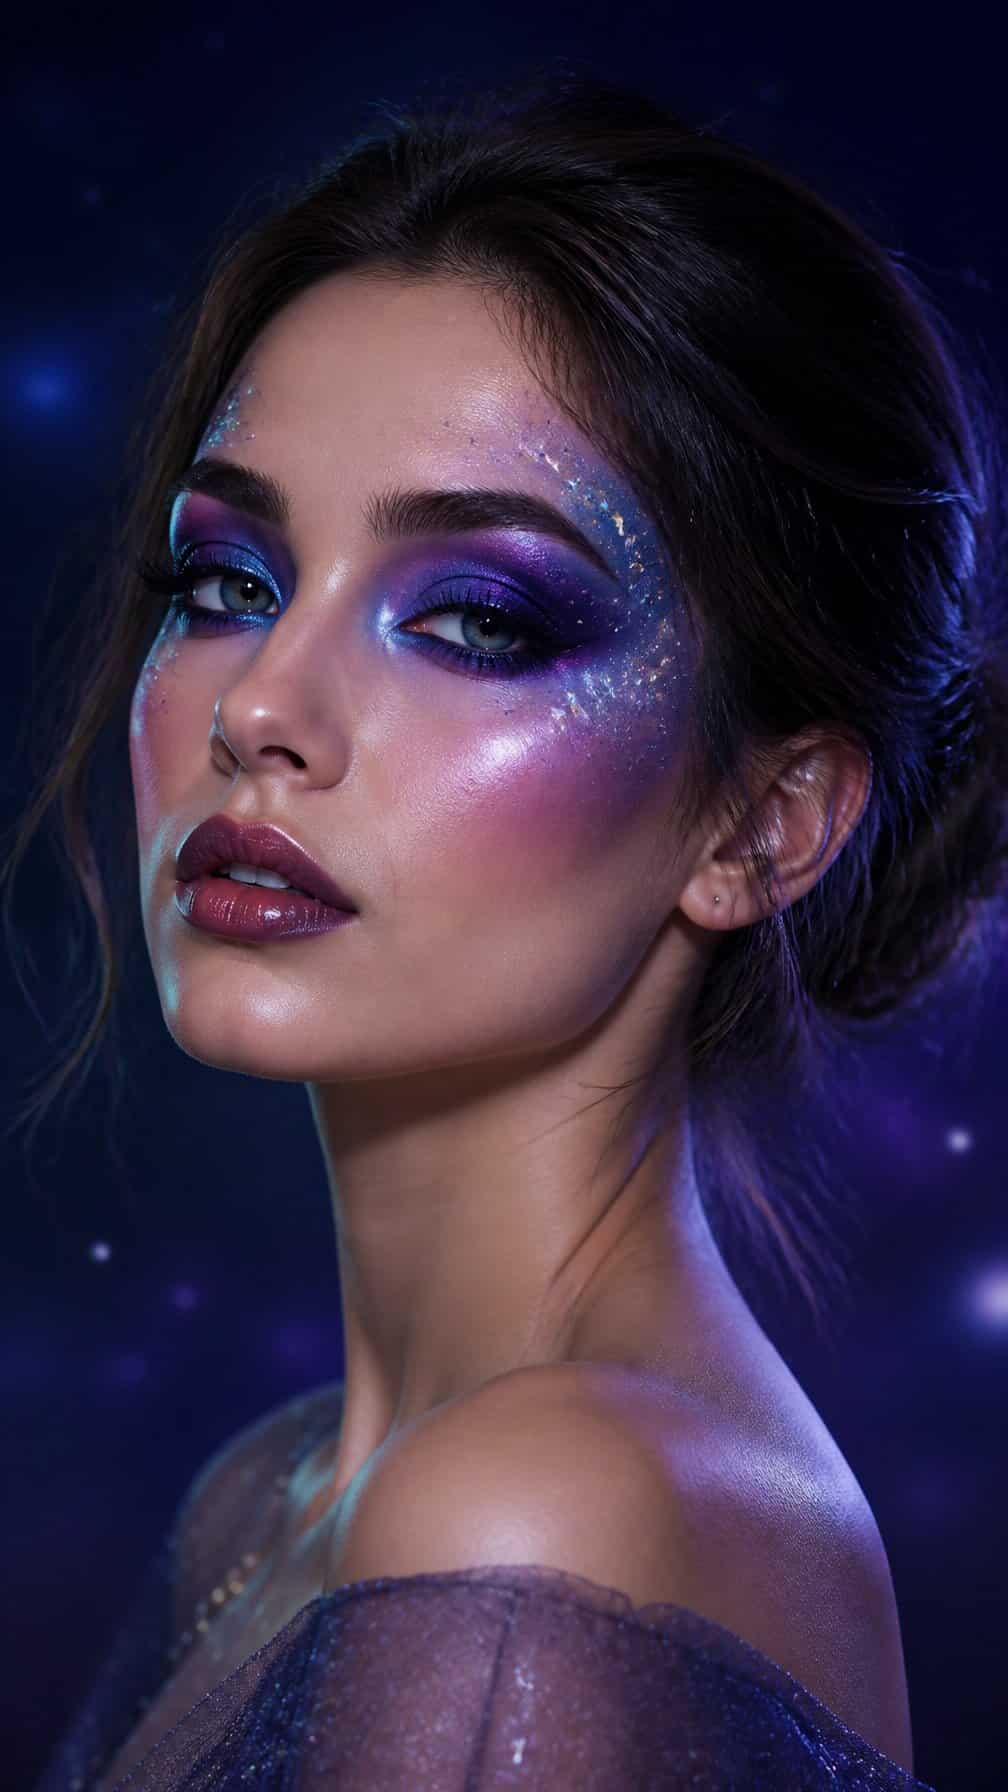
I create a starry effect by blending deep blue, violet, and black eyeshadow across my eyelids and temples. I soften the edges so the colors transition smoothly, then add small white dots with a fine makeup brush to suggest distant stars.
I place a few larger dots and tiny four-point stars near the outer corners for varied detail. A touch of silver or iridescent highlighter on my cheekbones catches the light without making the look appear glitter-heavy.
I keep the rest of my makeup understated, using neutral lips and softly defined brows. Cosmetic-grade glitter or face gems can add dimension, but I apply them with skin-safe adhesive and keep products away from my eyes.
13) Charming Scarecrow Makeup
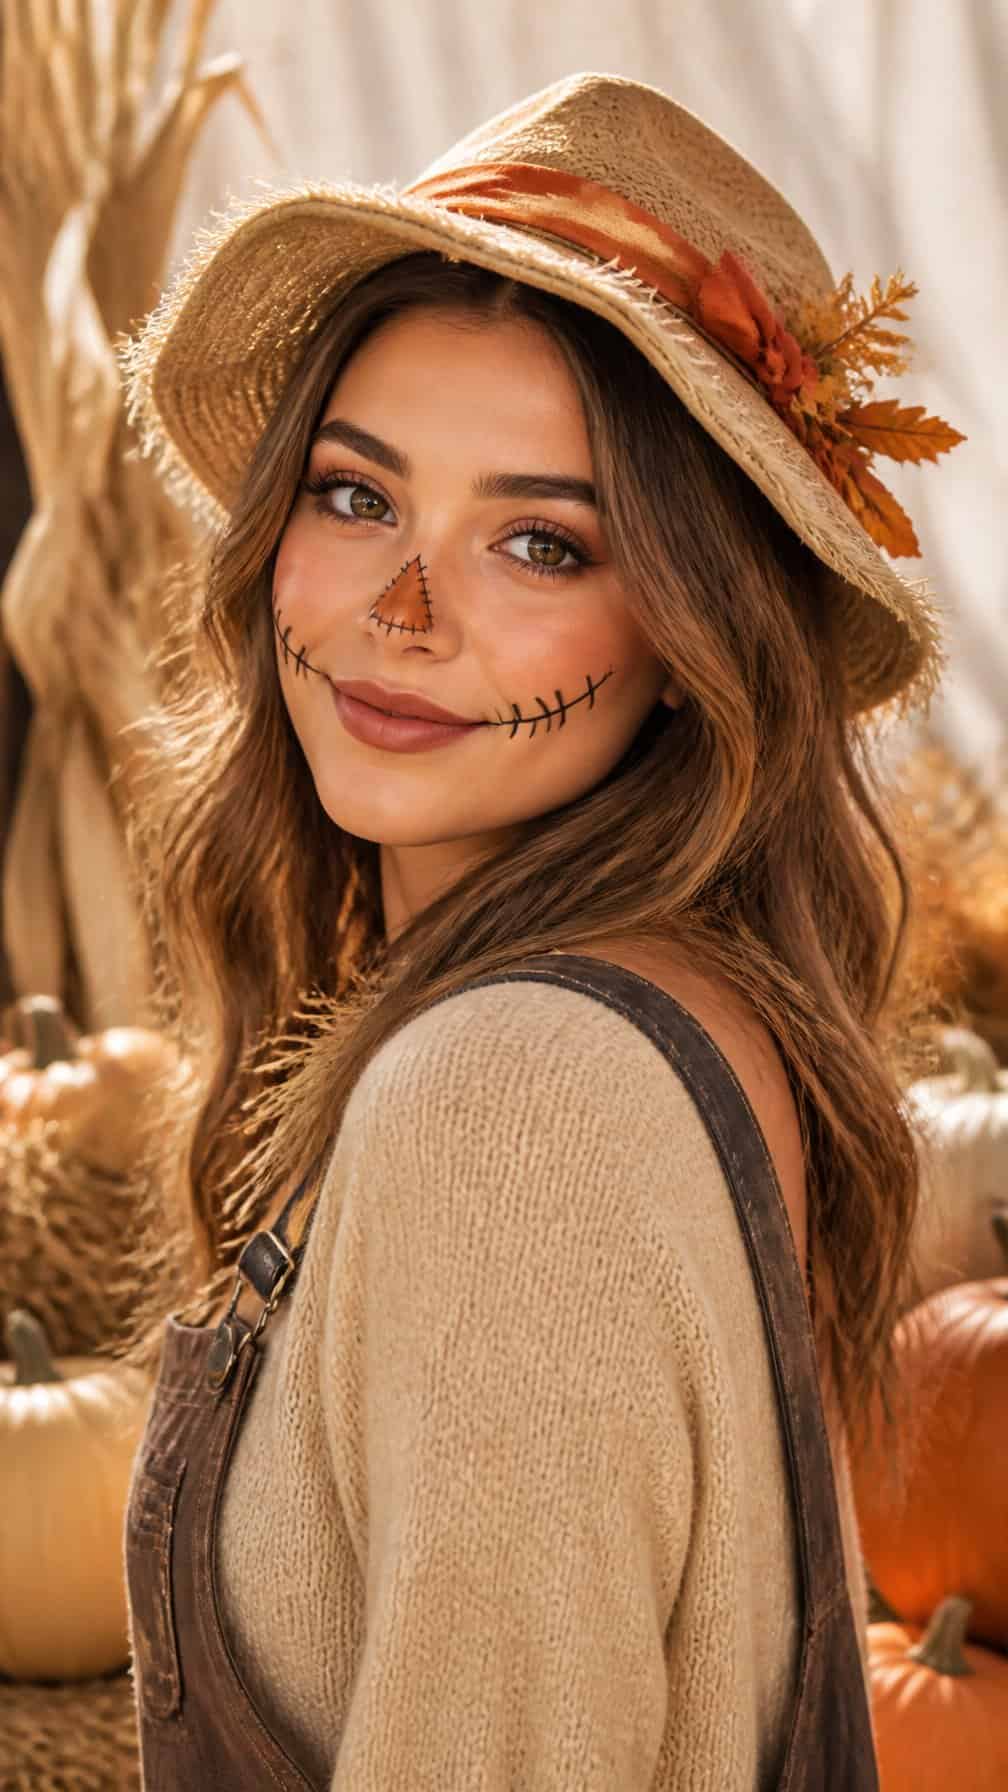
I create a friendly scarecrow look with warm peach blush, soft brown contour, and a small painted triangle on the nose. I add rosy cheeks with freckles across the bridge, then use brown eyeliner to draw short stitch marks near the mouth without making them look harsh.
For the eyes, I blend golden or copper shadow across the lids and finish with mascara. I pair the makeup with a straw hat, braided hair, and a denim shirt for a recognizable outfit that feels playful rather than frightening. A muted red lip adds color while keeping the focus on the cheeks and freckles.
14) Glamorous Witch Makeup
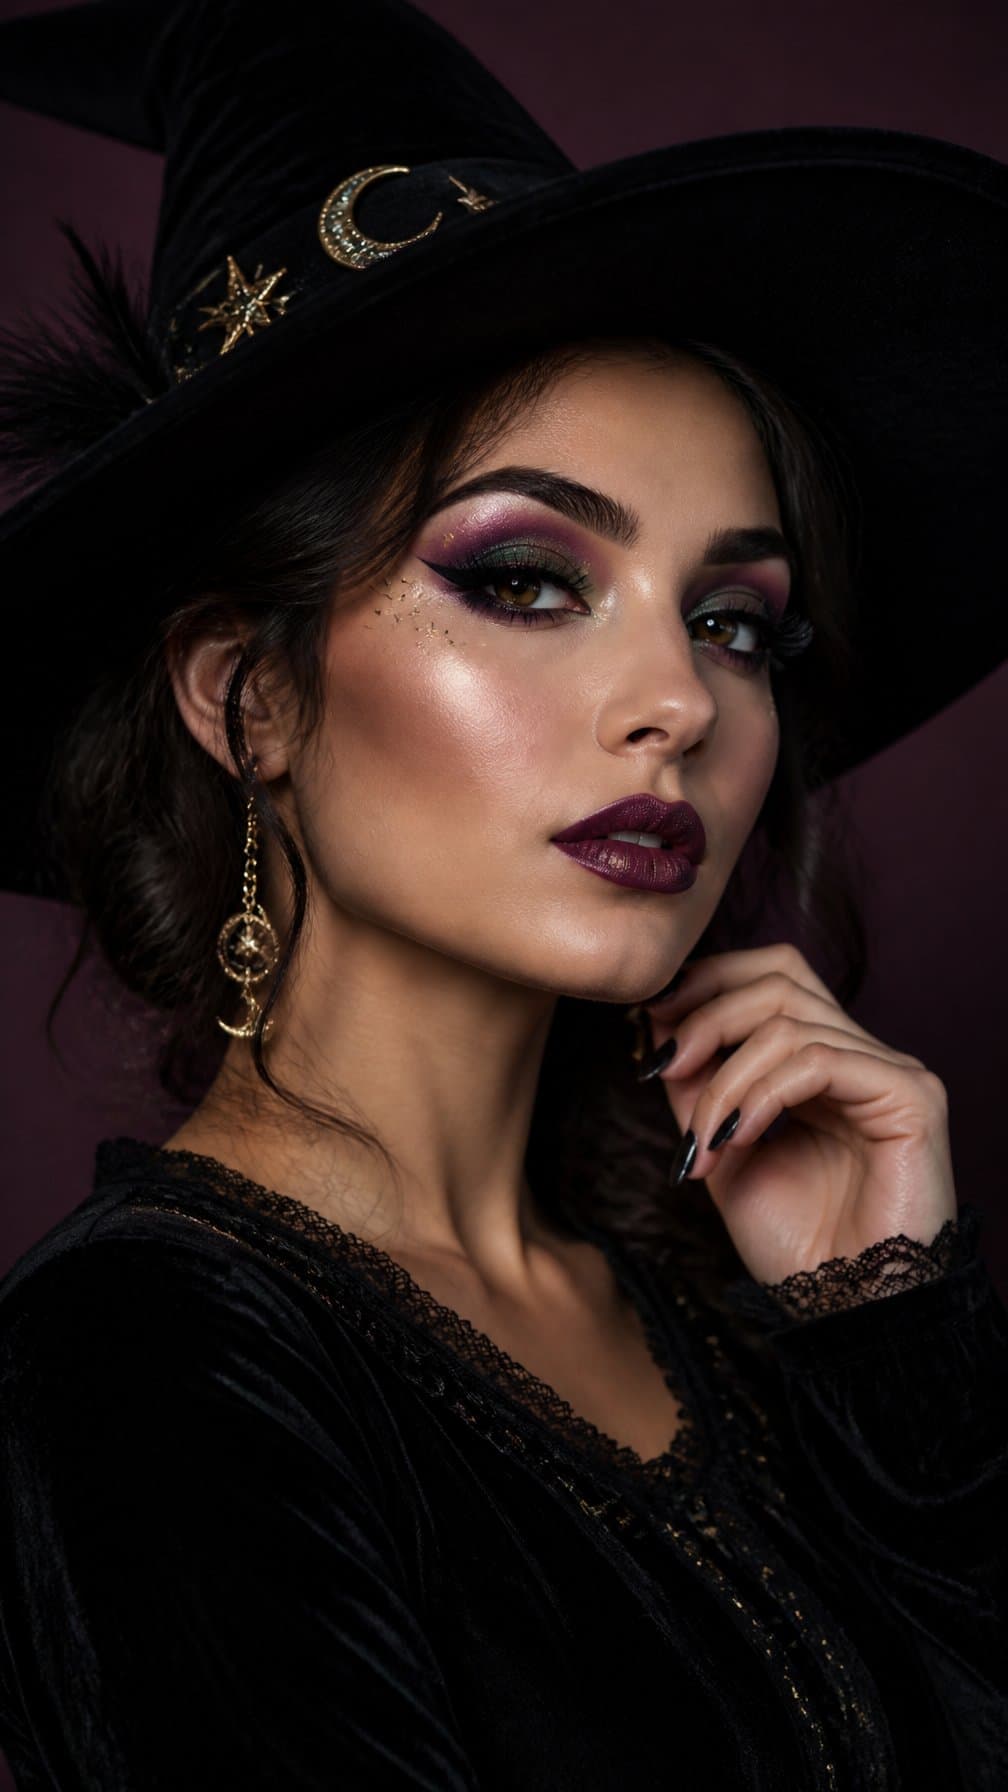
I create a polished witch look with a satin-finish base, softly sculpted cheeks, and deep berry lipstick. I sweep charcoal shadow across my lids, then add metallic pewter to the center for dimension. A sharp black wing and defined brows keep the makeup structured without making it gory.
I use cool-toned highlighter on my cheekbones and inner corners to add a subtle, spellbinding sheen. For extra detail, I draw a small star or crescent near one eye with liquid liner. Black, plum, silver, and emerald shades work well together while keeping the look elegant.
15) Whimsical Butterfly Makeup
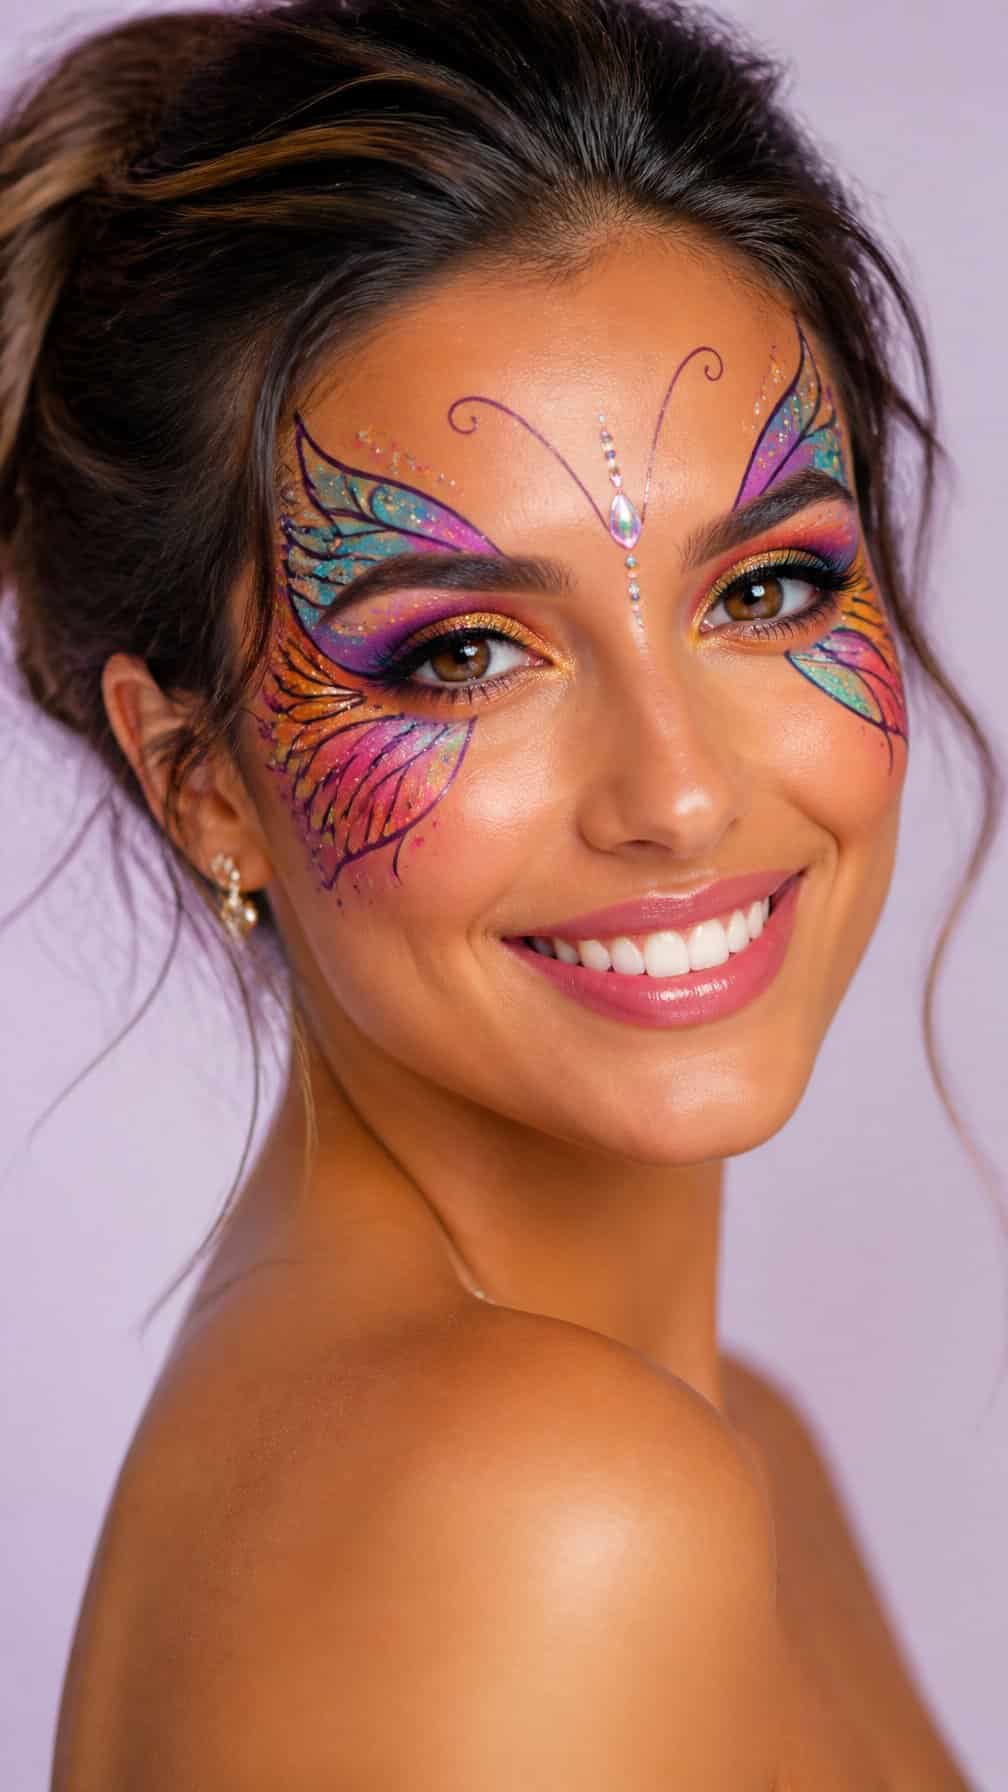
I create this look with pastel eyeshadow, sweeping wing shapes, and fine black lines that echo a butterfly’s pattern. I extend the design from my eyelids toward my temples, then add small white dots for contrast.
I keep one feature, such as the eye design, more detailed while using soft blush and a natural lip elsewhere. A few adhesive gems or a touch of shimmer can add dimension without making the makeup feel heavy.
16) Ice Queen Makeup
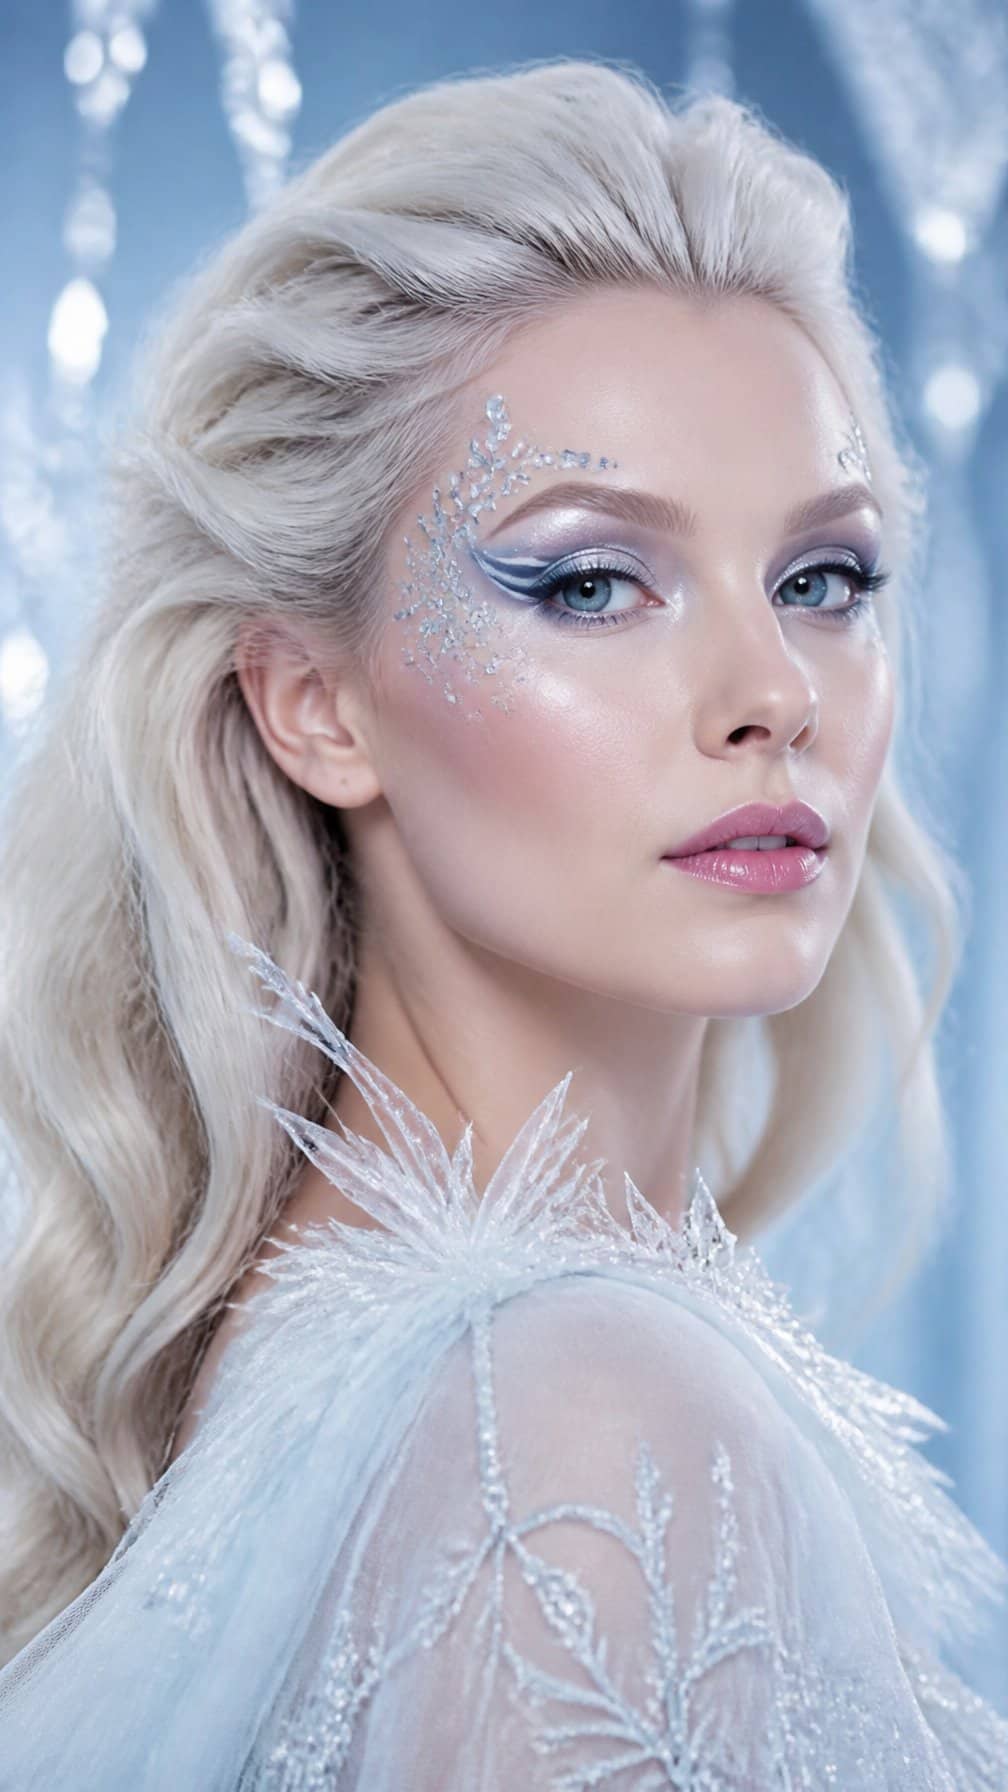
I create an icy look with pale blue or white face makeup, blending the color from my eyelids toward my temples. Silver shimmer on my cheekbones and inner corners adds a frosted effect without making the look dramatic.
I draw thin, branching lines near my eyes and along my forehead to suggest delicate ice patterns. A cool-toned blue lipstick or lightly powdered lips keeps the palette consistent, while white mascara or false lashes adds definition.
I finish with crystal-shaped face gems placed sparingly around my eyes. A silver crown, white wig, or blue satin clothing supports the theme while keeping the makeup comfortable and wearable.
17) Ethereal Angel Makeup
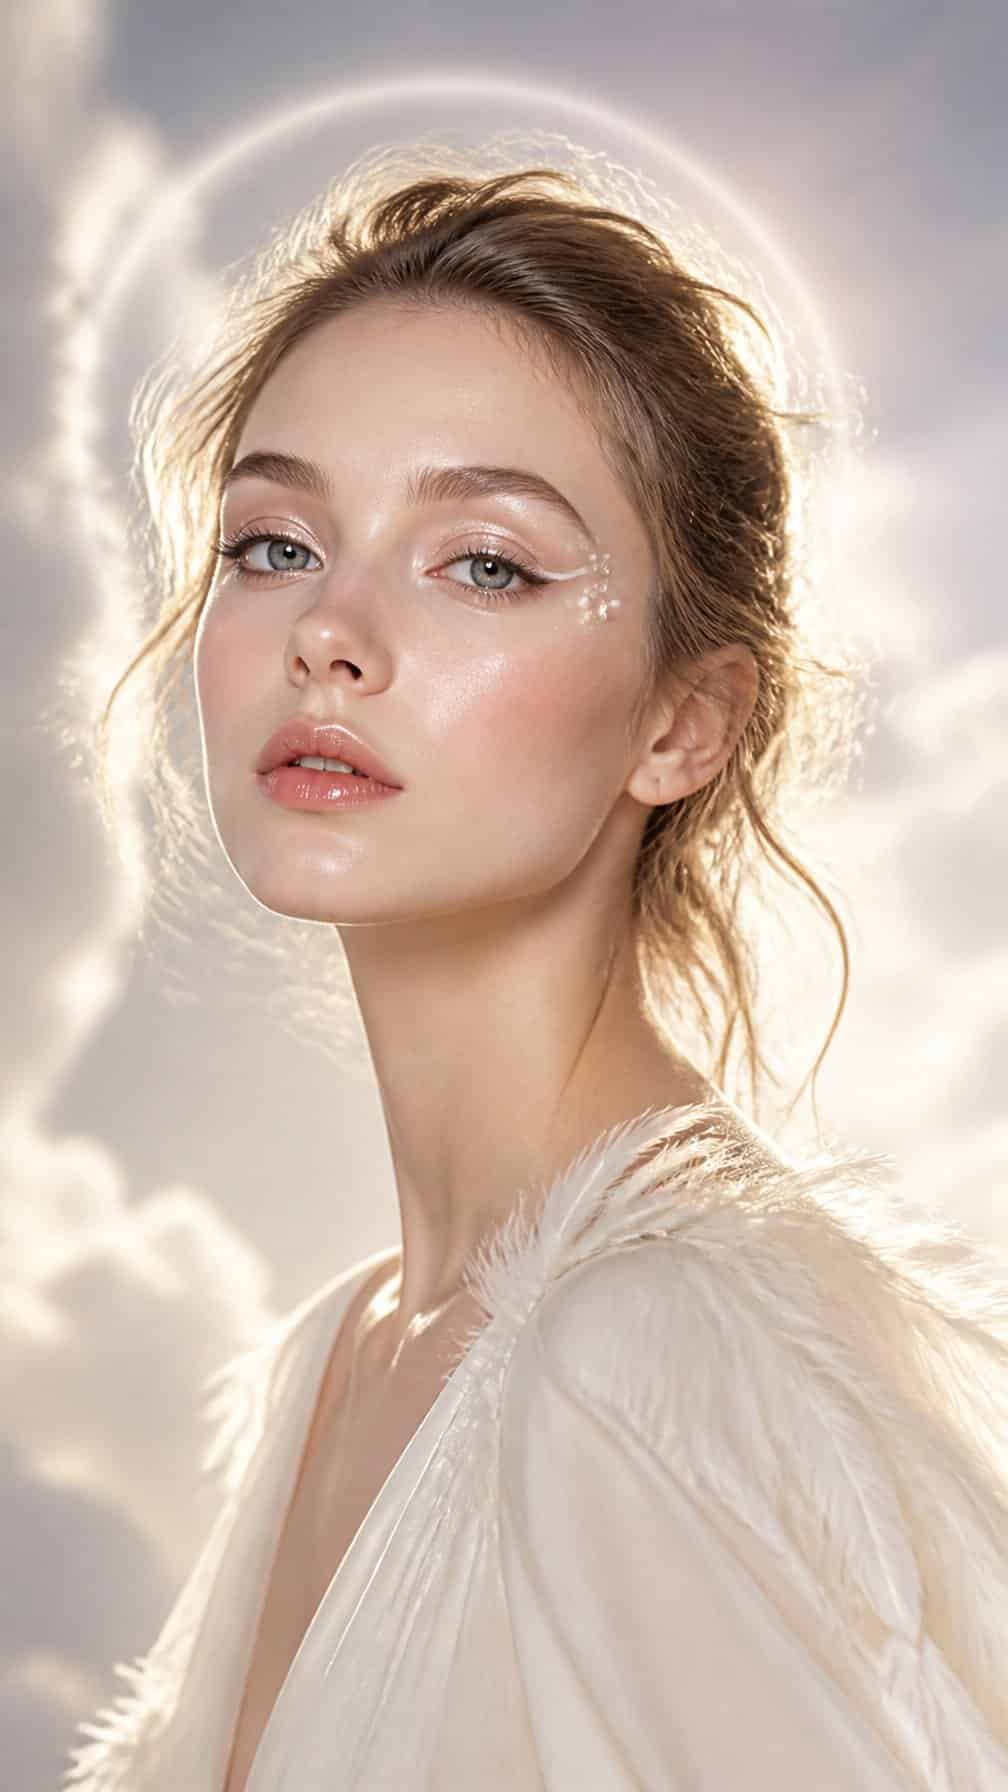
I create an ethereal angel look with luminous skin, pearly eyeshadow, and softly highlighted cheekbones. I blend white, champagne, and pale gold across my lids, then add a fine layer of shimmer to the inner corners. A light-reflecting base keeps the finish radiant without looking heavy.
I define my eyes with brown or gray liner instead of black for a softer effect. Wispy lashes, brushed-up brows, and a glossy nude lip maintain the airy style. I finish with small white dots or delicate star shapes near the temples using cosmetic-grade face paint.
For a stronger costume detail, I add a simple halo headband or a few iridescent gems beneath each eye. I apply cosmetic adhesive only to clean skin and remove every product gently before bed.
18) Classic Mime Makeup
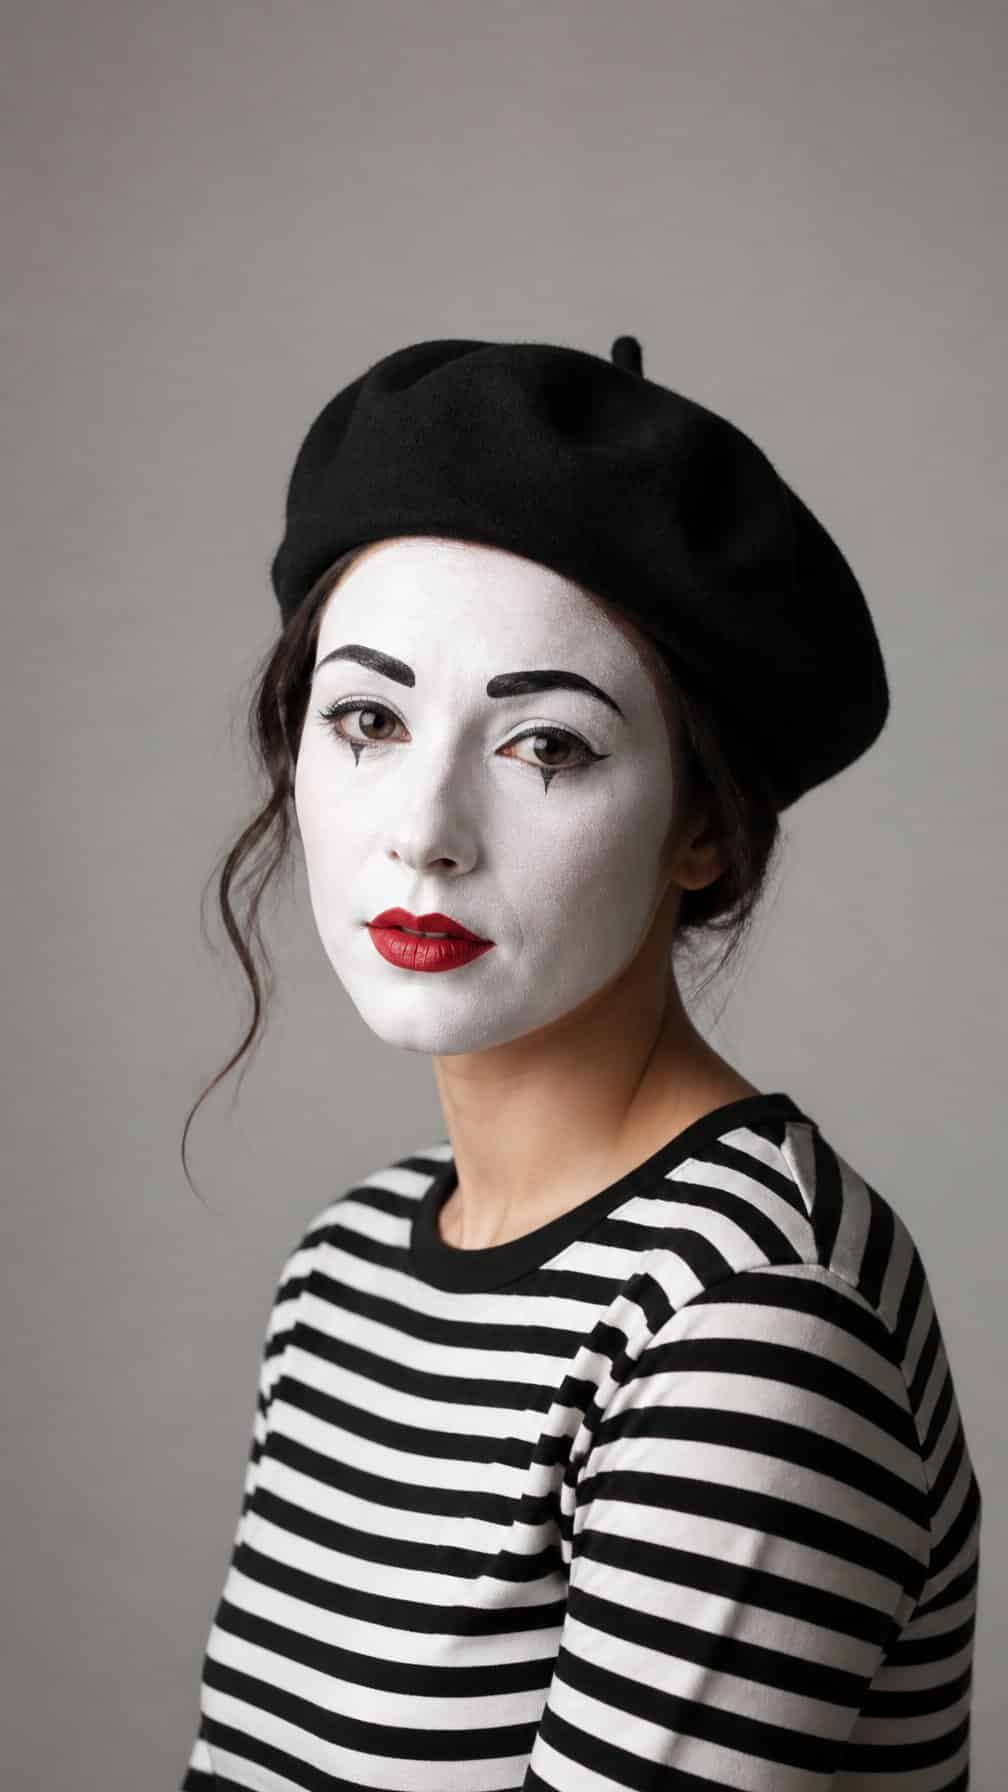
I create a classic mime look with a pale base, defined black eyebrows, and a small red or black accent on the lips. I use black eyeliner to outline the eyes and add simple lower lashes, keeping the shapes clean rather than dramatic.
A striped shirt, black trousers, suspenders, or a beret reinforces the character without requiring elaborate makeup. I can also add a small painted teardrop or heart near one eye for recognizable detail, while leaving the rest of the face uncluttered.
I set the makeup carefully so the white base stays even throughout the evening. This idea works well for me when I want a theatrical Halloween style that remains polished, expressive, and entirely non-gory.
19) Colorful Rainbow Makeup
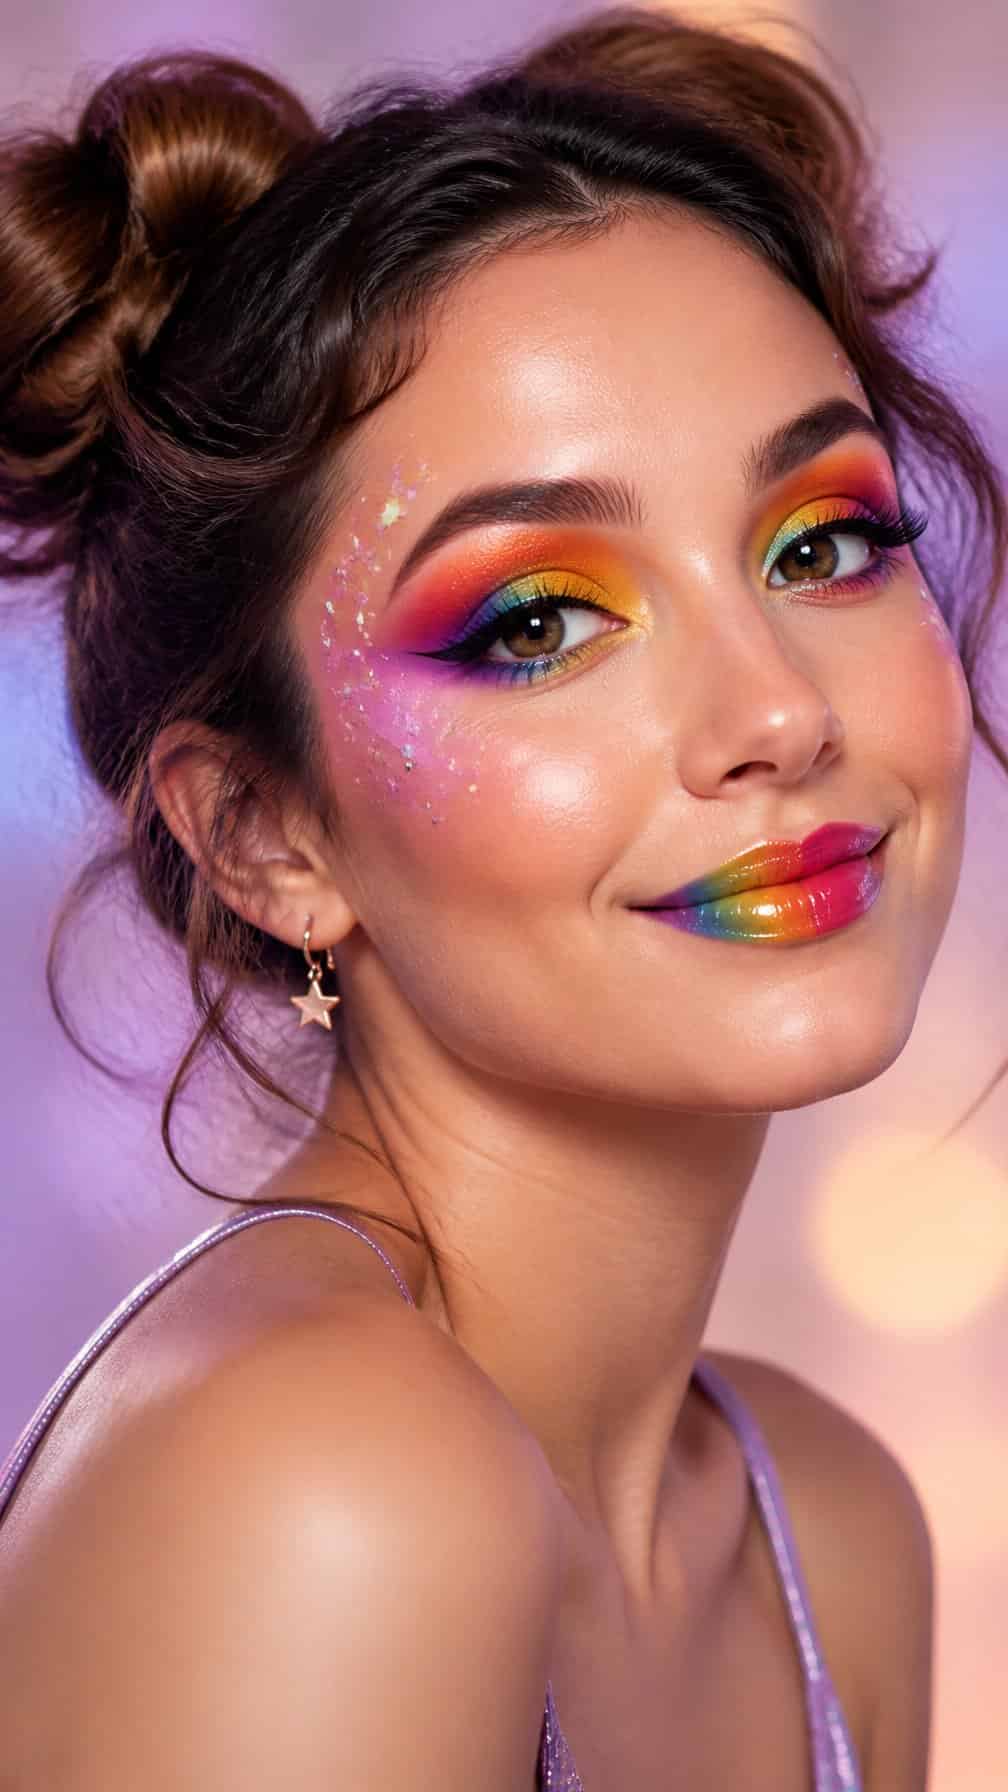
I create a bright rainbow look by blending red, orange, yellow, green, blue, and violet eyeshadows across the lids. I extend the colors slightly toward the temples for a graphic shape, then add white eyeliner accents to define each shade.
I keep the rest of my makeup simple so the eyes remain the focus. A fresh base, softly tinted cheeks, and clear or lightly colored lip gloss balance the saturated colors without making the look feel heavy.
For extra detail, I place small dots or stars beneath one eye using cosmetic face paint. I choose waterproof products and test them on a small area of skin before applying the full design.
20) Victorian Ghost Makeup
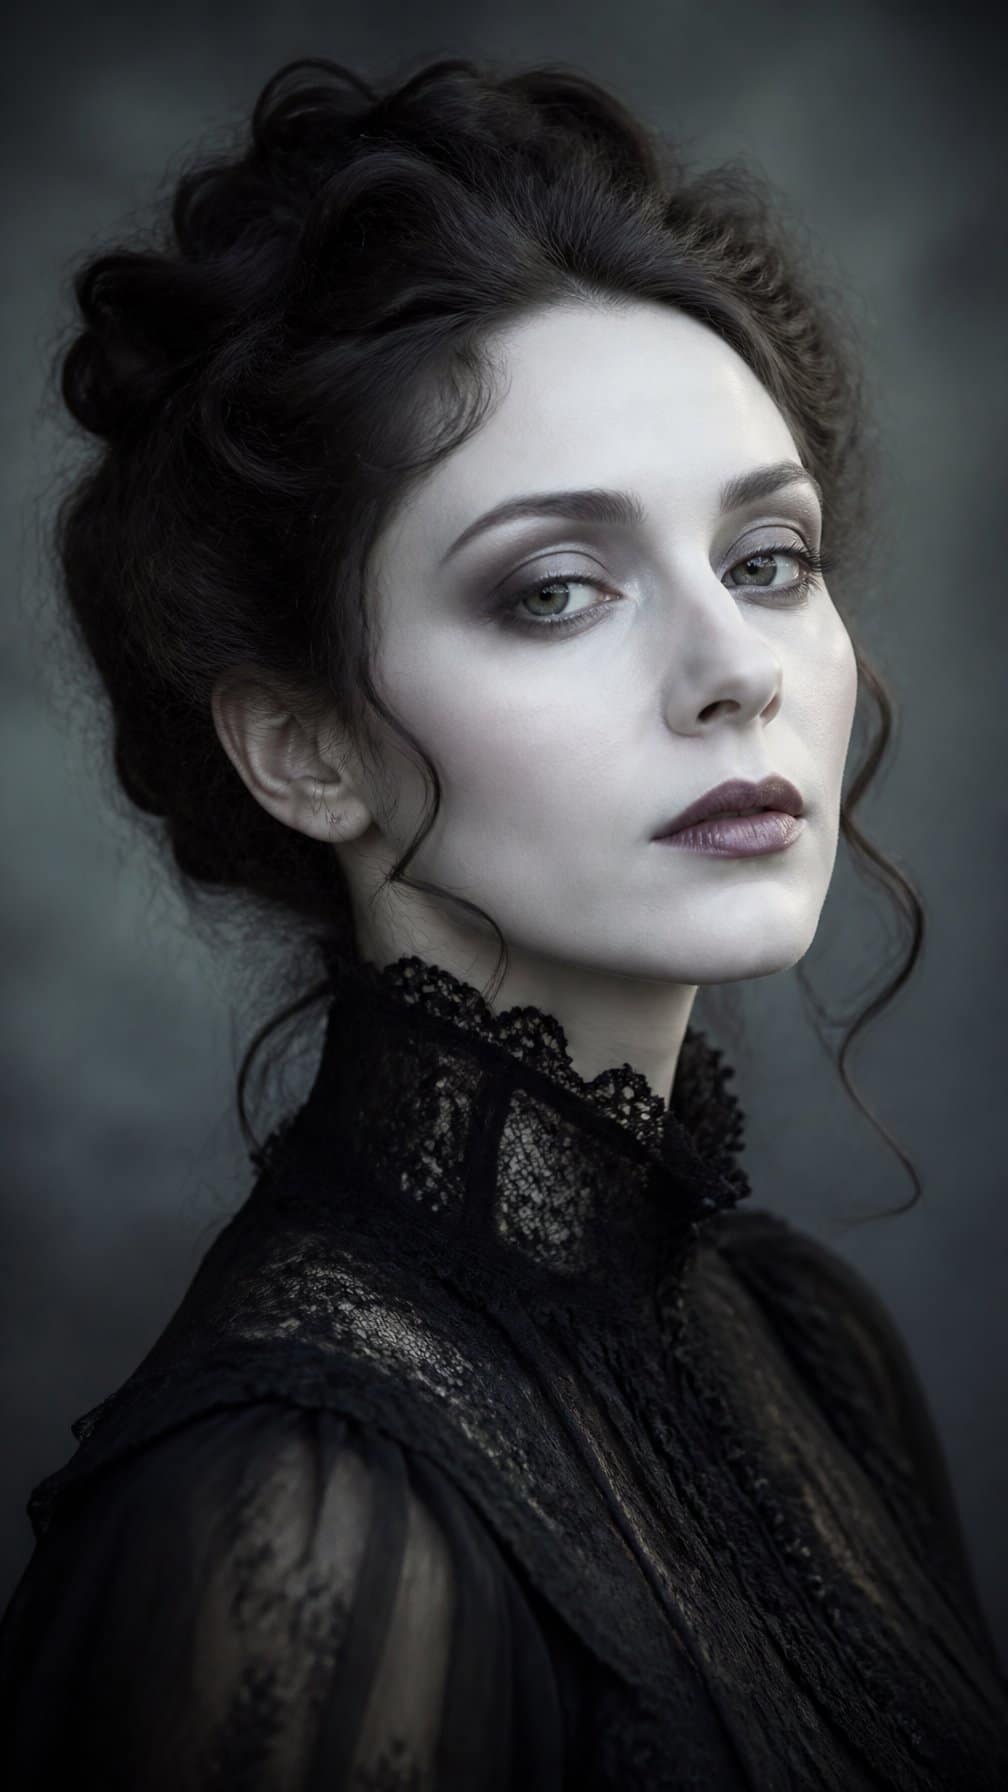
I create a pale, matte base with cool undertones, then lightly shade beneath my cheekbones and along my temples to give my face a naturally sunken appearance. I keep the effect subtle rather than harsh, using gray, taupe, and muted lavender instead of black.
For the eyes, I blend soft charcoal around the lids and extend the color slightly downward beneath the lower lash line. I add thin, uneven brows and a muted berry or grayish lip to suggest a faded Victorian portrait.
I finish with a high-neck blouse, lace collar, or dark ribbon at my throat. A loose updo, powdered hair, and a small beauty mark complete the period-inspired look without relying on blood or prosthetics.
21) Pop Art Comic Book Makeup
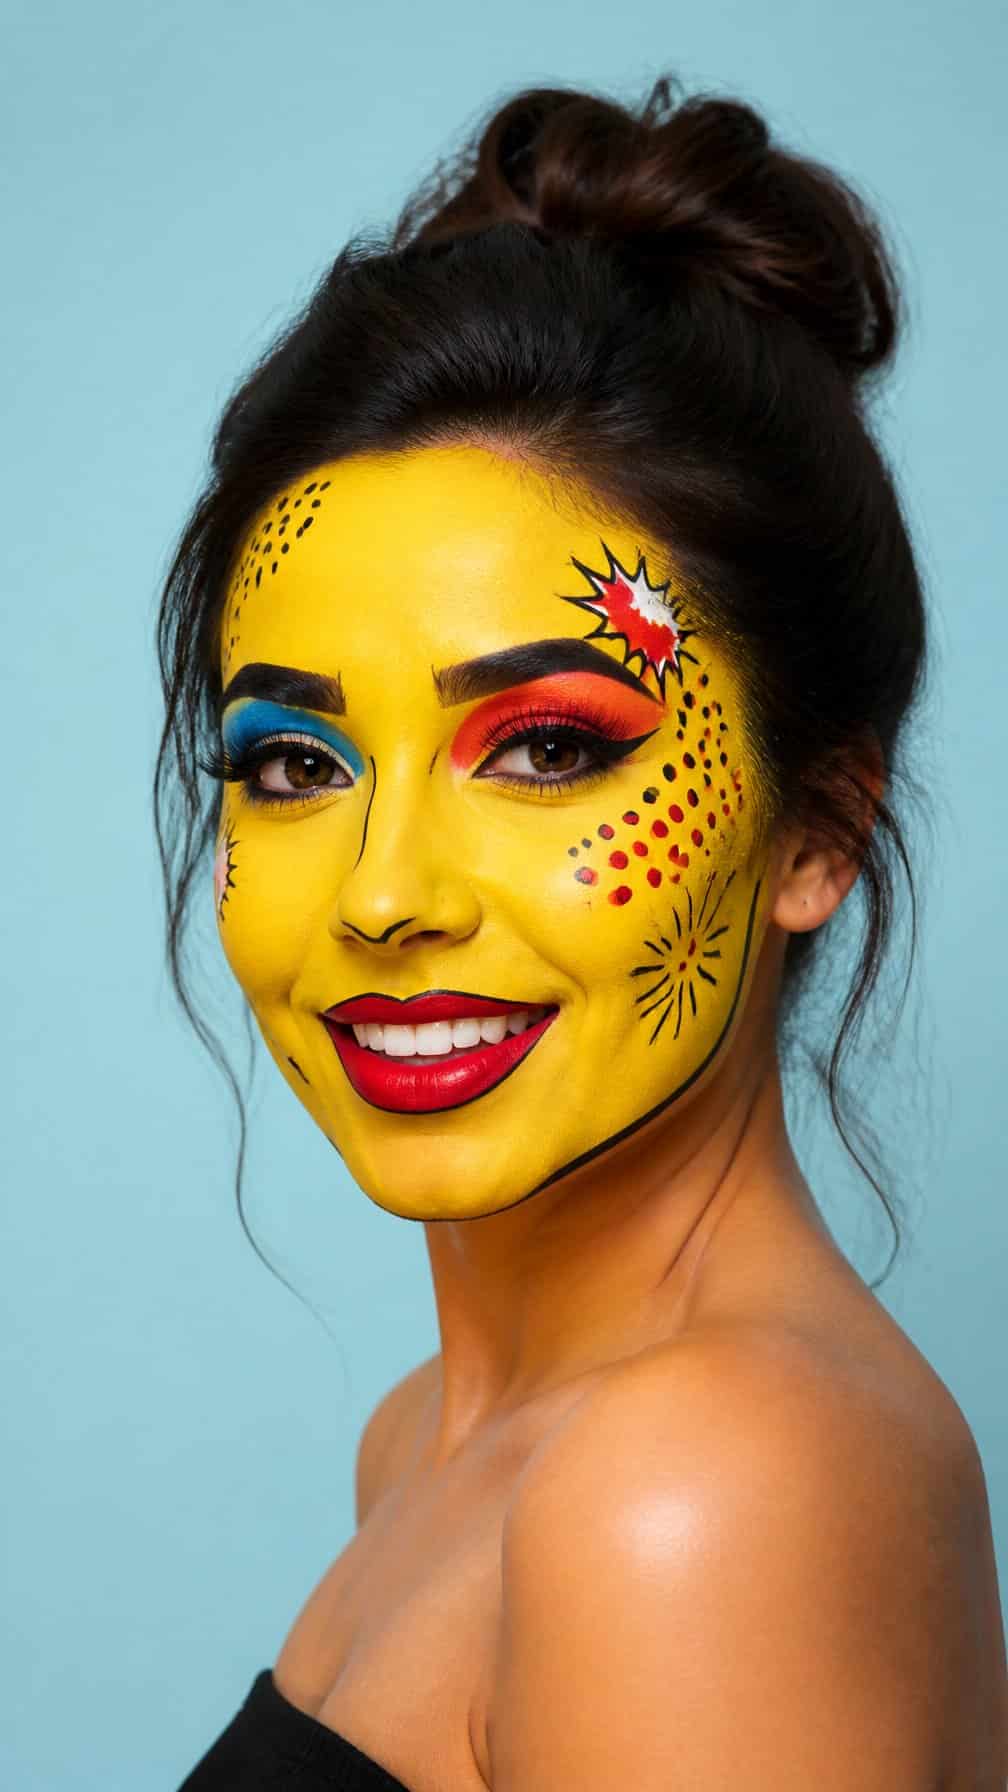
I create a comic-inspired look with a smooth base, bold black outlines, and bright blocks of color around the eyes and lips. I add small black dots across the cheeks and forehead to mimic printed shading, then outline the brows, nose, jaw, and lips with liquid liner.
For extra definition, I draw short lines near the temples or beneath the eyes to suggest movement. I use white face paint for small highlights on the lips, eyelids, and cheekbones, keeping the design graphic rather than gory. A colorful wig or solid top can reinforce the comic-book style.
22) Chic Leopard Makeup
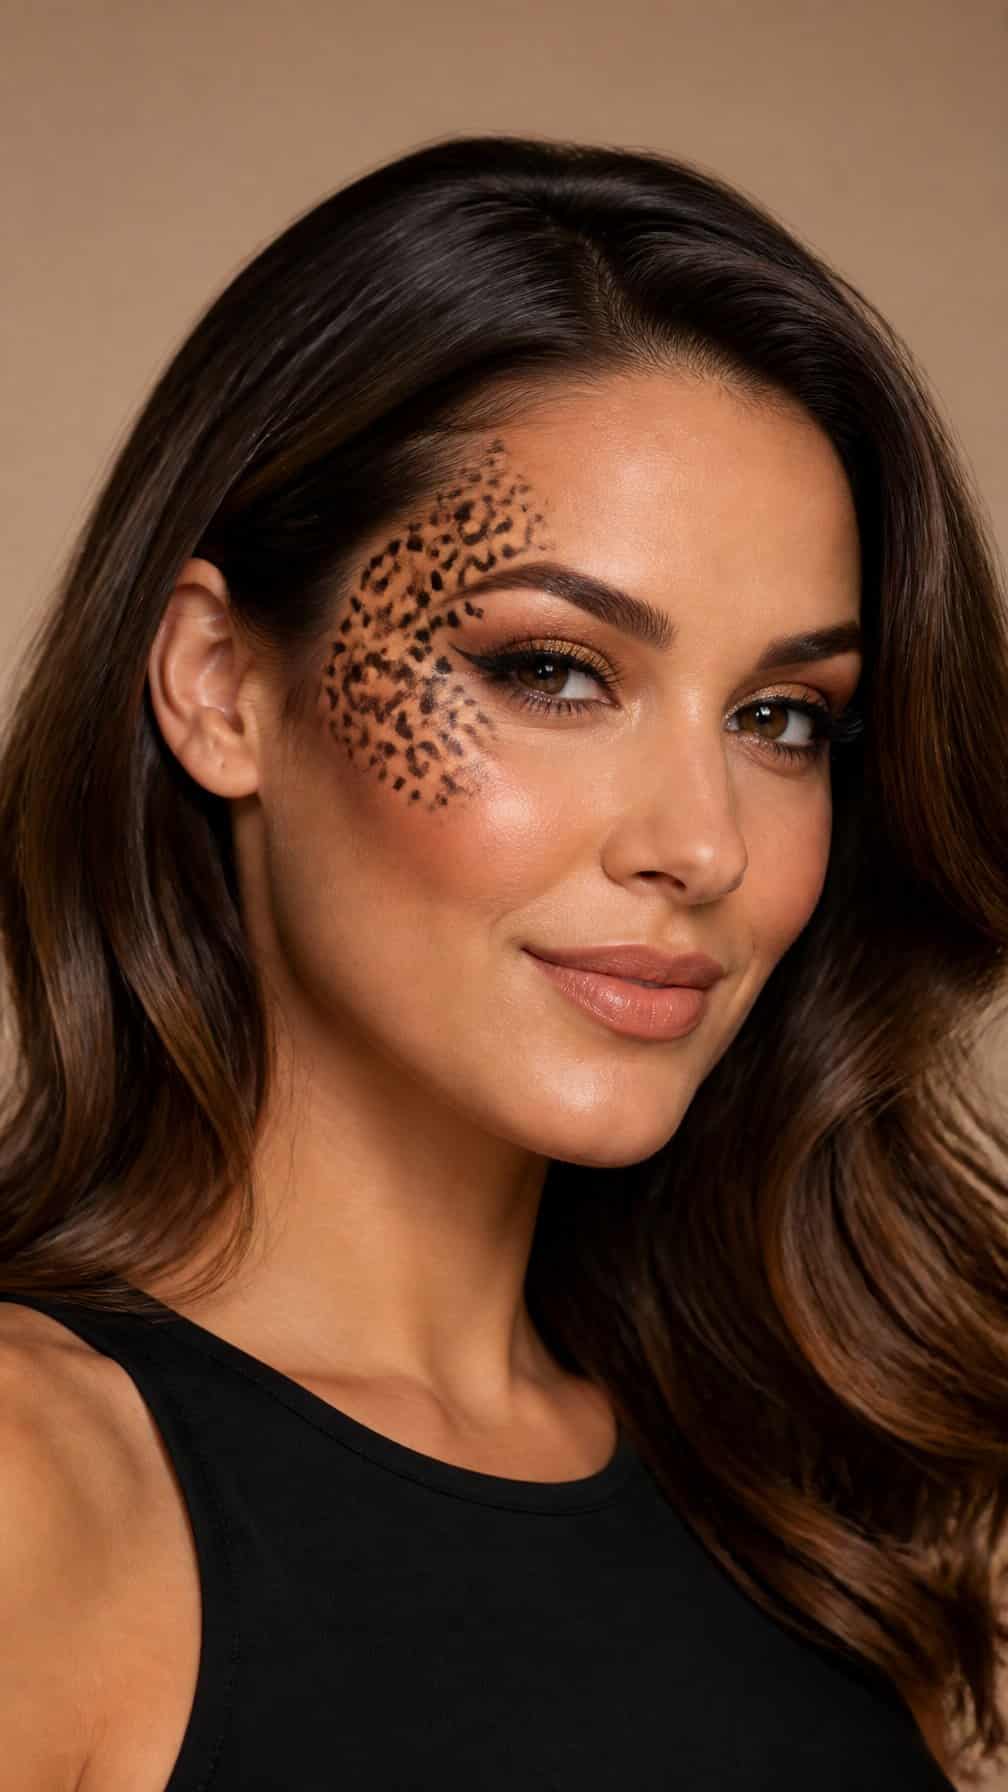
I create a polished leopard look by sweeping warm caramel shadow across my lids and blending a soft bronze shade into the crease. I add small black rosettes near my temples and along one cheek, varying their sizes for a natural pattern.
I keep the rest of my makeup refined with defined brows, subtle contour, and a neutral lip. A thin winged liner sharpens the eyes without competing with the spots, while gold shimmer on the inner corners adds a clean festive detail.
For a coordinated finish, I match the warm tones to my outfit or accessories. I use a fine liquid liner for crisp markings and a small angled brush to soften their edges when I want a less graphic effect.
23) Romantic Renaissance Makeup
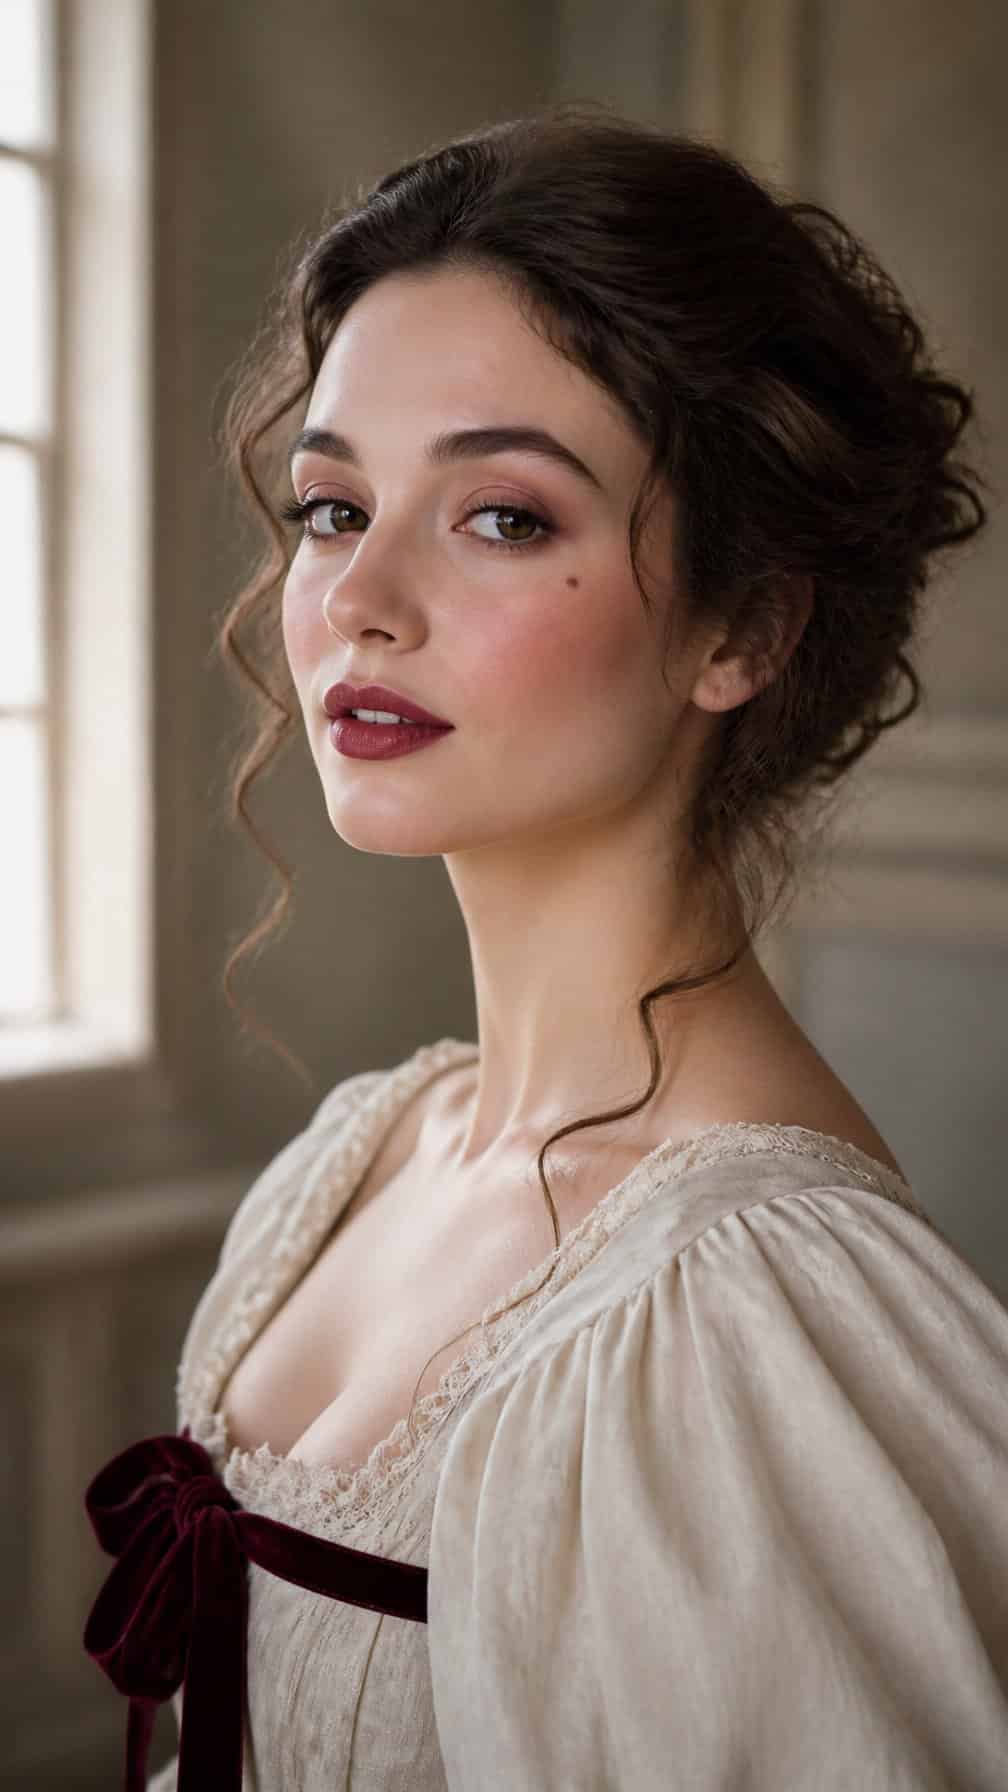
I create a soft, portrait-inspired look with a pale satin base, muted rose blush, and gently defined brows. I blend warm taupe across the eyelids, then add a thin brown line close to the lashes instead of a sharp modern wing.
For the lips, I choose a dusty red or berry shade and soften the edges with a fingertip. A small touch of champagne highlight on the cheekbones gives the makeup a candlelit finish without making it look glittery.
I complete the style with a few painted beauty marks near the cheek or mouth. A ribboned hairstyle, lace collar, or pearl accessory reinforces the Renaissance influence while keeping the makeup wearable and non-gory.
24) Neon Cyberpunk Makeup
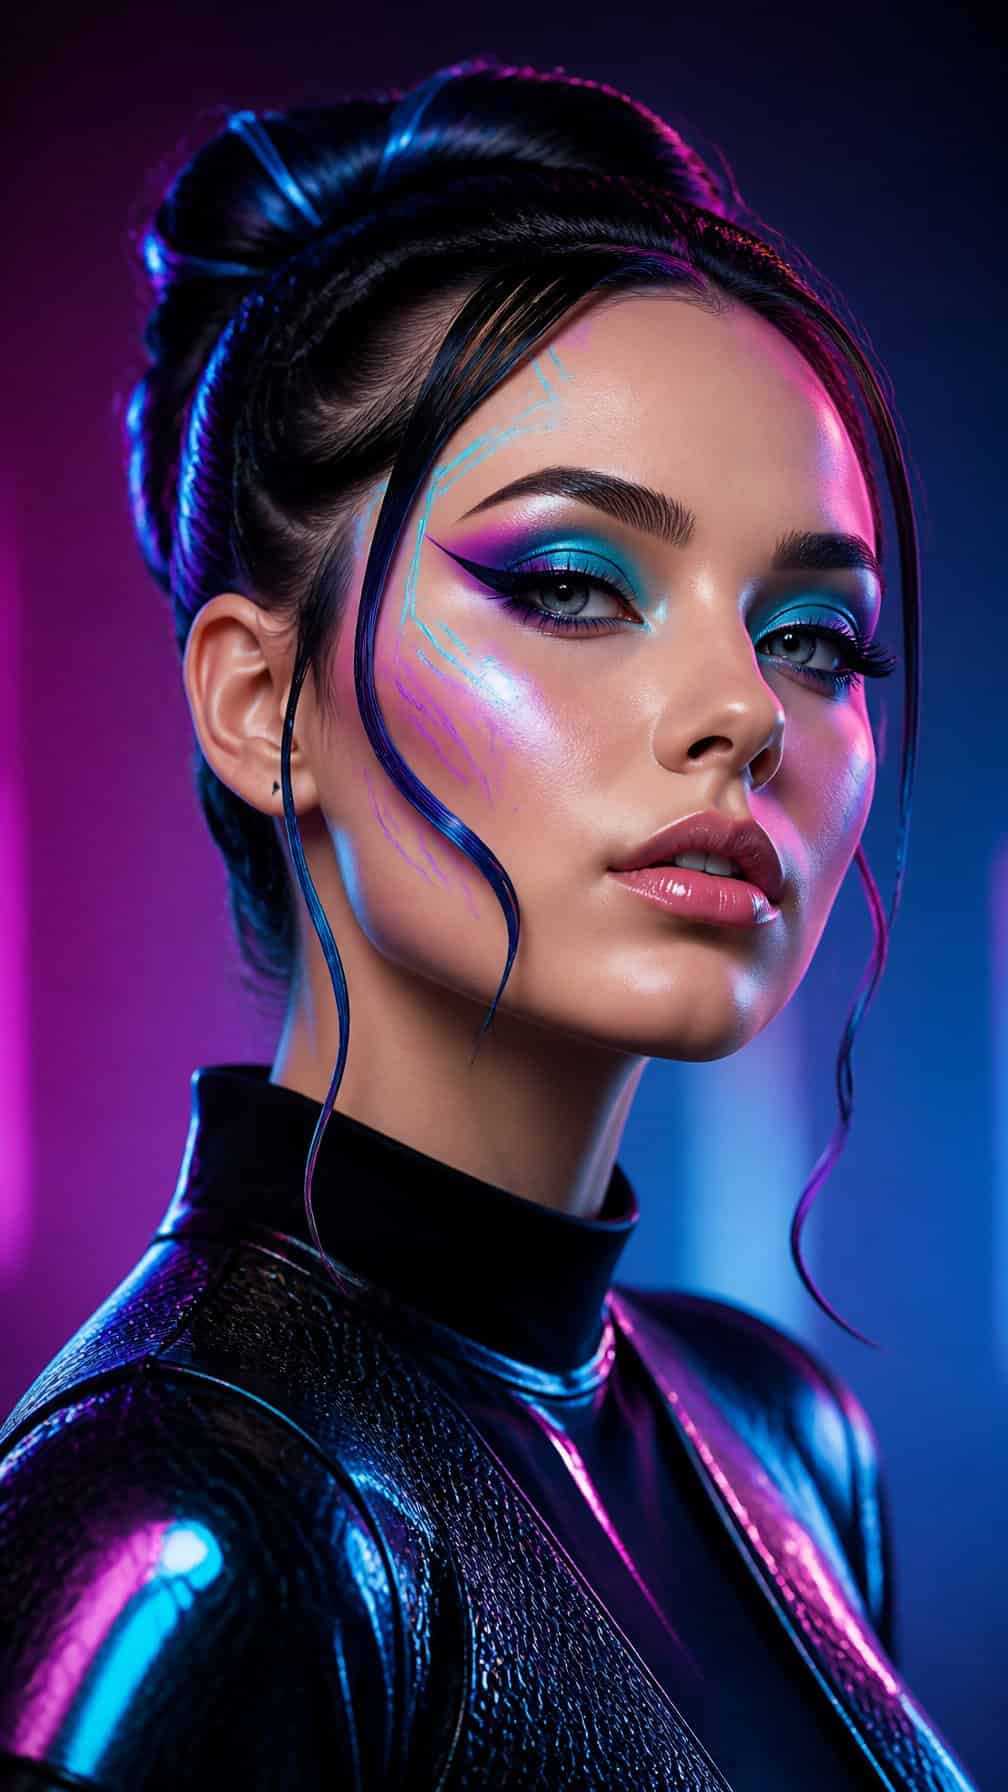
I create a futuristic look with electric blue, hot pink, and violet face paints placed in sharp lines around my eyes and cheekbones. I pair the color with black graphic liner, extending a few angles toward my temples for a digital, geometric effect.
I add small silver accents or adhesive rhinestones along selected lines to suggest glowing circuitry without making the design look crowded. A cool-toned highlighter on my cheekbones helps the colors stand out under dim lighting.
For the finishing details, I use glossy lips or a deep purple lip color and keep the rest of my makeup controlled. Temporary metallic tattoos, colorful hair clips, or a sleek black outfit can reinforce the cyberpunk style without requiring special effects.
25) Gothic Lace Makeup
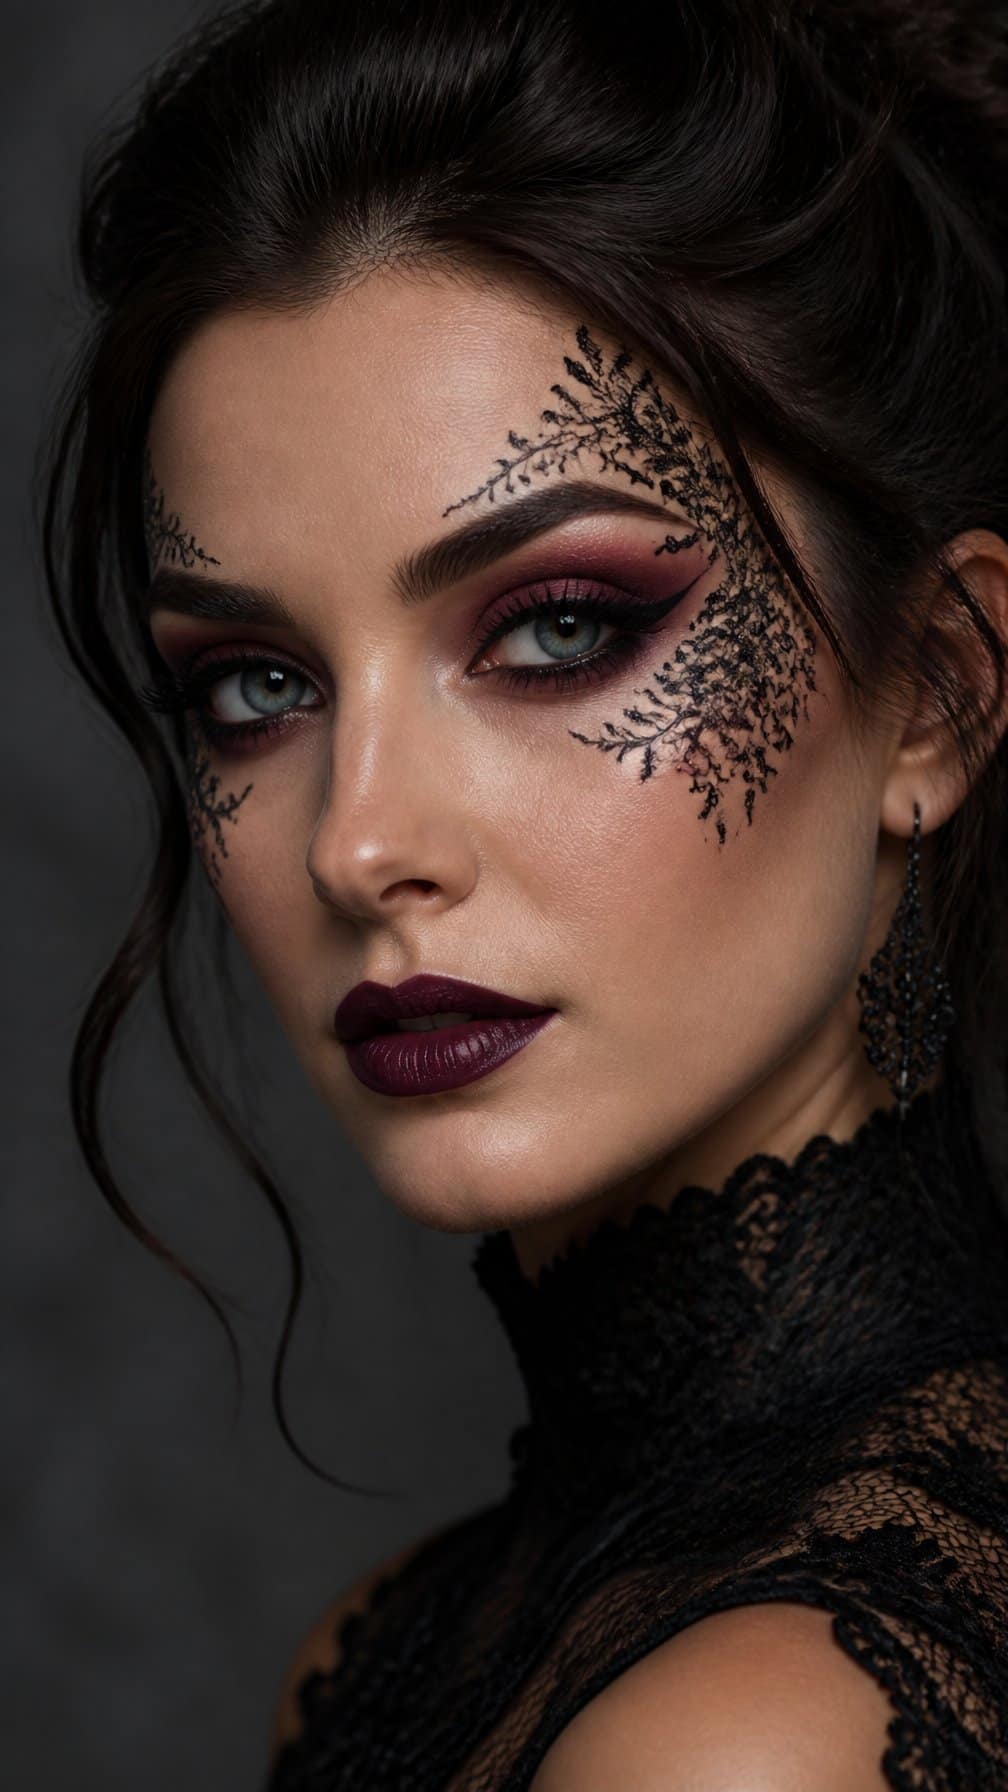
I create this look by placing a piece of lace over one side of my face and lightly dabbing black, charcoal, or deep plum face paint across it. The fabric leaves a delicate pattern around my eye, cheekbone, or temple without relying on fake blood or graphic effects.
I keep the base pale or matte and add thin black eyeliner to sharpen the design. A muted berry lip, dark nails, and a few small rhinestones can reinforce the gothic style while keeping the makeup refined.
I remove the lace carefully, then soften any harsh edges with a small brush. I use cosmetic-grade face paint and test the adhesive on my skin first, especially when securing lace near sensitive areas.


