

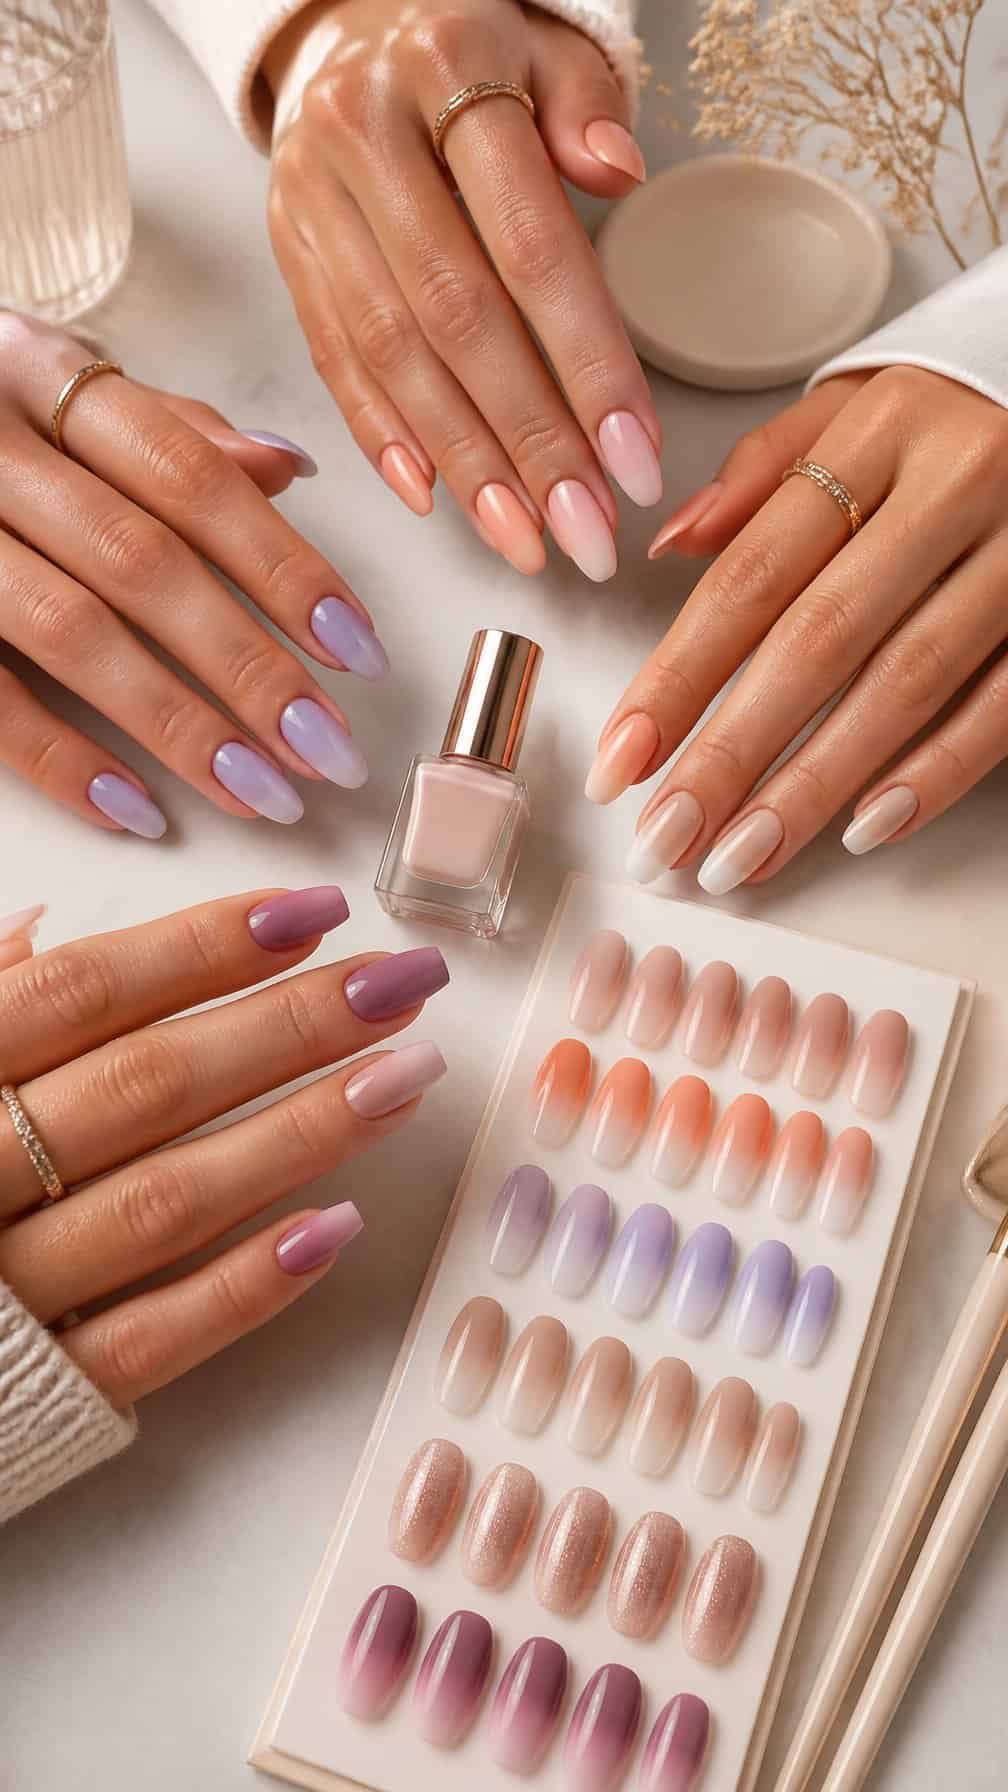
Ombre nails create a smooth transition between shades, giving your manicure a soft, polished appearance. I’ll guide you through color combinations that range from subtle neutrals and pastels to richer tones, metallic finishes, and glitter accents.
Save for later
Want to come back to this story? Save it with your email so it is easy to find again.
You can use these 26 ombre nail designs to find a blend that suits your style, occasion, and preferred finish. I’ll also cover ways to choose coordinating colors and maintain a seamless fade for a neat, lasting manicure.
Table of Contents
- 1 1) Milky White to Blush Pink Ombre
- 2 2) Nude Beige to Soft White Ombre
- 3 3) Baby Blue to White Ombre
- 4 4) Lavender to Pale Pink Ombre
- 5 5) Peach to Cream Ombre
- 6 6) Dusty Rose to Mauve Ombre
- 7 7) Sage Green to Ivory Ombre
- 8 8) Sky Blue to Lilac Ombre
- 9 9) Coral to Peach Ombre
- 10 10) Classic French Ombre
- 11 11) Pink Glitter Fade Ombre
- 12 12) Champagne Shimmer Ombre
- 13 13) Rose Gold Ombre Tips
- 14 14) Silver Glitter Ombre
- 15 15) Gold Chrome Ombre
- 16 16) Pearl Chrome Ombre
- 17 17) Vanilla Ombre with Micro-French Tips
- 18 18) Caramel Nude Ombre
- 19 19) Mocha Brown to Cream Ombre
- 20 20) Cocoa to Beige Ombre
- 21 21) Terracotta to Nude Ombre
- 22 22) Burgundy to Blush Ombre
- 23 23) Berry Pink to Pale Pink Ombre
- 24 24) Plum to Lavender Ombre
- 25 25) Navy Blue to Baby Blue Ombre
- 26 26) Teal to Mint Ombre
1) Milky White to Blush Pink Ombre
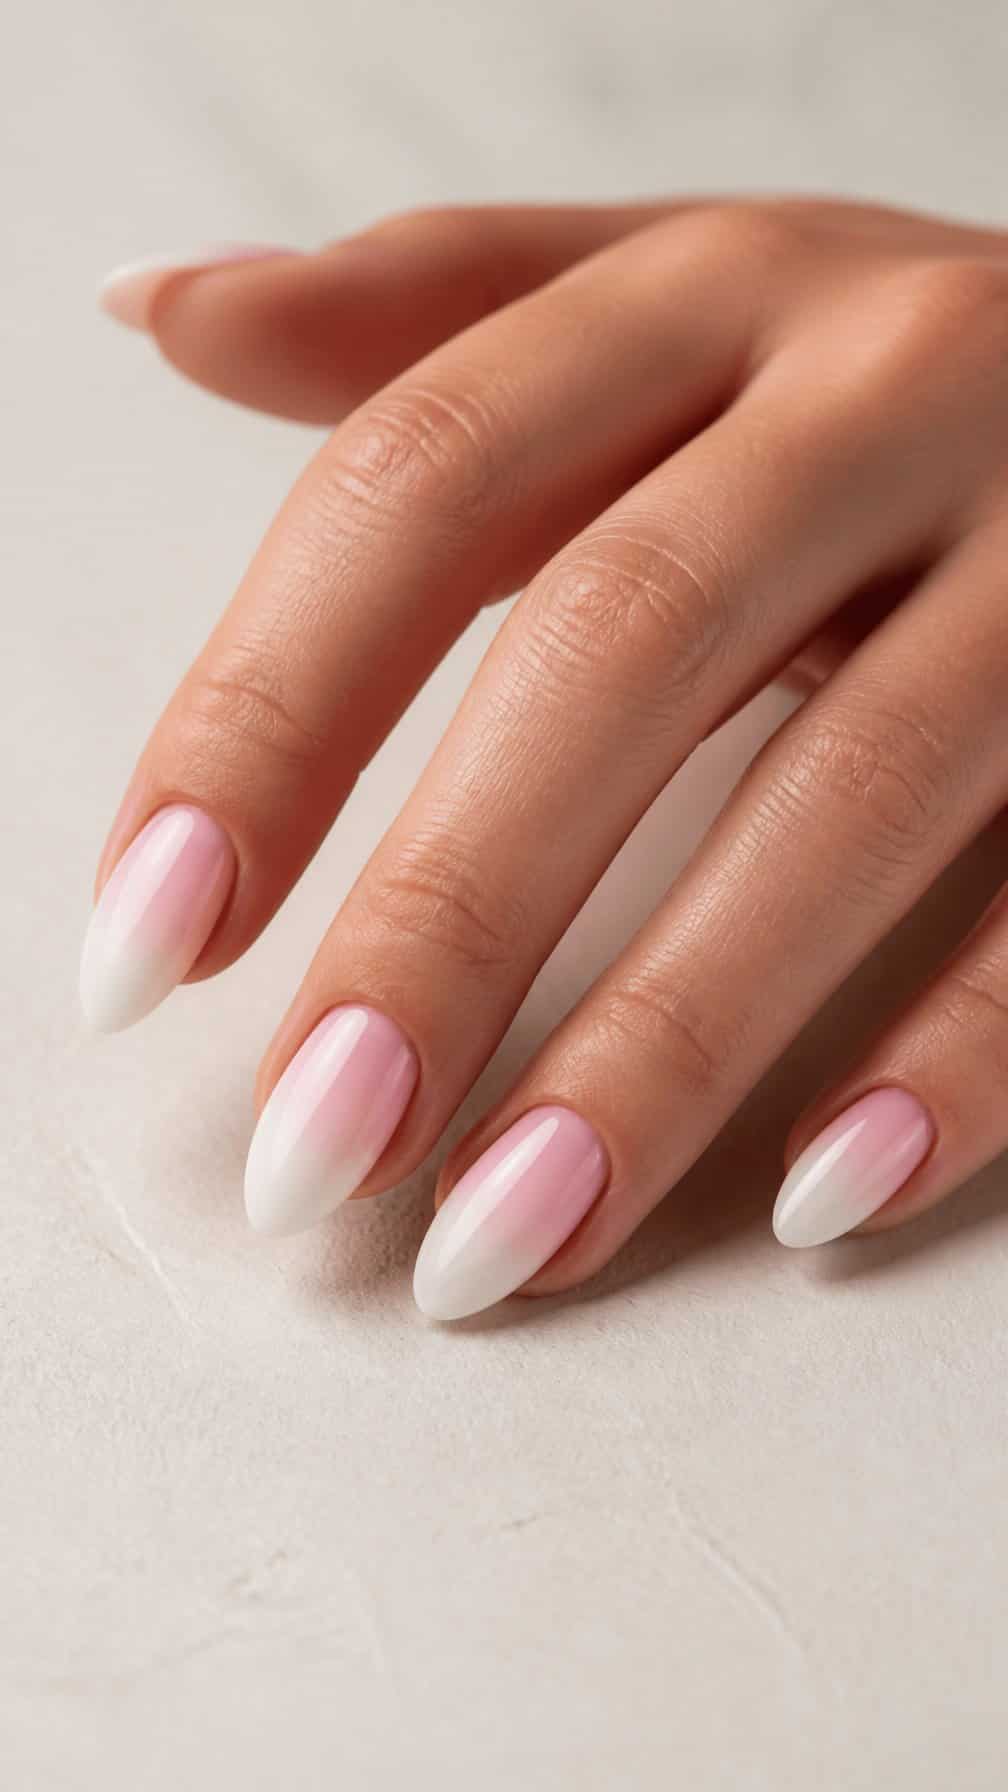
I like this ombre pairing for its soft, polished finish. Milky white creates a clean base, while blush pink adds a subtle flush near the tips or cuticles, depending on the direction of the blend.
I find the design works especially well on almond, oval, and short square nails. A sheer base keeps the transition smooth, and a glossy topcoat helps the pale shades look even and consistent.
For a more delicate result, I would use two thin layers of translucent color rather than one opaque coat. I might also add a fine pearl shimmer or leave the surface plain for a simple everyday manicure.
2) Nude Beige to Soft White Ombre
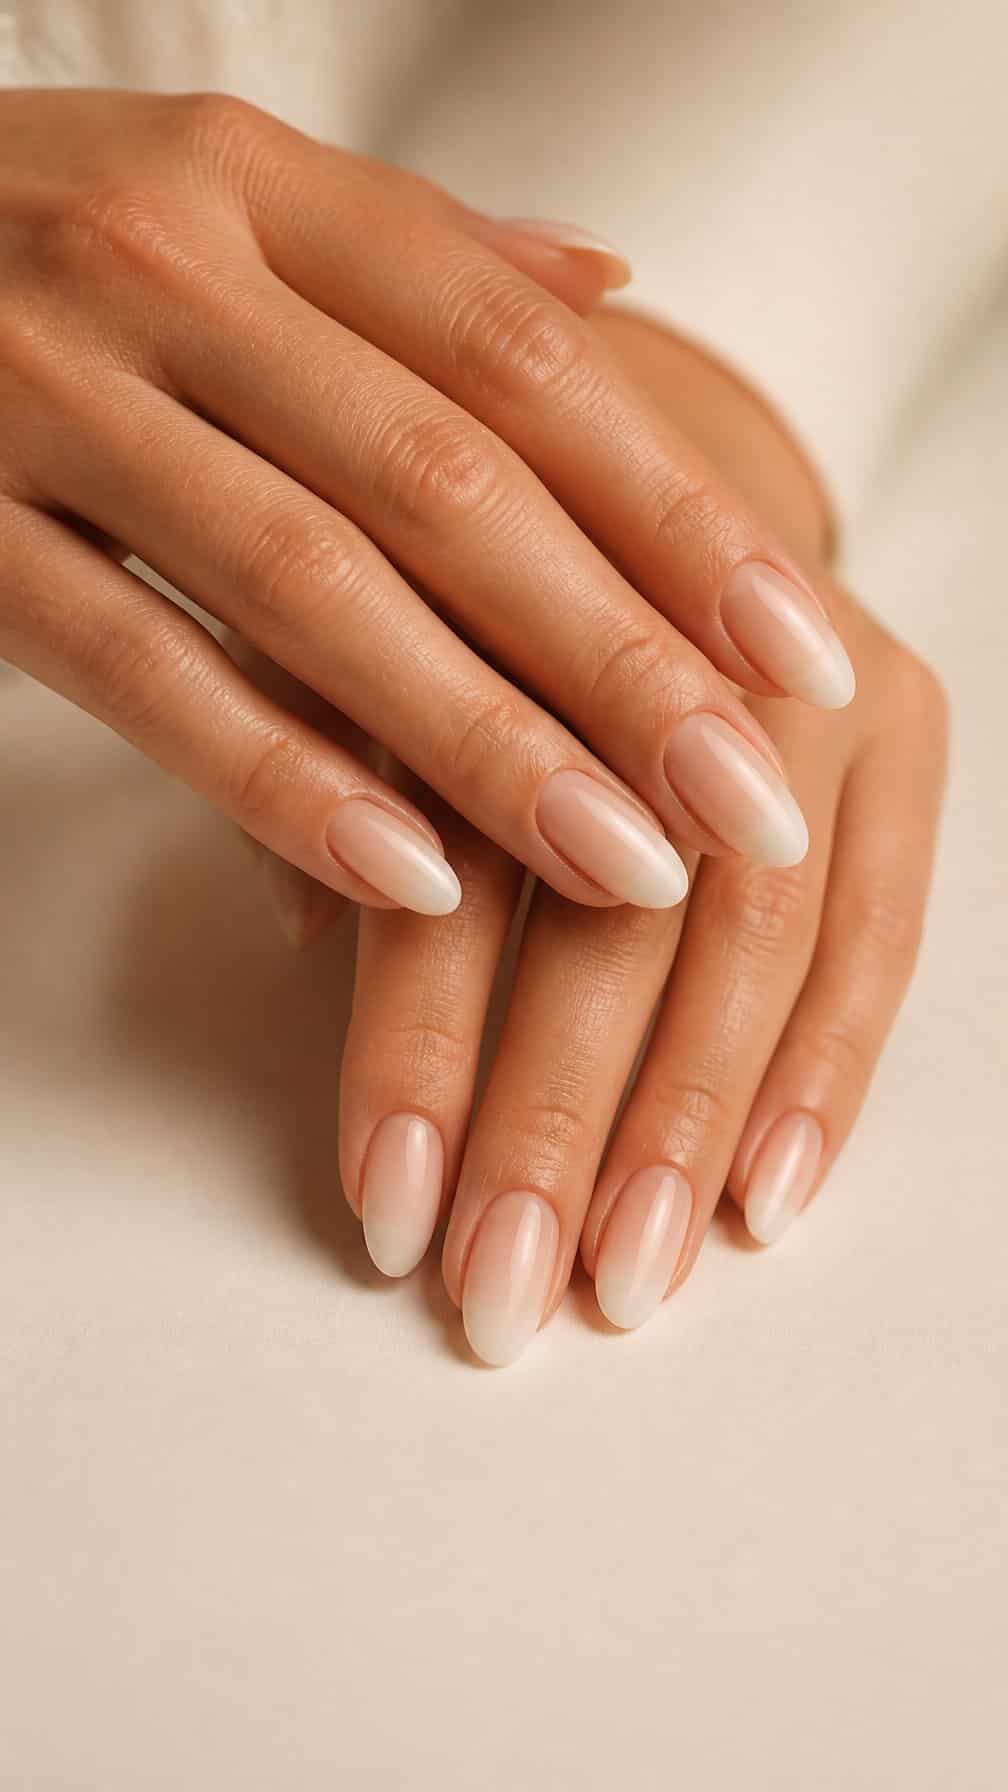
I like this nude beige to soft white blend for its clean, understated finish. The beige base adds warmth near the cuticles, while the pale white tips create a gentle gradient without a sharp color break. I find a sheer, milky formula works best for keeping the transition smooth and natural.
I usually choose a short square or softly rounded shape with this design because both silhouettes support its minimal look. A glossy topcoat helps the colors appear more seamless and gives the manicure a polished surface. For a softer effect, I prefer warm ivory tips instead of bright white.
3) Baby Blue to White Ombre
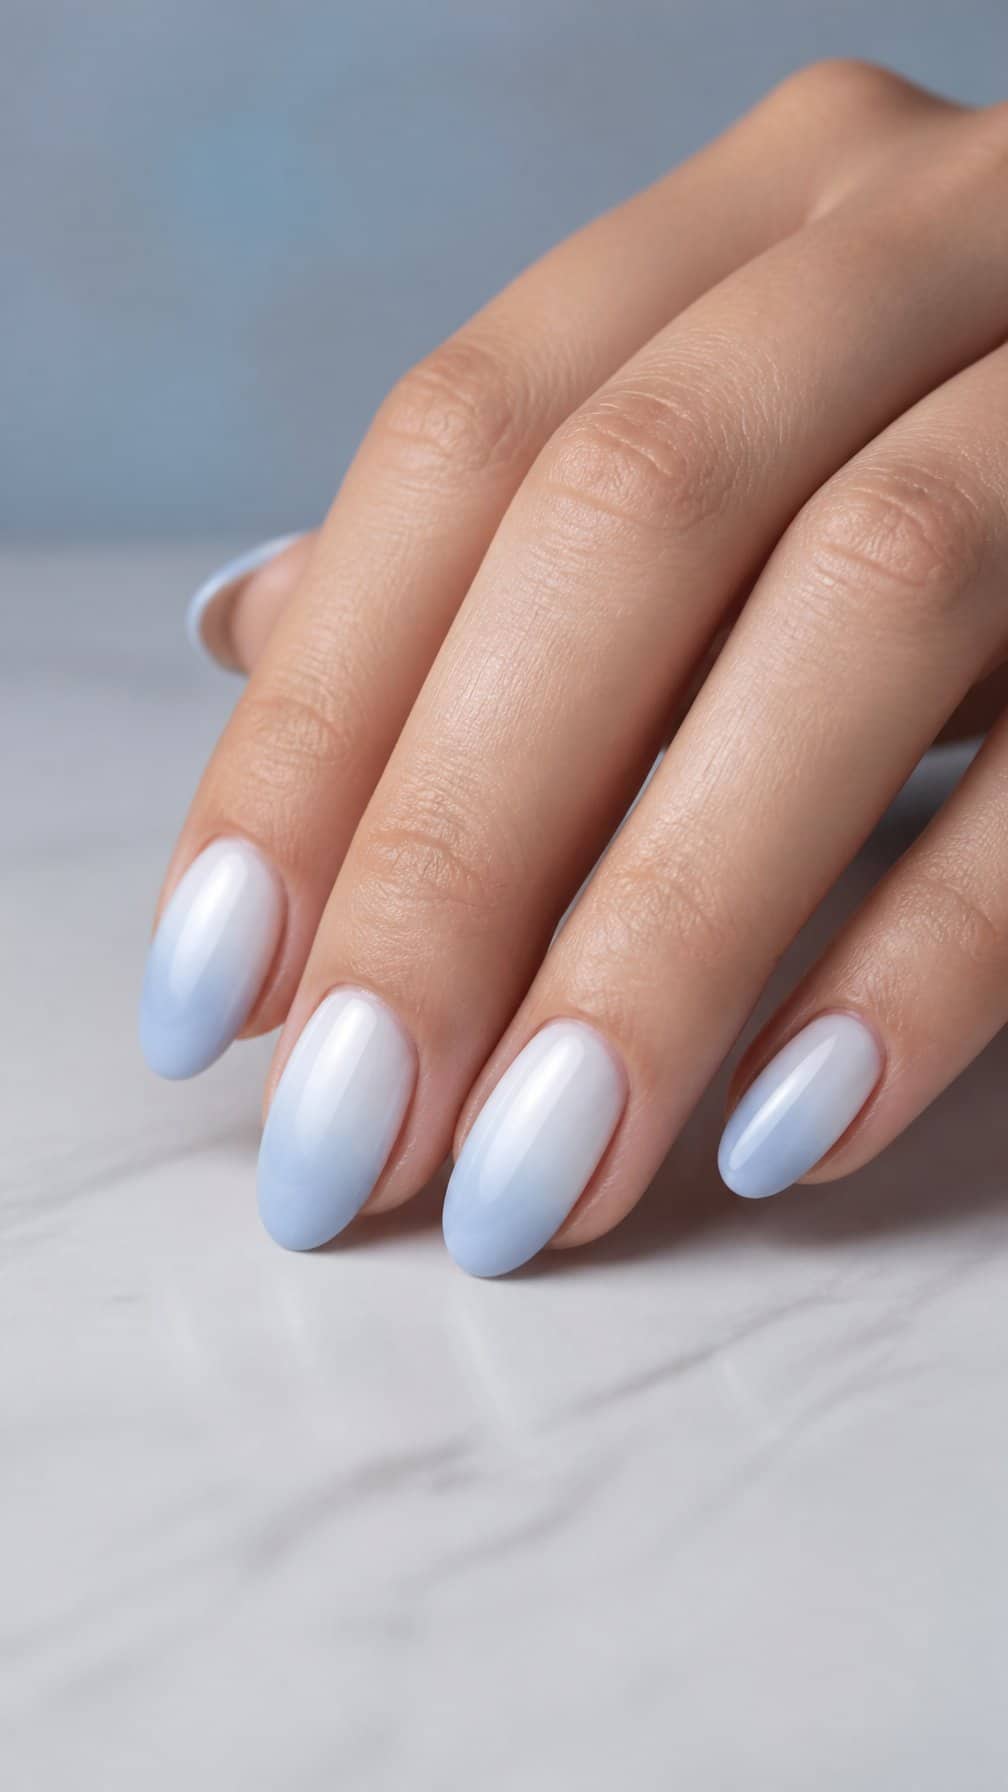
I like this soft gradient for its clean, airy finish. I blend baby blue from the tips toward the center, then fade it into a sheer white base near the cuticles. The contrast stays subtle, so the design suits short and long nails alike.
I find a sponge creates the smoothest transition, while a glossy top coat helps the pale shades look even and polished. For added detail, I sometimes apply a fine shimmer over the gradient or keep the finish completely cream for a simpler look.
4) Lavender to Pale Pink Ombre
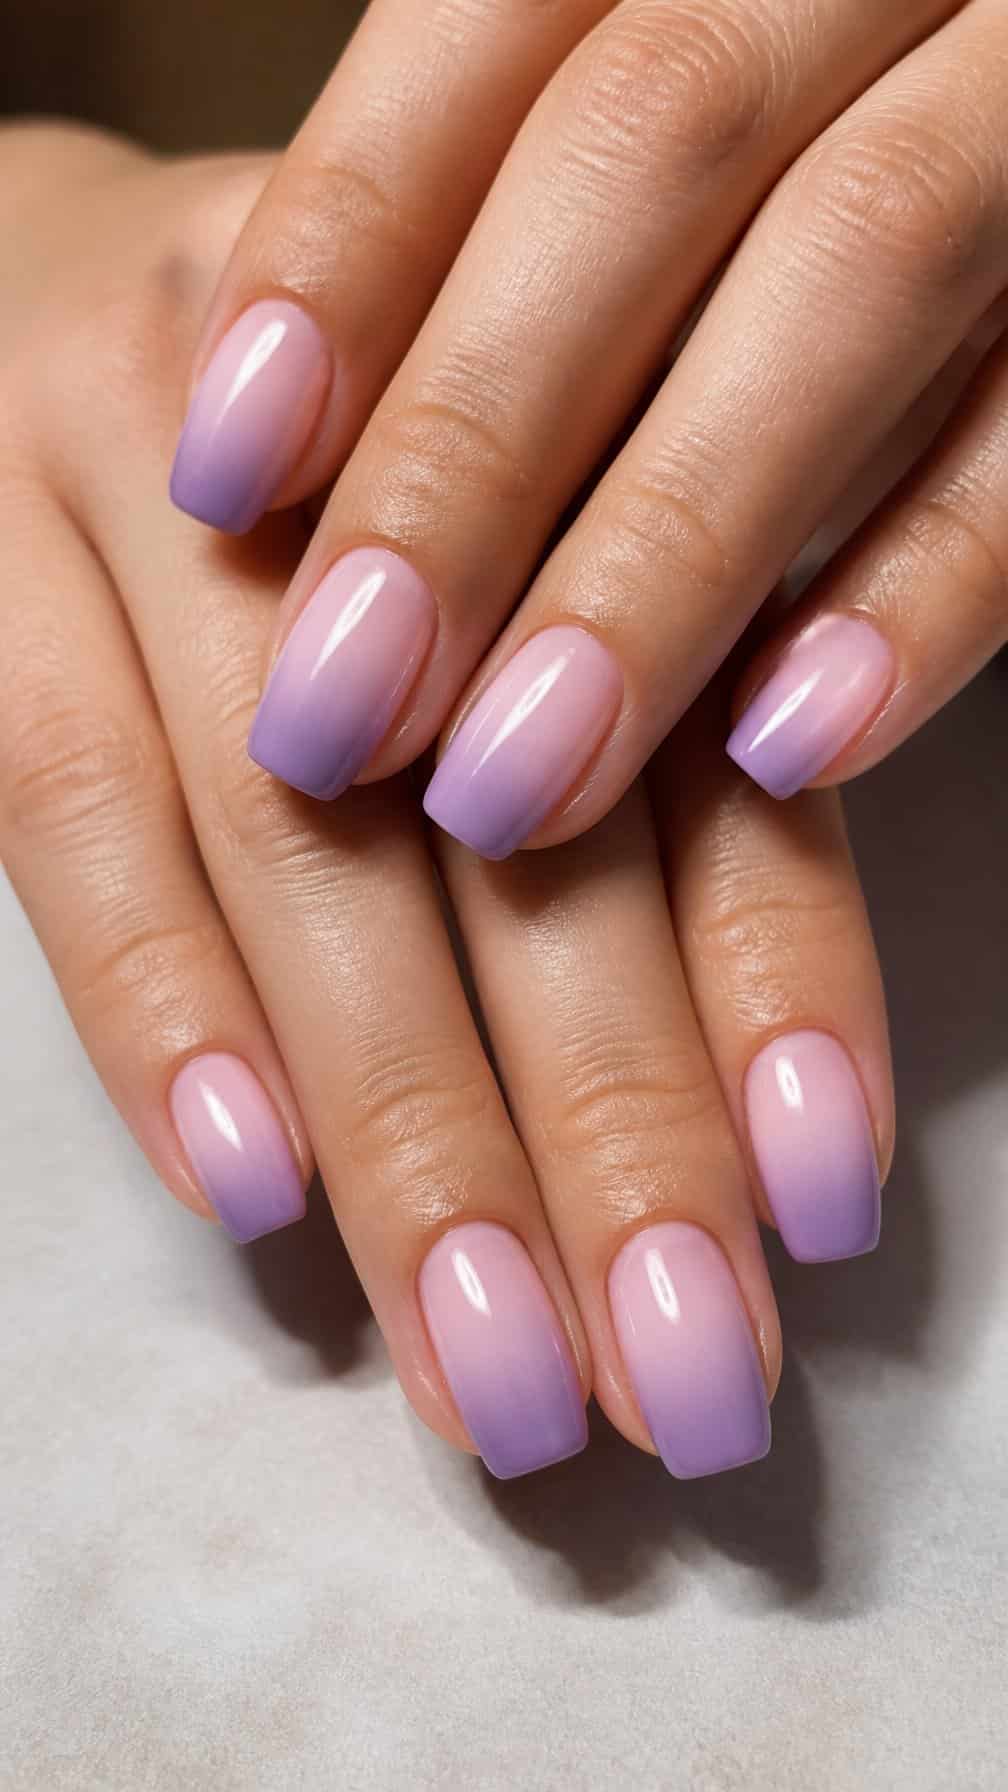
I like this lavender-to-pale-pink blend for its soft, balanced color shift. Lavender starts near the tips or cuticles, depending on the design, then fades into a light pink with no sharp boundary. The result feels polished without looking overly formal.
I would pair this gradient with a short almond or squoval shape to keep the colors delicate and wearable. A glossy topcoat brings out the transition, while a matte finish gives the manicure a softer, powdery appearance.
For added detail, I might use a thin chrome line, tiny white flowers, or subtle pearl accents on one or two nails. These decorations preserve the gentle palette instead of competing with the ombre effect.
5) Peach to Cream Ombre
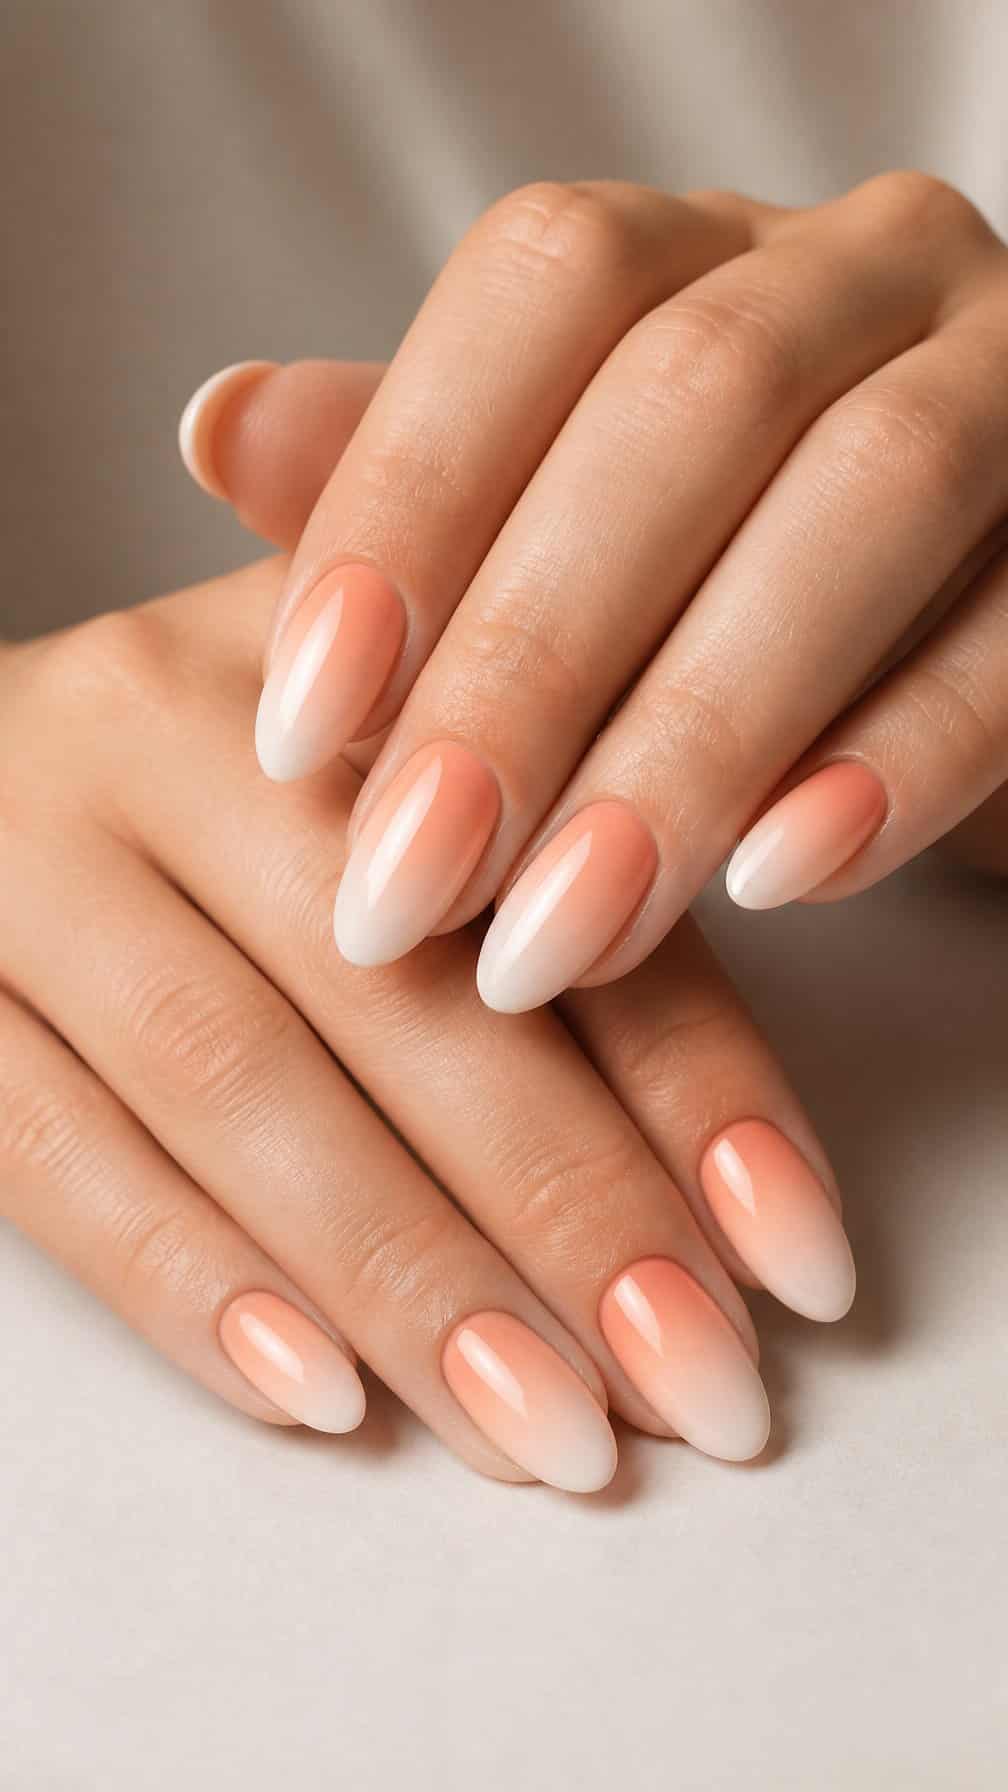
I like this peach-to-cream blend for its soft, warm finish. The color starts with a gentle peach near the cuticle and fades into a creamy ivory at the tips, creating a smooth transition without sharp contrast. I find the look especially flattering on short, rounded, or almond-shaped nails.
A glossy topcoat keeps the gradient clean and helps the lighter ends look polished rather than flat. I would pair this design with a sheer base and two thin layers of each shade, blending while the polish remains wet. A fine shimmer can add subtle dimension without changing the soft color balance.
6) Dusty Rose to Mauve Ombre
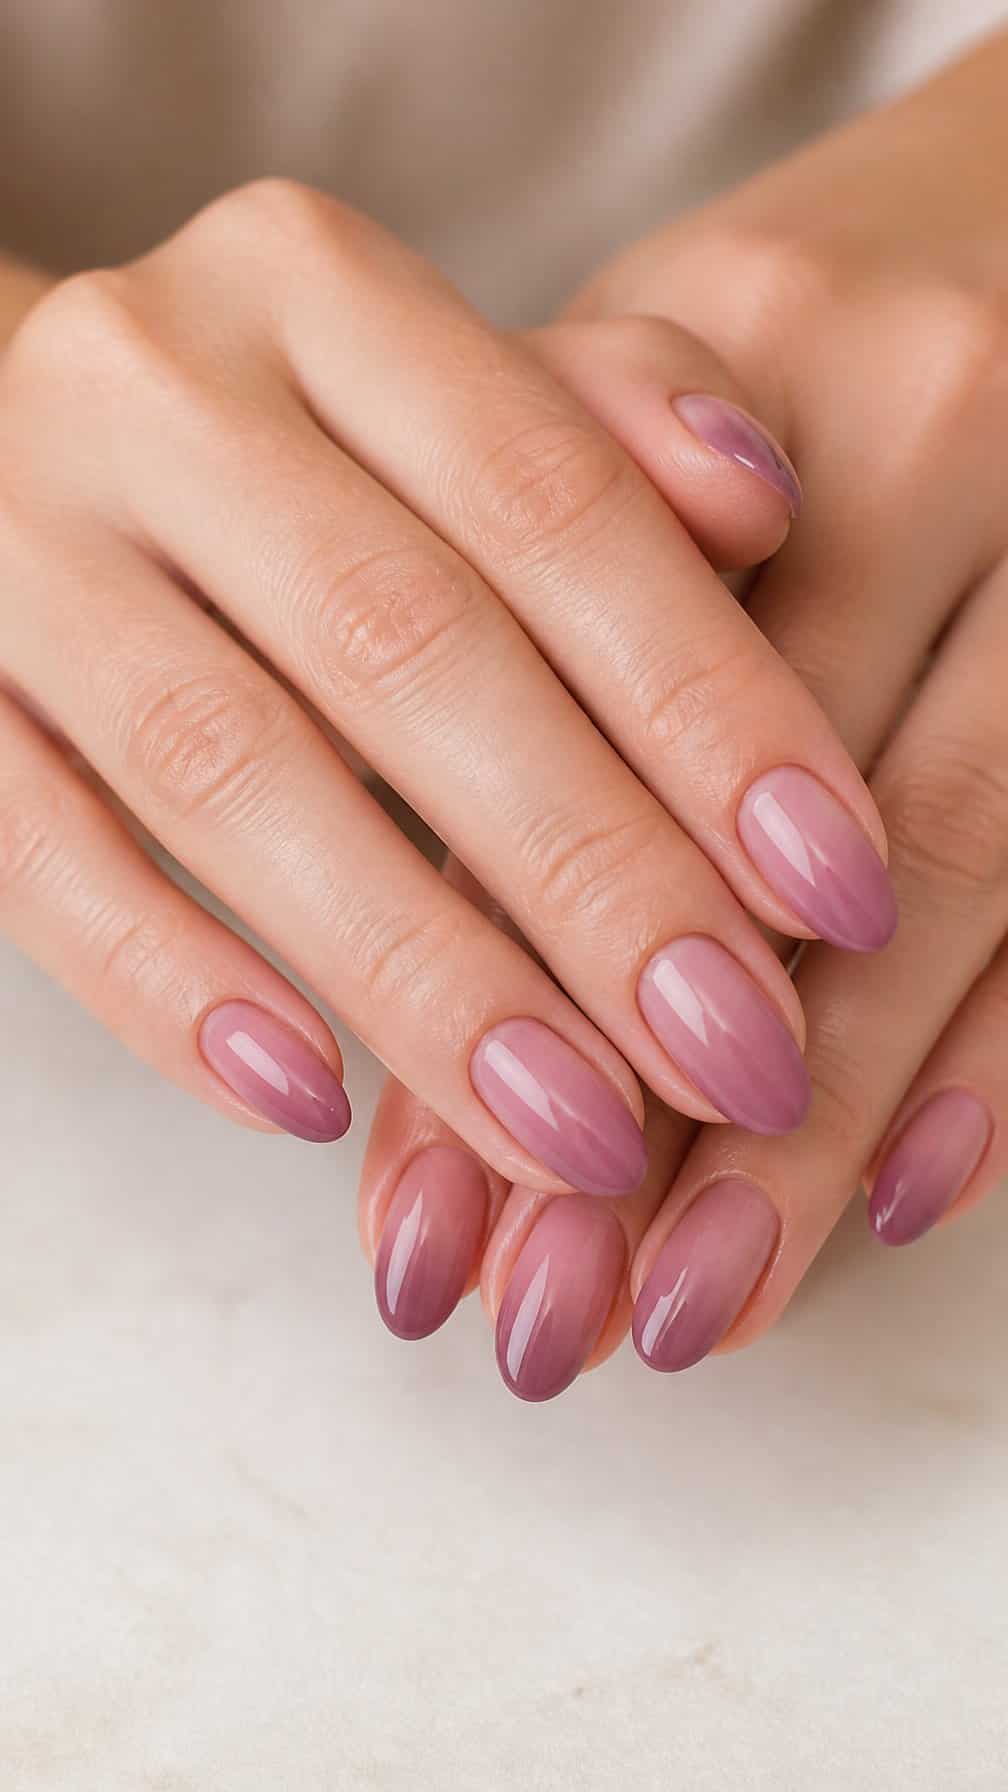
I like this pairing for its muted color shift and soft, polished finish. Dusty rose creates a lighter base near the cuticle, while mauve adds depth toward the tips without making the design look too dark.
I find a short almond or rounded-square shape works especially well because it keeps the gradient subtle and balanced. A glossy topcoat brings out the color transition, while a matte finish gives the manicure a more understated look. I would use thin layers and blend each shade before curing to keep the fade smooth.
7) Sage Green to Ivory Ombre
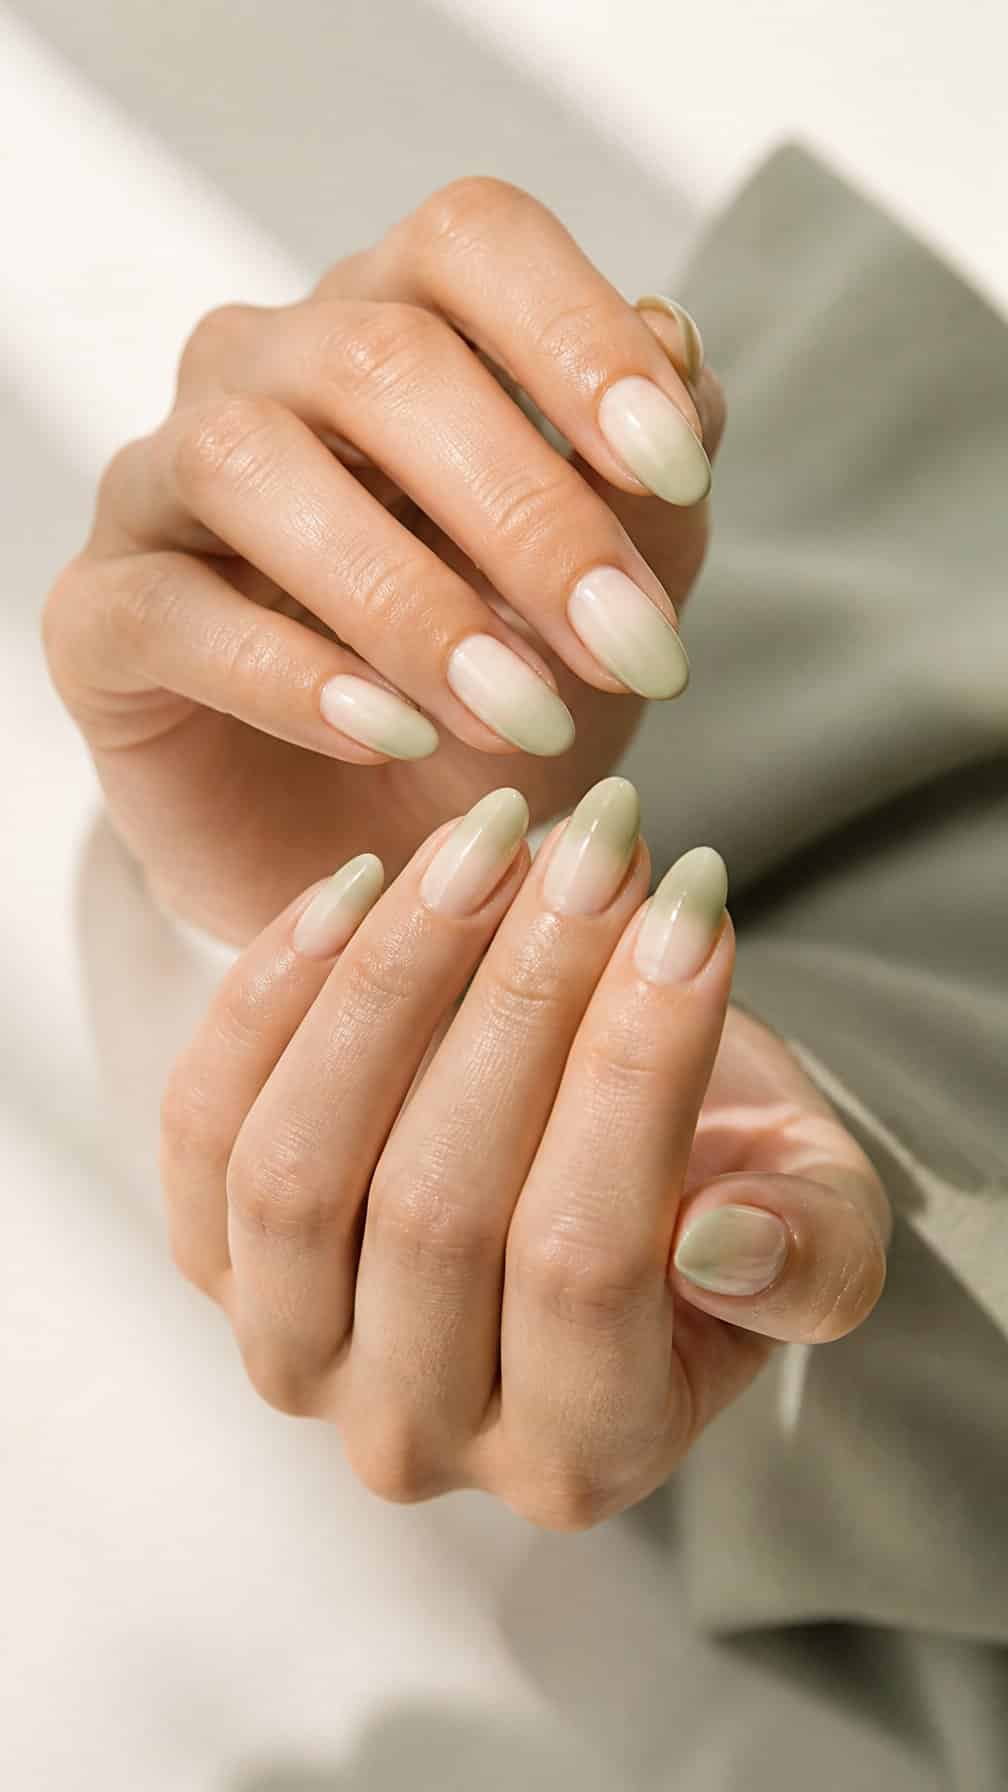
I like this pairing for its soft contrast: muted sage green adds color while ivory keeps the finish light and polished. I would place the sage near the cuticle and blend it gradually toward the tips, using a sheer base to prevent a harsh transition.
A glossy topcoat suits this design because it brings out the subtle shift between the two shades. For a quieter look, I would choose short almond or rounded nails and skip extra decoration. A fine gold line on one or two nails can add definition without competing with the gradient.
8) Sky Blue to Lilac Ombre
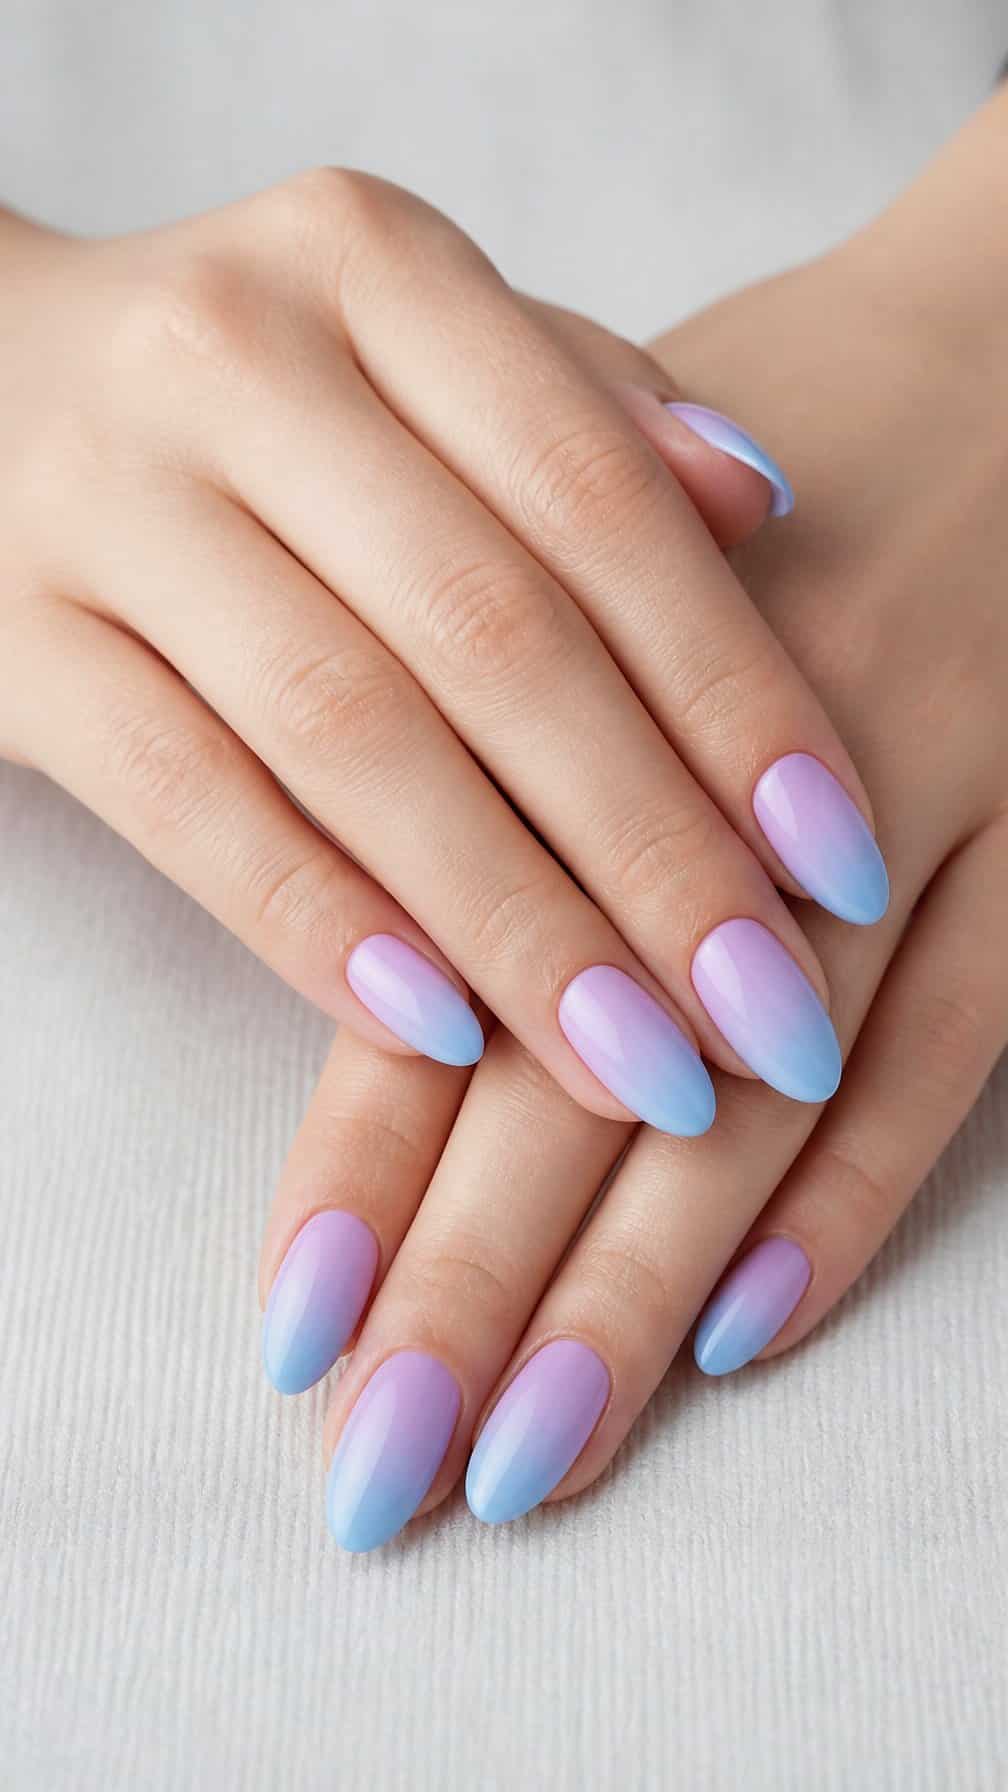
I like this cool-toned gradient for its clean transition from airy sky blue at the tips to soft lilac near the cuticles. The colors create a gentle contrast without looking harsh, especially on medium or long almond-shaped nails.
I would use a sheer base and blend each shade with a small sponge, building the color gradually to prevent visible bands. A glossy topcoat enhances the smooth fade, while a fine silver detail on one accent nail adds definition without distracting from the gradient.
9) Coral to Peach Ombre
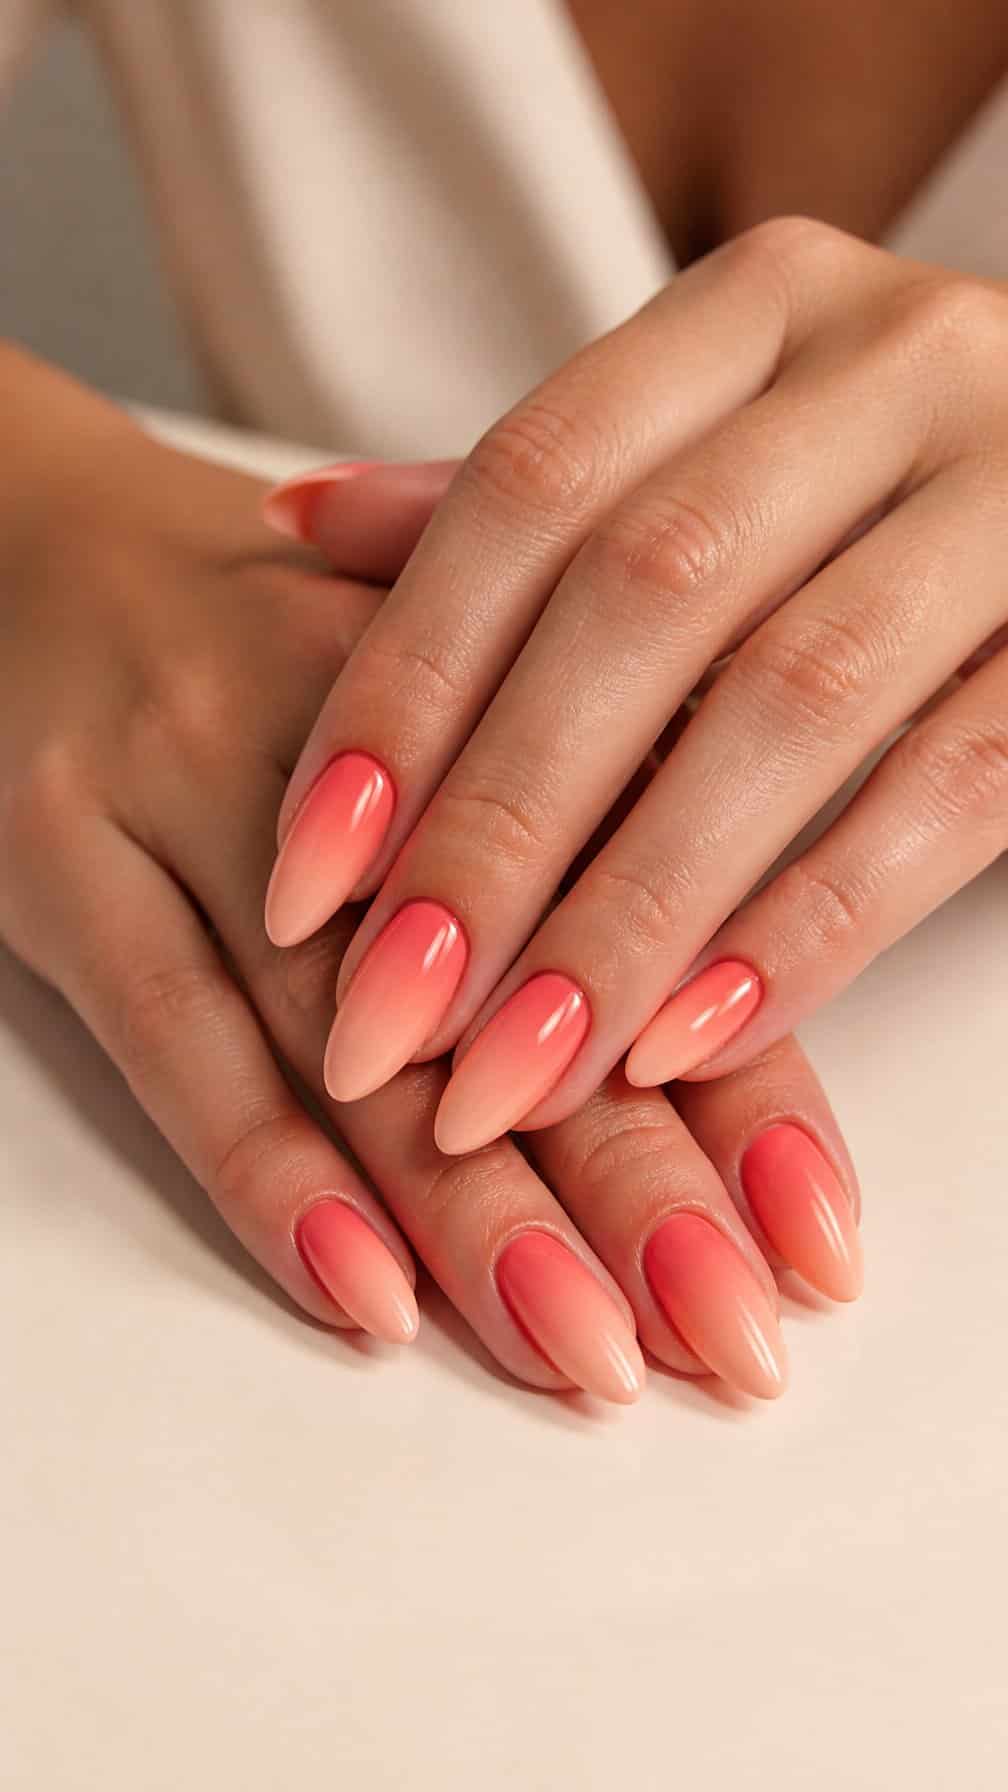
I like this gradient for its warm, polished color shift. Coral works well near the cuticle, while peach softens the tips into a lighter finish. The blend looks especially smooth on medium-length oval or almond nails.
I would use a sheer peach base and layer coral polish gradually with a makeup sponge. Thin coats help prevent a harsh line between the shades. A glossy topcoat intensifies the color and gives the manicure a clean, even surface.
For a softer look, I would choose pastel coral and muted peach. A fine gold detail on one or two nails can add definition without interrupting the gradient. Satin or matte topcoat creates a more understated finish.
10) Classic French Ombre
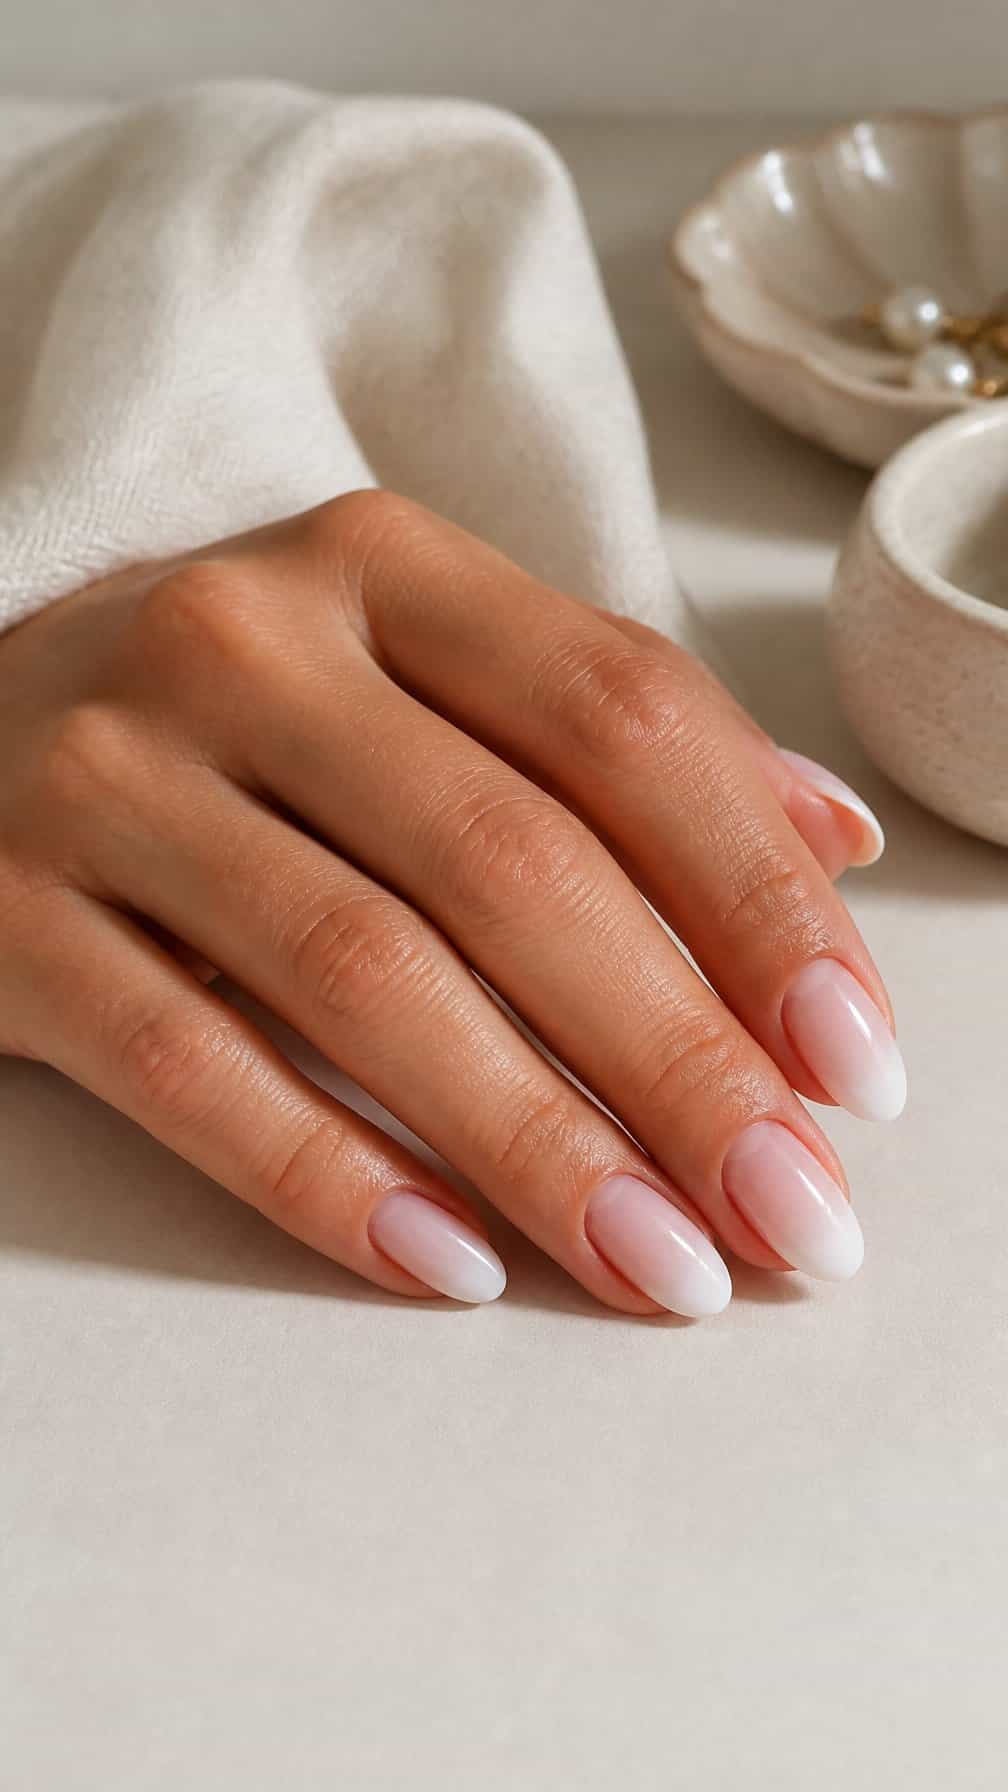
I use a sheer nude or soft pink base that gradually fades into crisp white tips, creating a gentle transition without a visible boundary. This design keeps the clean look of a French manicure while adding a softer, more blended finish.
I prefer a short or medium almond shape for this style because it supports the gradual color shift without overwhelming the nails. A glossy topcoat sharpens the white tips and gives the surface a smooth, polished appearance.
For a subtle variation, I choose a milky base and slightly off-white tips instead of stark white. The result looks understated and works well for weddings, professional settings, and everyday wear.
11) Pink Glitter Fade Ombre
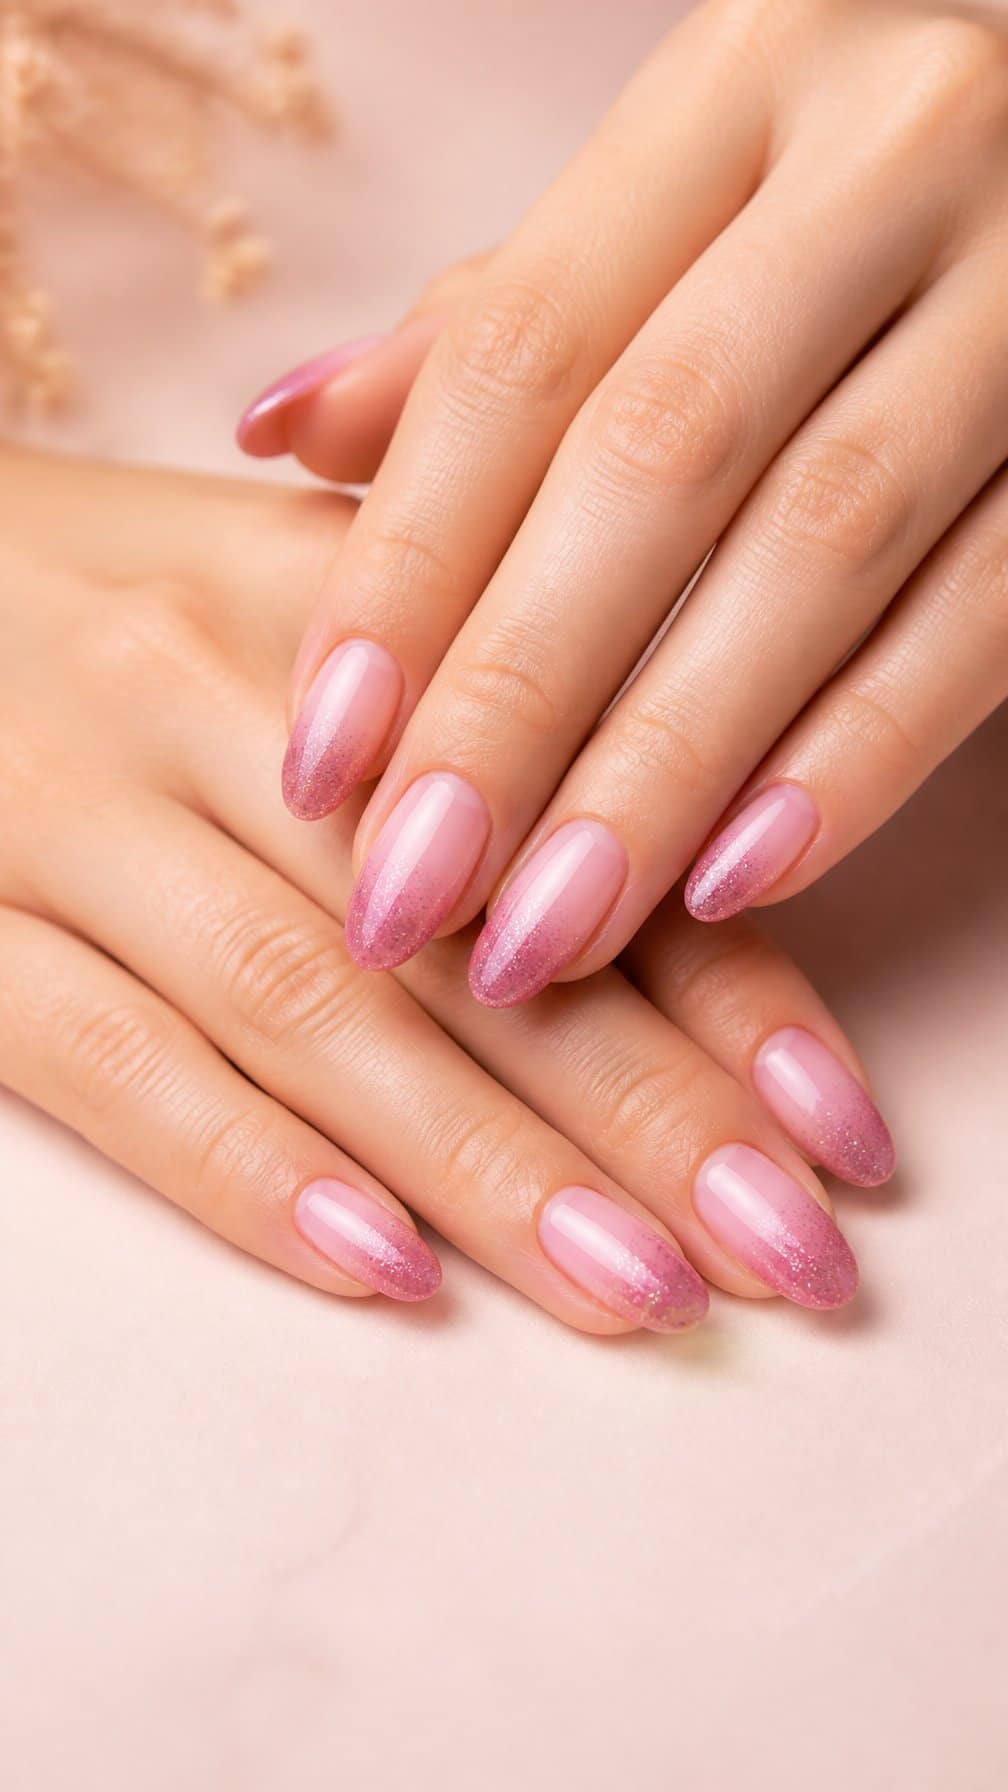
I start with a soft pink base and blend a lighter shade toward the tips for a smooth gradient. I add fine glitter over the upper half of each nail, concentrating it near the free edge so the fade remains visible.
I prefer a sheer, reflective glitter for this design because it adds texture without hiding the color transition. A glossy top coat smooths the surface and helps the pink tones look polished. Short almond or squoval nails work well with this balanced finish.
12) Champagne Shimmer Ombre
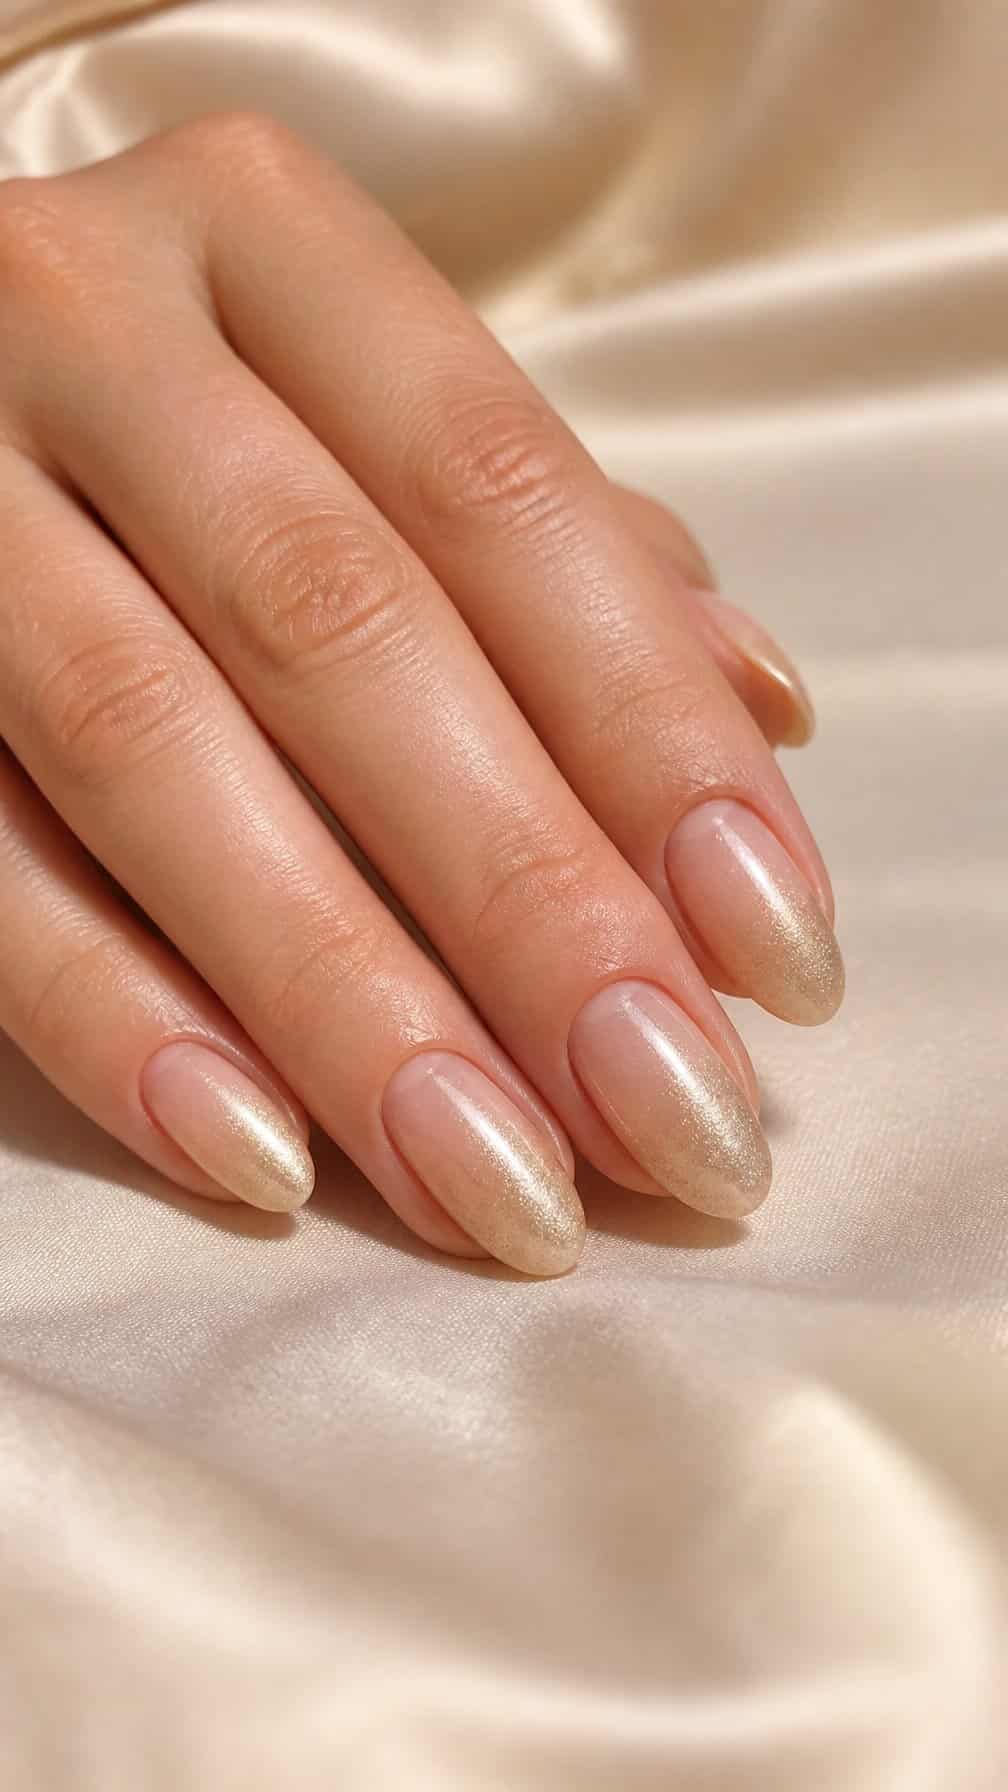
I like champagne shimmer ombre for its soft transition from a sheer nude base to warm, sparkling tips. The neutral color keeps the design polished, while fine glitter adds light without making the manicure look too bold.
I usually choose a short almond or rounded shape to keep the finish refined. A glossy top coat helps the shimmer catch light evenly and smooths the gradient across each nail.
For a more delicate result, I use a translucent beige near the cuticle and build the champagne glitter gradually toward the free edge. This technique creates a subtle fade that works well for weddings, celebrations, or everyday wear.
13) Rose Gold Ombre Tips
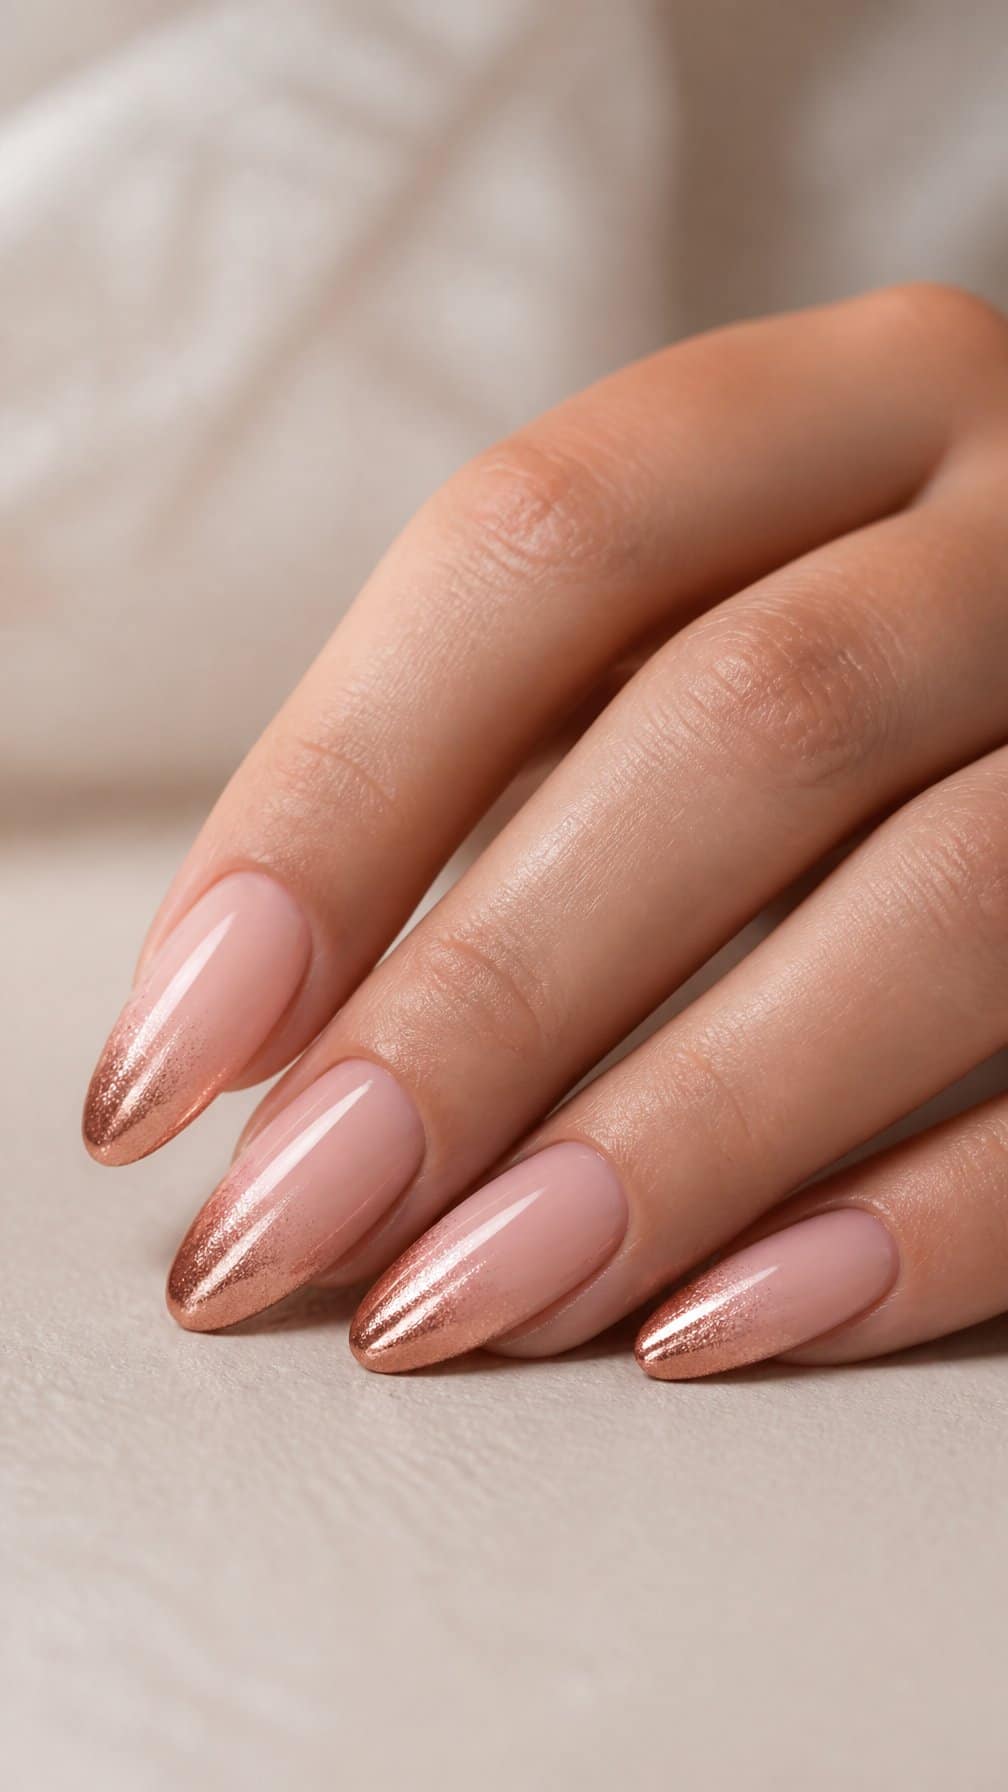
I like rose gold ombre tips for their soft metallic finish and refined color shift. I start with a sheer nude or blush base, then blend rose gold polish from the free edge toward the center of each nail. A fine glitter formula creates a smoother transition than chunky particles.
I keep the tips thin for a clean, modern look, especially on almond or coffin-shaped nails. A glossy topcoat helps level the surface and brings out the warm pink-gold tone without overpowering the base.
14) Silver Glitter Ombre
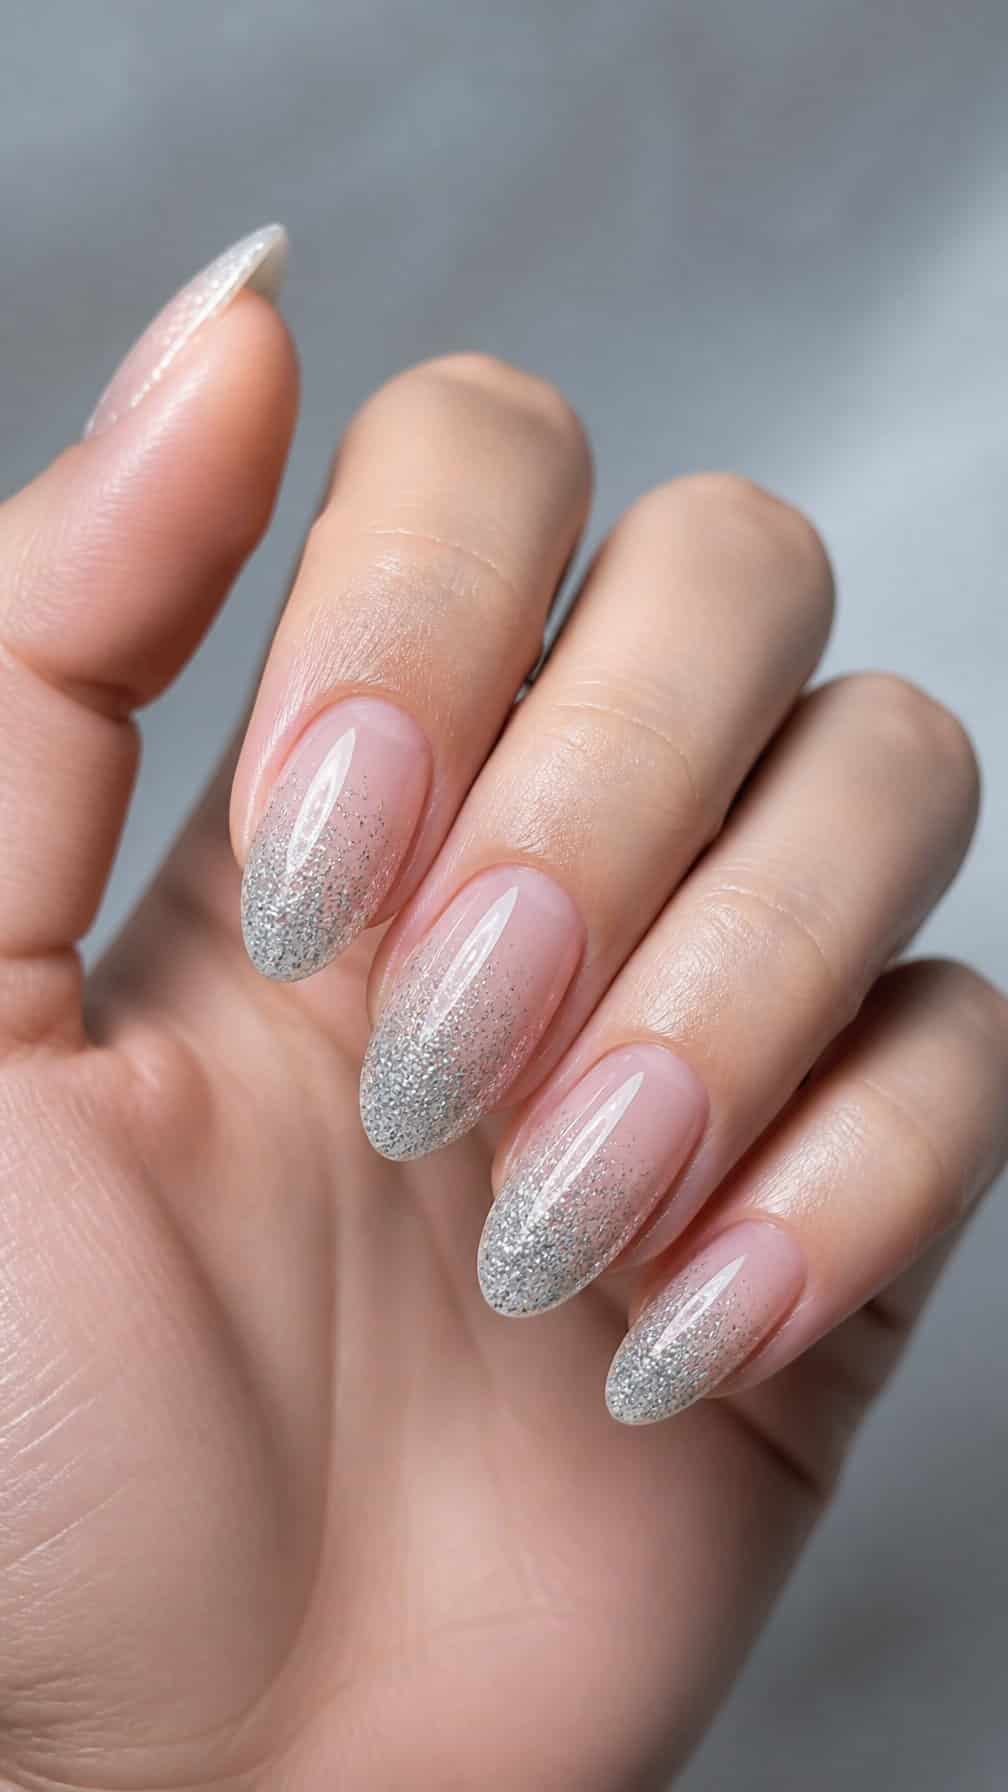
I like this design for its polished transition from a sheer or pale base into fine silver glitter at the tips. The gradual fade keeps the sparkle controlled, while the reflective finish adds definition under different lighting.
I would pair this look with a short almond, square, or coffin shape so the gradient remains visible without feeling crowded. A clear top coat smooths the glitter and helps create an even, glass-like surface.
For a softer result, I would use sparse glitter near the cuticle and build the coverage toward the free edge. A cool-toned nude base keeps the silver crisp, while a milky white base creates a brighter, winter-inspired finish.
15) Gold Chrome Ombre
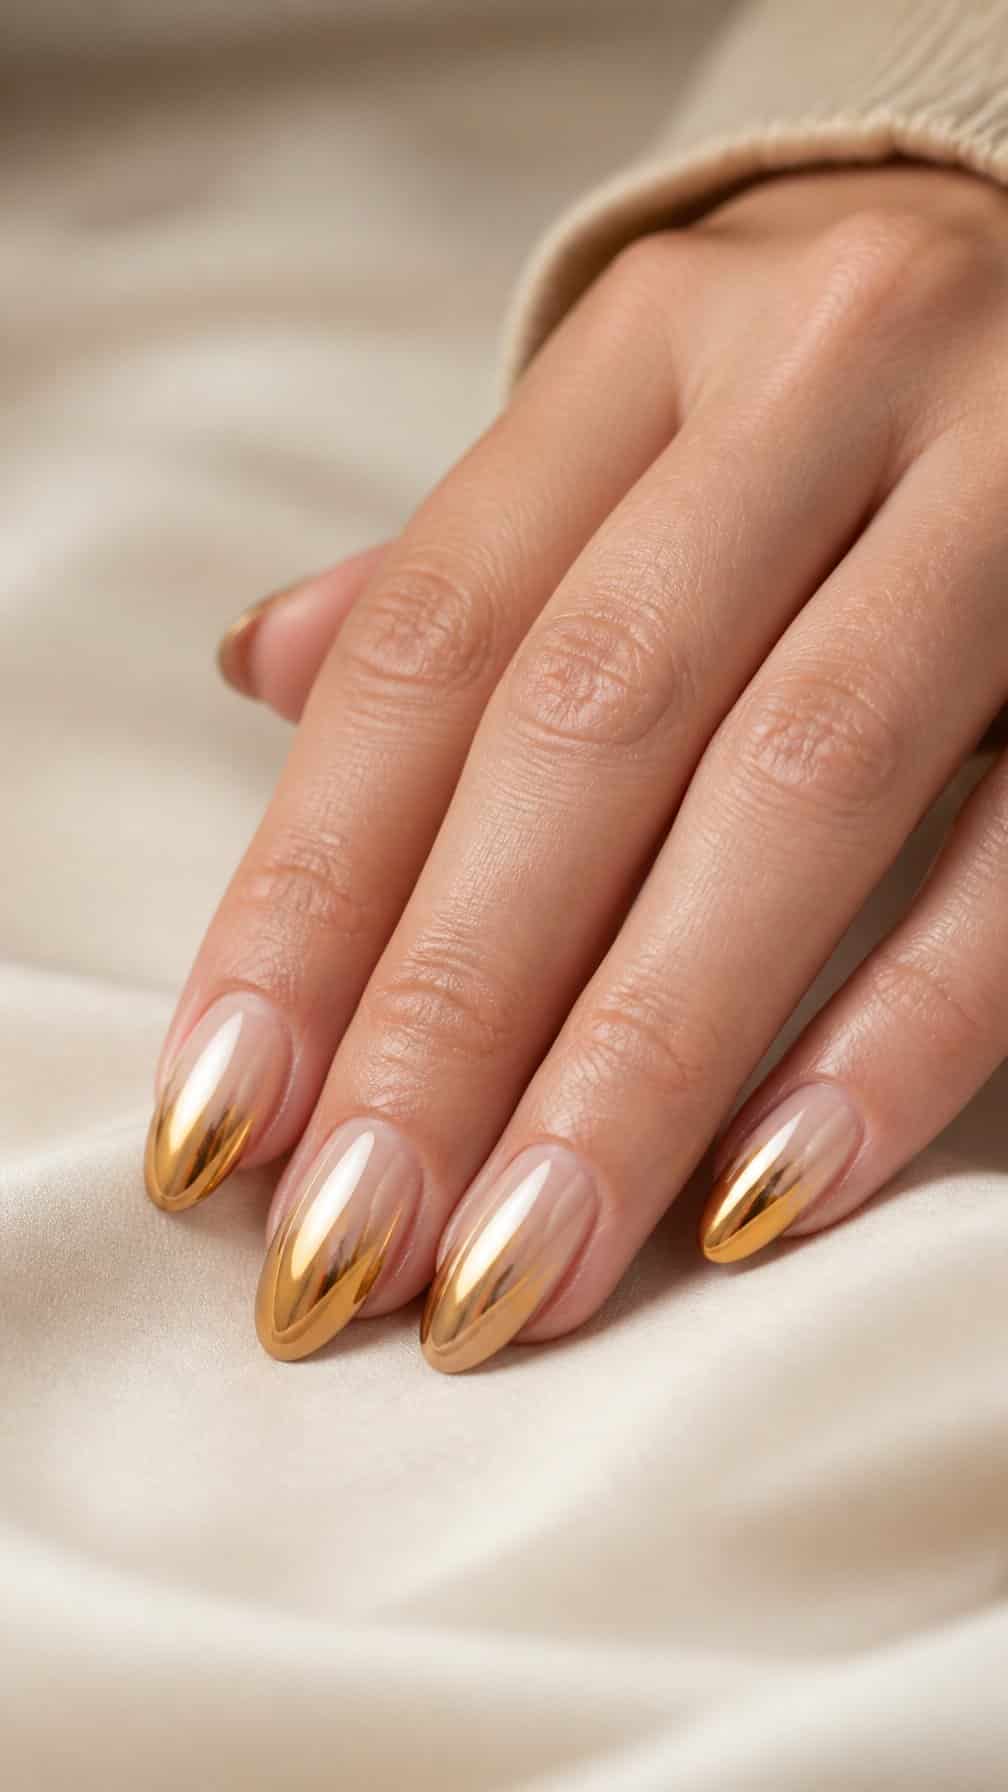
I like this design for its polished transition from a soft nude base to reflective gold at the tips. The gradual fade keeps the metallic finish refined rather than harsh, while the chrome effect catches light with every movement.
I would pair it with a short almond or medium coffin shape to give the color shift enough space to show clearly. A sheer beige or blush foundation works well beneath the gold, especially when I want the manicure to look warm and wearable.
I would finish with a smooth, high-shine top coat to protect the chrome surface and sharpen the gradient. Minimal jewelry complements the reflective tips without competing with the manicure.
16) Pearl Chrome Ombre
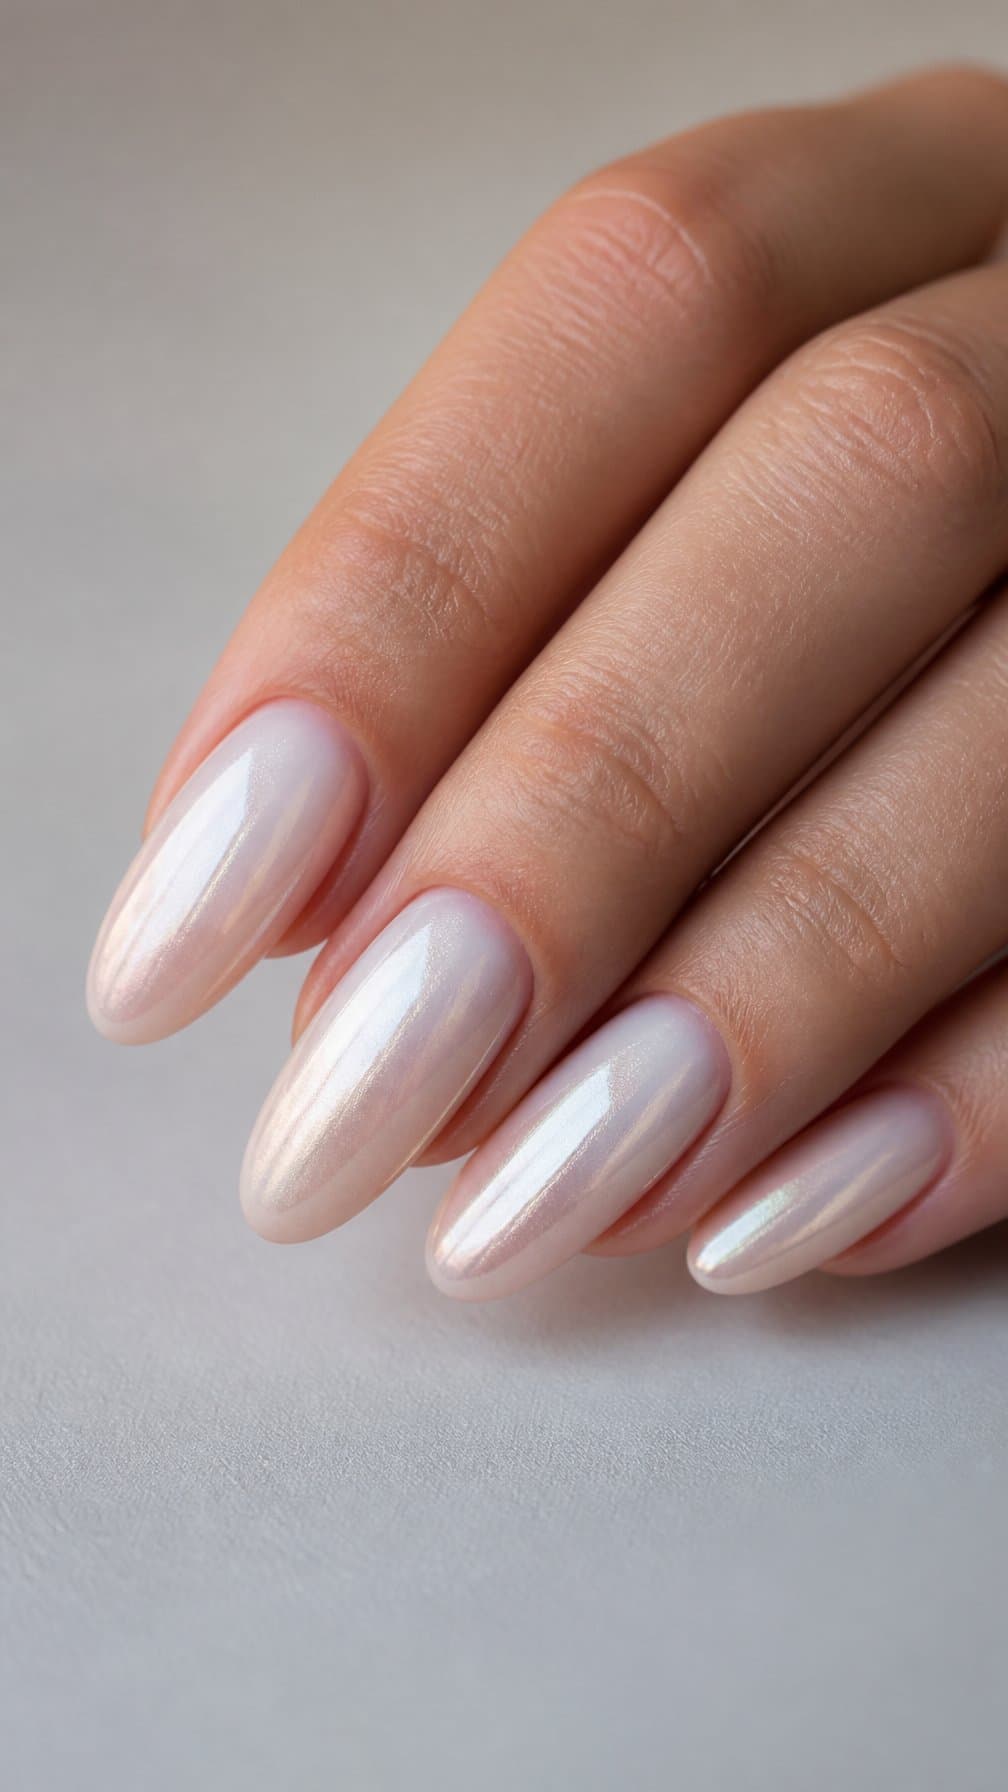
I like this design for its soft, reflective finish and gradual color shift. A sheer pink or milky nude base fades into a bright pearl chrome tip, creating a clean ombre effect without harsh contrast.
I would keep the shape medium-length and softly almond or squoval to let the finish remain refined. The chrome powder catches light along the tips, while the translucent base keeps the manicure delicate in natural lighting.
For a smoother blend, I would ask for a very thin layer of chrome near the center of each nail rather than a sharp tip boundary. A glossy top coat enhances the reflective surface and helps the gradient look seamless.
17) Vanilla Ombre with Micro-French Tips
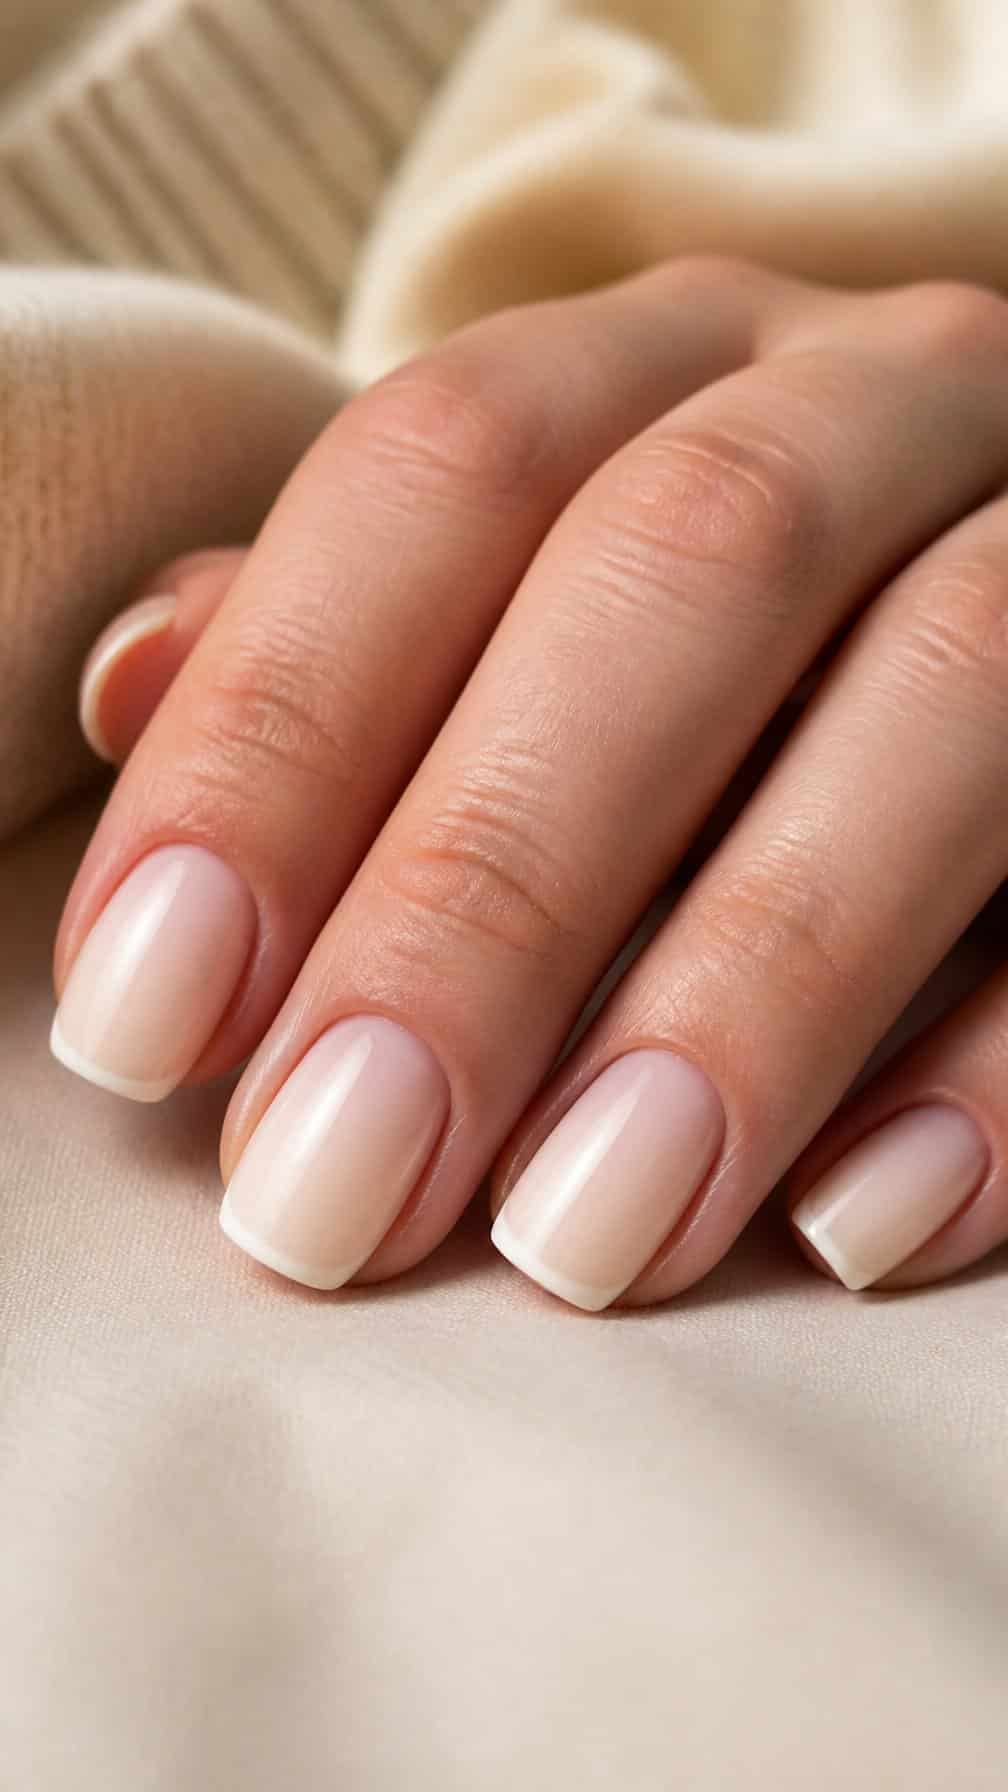
I like this vanilla ombre for its soft, polished finish. The creamy base fades into a sheer nude near the cuticle, creating gentle contrast without sharp color breaks. Its warm tone suits short, medium, and long nail shapes.
I would add micro-French tips in crisp white or a slightly deeper ivory. Keeping the lines extremely thin preserves the delicate look, while a glossy top coat smooths the gradient and defines the tips. Almond and squoval shapes work especially well because they give the design a clean outline.
18) Caramel Nude Ombre
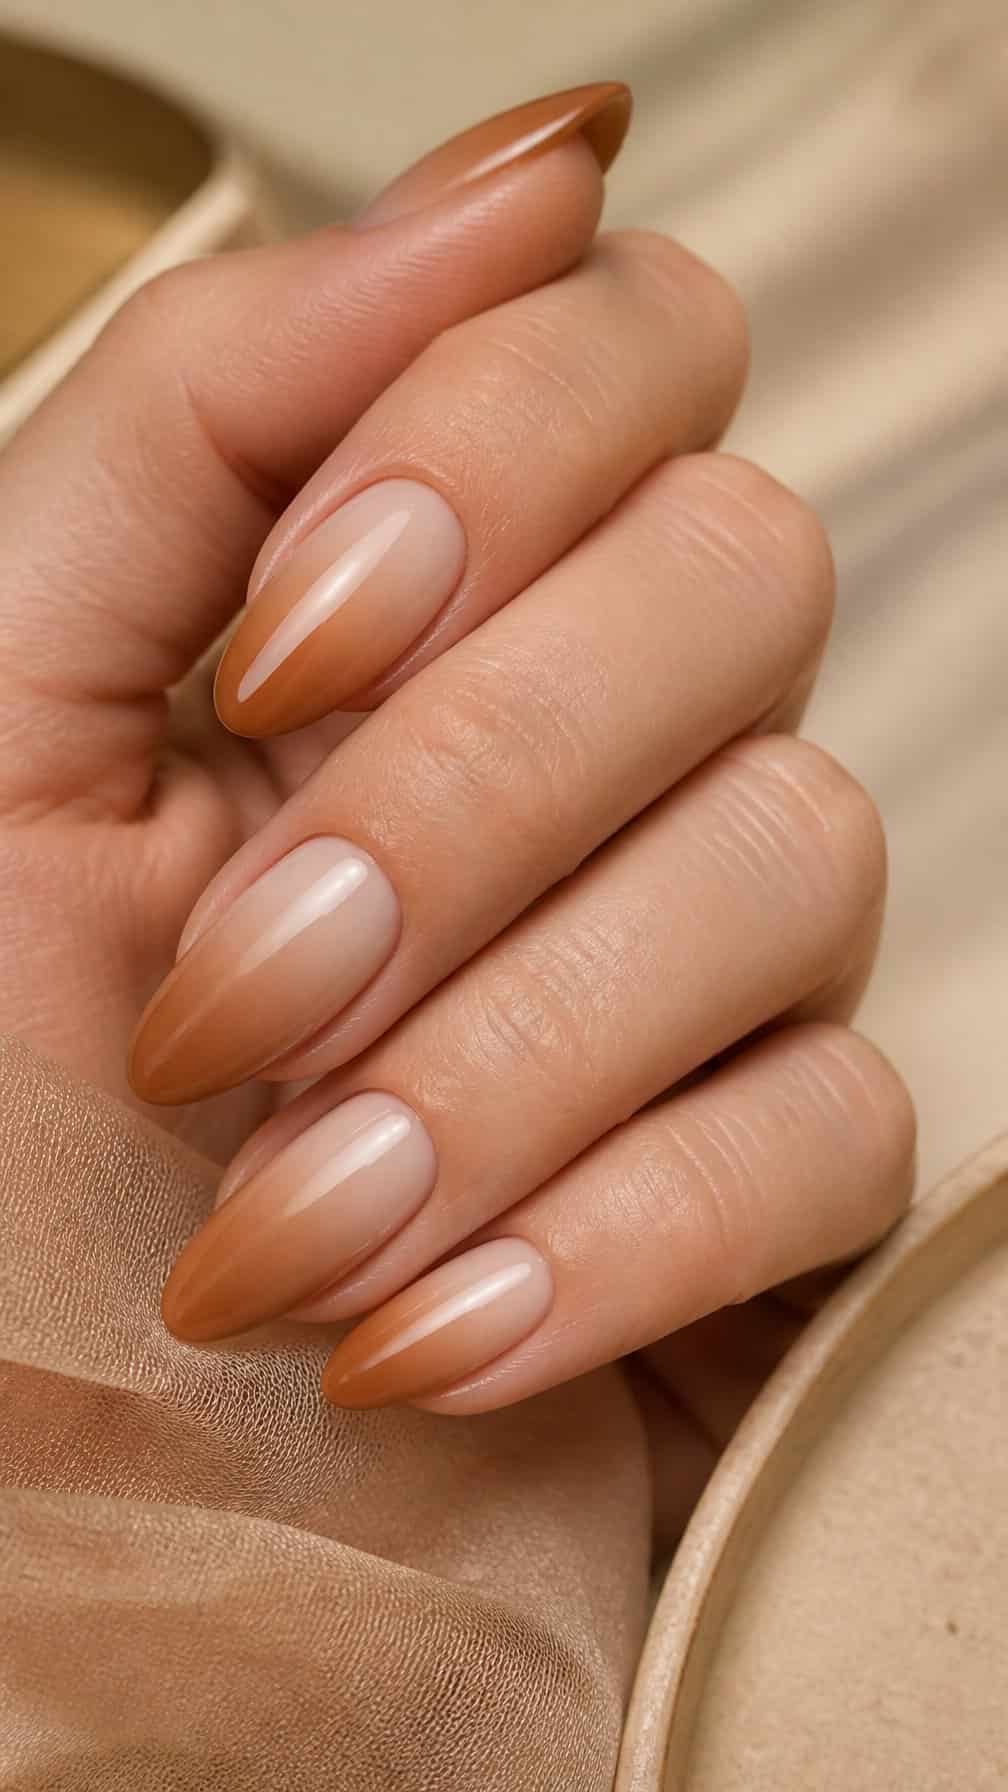
I like this caramel nude ombre for its soft, polished transition from a pale beige base to a warmer caramel tip. The gradual color shift keeps the design subtle while adding more depth than a single neutral shade.
I would pair this look with a short almond or medium coffin shape to keep the finish refined. A glossy topcoat highlights the blended tones, while a matte finish gives the manicure a smoother, understated appearance.
19) Mocha Brown to Cream Ombre
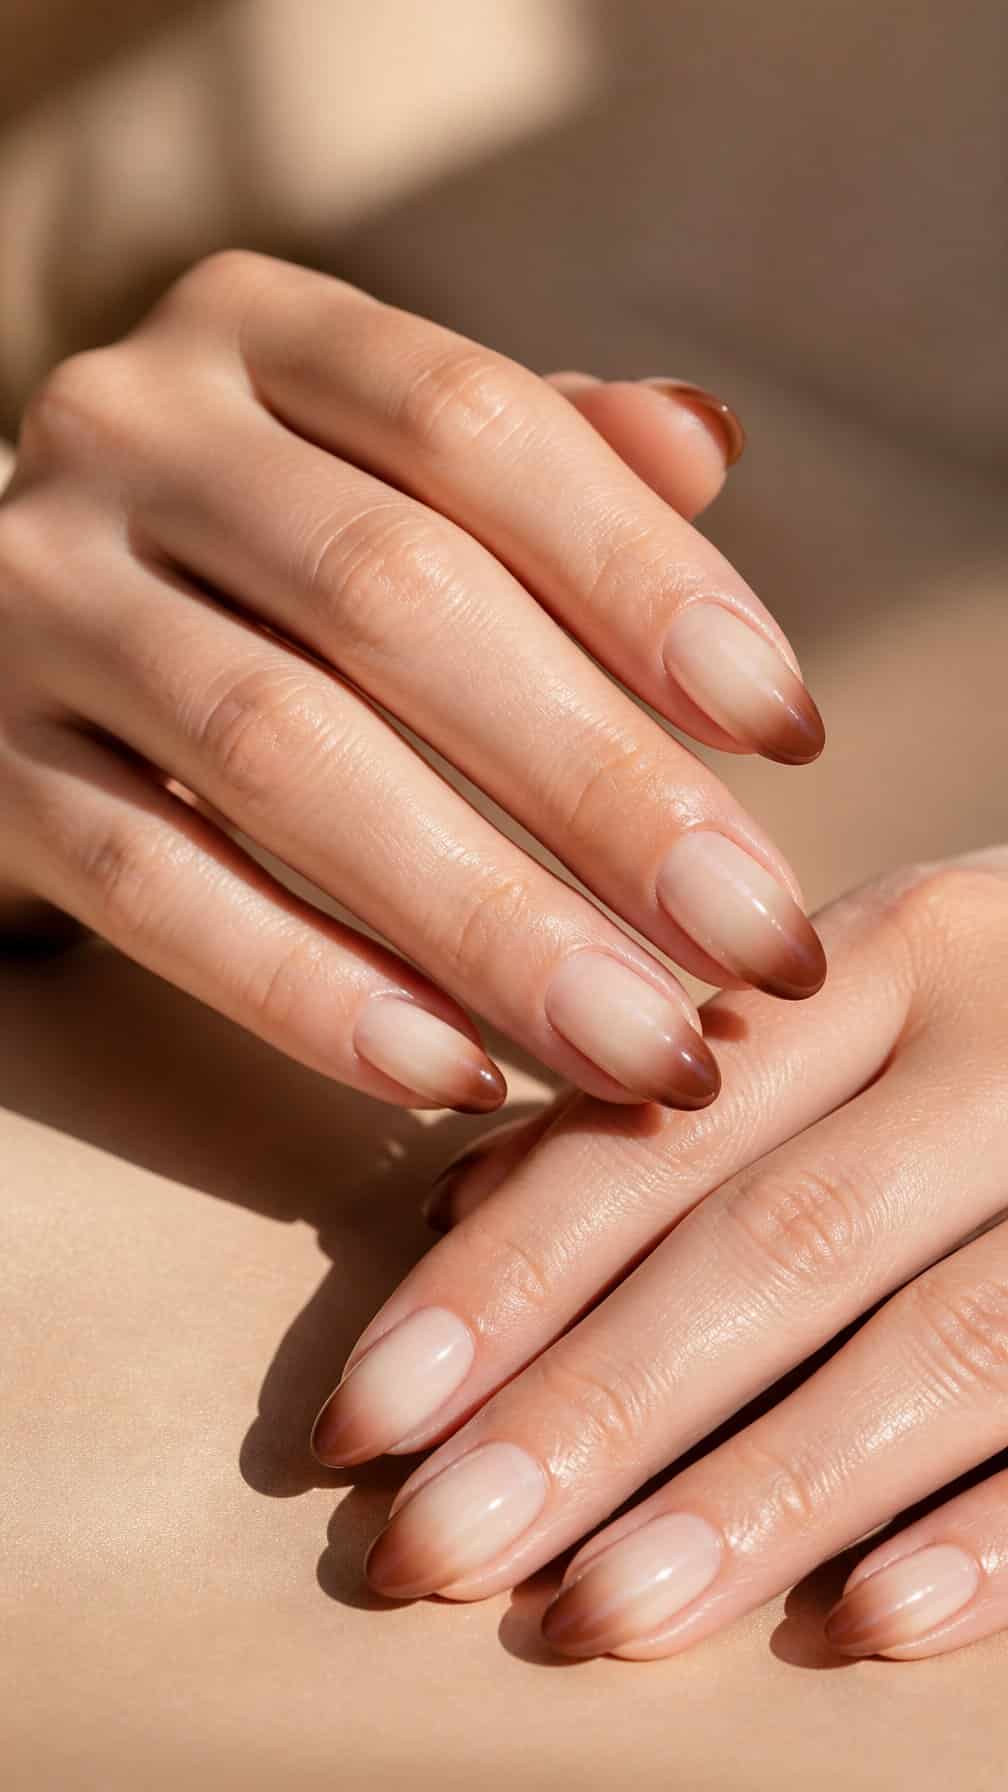
I like this gradient for its warm, understated contrast. Deep mocha brown covers the base, then fades into a soft cream at the tips, creating a smooth transition that suits both short and long nails.
I would keep the finish glossy to emphasize the tonal shift and make the cream ends look clean. A rounded or almond shape complements the gentle color flow, while a matte topcoat gives the design a softer, more modern appearance.
20) Cocoa to Beige Ombre
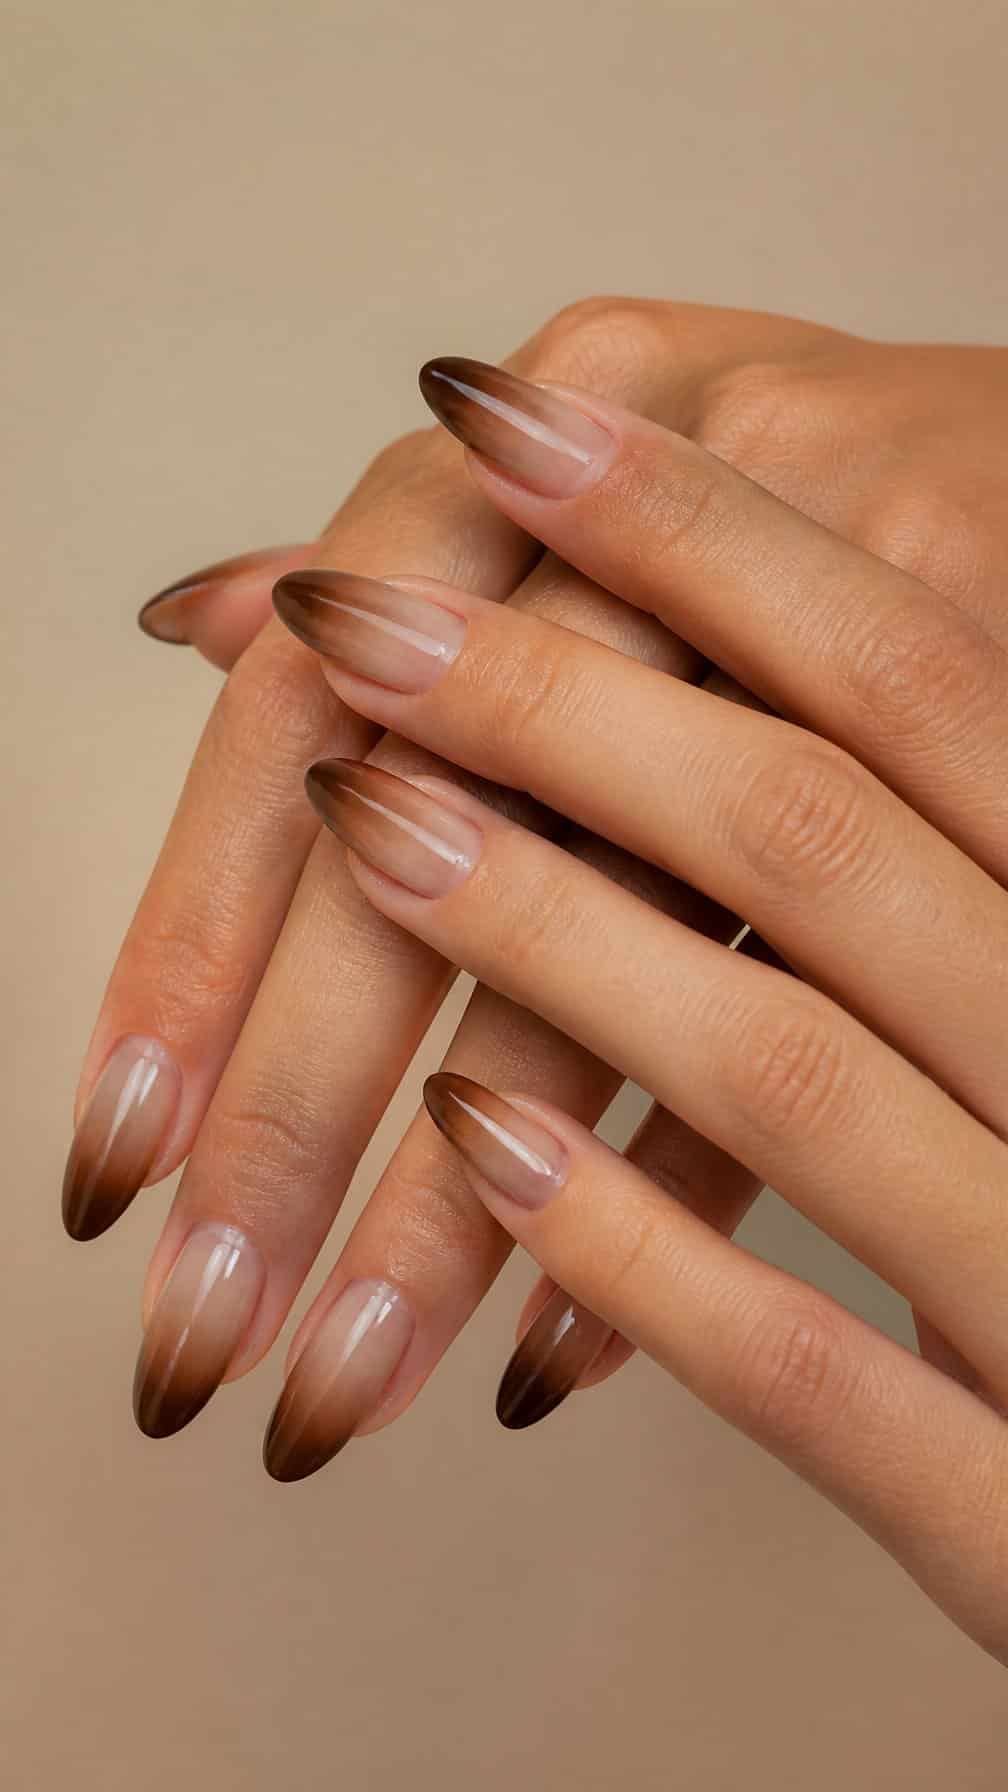
I like this cocoa-to-beige ombre for its soft contrast and adaptable color range. Deep cocoa starts near the cuticle and gradually fades into a warm beige at the tips, creating a polished gradient that suits both short and long nails.
I would choose a glossy topcoat to emphasize the smooth transition and make the beige look brighter. A rounded or almond shape keeps the design gentle, while a squared shape gives it a more structured appearance.
I find this palette especially suitable for autumn outfits, neutral wardrobes, and understated office manicures. Use thin layers and blend each shade before curing to prevent visible bands between the colors.
21) Terracotta to Nude Ombre
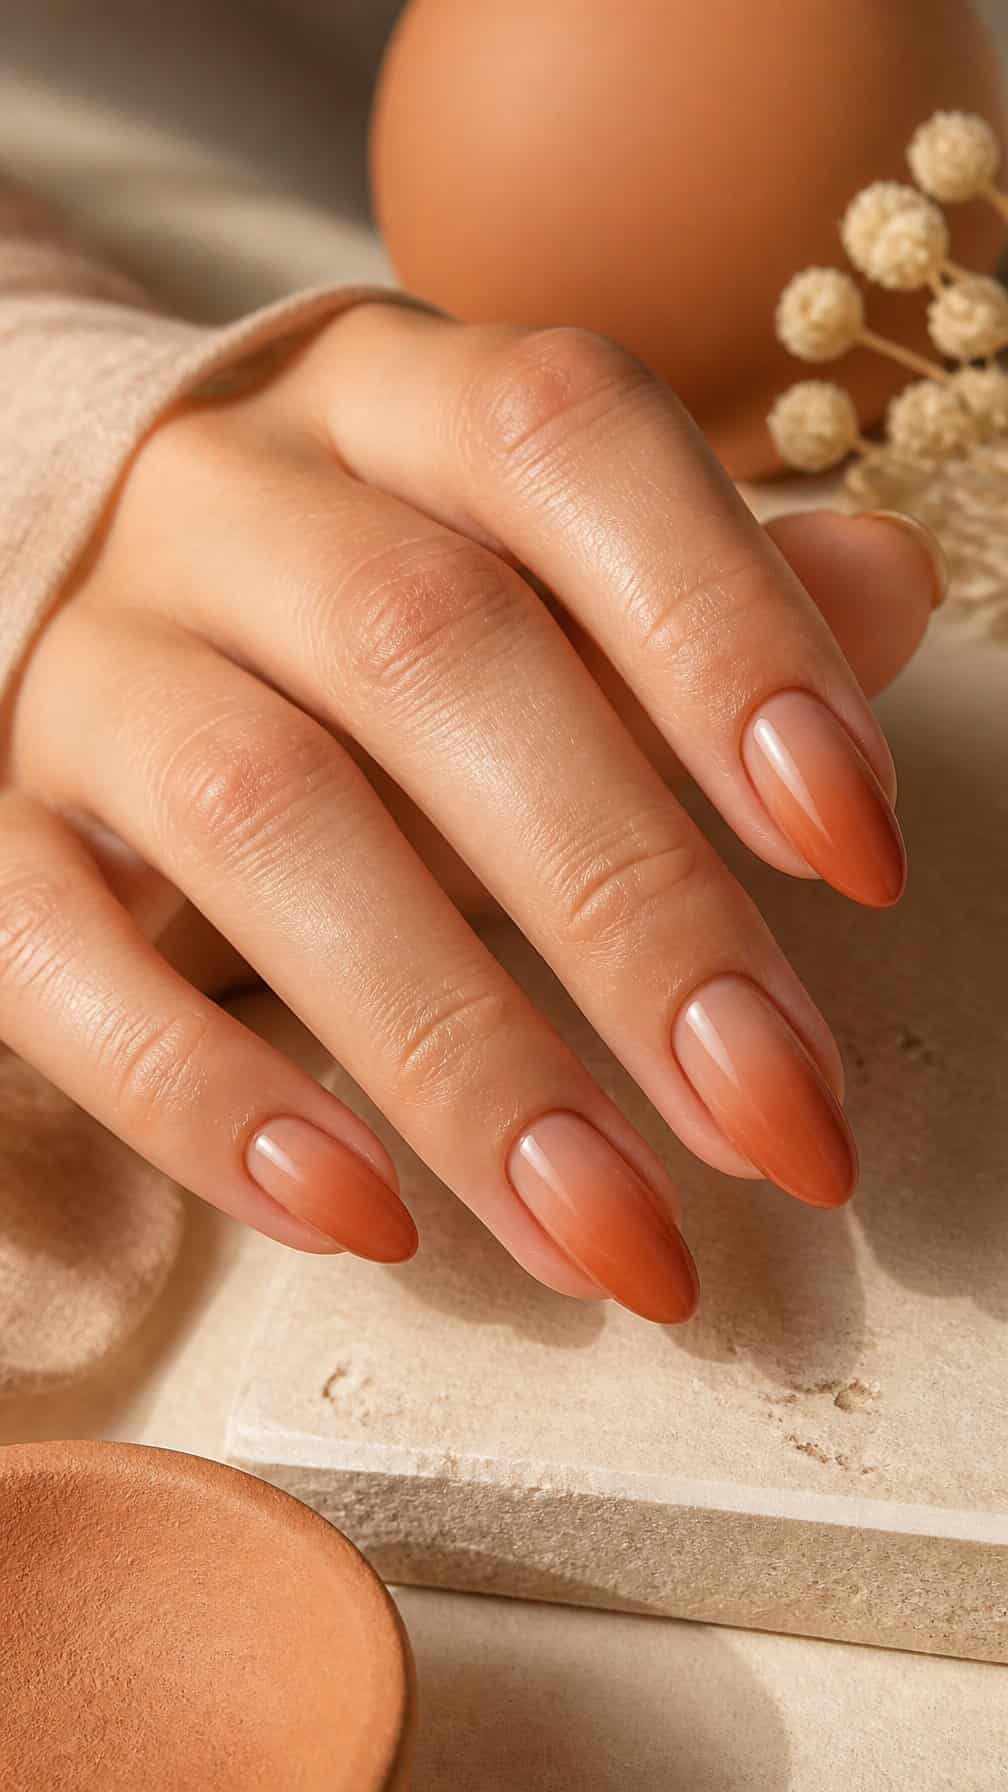
I like this warm ombre for its balanced transition from earthy terracotta at the tips to a soft nude near the cuticles. The muted palette feels polished without looking overly formal, and it suits both short, rounded nails and longer almond shapes.
I would keep the finish glossy to emphasize the color shift and make the terracotta look richer. A thin, even application helps prevent the darker shade from appearing heavy, while a clean cuticle line keeps the design refined.
22) Burgundy to Blush Ombre
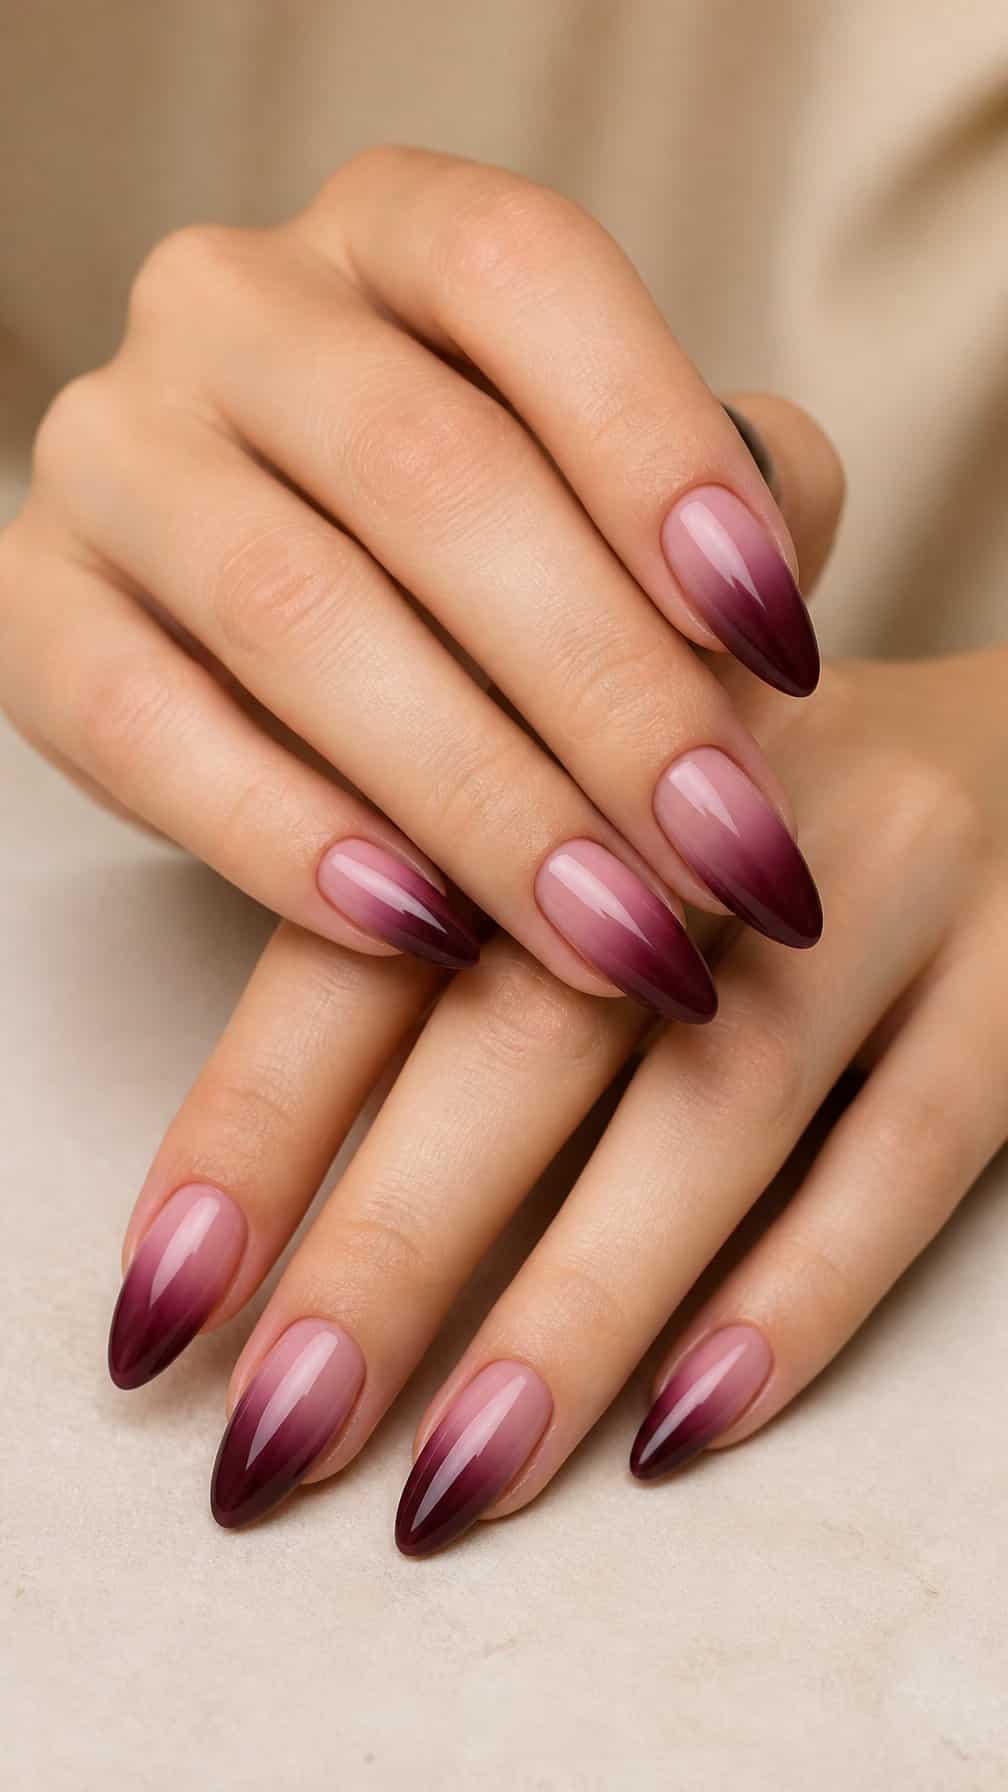
I like this gradient for its balanced shift from deep burgundy at the tips to soft blush near the cuticles. The darker end adds definition, while the pale base keeps the manicure light enough for everyday wear.
I would use a fine sponge or airbrush technique to soften the transition and prevent harsh bands between shades. A glossy top coat enhances the color change, while a short almond or rounded shape keeps the design polished and practical.
For added detail, I might place a few tiny gold accents near the fade or leave the surface completely minimal. This combination works well across seasons because it pairs a rich wine tone with a restrained pink finish.
23) Berry Pink to Pale Pink Ombre
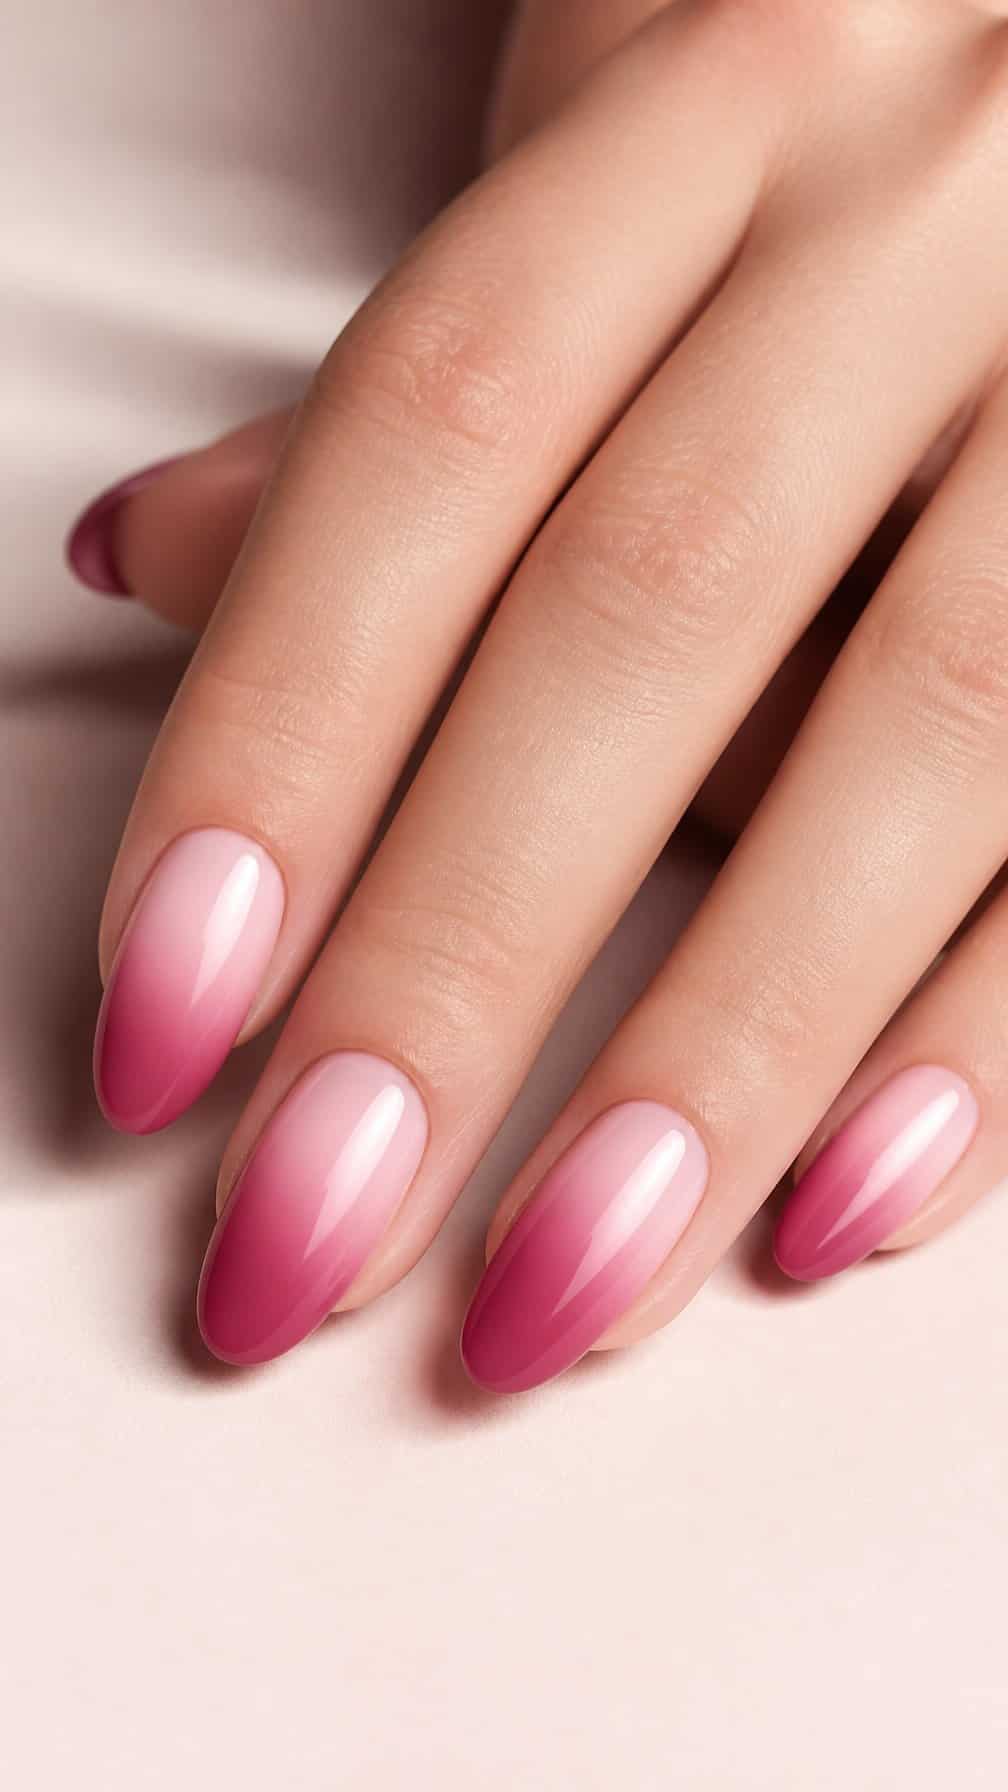
I like this gradient for its clean transition from a saturated berry shade at the tips to soft pale pink near the cuticles. The color shift adds depth while keeping the manicure polished and wearable.
I would use a fine sponge or an airbrush to blend the shades, then apply a glossy top coat to smooth the surface. Short, rounded nails make the gradient look delicate, while almond or coffin shapes give it a more defined finish.
24) Plum to Lavender Ombre
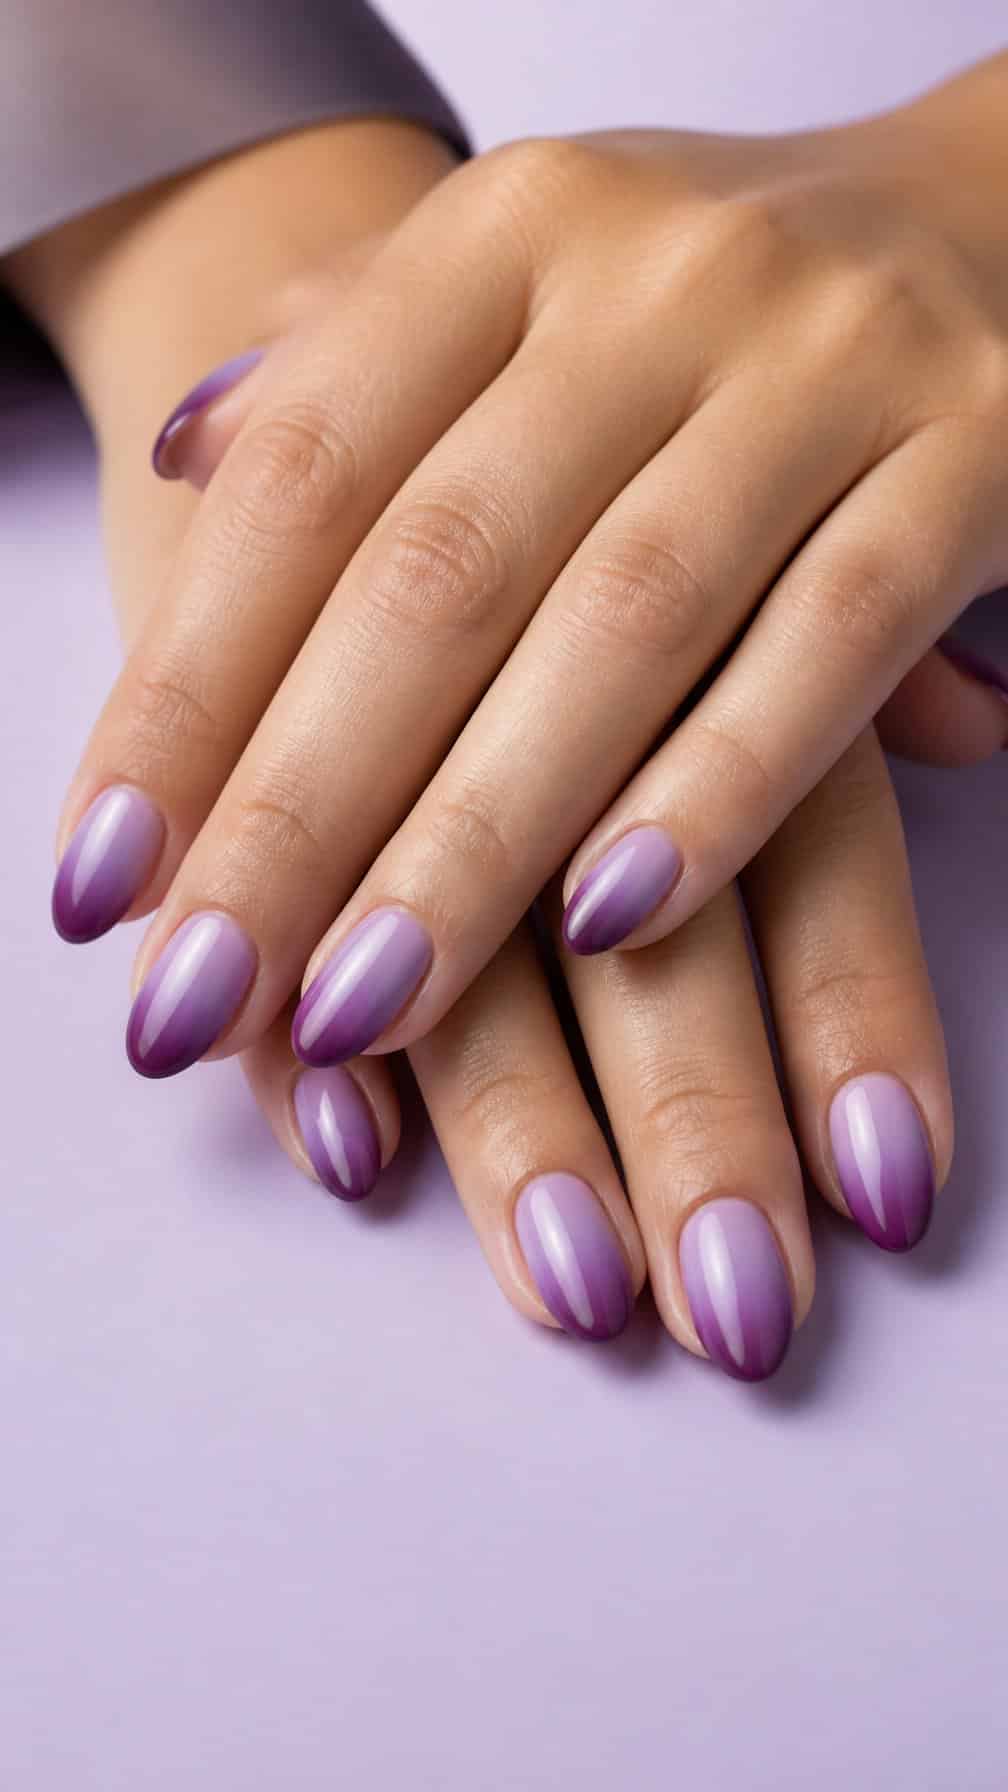
I like this plum-to-lavender ombre for its balanced shift from deep, muted color to a softer pastel finish. I would keep the darkest shade near the cuticle and blend lavender toward the tips, creating a smooth gradient that suits almond, coffin, or square nails.
A glossy topcoat brings out the color transition and helps the lighter end look clean. I would pair this design with minimal jewelry and neutral clothing so the purple tones remain the main focus. For a softer effect, I would use a milky lavender; for more contrast, I would choose a cooler, gray-toned shade.
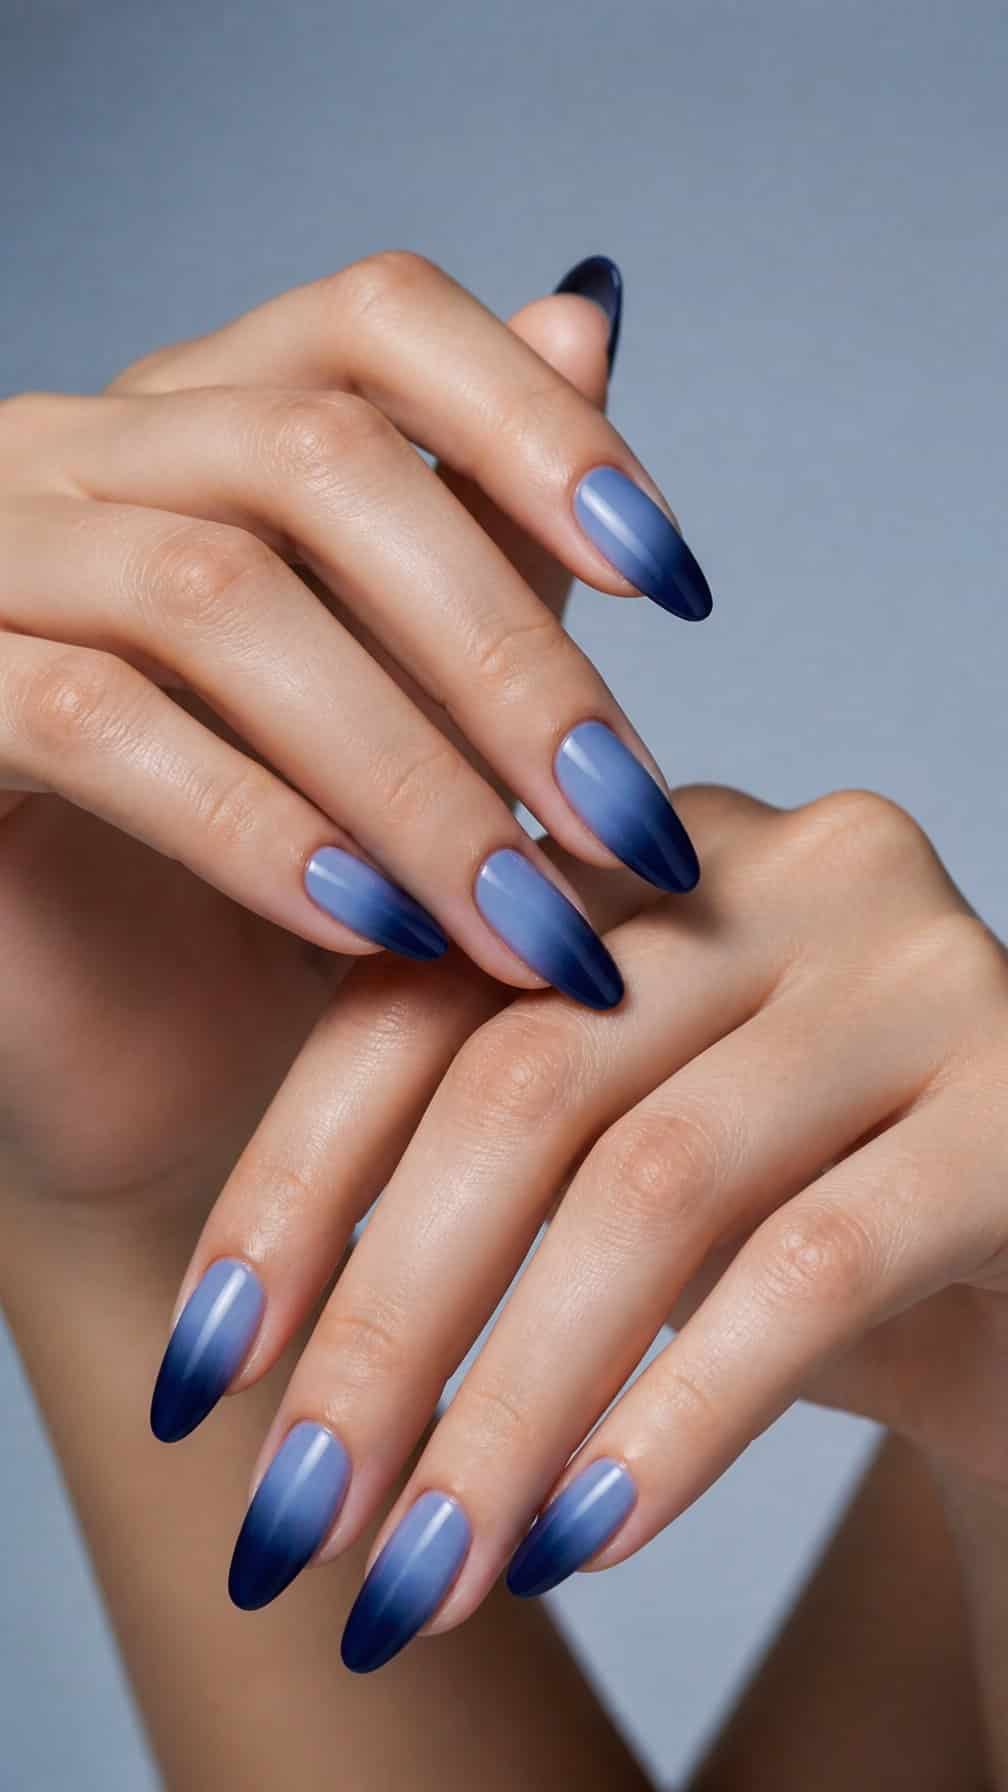
I like this navy-to-baby-blue gradient for its clean contrast and balanced color shift. The darker polish creates definition near the base or tip, while the pale blue keeps the design light and wearable.
I would use a short almond or squoval shape to keep the look polished. A glossy topcoat helps the shades blend smoothly and gives the lighter blue a fresh finish.
For added detail, I might apply a thin layer of fine silver shimmer over the gradient. I would keep the accent subtle so it enhances the color transition without hiding it.
26) Teal to Mint Ombre
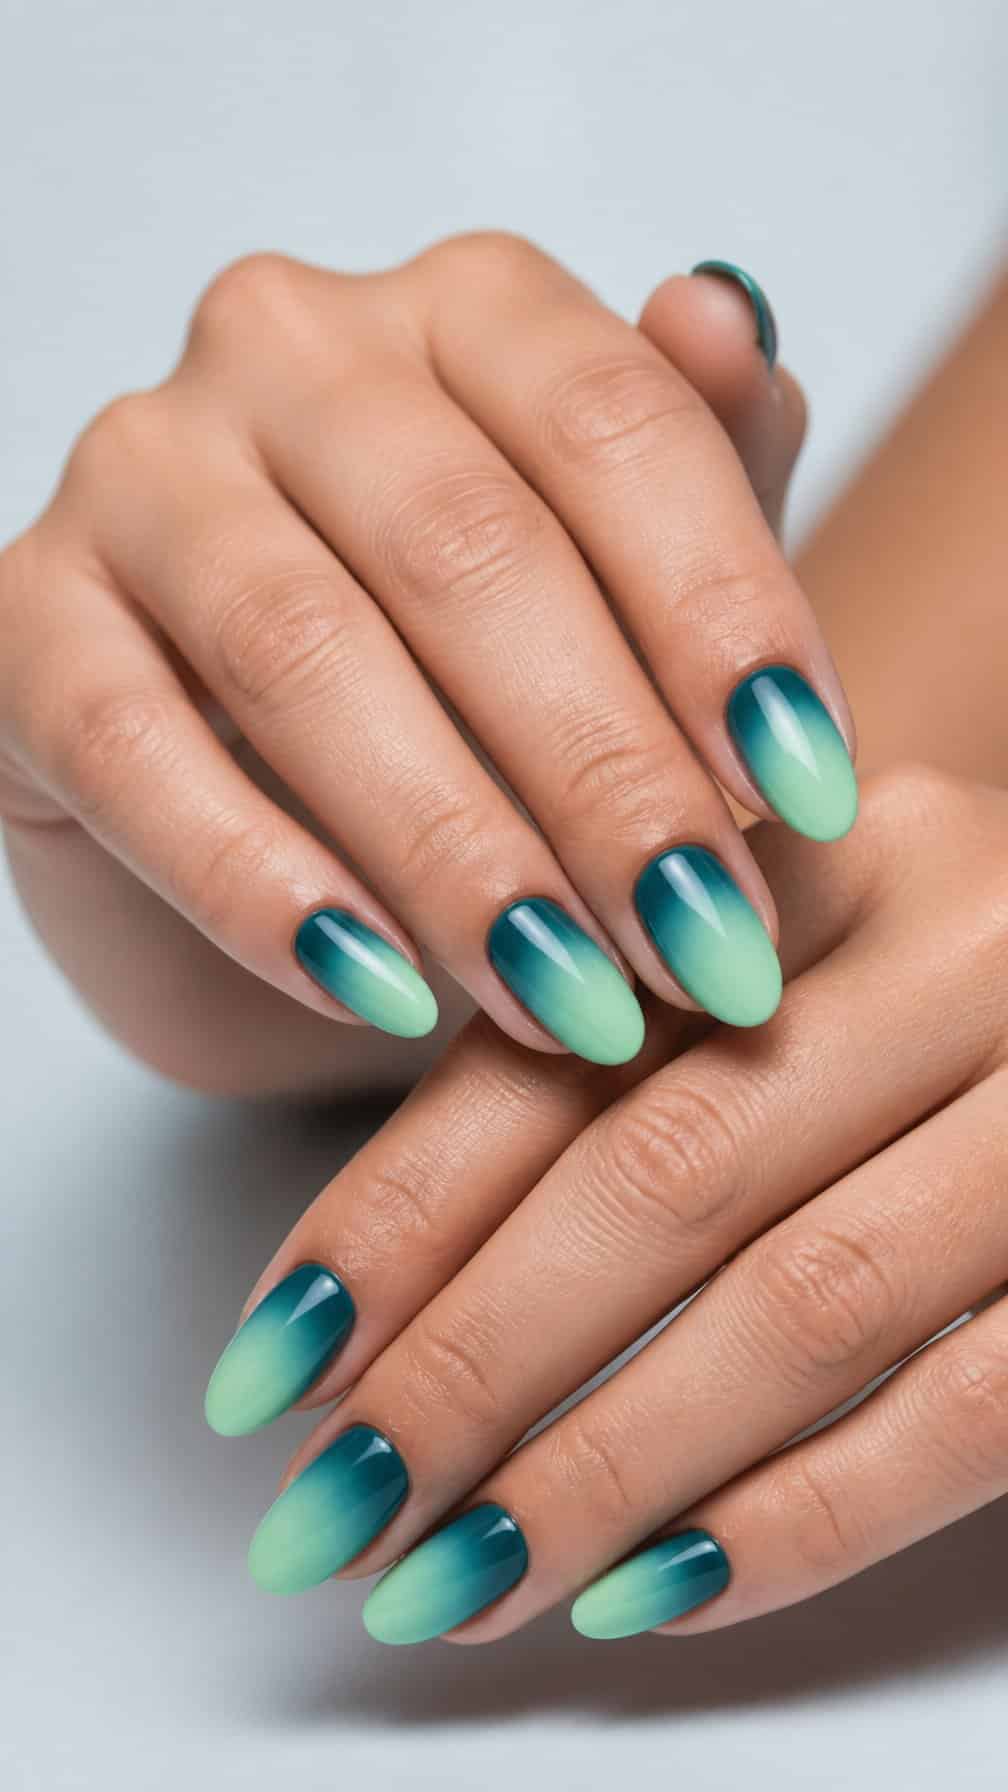
I like this teal-to-mint blend for its clean transition from a deeper blue-green base to a pale, fresh tip. The gradient looks especially smooth on medium or long almond nails, where each shade has enough space to show clearly.
I would use a glossy finish to emphasize the color shift, or choose a matte topcoat for a softer effect. A thin white accent line on one or two nails can define the gradient without competing with it.
For a more polished set, I would keep the shape consistent and match the mint tip across every nail. This design suits casual outfits but also works well with simple silver jewelry.


