
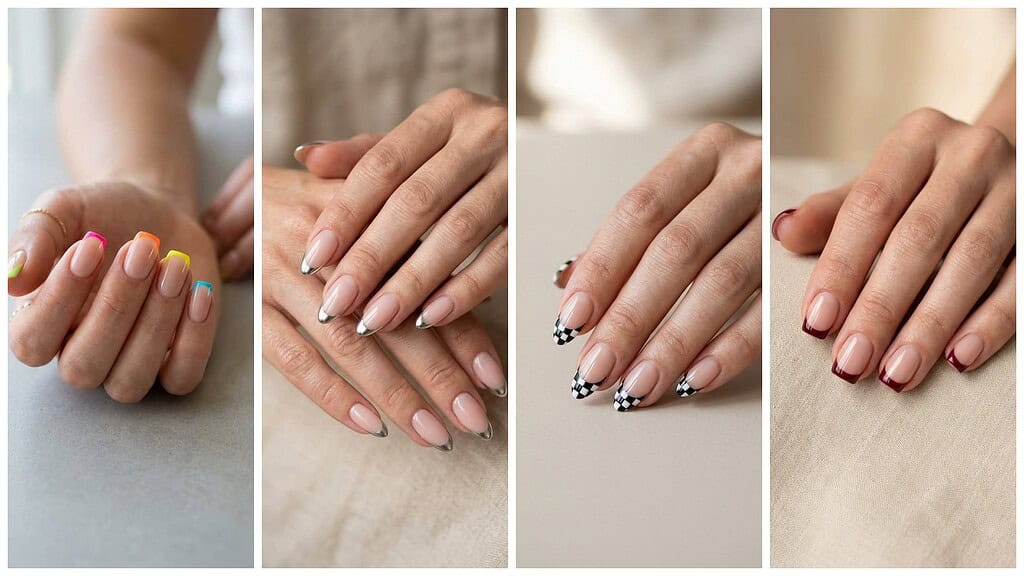
French tips can look polished without feeling predictable. I’m exploring fresh ways to update the classic design through color, texture, finish, shape, and small decorative details, so you can find inspiration that suits your personal style.
Save for later
Want to come back to this story? Save it with your email so it is easy to find again.
You can make French tips feel modern by changing the palette, placement, finish, or nail shape while keeping their clean structure. I’ll also cover how to choose a design that fits your manicure preferences and how to help the finished look last.
Table of Contents
- 1 1) Micro French tips in alternating neon colors
- 2 2) Chrome silver French tips on sheer pink
- 3 3) Black-and-white checkerboard French tips
- 4 4) Tortoiseshell French tips with caramel accents
- 5 5) Pastel rainbow French tips on almond nails
- 6 6) Glazed pearl French tips with a chrome finish
- 7 7) Deep burgundy French tips on short square nails
- 8 8) Mismatched jewel-tone French tips
- 9 9) Double-line French tips in black and gold
- 10 10) Lavender French tips with tiny white flowers
- 11 11) Metallic gold French tips with nude polish
- 12 12) Matte black French tips with glossy outlines
- 13 13) Blue-and-white wave French tips
- 14 14) Cow-print French tips in chocolate brown
- 15 15) Rose-gold French tips with glitter edges
- 16 16) Green aura French tips on sheer nude nails
- 17 17) Reverse French tips in cobalt blue
- 18 18) Flame-shaped French tips in orange and red
- 19 19) Velvet cat-eye French tips
- 20 20) Sage green French tips with gold foil
- 21 21) Negative-space French tips with geometric corners
- 22 22) Strawberry French tips with tiny seeds
- 23 23) Iridescent unicorn French tips
- 24 24) Navy French tips with silver stars
- 25 25) Peach ombré French tips
1) Micro French tips in alternating neon colors
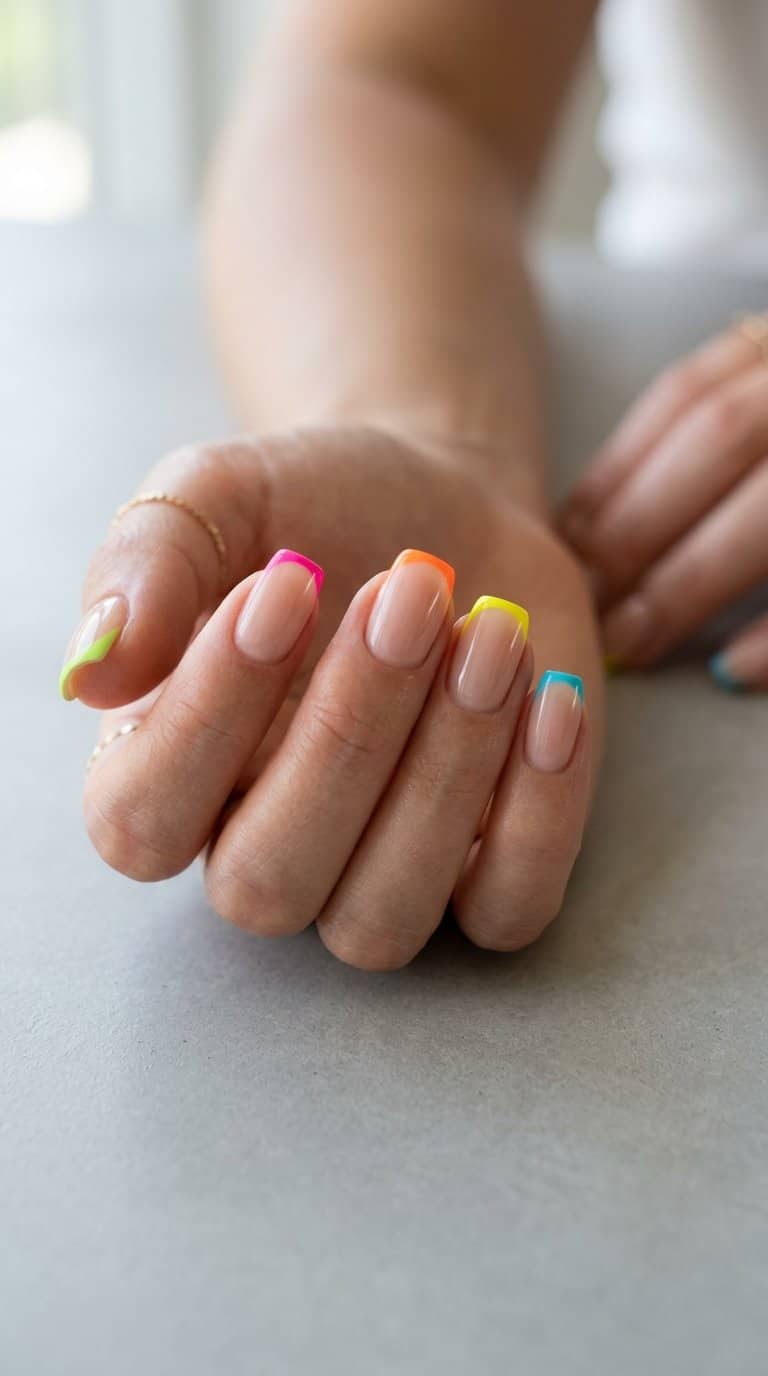
I keep the base sheer and let each nail carry a different neon shade, such as lime, coral, electric blue, or pink. A fine brush creates the narrow French line without overpowering the short length or natural shape of the nail.
I prefer alternating colors in a consistent order across both hands, rather than matching every nail randomly. A glossy topcoat sharpens the contrast, while a soft matte finish gives the bright tips a more muted, modern appearance.
2) Chrome silver French tips on sheer pink
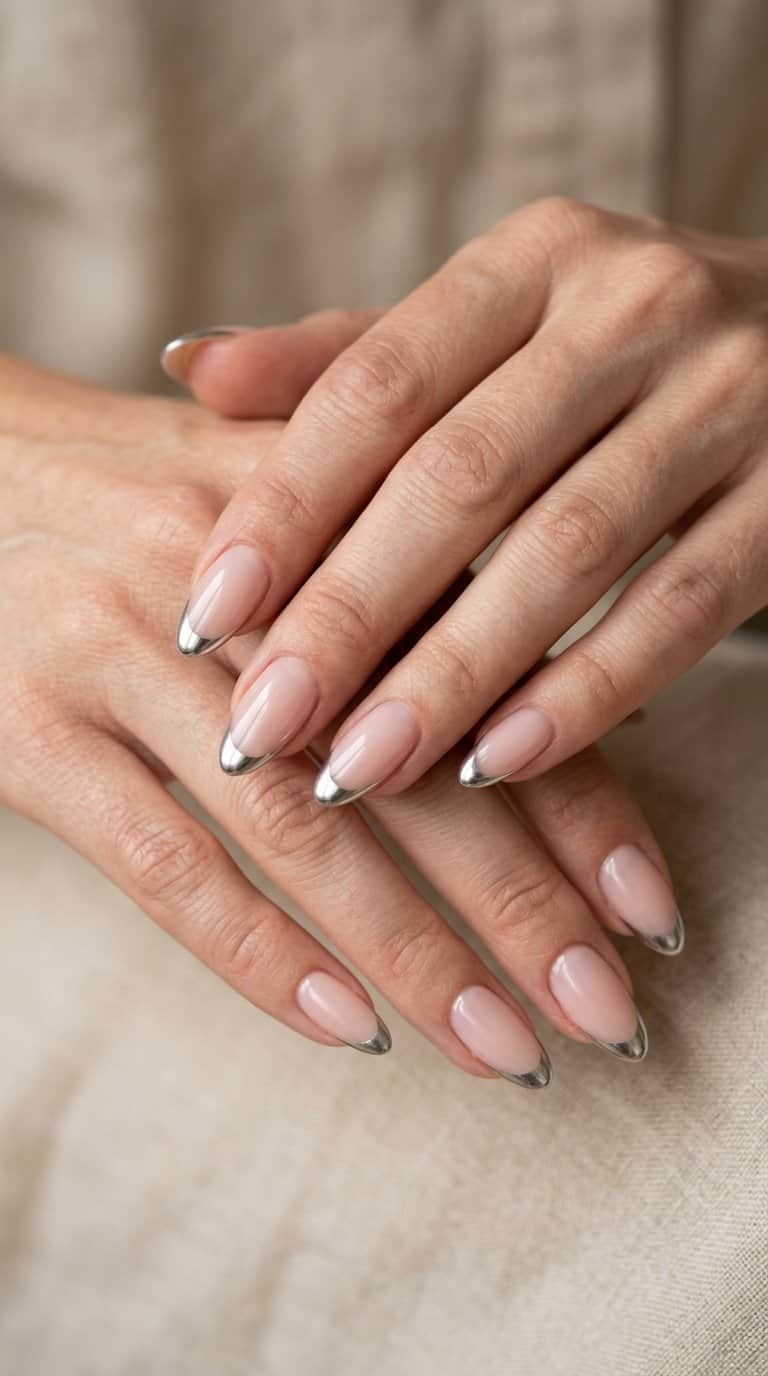
I like this combination for its clean contrast: a translucent pink base keeps the manicure soft, while chrome silver tips add a reflective finish. I keep the tips thin and evenly curved so the metallic detail looks polished rather than heavy.
A short or medium almond shape suits this design particularly well, though square nails also create a crisp edge. I prefer a glossy topcoat to enhance the chrome effect and protect the sheer base from looking dull.
For a more delicate result, I would use a narrow silver line beneath the tips or add one tiny rhinestone near the cuticle. These small details maintain the classic French structure without making the manicure feel plain.
3) Black-and-white checkerboard French tips
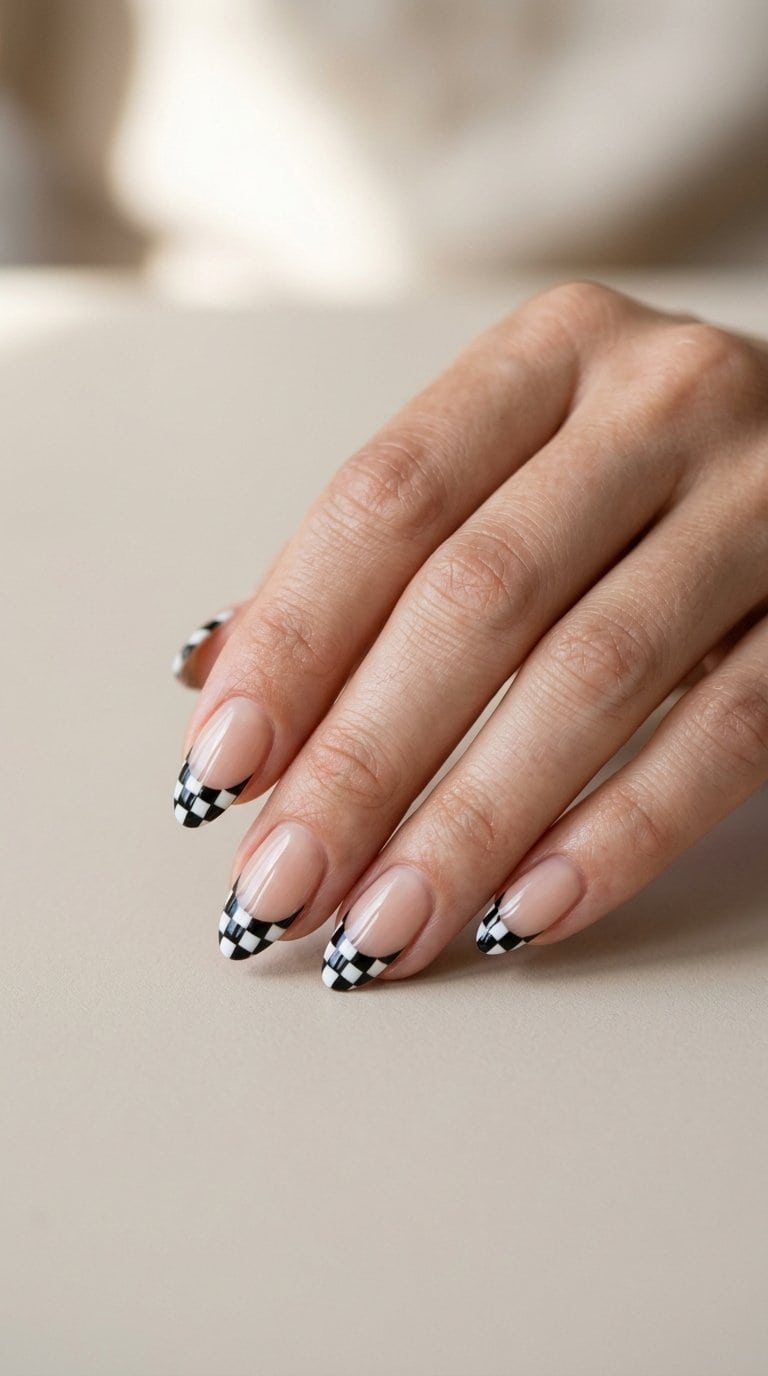
I like checkerboard French tips because the pattern adds structure without covering the entire nail. I would keep the base sheer or pale pink, then paint alternating black and white squares along each tip. A thin outline can sharpen the design, while a glossy topcoat helps the contrasting colors look clean.
For a softer version, I would use smaller squares and slightly rounded edges rather than sharp corners. I could also vary the checkerboard placement across the nails, keeping two or three tips fully patterned and using partial blocks on the others. This creates contrast while preserving the classic French-tip shape.
4) Tortoiseshell French tips with caramel accents
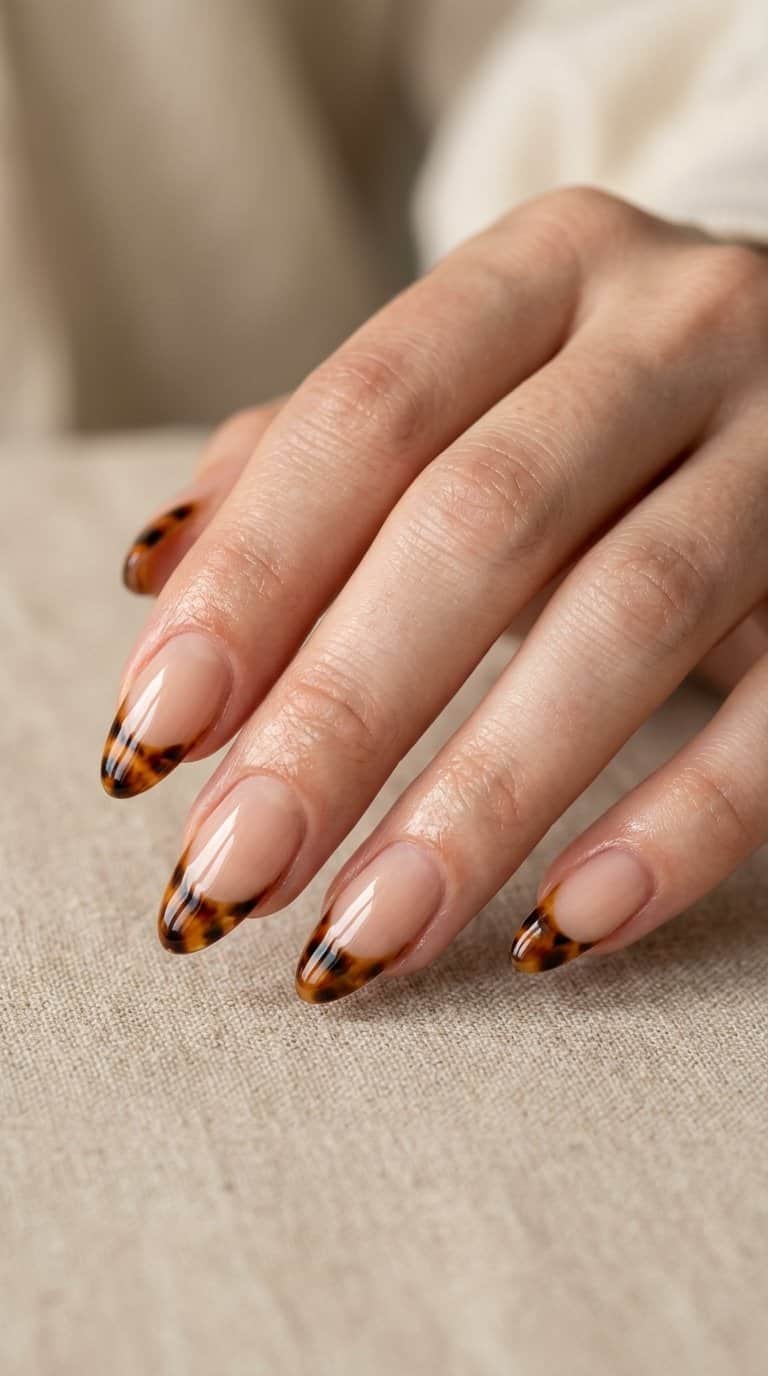
I like this design for its warm, layered color without relying on glitter. A sheer nude base keeps the manicure balanced, while tortoiseshell tips combine amber, brown, and black in irregular patches that resemble the pattern of acetate frames.
I add thin caramel lines along selected edges to separate the colors and create a cleaner French-tip shape. I keep the accents uneven rather than matching every nail, which preserves the organic pattern. A glossy topcoat brings out the depth and smooths the layered finish.
5) Pastel rainbow French tips on almond nails
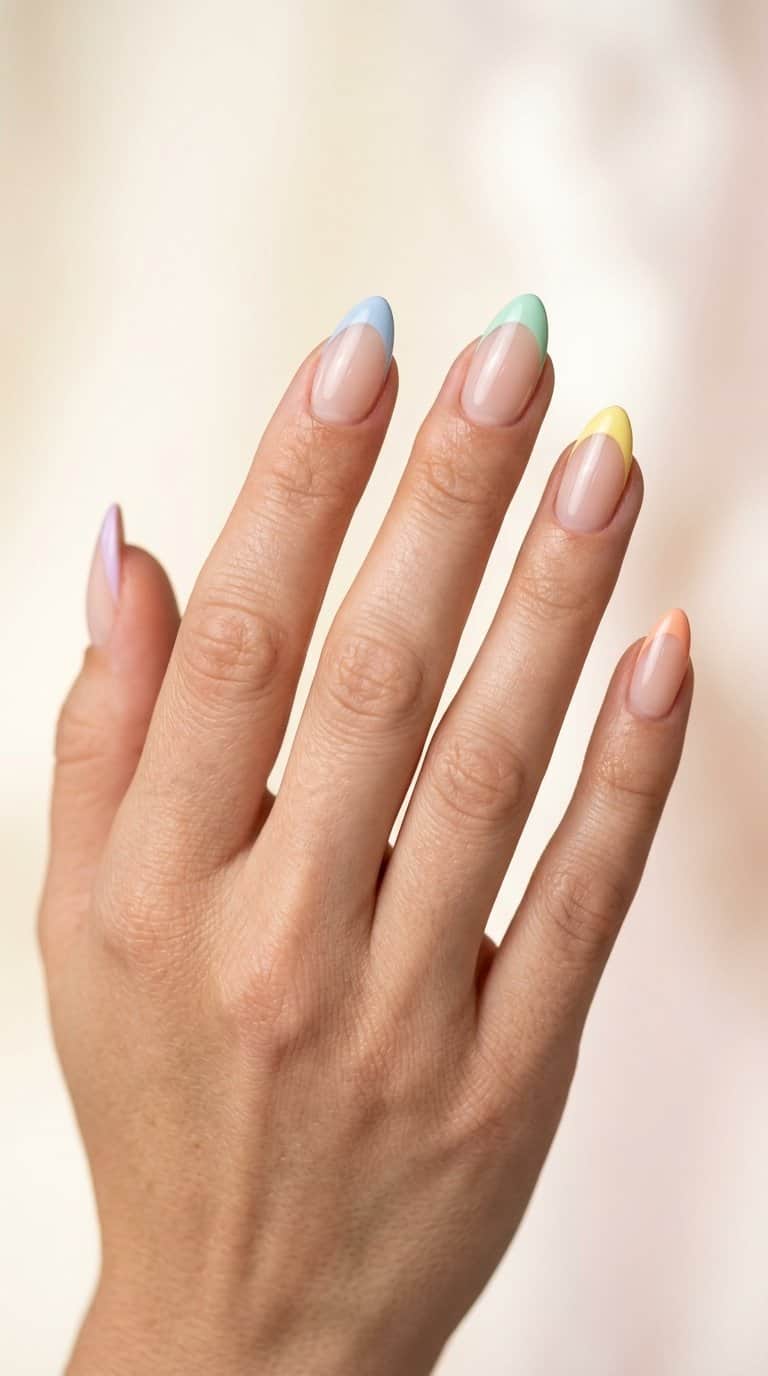
I like pastel rainbow tips on almond nails because the tapered shape gives each color a clean, balanced outline. I use one soft shade per nail, such as lavender, mint, pale yellow, peach, and baby blue, while keeping the base sheer or milky.
A thin white line beneath the colors can sharpen the design without making it look heavy. I prefer matching the tip width across every nail, then adding a glossy topcoat to emphasize the smooth curve and subtle contrast.
6) Glazed pearl French tips with a chrome finish
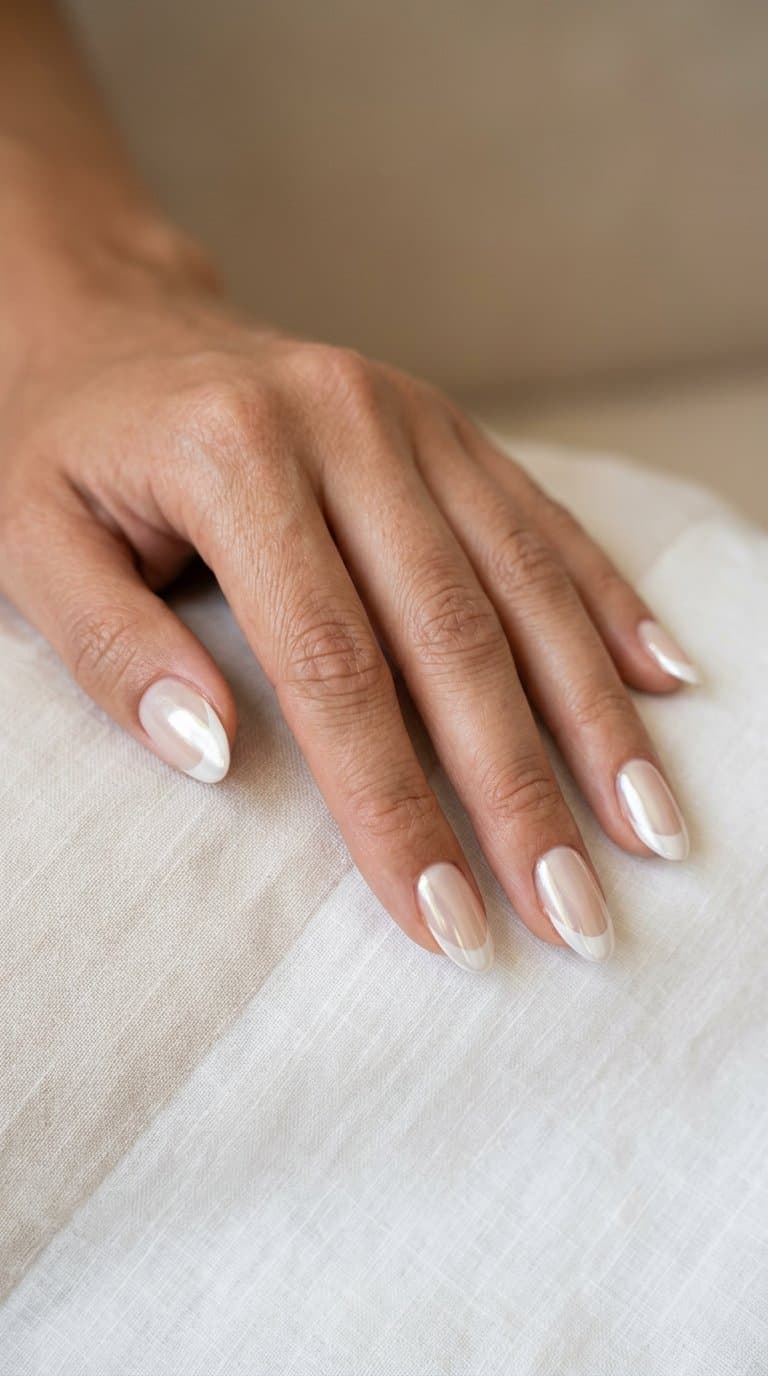
I like this style for its clean contrast between a soft pearl base and reflective chrome tips. I start with a sheer milky polish, then add a fine French line in silver or white chrome. The glazed finish catches light without making the design look too busy.
I keep the tip narrow for a polished, modern shape, especially on short or medium-length nails. A rounded or softly squared edge helps the chrome follow the natural outline, while a glossy topcoat smooths the layers and protects the reflective finish.
7) Deep burgundy French tips on short square nails
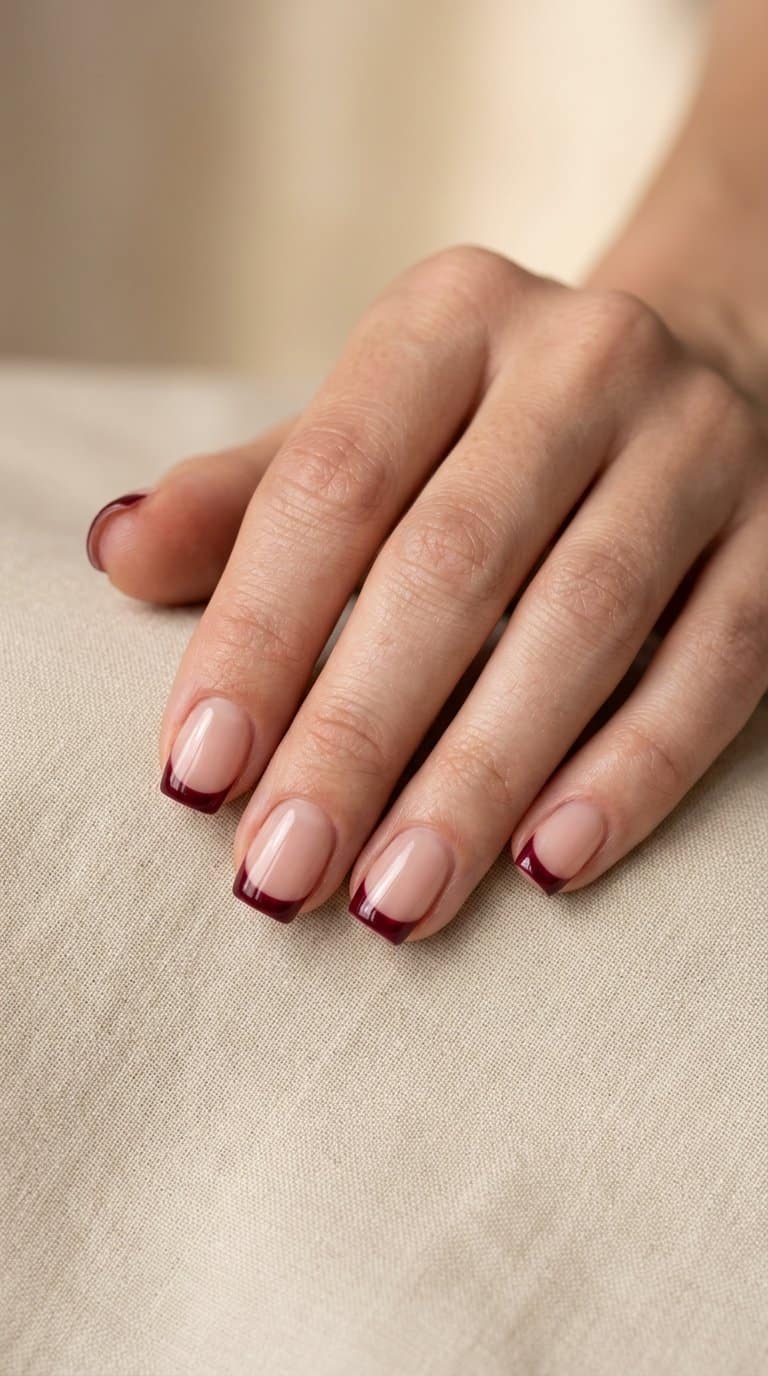
I like deep burgundy tips on short square nails because the crisp shape gives the rich color a clean, controlled finish. I keep the base sheer pink or nude, then apply the burgundy along the free edge with a precise, medium-thin curve.
The darker shade suits the compact nail length without requiring extra detail. I would match the tips across every nail for a polished look, or add one subtle accent nail with a glossy burgundy base for gentle variation.
A high-shine topcoat defines the square edges and keeps the manicure looking fresh. For a softer effect, I choose a velvet or satin finish instead of adding glitter or metallic accents.
8) Mismatched jewel-tone French tips
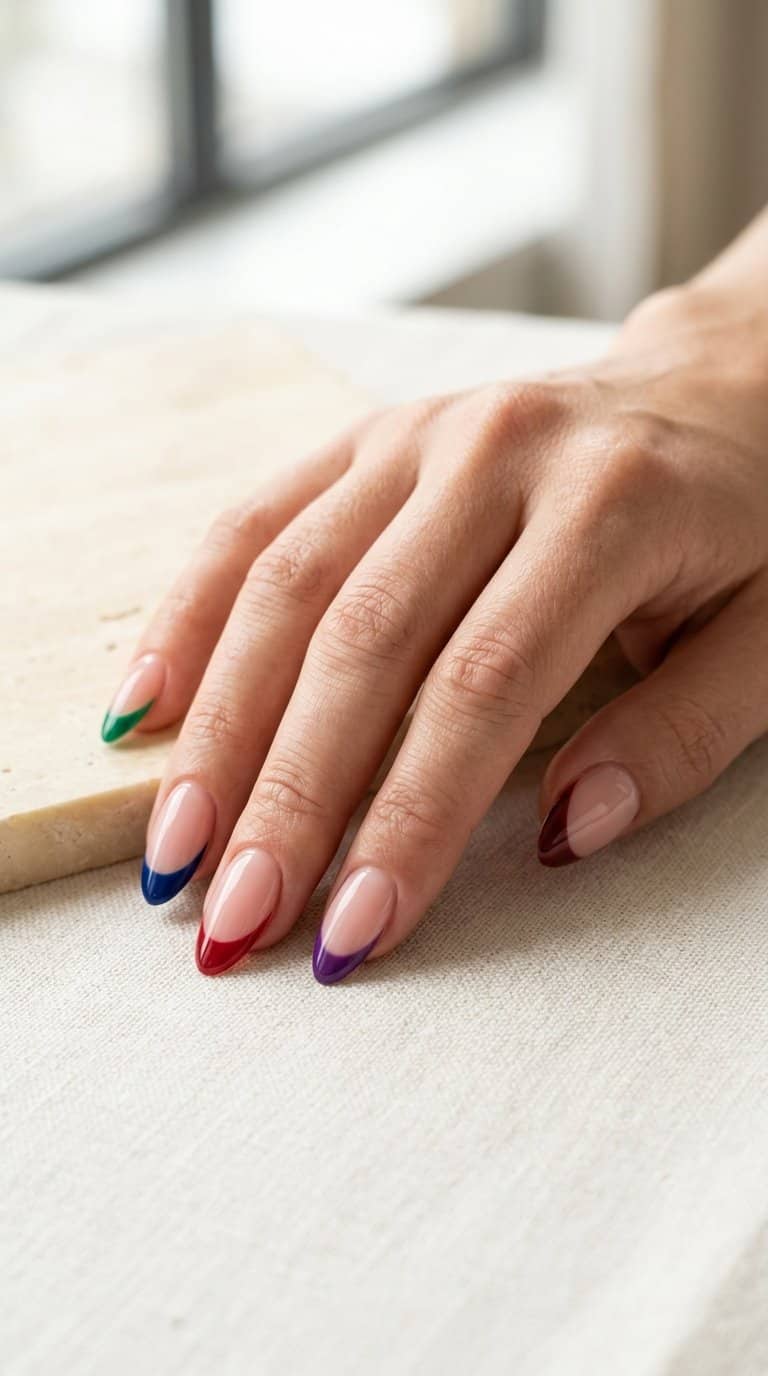
I use a different jewel tone on each nail—emerald, sapphire, ruby, amethyst, and teal—for a polished mismatched look. Keeping the base sheer or nude lets the saturated tips stand out without making the design feel crowded.
I prefer a consistent tip shape across every nail, such as a slim almond curve or a crisp squared edge. A glossy topcoat brings the colors together, while tiny gold dots at the sidewalls can add detail without competing with the varied palette.
9) Double-line French tips in black and gold
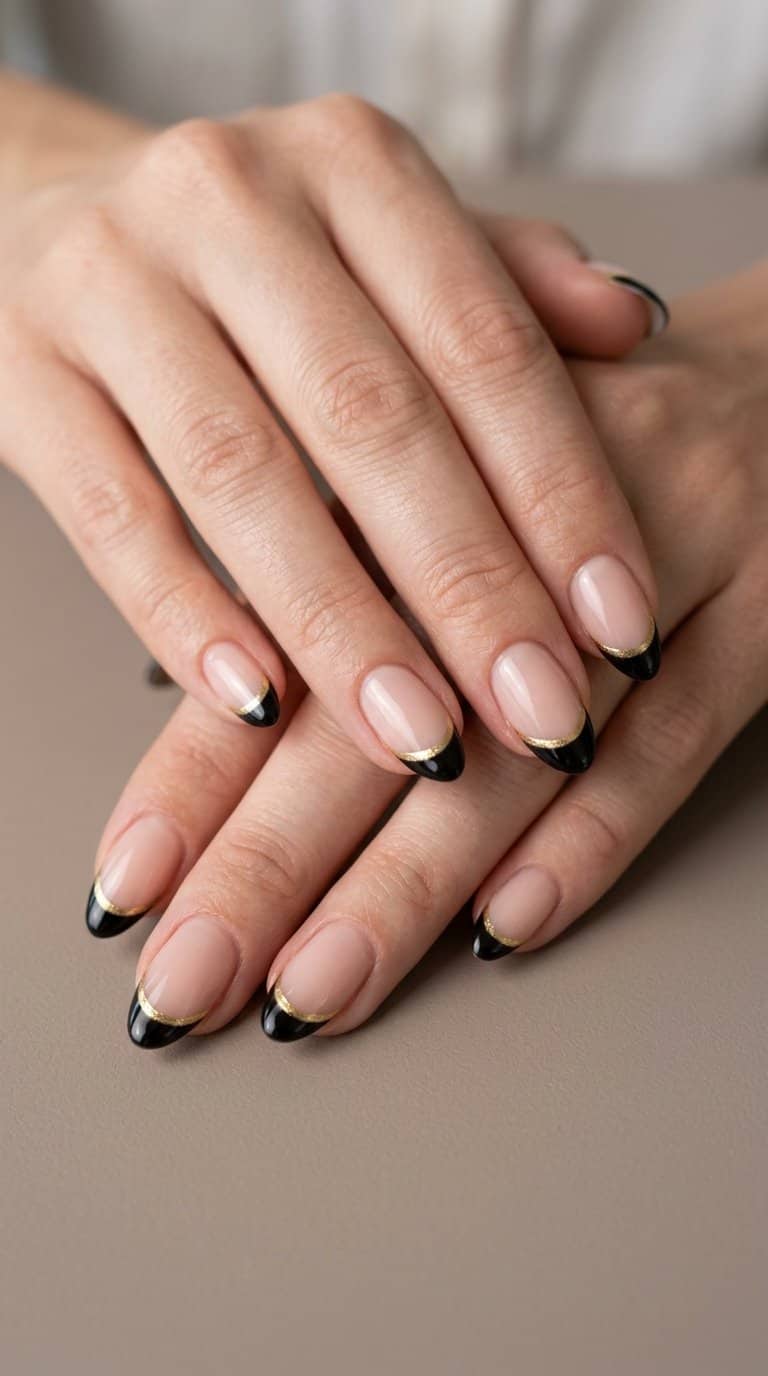
I like this design for its clean contrast and precise finish. I start with a sheer nude or soft beige base, then place a thin black line near the free edge and add a gold line beside it. Keeping both bands narrow prevents the look from feeling heavy.
I use metallic gold polish for a reflective detail or gold foil for a softer, textured effect. A fine nail-art brush helps me control the spacing, while a steady hand keeps each tip even across the set.
I prefer a rounded or almond shape for this style because the curved lines follow the nail’s natural outline. For a sharper result, I use square nails and keep the two lines parallel. A glossy top coat seals the design and smooths the metallic layer.
10) Lavender French tips with tiny white flowers
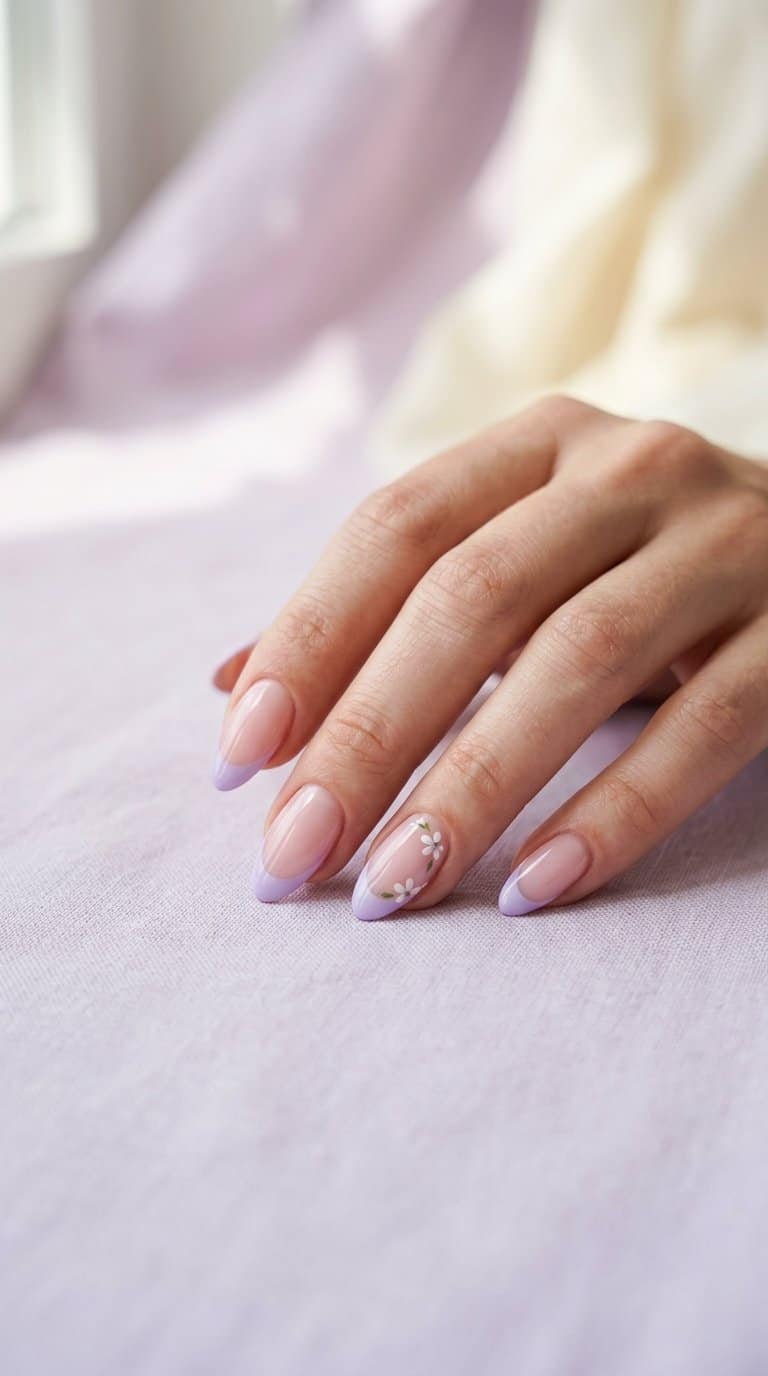
I like lavender tips for their soft color and clean finish. I keep the base sheer or milky, then add a thin lavender curve along each free edge for a subtle French manicure with a cooler tone.
Tiny white flowers add detail without making the design feel crowded. I place one or two near the tip of each nail, using small dots for petals and a pale yellow or lavender center. Varying the flower placement keeps the set looking natural and balanced.
11) Metallic gold French tips with nude polish
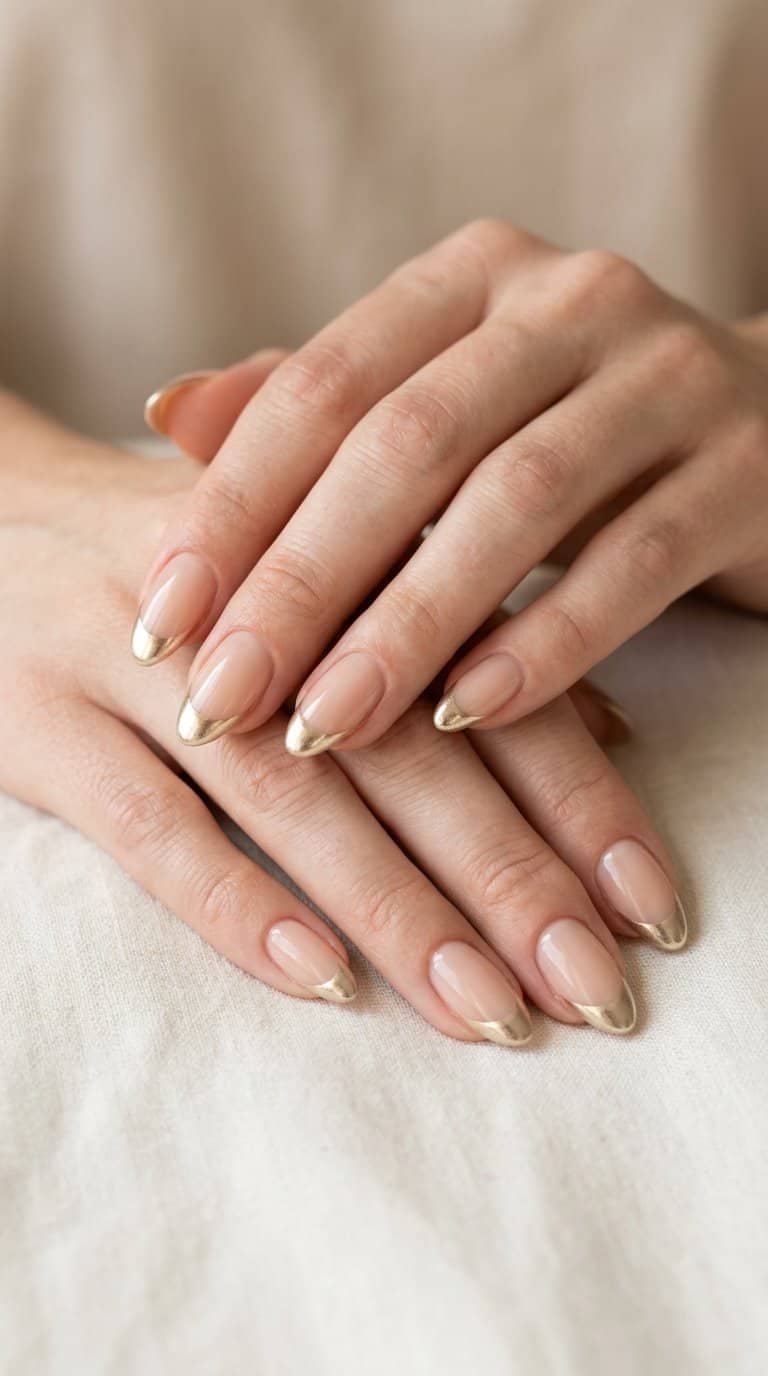
I like metallic gold tips over a sheer nude base because the contrast feels polished without looking stark. The warm gold catches light along the free edge, while the neutral polish keeps the design suitable for everyday wear.
I would keep the tips narrow and apply them evenly across each nail. A rounded or almond shape complements the curved line, while a square shape gives the manicure a sharper, more graphic finish.
For a softer look, I would choose champagne gold instead of a bright yellow gold. I would seal the design with a glossy top coat to smooth the surface and help protect the metallic detail.
12) Matte black French tips with glossy outlines
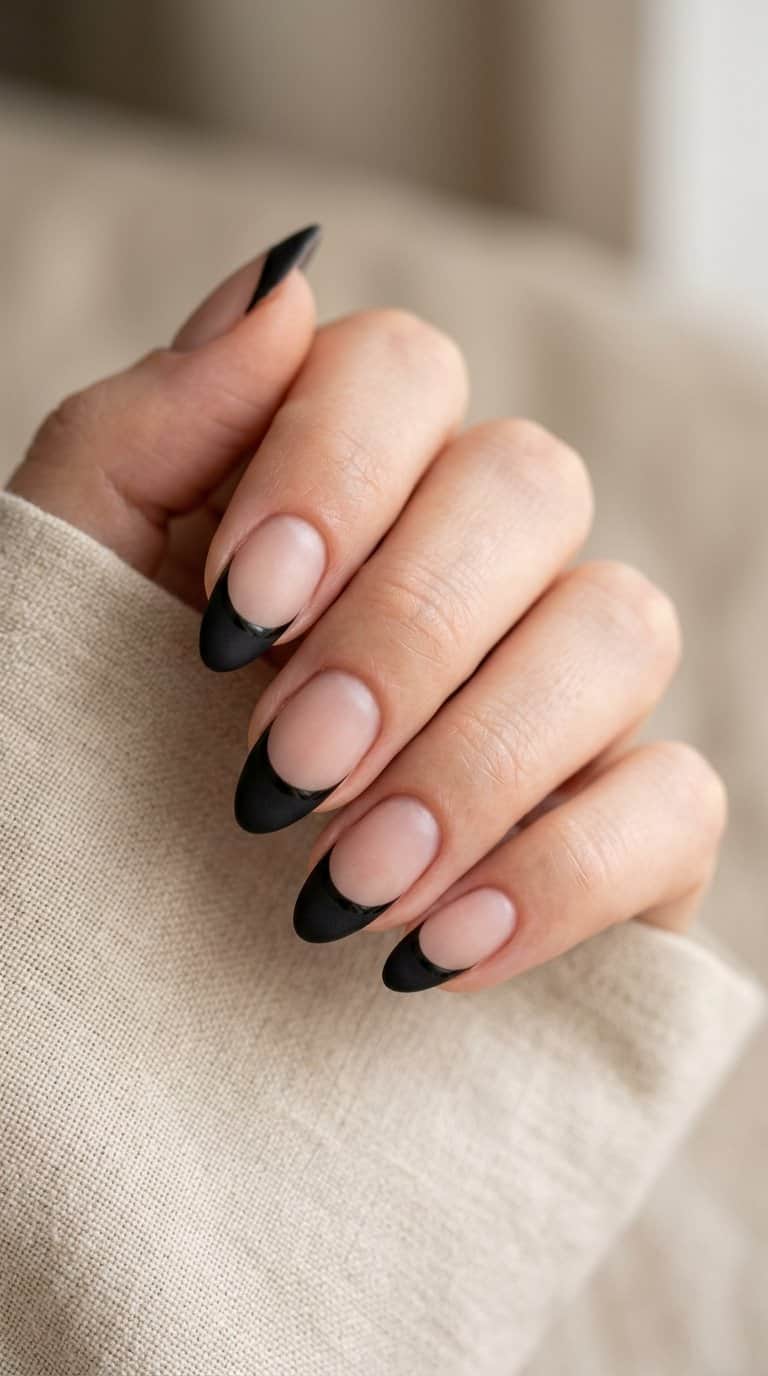
I like the contrast between a soft matte base and a narrow glossy border along each tip. The finish keeps the design minimal while adding a visible change in texture.
I would shape the tips evenly and keep the outline thin for a clean result. A short square or almond nail gives the pattern enough space without making it look heavy.
I use a matte top coat over the entire nail first, then add the glossy outline with a fine detail brush. This design works well on natural nails and pairs easily with silver jewelry or simple black clothing.
13) Blue-and-white wave French tips
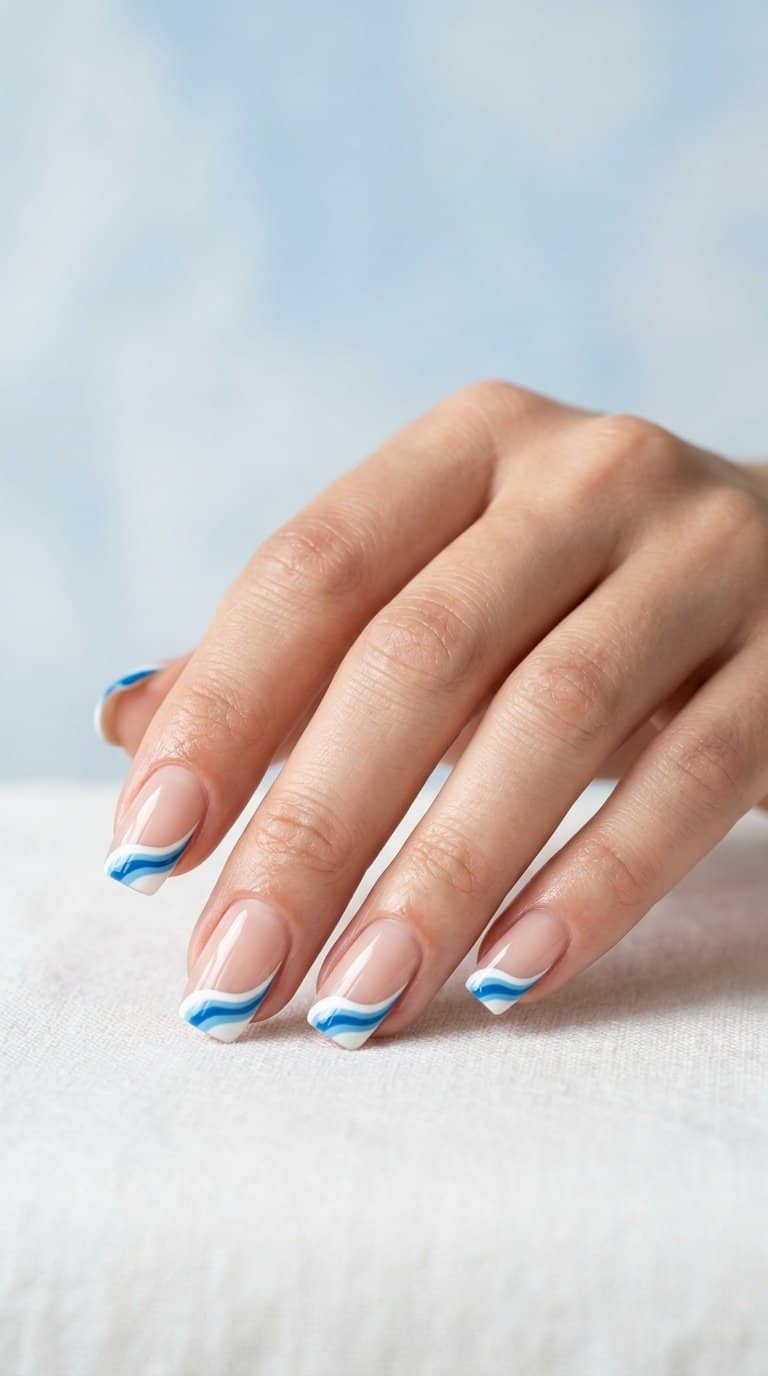
I use a soft white base to keep these tips crisp, then layer curved blue lines across each edge. A deep navy stripe paired with a lighter blue wave creates contrast without making the design feel busy. I vary the wave height slightly on each nail for a hand-painted finish.
I prefer a fine brush for the narrow lines and a steady, rounded motion for the wider curves. A glossy topcoat sharpens the colors and helps the design last, while a sheer nude base keeps the blue-and-white pattern wearable.
14) Cow-print French tips in chocolate brown
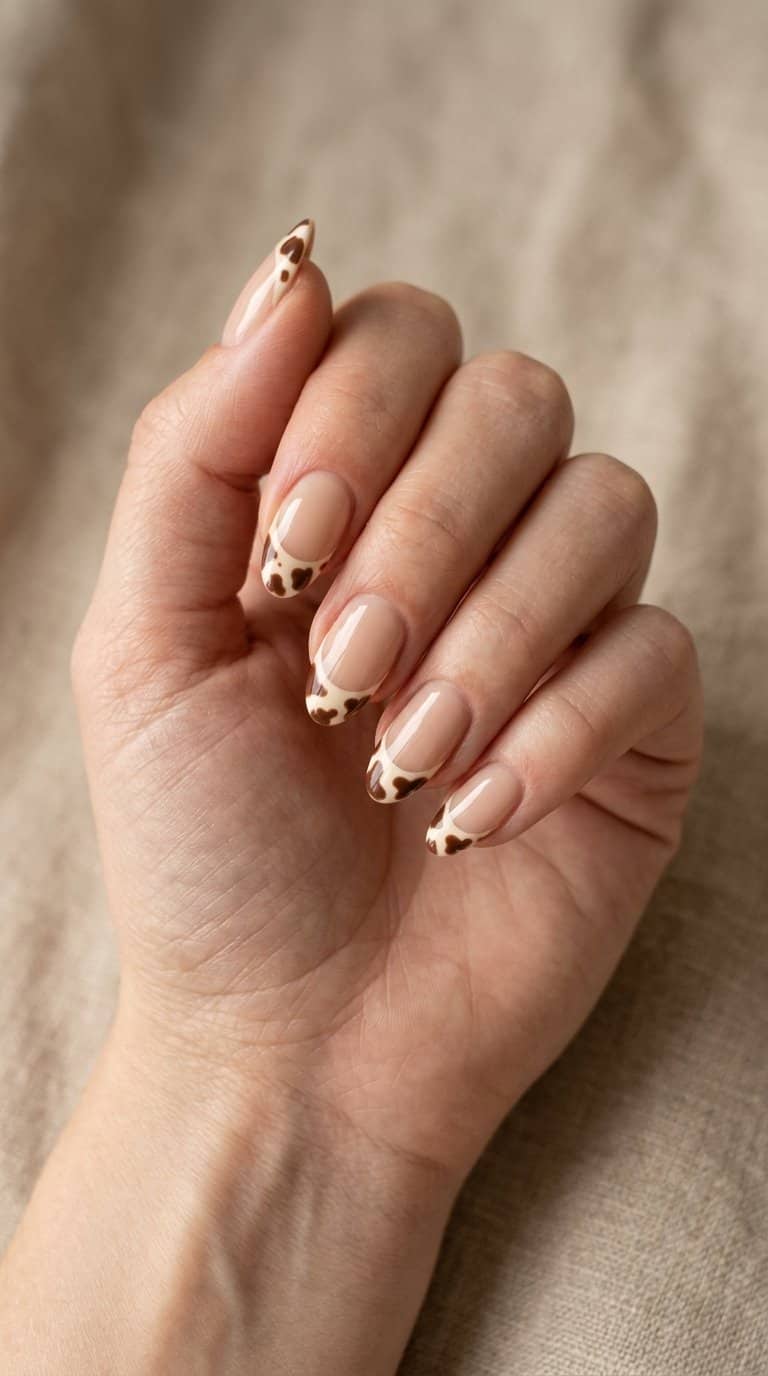
I like this softer take on animal print because chocolate brown feels less stark than black and white. I would keep each tip transparent or nude, then add irregular brown patches with rounded edges so the pattern resembles cowhide rather than polka dots.
A fine liner brush helps me vary the patch sizes and leave small gaps between them. I would use a glossy topcoat to sharpen the contrast, or choose a matte finish for a muted look. Short square or almond-shaped nails both suit this design.
15) Rose-gold French tips with glitter edges
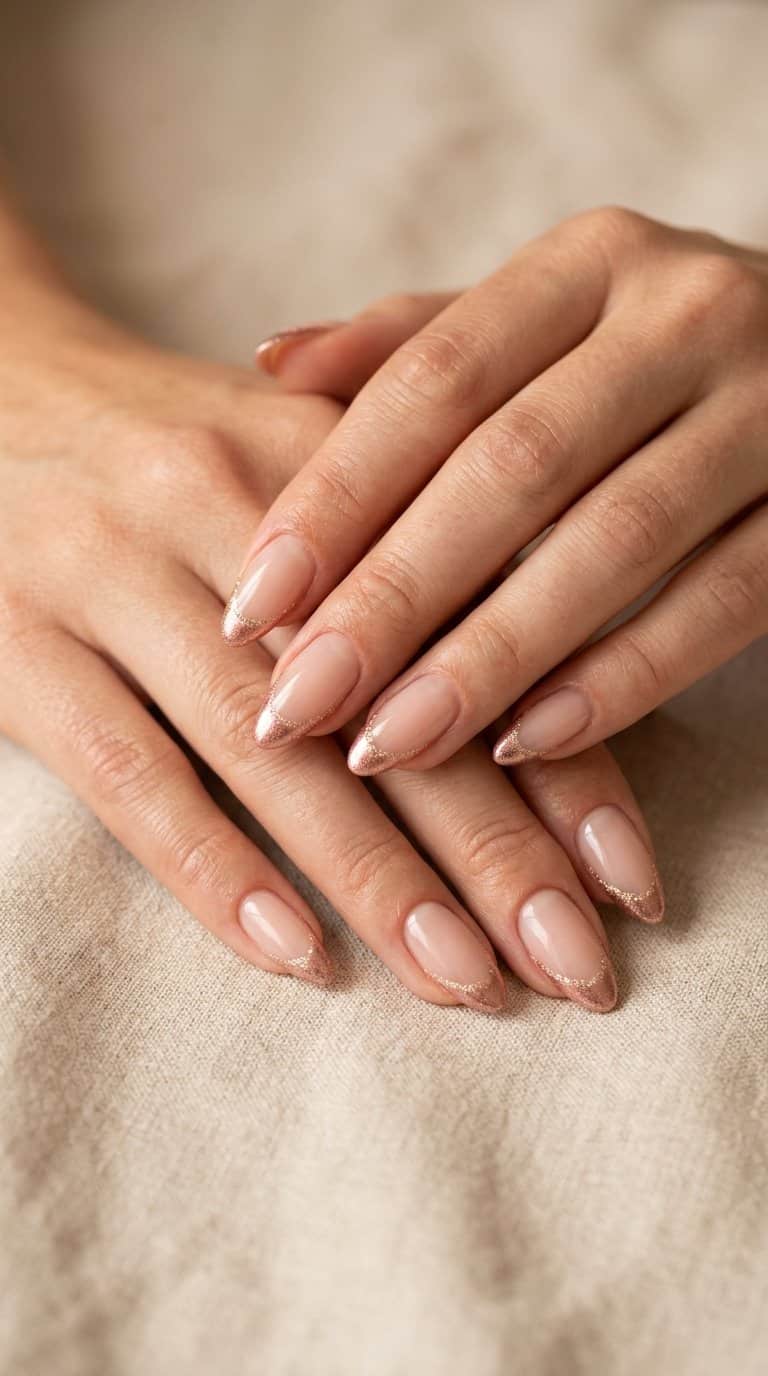
I like rose-gold tips for their warm metallic finish, especially against sheer pink or nude polish. I keep the base smooth and understated so the color remains the focus without looking heavy.
A narrow glitter line along the tip adds definition and catches light from different angles. I prefer fine champagne or rose-gold glitter, applied just above the metallic edge for a clean, layered effect.
I would use a thin French-tip brush for the curved shape, then seal the design with a glossy top coat. Short, rounded nails keep the look polished, while almond or coffin shapes give the tip more space.
16) Green aura French tips on sheer nude nails
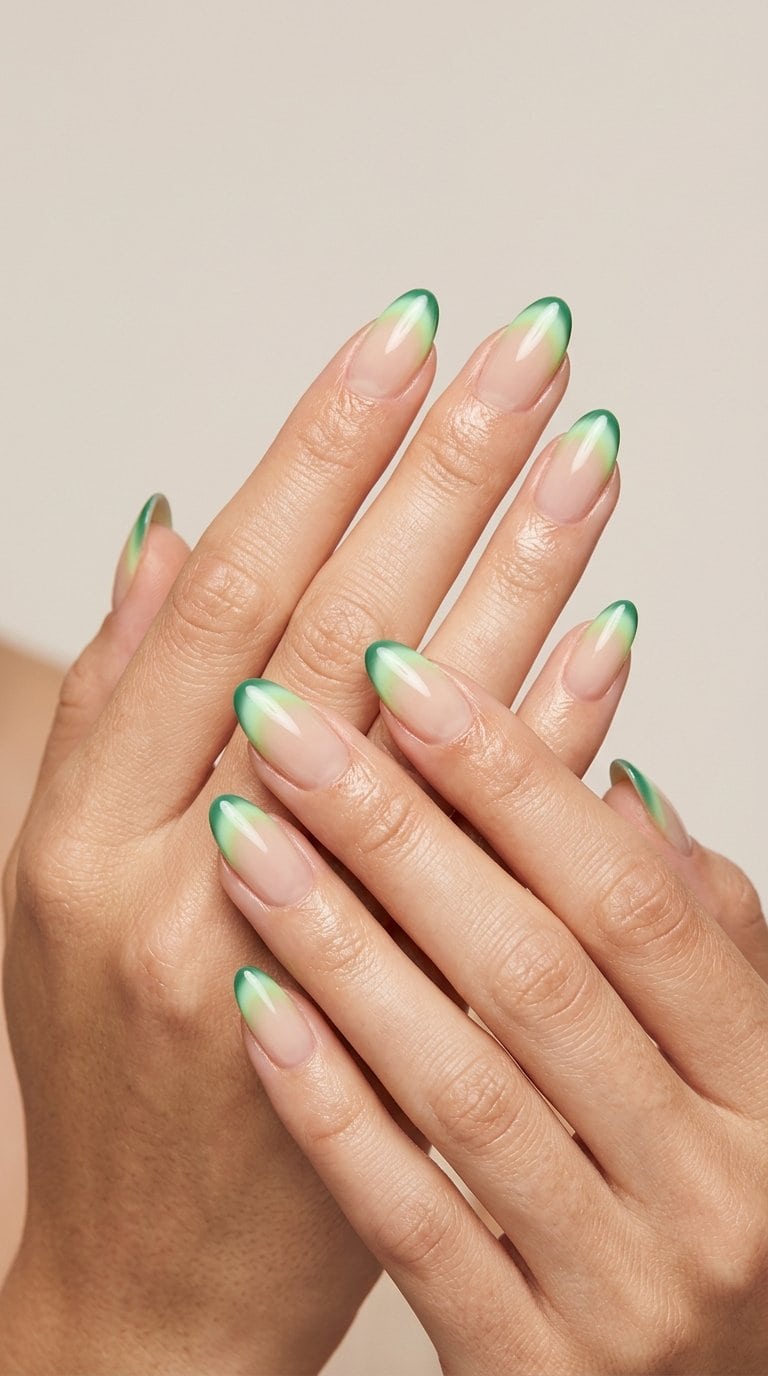
I like this design for its soft contrast: a sheer nude base keeps the manicure light, while green aura shading adds a diffused wash of color near the tips. The effect looks blended rather than sharply outlined.
I would choose a muted sage or moss green for a subtle finish, or a brighter emerald tone for more contrast. A fine French tip over the aura creates definition without covering the hazy color underneath.
I prefer a short almond or rounded shape for this look because both silhouettes support the soft gradient. A glossy topcoat helps the sheer base and green details appear smooth and balanced.
17) Reverse French tips in cobalt blue
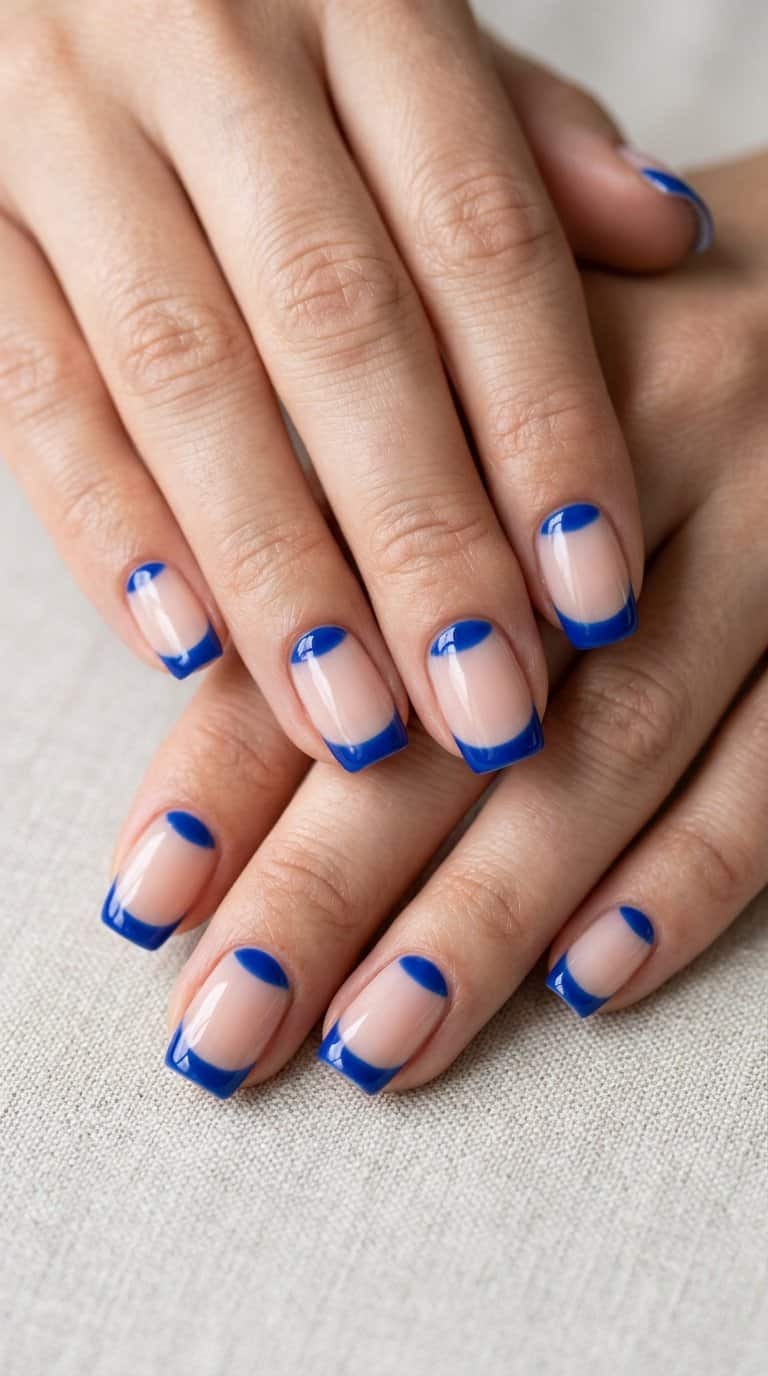
I like this reverse French design for its unexpected placement: cobalt blue traces the cuticle instead of the free edge. The vivid band stands out against a sheer nude, milky white, or pale pink base while keeping the shape clean and polished.
I would ask for a thin, even curve that follows each cuticle closely, with enough negative space between the color and nail edge to preserve the reverse effect. A glossy topcoat sharpens the blue and helps the manicure look neat as it grows out.
Short, rounded nails make the detail feel precise, while almond or coffin shapes give the curved line more room to show.
18) Flame-shaped French tips in orange and red
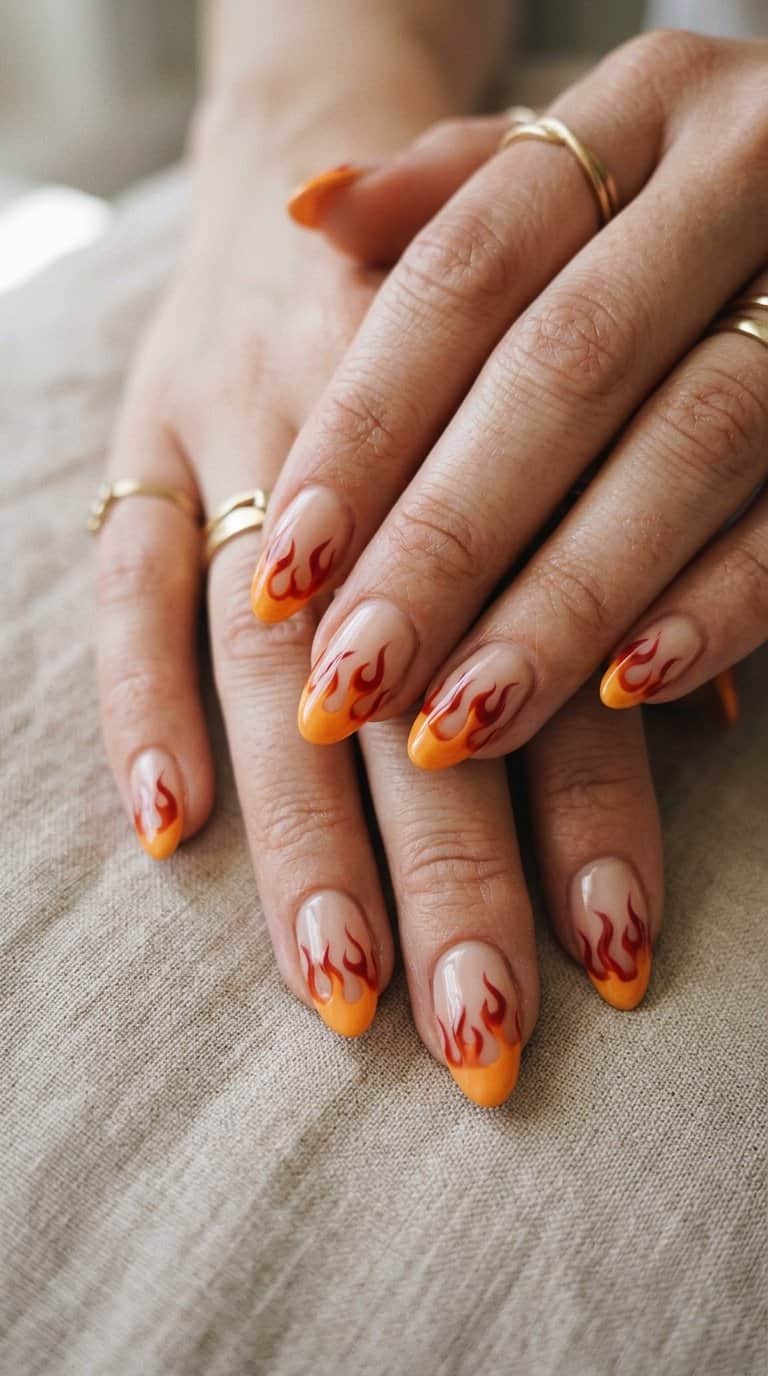
I like this design for its sharp, graphic outline and warm color contrast. A thin red flame can follow the orange tip, creating a layered effect without covering the entire nail. I would keep the base sheer or nude so the pointed shapes remain clear.
Short, rounded nails suit smaller flames, while longer almond or coffin shapes offer more space for sweeping curves. I prefer alternating the dominant shade on each nail—orange on one, red on the next—for variation that still looks coordinated.
A glossy finish strengthens the bright, polished look, but a matte topcoat gives the colors a softer appearance. I would use fine detailing brushes to define each flame and leave a narrow gap between the design and the cuticle.
19) Velvet cat-eye French tips
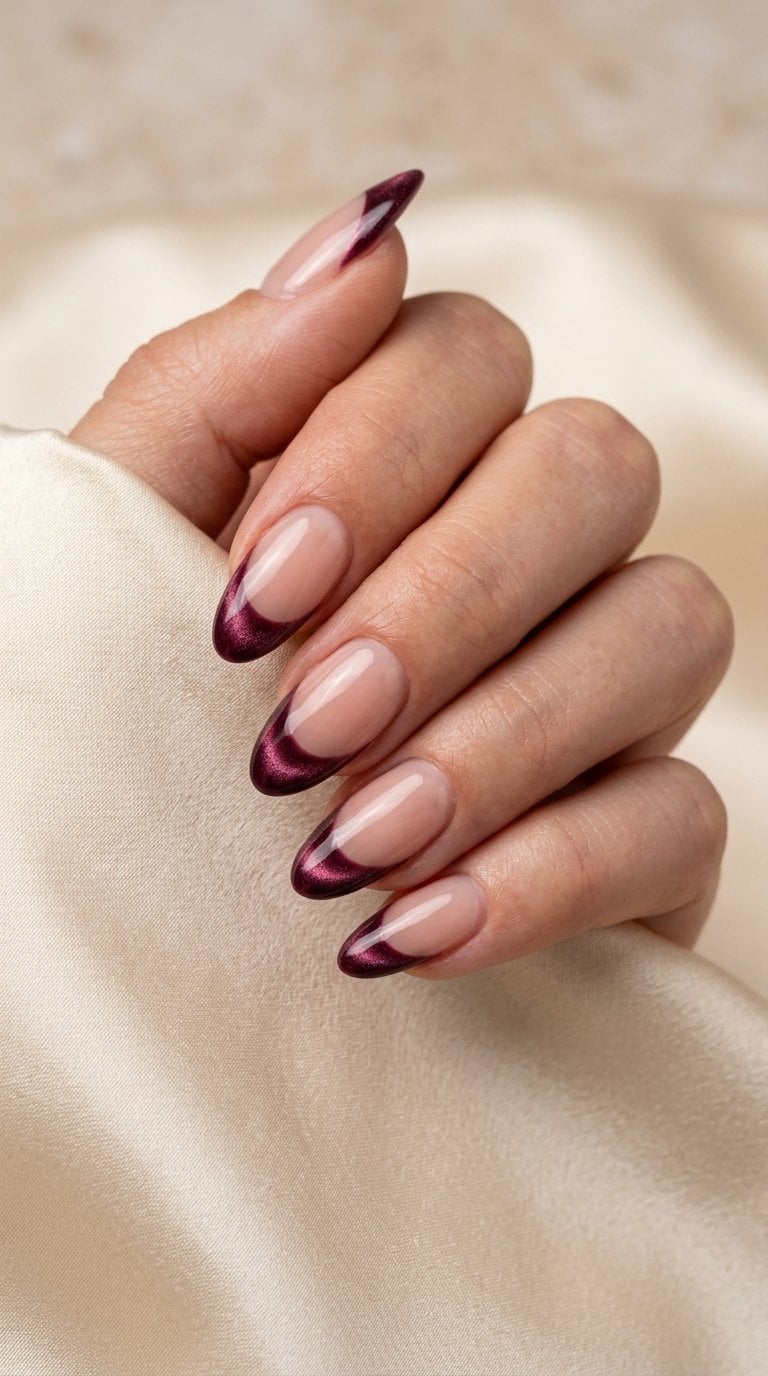
I like velvet cat-eye French tips for the way they add shifting dimension without changing the classic shape. I keep the base sheer or nude, then apply a magnetic polish only along the tips. The reflective stripe moves as the light changes, giving each nail a soft, brushed-metal effect.
I usually choose deep green, burgundy, navy, or chocolate brown for a defined contrast. A thin, even smile line keeps the design polished, while a slightly thicker tip makes the magnetic effect easier to see. A glossy top coat helps preserve the reflective finish.
20) Sage green French tips with gold foil
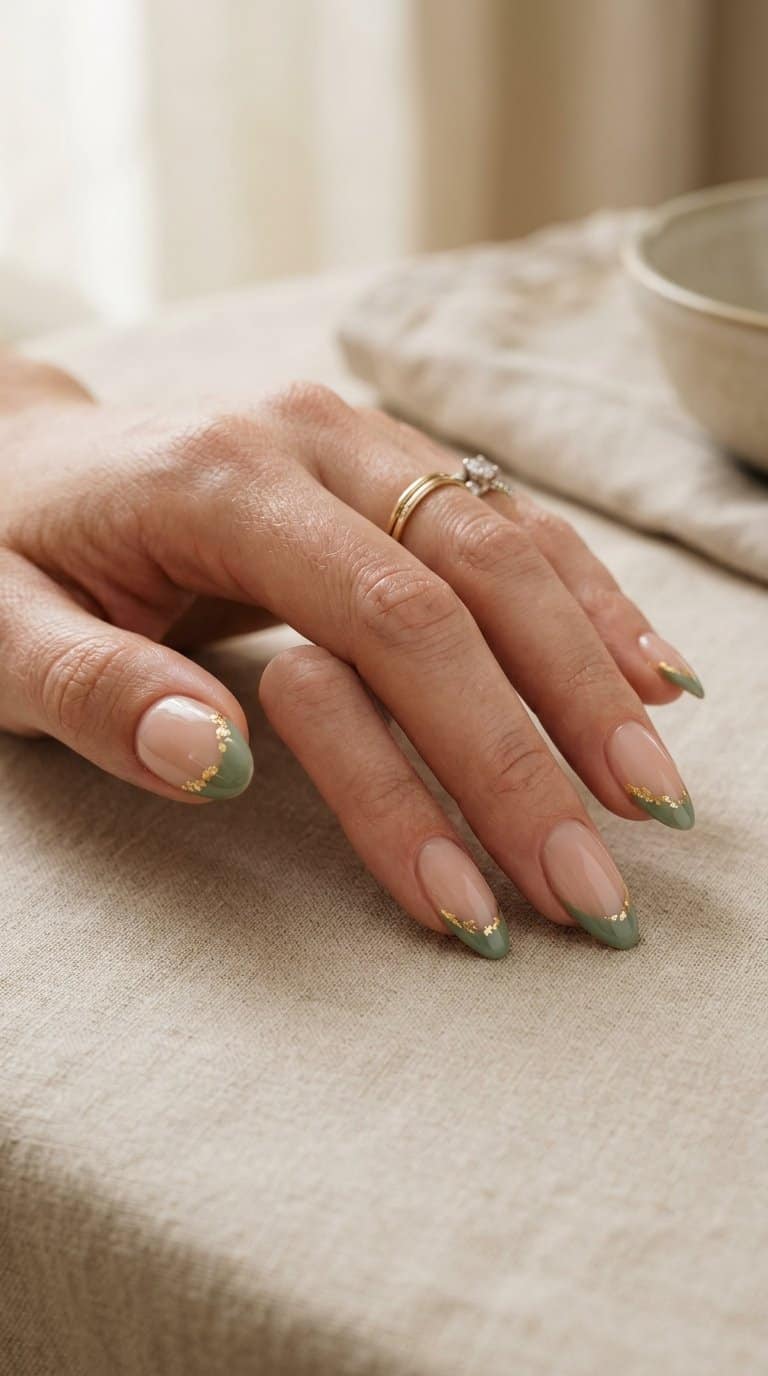
I like sage green tips for their muted color and clean finish. I keep the base sheer or milky, then shape the green into a slim French line that follows the natural curve of each nail.
Small pieces of gold foil add contrast without overpowering the soft green. I place them near the tip or along one side of the nail, leaving enough negative space to keep the design balanced.
A glossy topcoat helps the foil catch the light and gives the manicure a polished surface. I usually pair this look with short almond or squoval nails, though the design also works on longer shapes.
21) Negative-space French tips with geometric corners
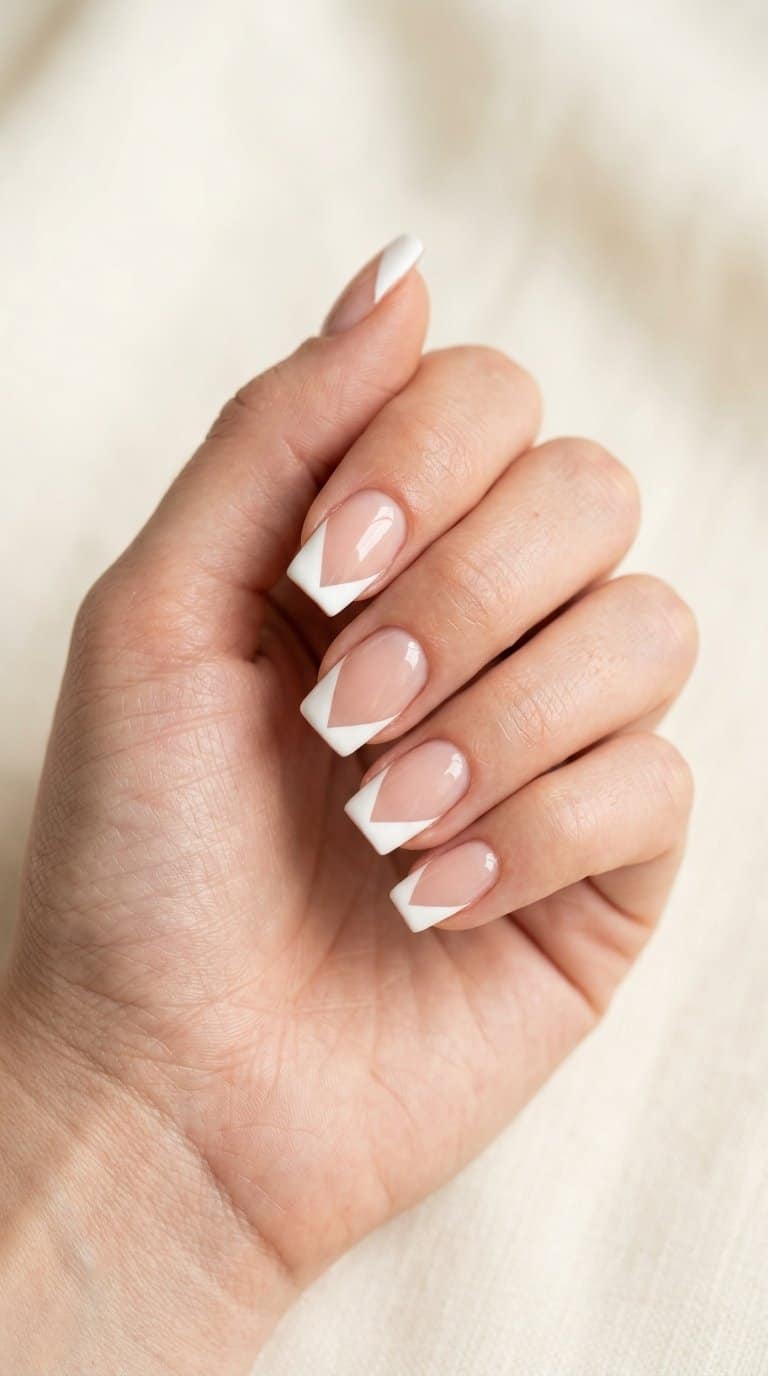
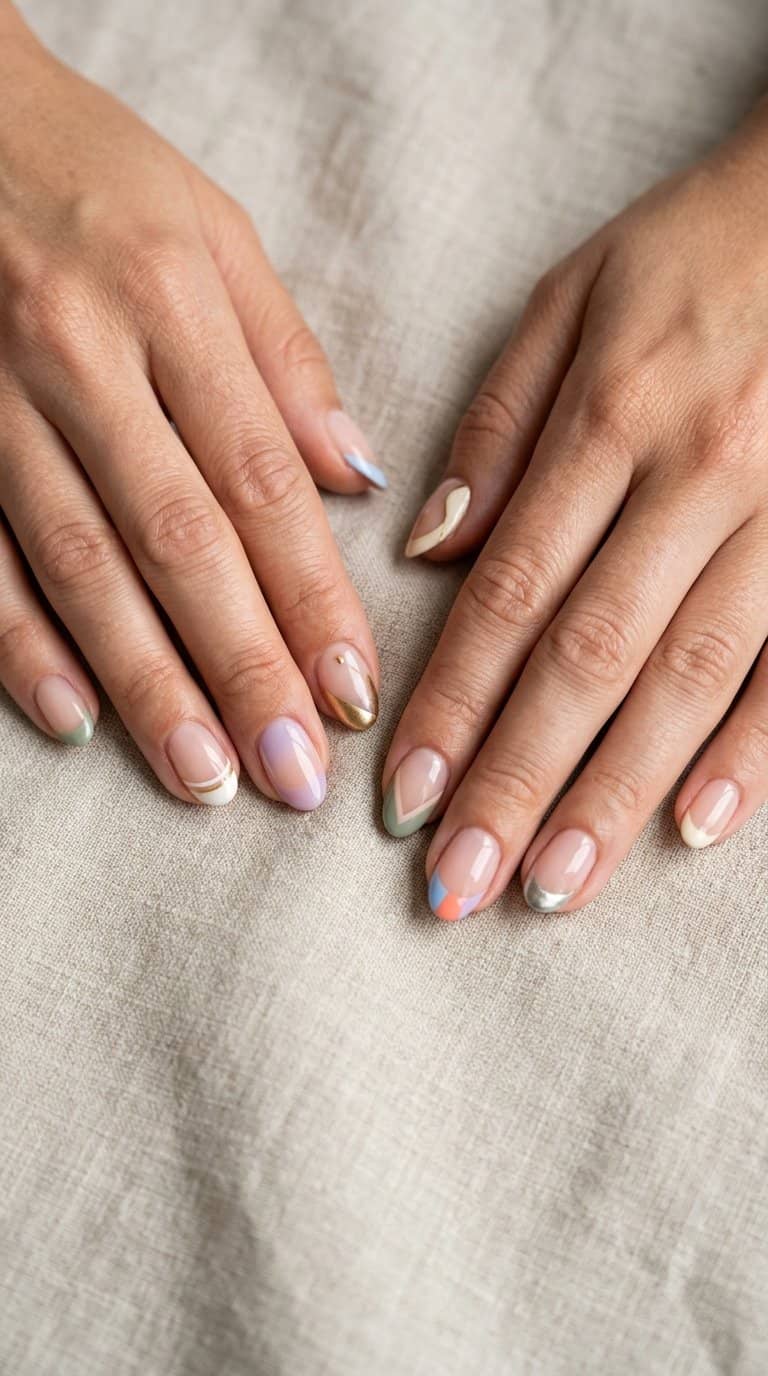
I keep the base bare or close to my natural nail color, then frame each tip with sharp lines instead of a traditional curved smile. Triangles, angled blocks, and squared corners create a clean graphic effect while leaving visible negative space between the design and cuticle.
I use a fine brush or striping tape to outline the shape, then fill only the outer section with polish. Black and white give me a crisp contrast, while soft beige, sage, or cobalt make the geometry more subtle without losing definition.
I keep the lines consistent across each nail, even when I vary the corner placement. A glossy topcoat preserves the contrast and helps the narrow edges look smooth.
22) Strawberry French tips with tiny seeds
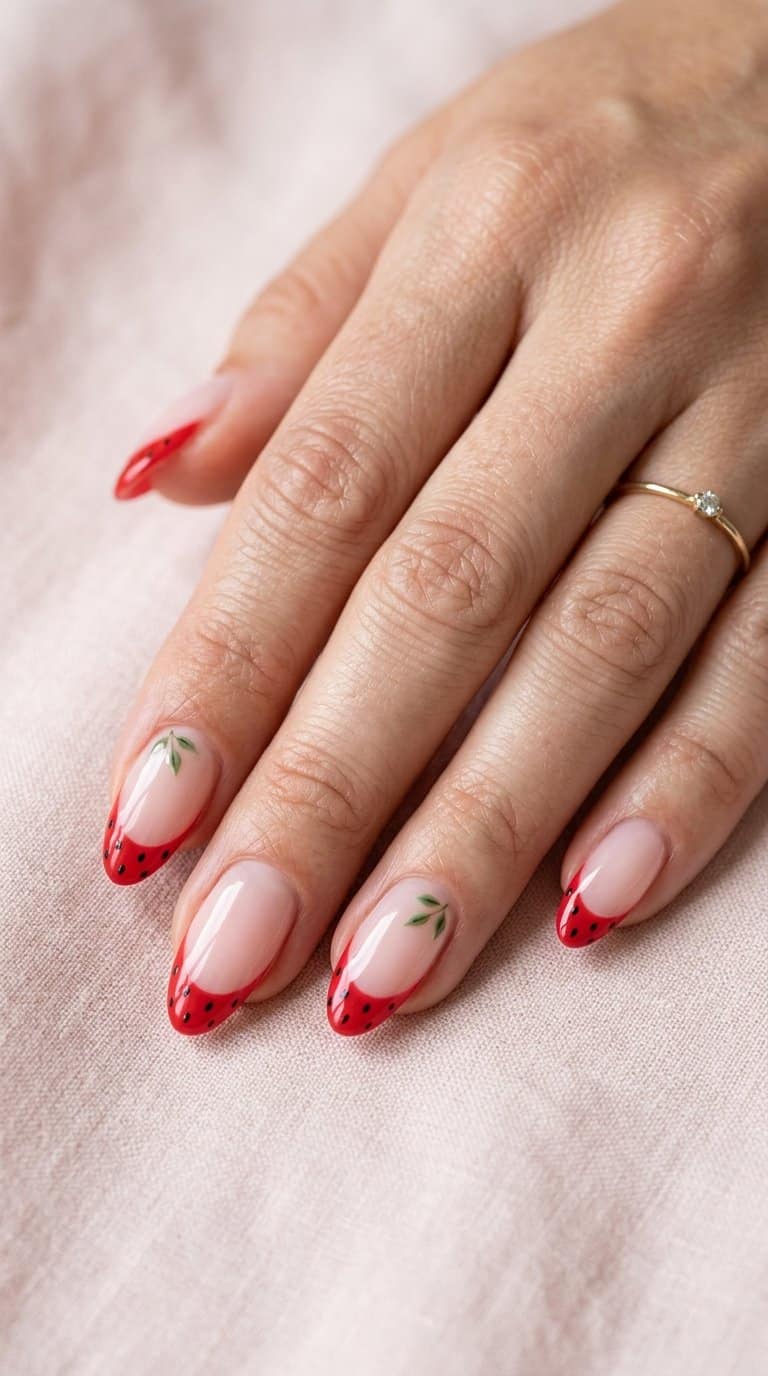
I like this design for its clean shape and playful detail. I keep the base sheer or pale pink, then paint each tip in a rounded red curve that follows the natural nail line. Tiny black or dark green seed marks add the strawberry effect without making the manicure look crowded.
I place the seeds unevenly, using short oval dots rather than identical marks. A thin green accent at the tip can suggest the leafy crown, while a glossy topcoat helps the red and pink tones look smooth. I find this style works best on short to medium nails, where the fruit pattern stays crisp.
23) Iridescent unicorn French tips
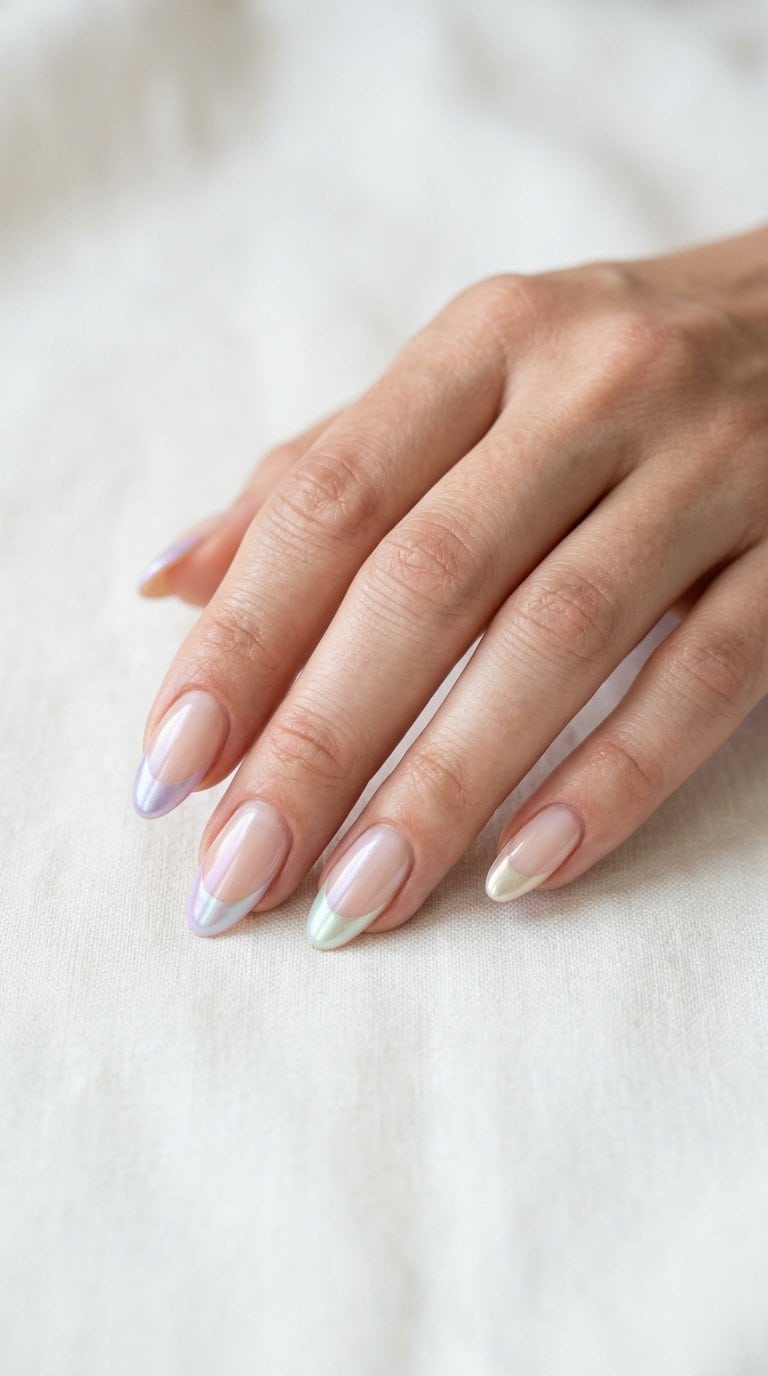
I use a sheer milky or pale pink base to keep the manicure soft, then add shifting iridescent polish to the tips. The color can flash lavender, blue, green, or pink as the light moves, giving the classic French shape a more reflective finish without making it look heavy.
I prefer a thin, even tip with a rounded or almond outline because it keeps the changing colors visible and precise. A glossy top coat enhances the reflective effect, while a satin finish creates a subtler result.
For a cleaner design, I keep the base translucent and apply the shimmer only along the free edge. I can also add a fine chrome line beneath each tip, but I avoid extra embellishments when the polish already provides enough detail.
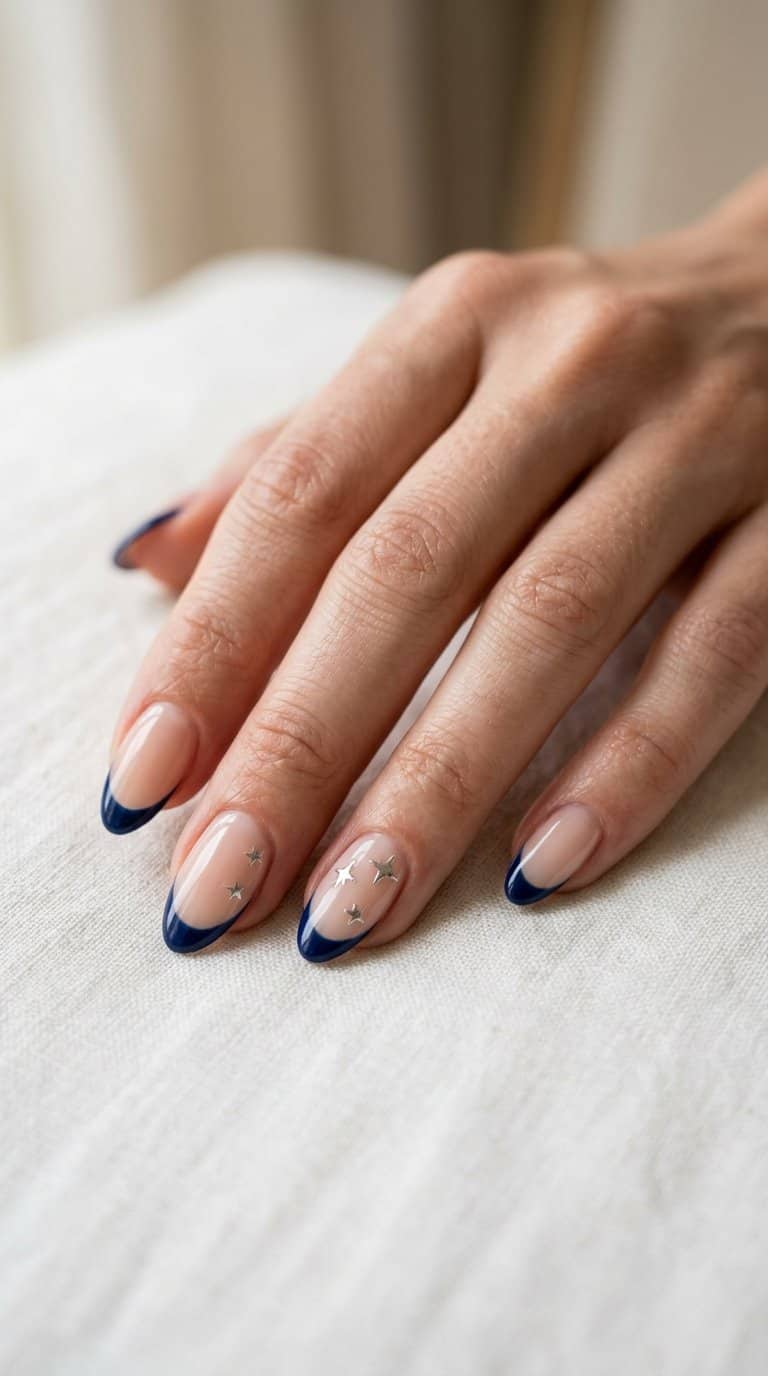
I like navy tips when I want a darker alternative to classic black without losing a polished look. I keep the base sheer or nude, then add slim navy arcs that follow the natural curve of each nail.
Small silver stars create a clean contrast against the deep blue. I place one or two near the tip or along the side of the nail, using metallic polish or flat decals for a neat finish.
I would keep the stars varied in size but limited in number. A glossy topcoat sharpens the navy color and helps the details stay smooth.
25) Peach ombré French tips
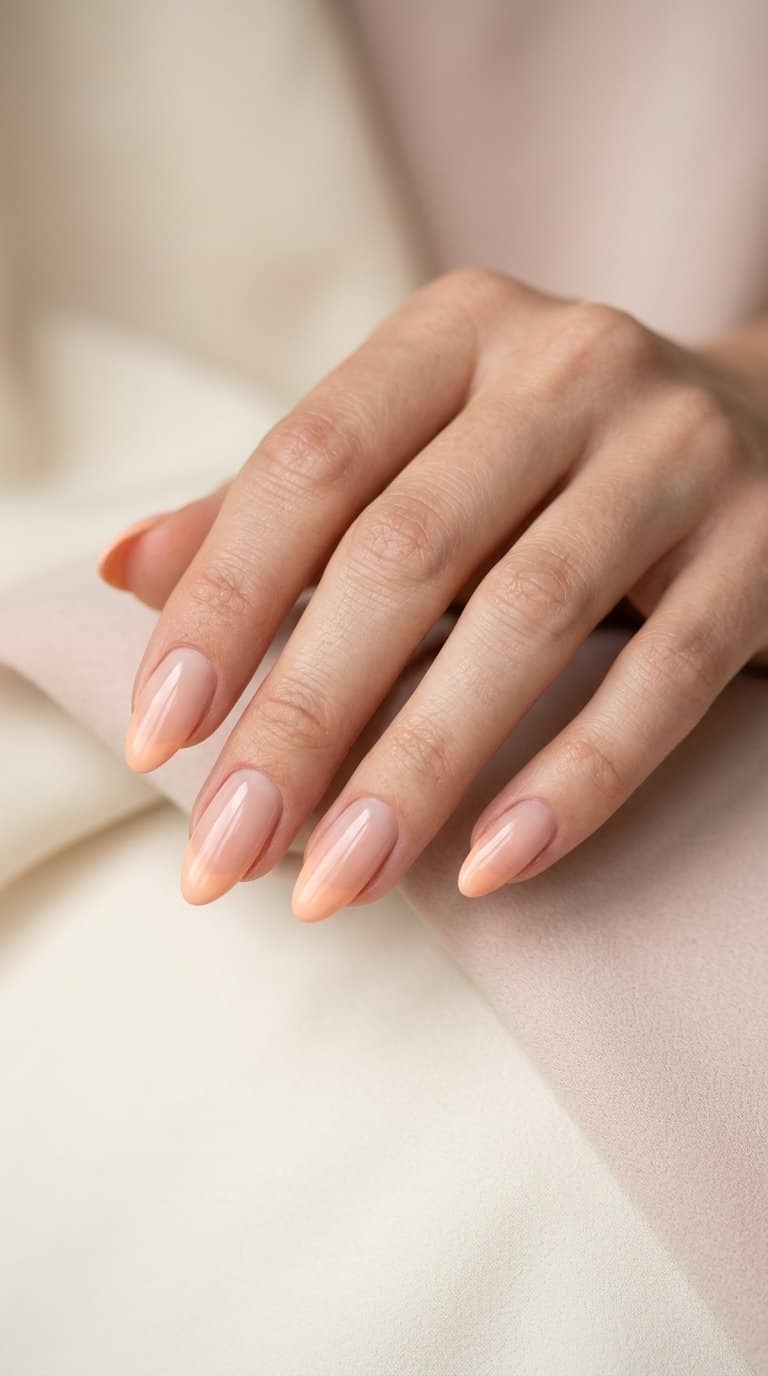
I like peach ombré tips for their soft transition from a pale base to a warmer, fruit-toned edge. The gradient keeps the French shape recognizable while replacing the usual white with a more subtle finish.
I would ask for a sheer nude or milky base, then blend peach polish from the middle of each tip toward the free edge. A glossy top coat helps smooth the color shift and gives the design a clean, fresh appearance.
I find this style especially easy to adapt to different nail lengths. On short nails, I would keep the peach band narrow; on longer almond or coffin nails, I could extend the gradient for a more visible effect.


