Holiday nails can extend far beyond traditional red and green. I can help you explore polished seasonal designs in cool blues, soft neutrals, metallic finishes, rich jewel tones, and delicate winter-inspired details.
Save for later
Want to come back to this story? Save it with your email so it is easy to find again.
These 30 Christmas nail ideas give you versatile ways to create a festive manicure that matches your personal style without relying on classic holiday colors. I’ll also cover how to choose a cohesive palette and help your nail art last throughout the season.
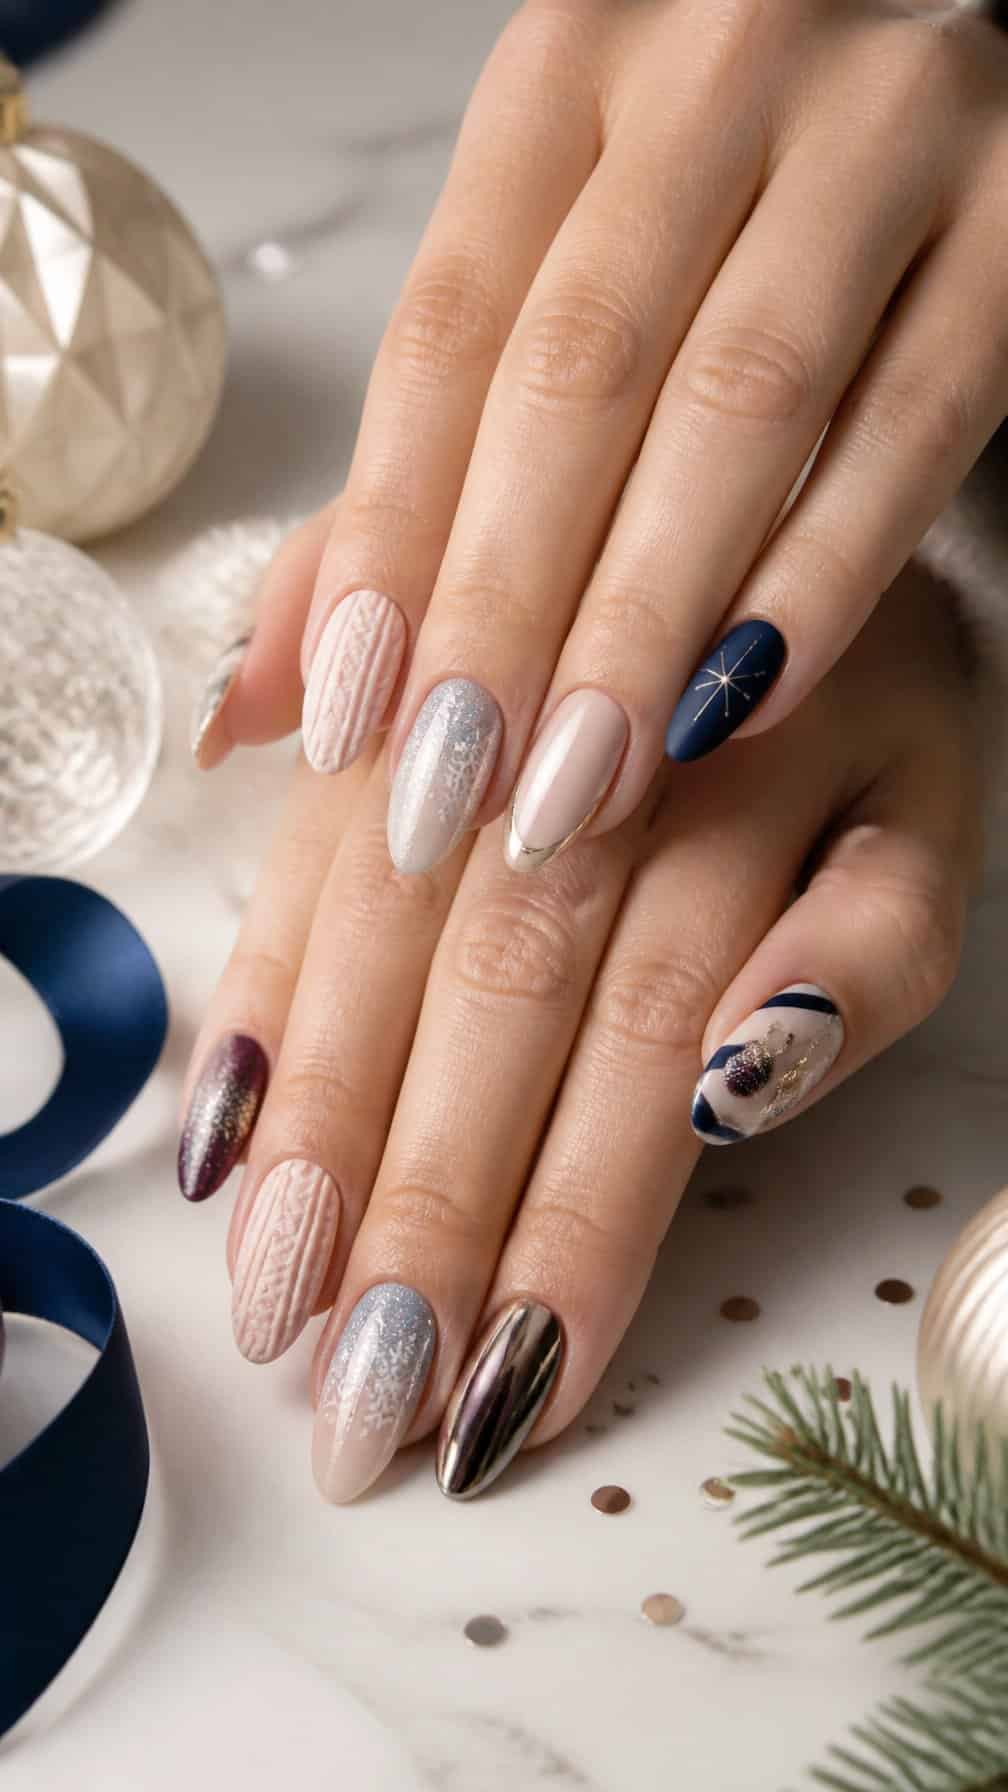
Table of Contents
- 1 1) Icy blue snowflake nails
- 2 2) Champagne gold glitter nails
- 3 3) Silver chrome peppermint nails
- 4 4) White sweater-textured nails
- 5 5) Midnight blue starry nails
- 6 6) Rose gold bauble nails
- 7 7) Plum velvet Christmas nails
- 8 8) Emerald and gold holly nails
- 9 9) Frosted lavender snowflake nails
- 10 10) Pearl white ornament nails
- 11 11) Black and silver winter nails
- 12 12) Navy blue Fair Isle nails
- 13 13) Copper glitter pinecone nails
- 14 14) Blush pink candy cane nails
- 15 15) Teal and silver gift-wrap nails
- 16 16) Matte burgundy plaid nails
- 17 17) Opal aurora Christmas nails
- 18 18) Sage green mistletoe nails
- 19 19) Gold foil Christmas tree nails
- 20 20) Cranberry and cream knit nails
- 21 21) Icicle French tip nails
- 22 22) Mocha gingerbread nails
- 23 23) Holographic silver tinsel nails
- 24 24) Dusty rose poinsettia nails
- 25 25) Cobalt blue ornament nails
- 26 26) White and gold star nails
- 27 27) Lilac Christmas sweater nails
- 28 28) Gunmetal glitter reindeer nails
- 29 29) Terracotta winter berry nails
- 30 30) Clear nails with silver snowflakes
- 31 Choosing a Festive Color Palette Beyond Traditional Holiday Shades
- 32 Winter Neutrals and Metallic Accents
- 33 Jewel Tones and Icy Pastels
- 34 Making Holiday Nail Art Last Through the Season
- 35 Selecting Durable Polish and Top Coats
- 36 Protecting Nails From Chips and Dryness
1) Icy blue snowflake nails
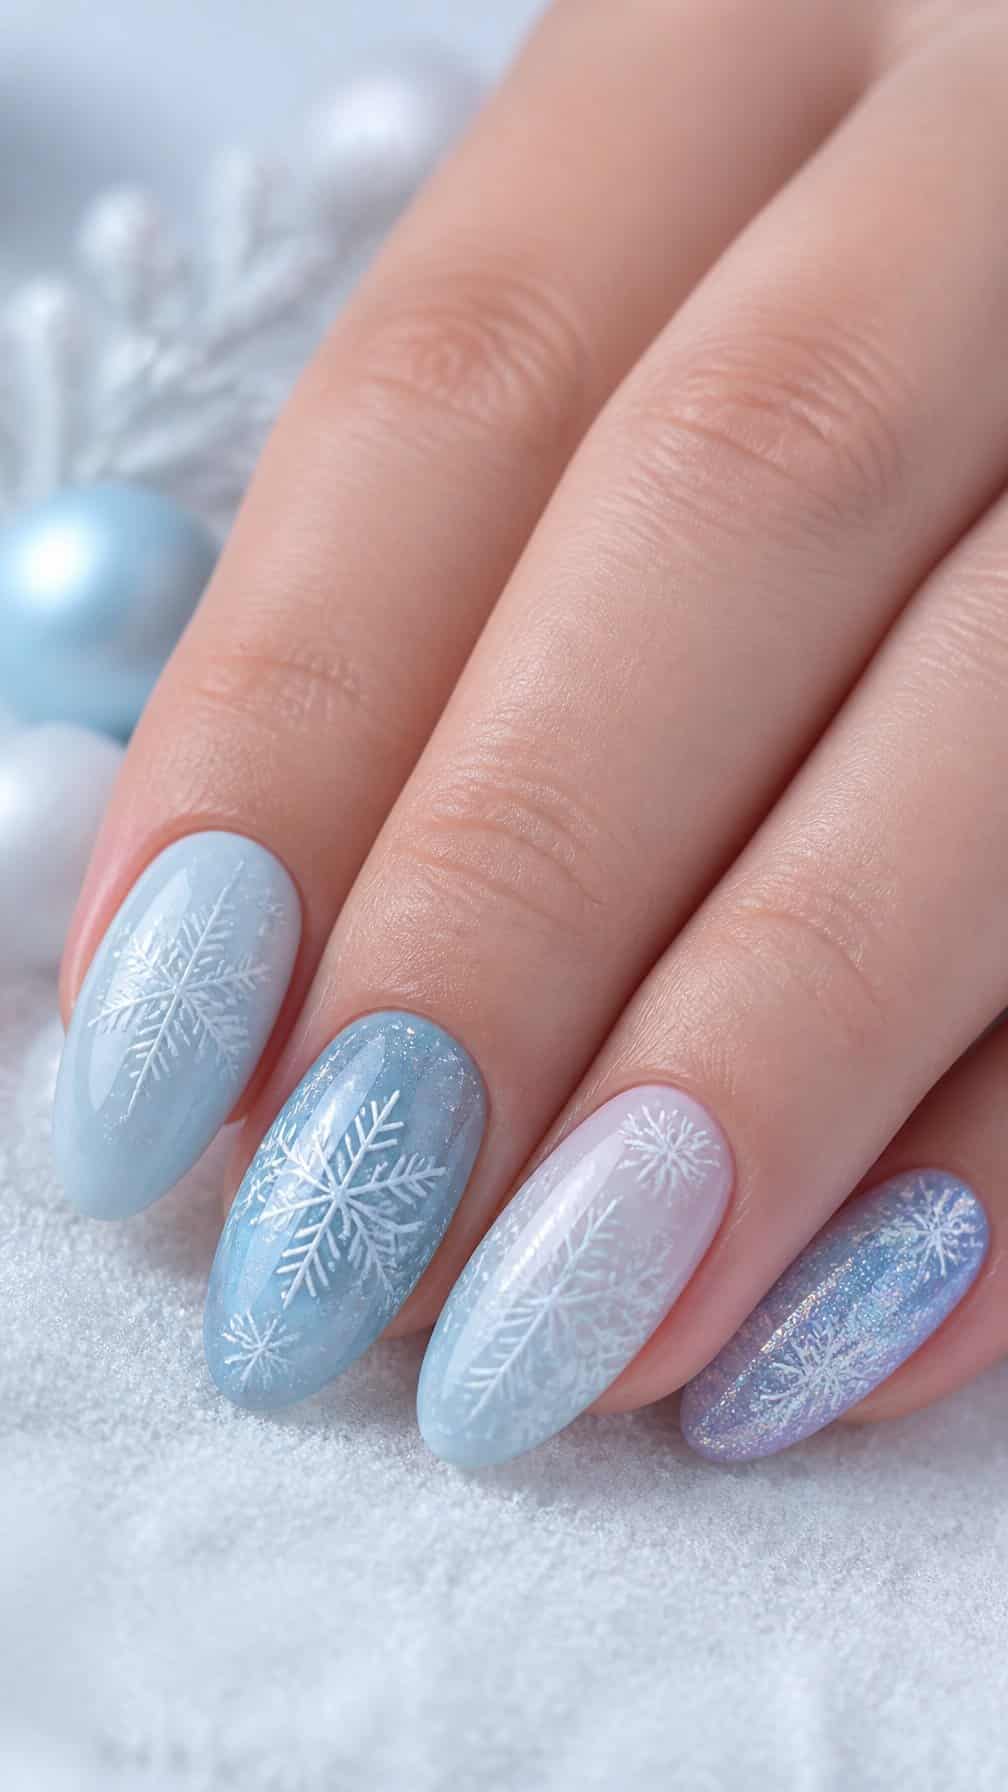
I use an icy blue polish as the base, choosing a sheer finish for a soft, frosted look or a solid shade for stronger contrast. I add white snowflakes with a fine nail-art brush, placing one larger design on each accent nail and smaller flakes across the rest.
A layer of silver shimmer gives the manicure subtle sparkle without adding red or green. I keep the snowflake lines thin and slightly varied so the pattern looks delicate rather than crowded, then seal everything with a glossy topcoat.
2) Champagne gold glitter nails
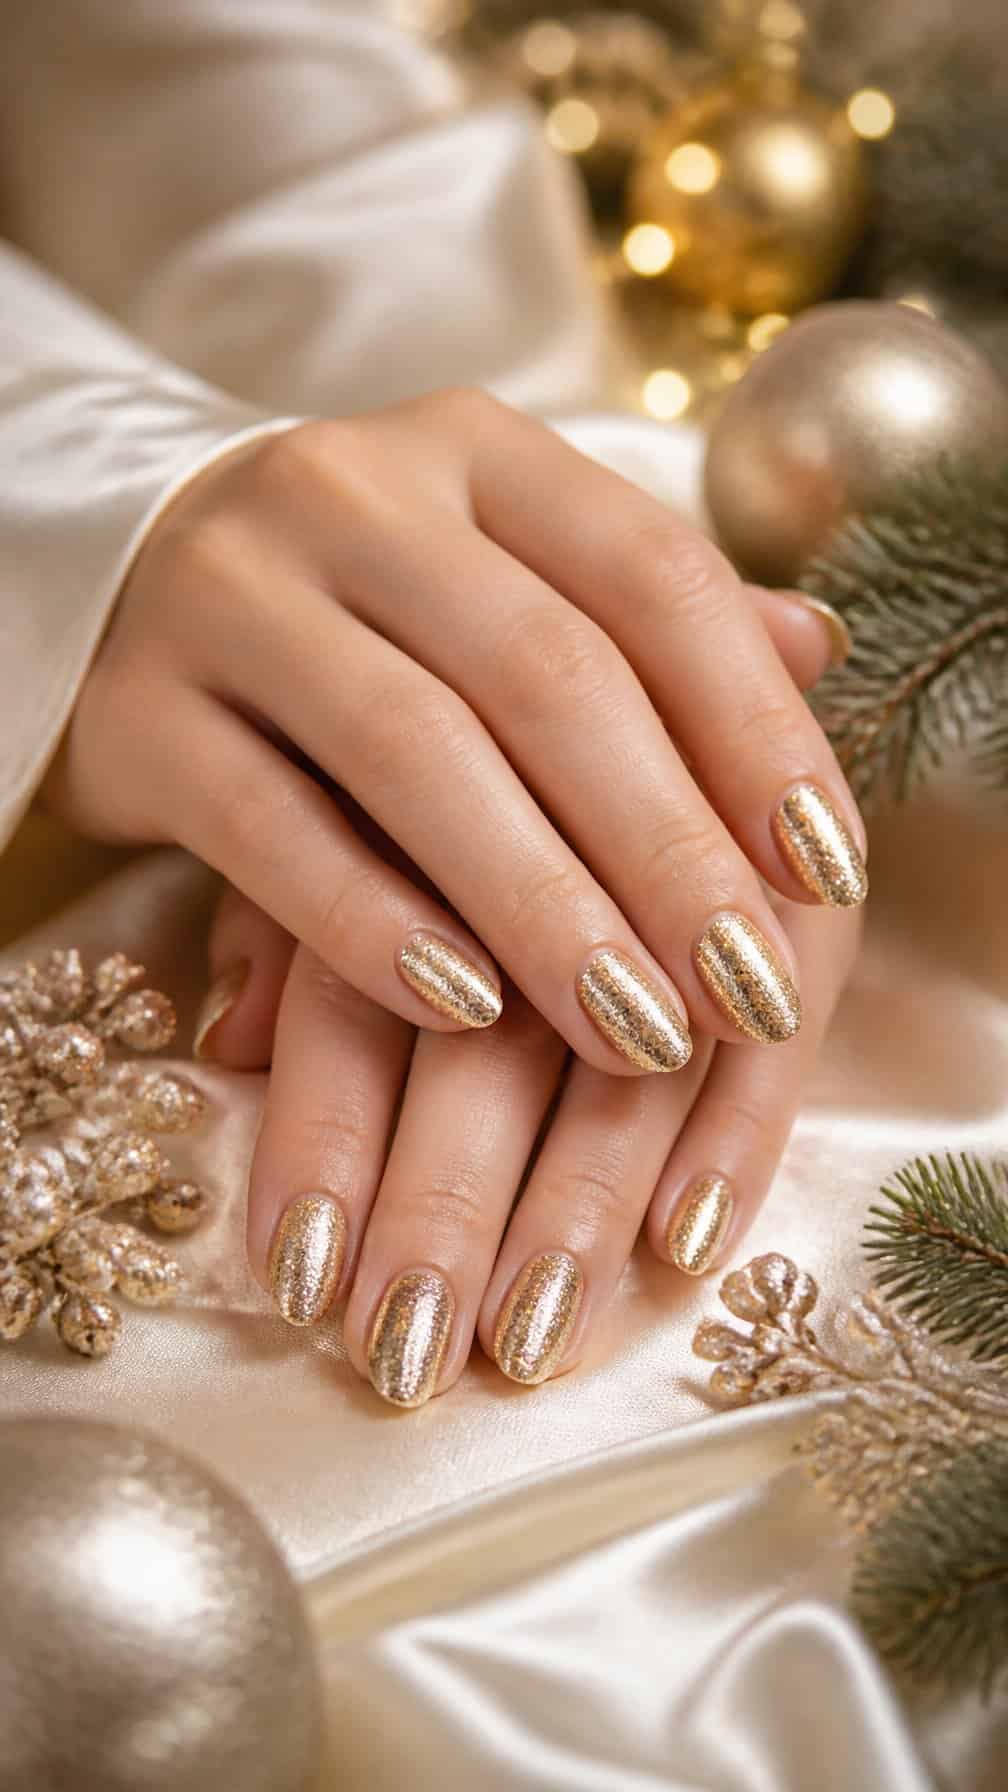
I like champagne gold glitter for its softer take on traditional holiday sparkle. I start with a sheer beige or warm nude base, then apply fine gold glitter across each nail for a smooth, reflective finish.
For more contrast, I place the glitter heavily at the tips and blend it toward the center, creating a subtle gradient. A glossy topcoat helps level the texture and keeps the manicure looking polished.
I pair this design with delicate gold jewelry or neutral clothing. The warm metallic shade suits short, rounded nails as well as longer almond shapes, making it easy to adapt without relying on red or green.
3) Silver chrome peppermint nails
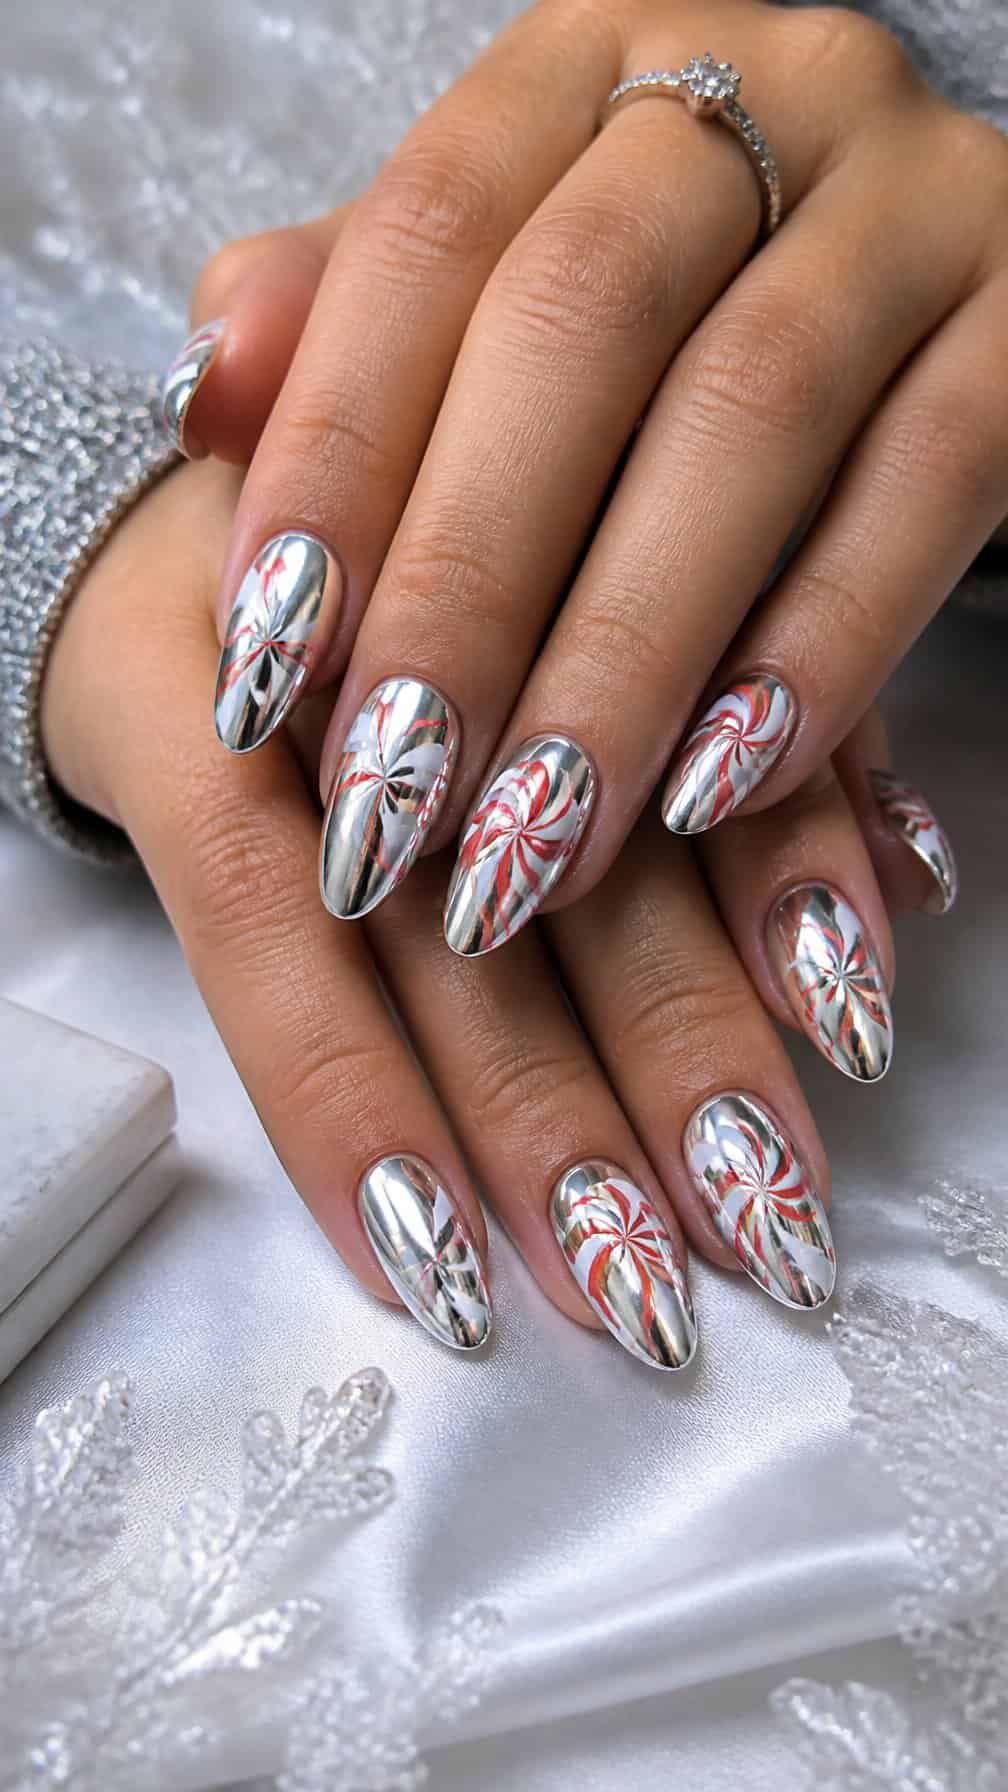
I like silver chrome as a cool alternative to traditional holiday color schemes. I would use a reflective silver base on each nail, then add thin peppermint-style swirls in white or soft silver. The curved lines create a candy-inspired look without relying on red.
For a cleaner design, I would keep the swirls on two or three accent nails and leave the others fully chrome. A glossy topcoat helps preserve the metallic finish and gives the manicure a smooth, polished appearance.
4) White sweater-textured nails
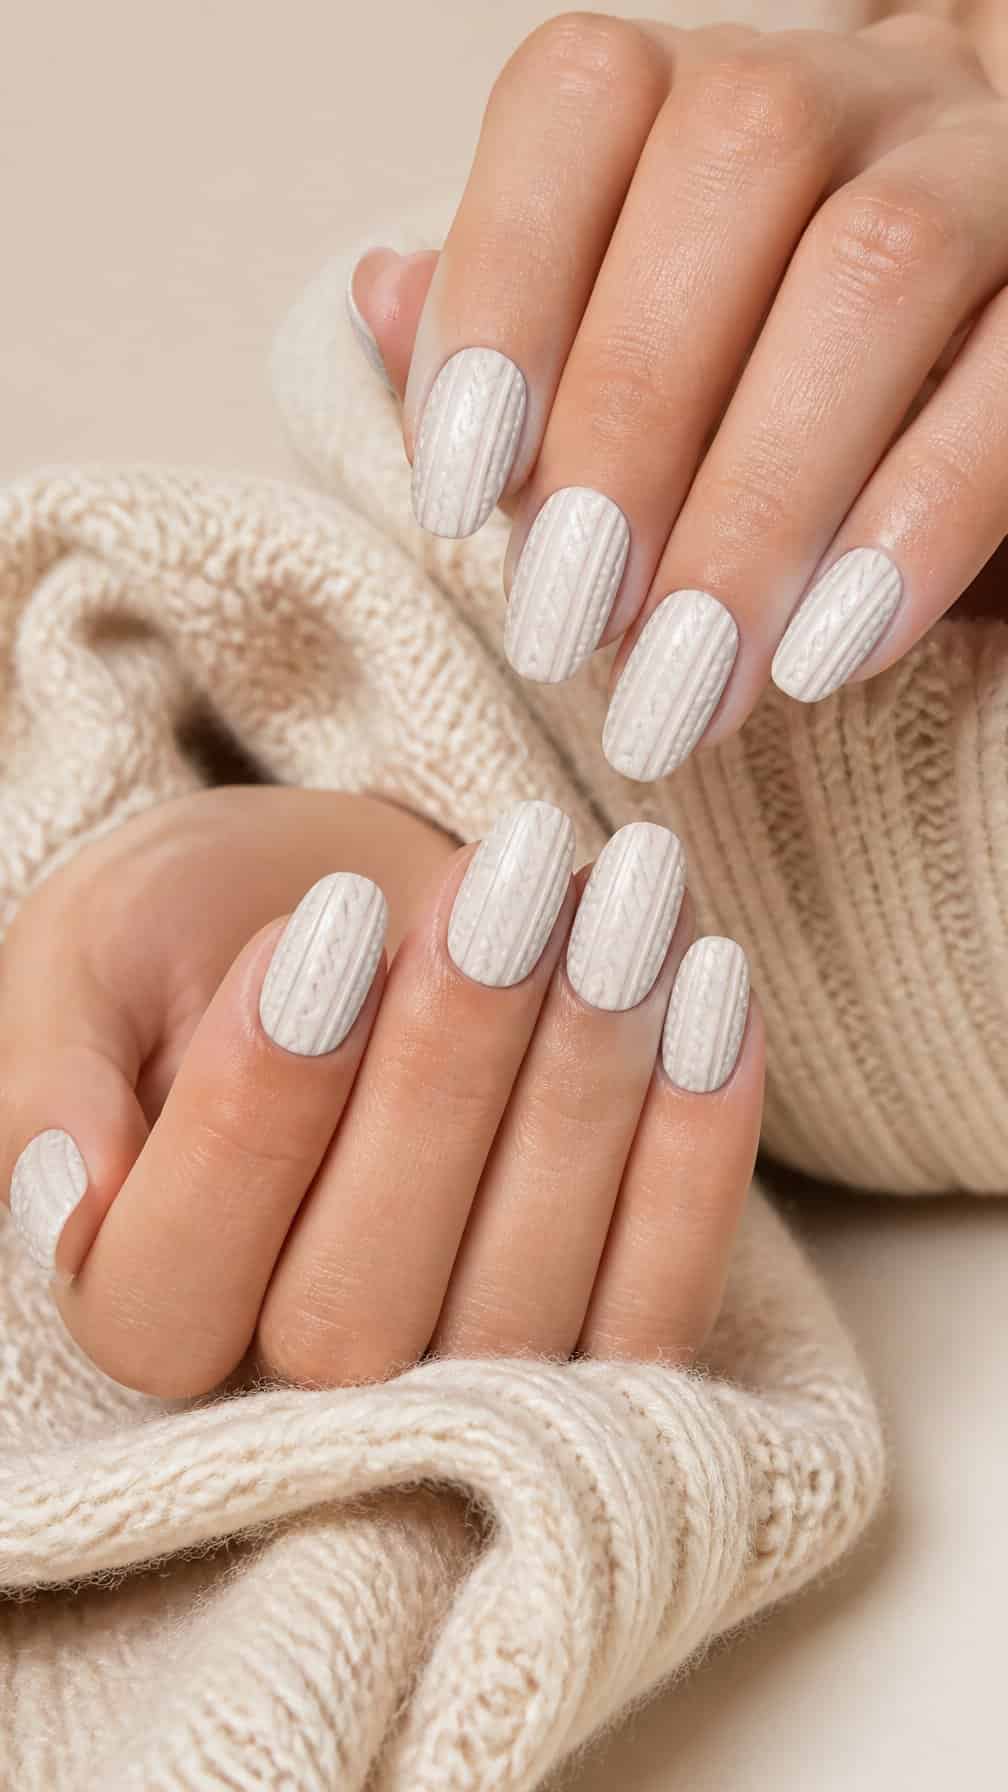
I like white sweater-textured nails for their soft, winter-inspired finish. A creamy white base keeps the design clean, while raised cable-knit lines add dimension without relying on bright colors. I would choose a matte topcoat to make the texture resemble a knitted jumper.
This style works well on short, rounded nails because the pattern remains subtle and balanced. I can add a small silver accent nail or tiny pearl details for contrast, but the design looks polished even when every nail uses the same white texture.
5) Midnight blue starry nails
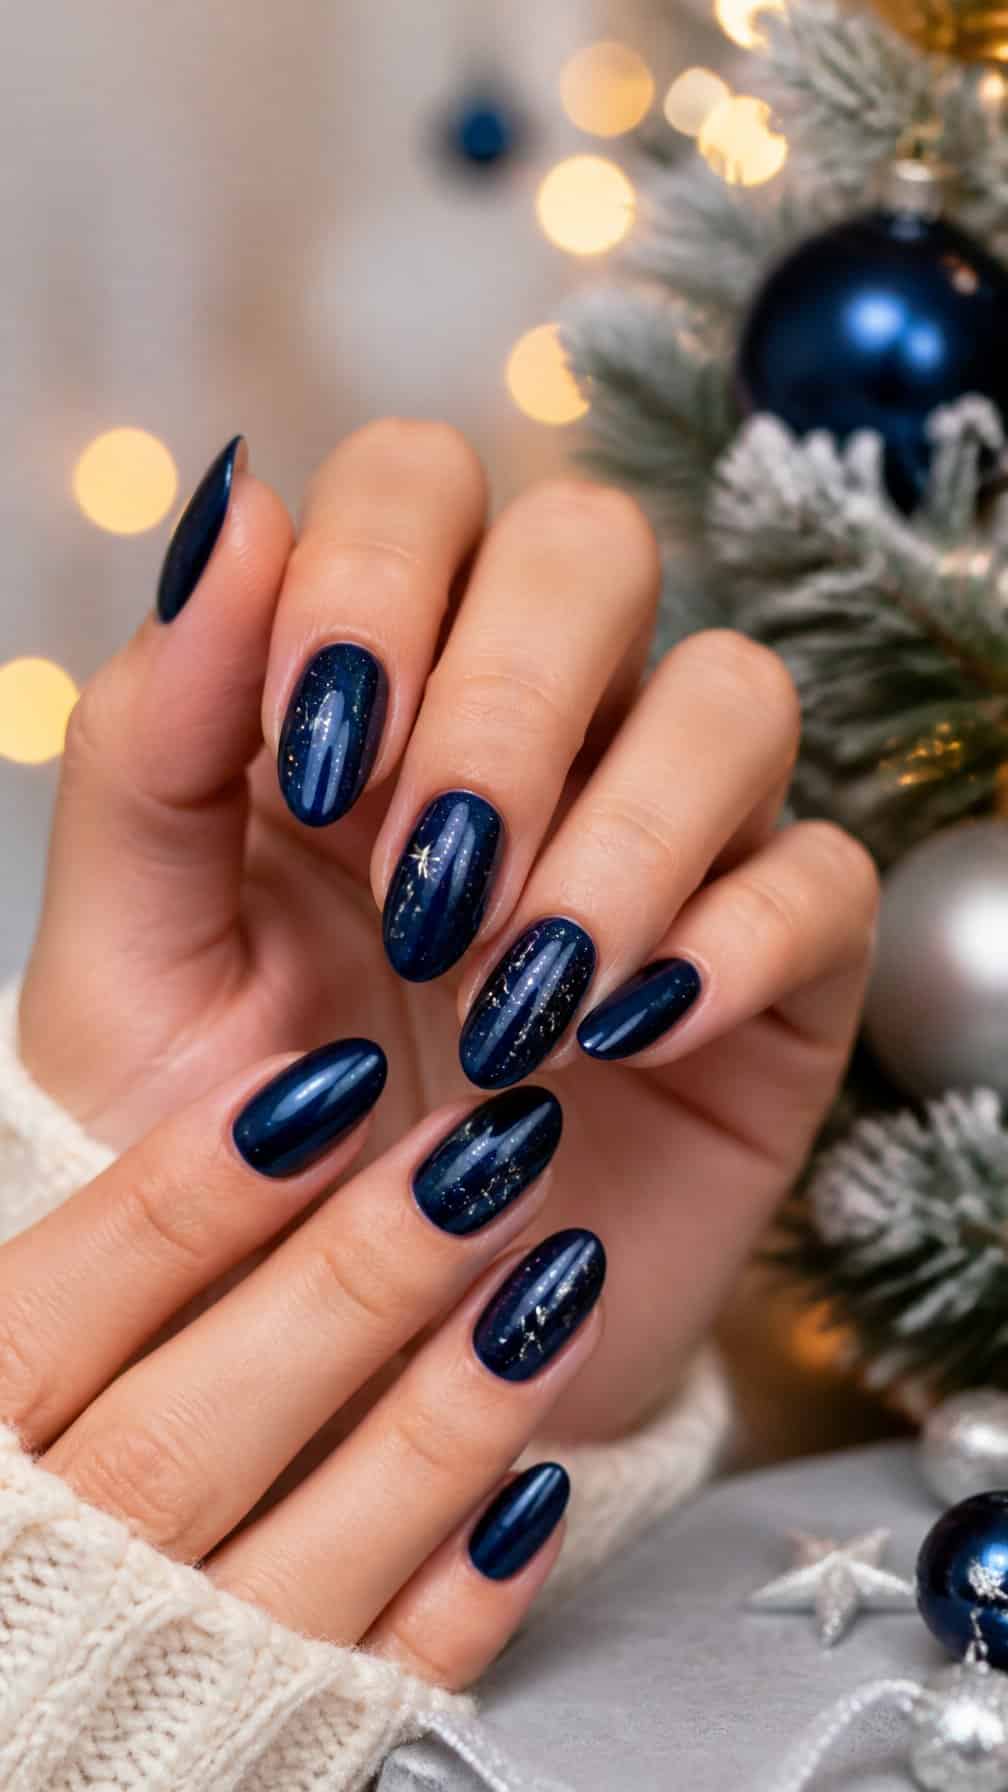
I use midnight blue polish as a rich alternative to black, then add small silver stars for a crisp winter-sky effect. The deep base makes the metallic details stand out without relying on red or green.
I prefer placing the stars unevenly across each nail, mixing tiny dots with a few larger shapes. A glossy topcoat sharpens the contrast and helps the design last longer, while a matte finish creates a softer, more muted look.
For a simpler version, I paint stars on one or two accent nails and leave the others solid blue. I can also add a thin silver French tip to connect the design without making it feel crowded.
6) Rose gold bauble nails
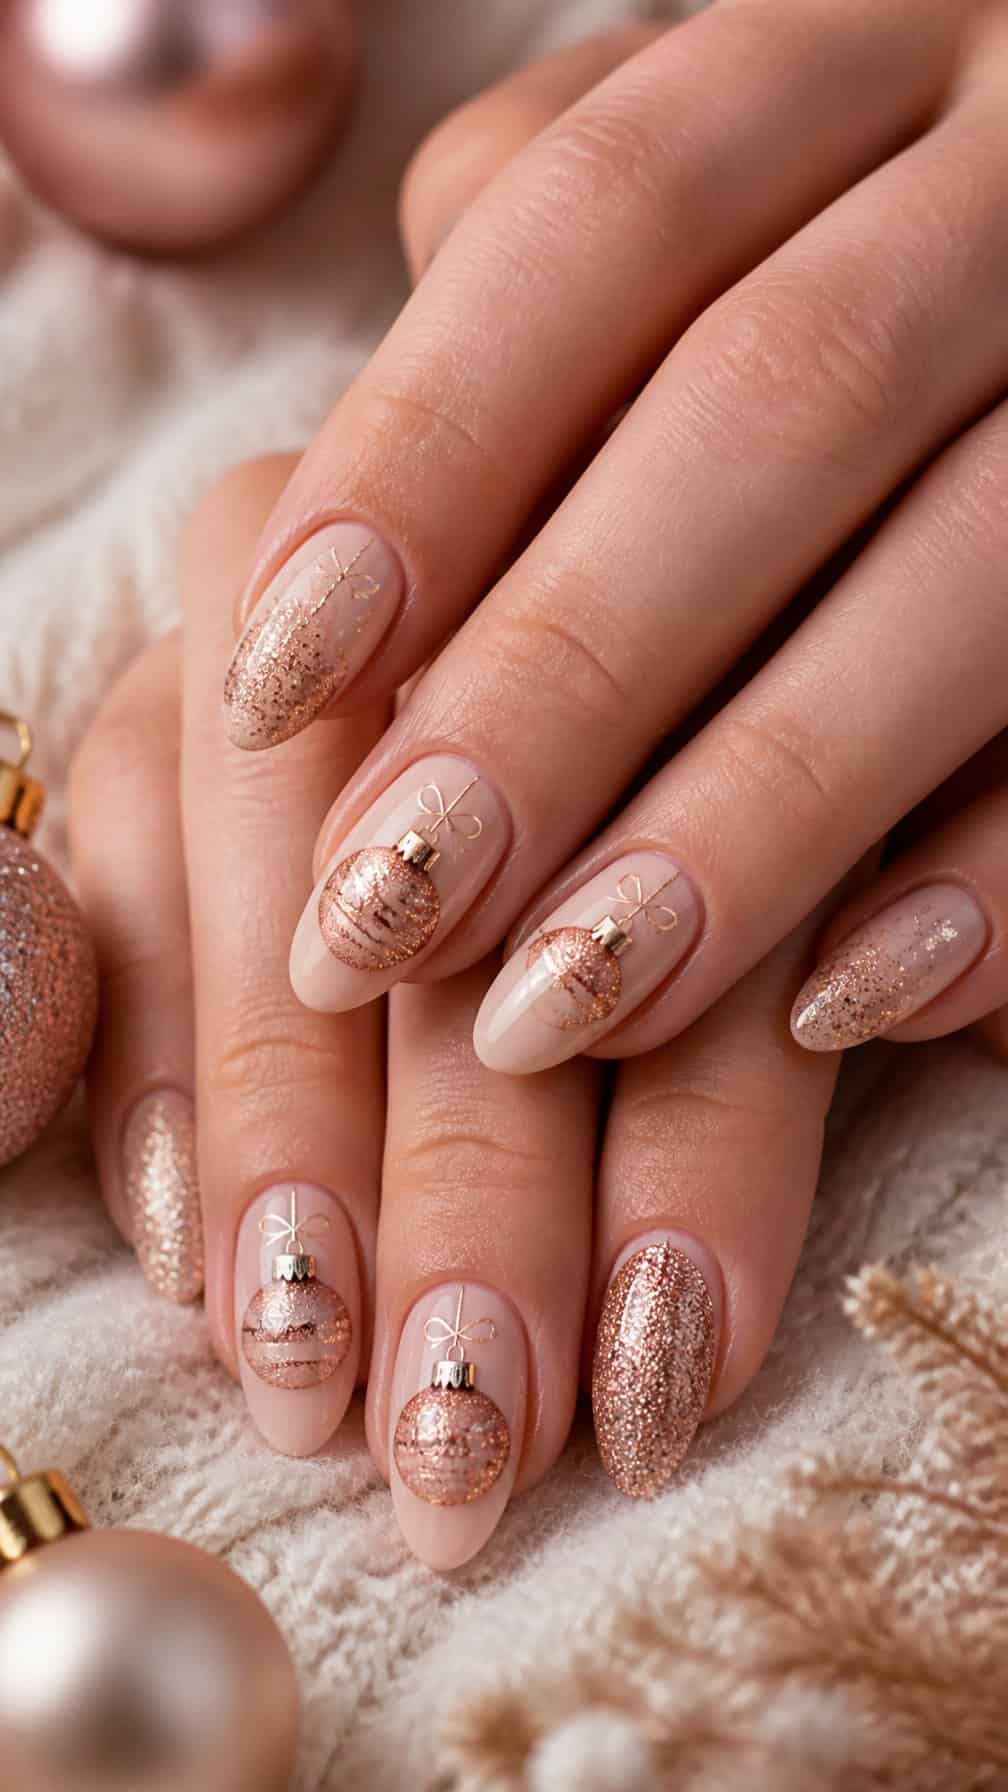
I like rose gold bauble nails for their soft metallic finish and festive detail. I would use a sheer blush or warm nude base, then add small rose gold circles near the tips or along one side of each nail.
A fine gold or white outline can make the baubles look more defined without adding visual weight. I would vary their sizes and placement, leaving plenty of negative space so the design stays polished rather than crowded.
For extra detail, I might add tiny hanging lines, white highlights, or a single glitter accent nail. A glossy top coat helps the metallic elements catch the light and keeps the manicure looking smooth.
7) Plum velvet Christmas nails
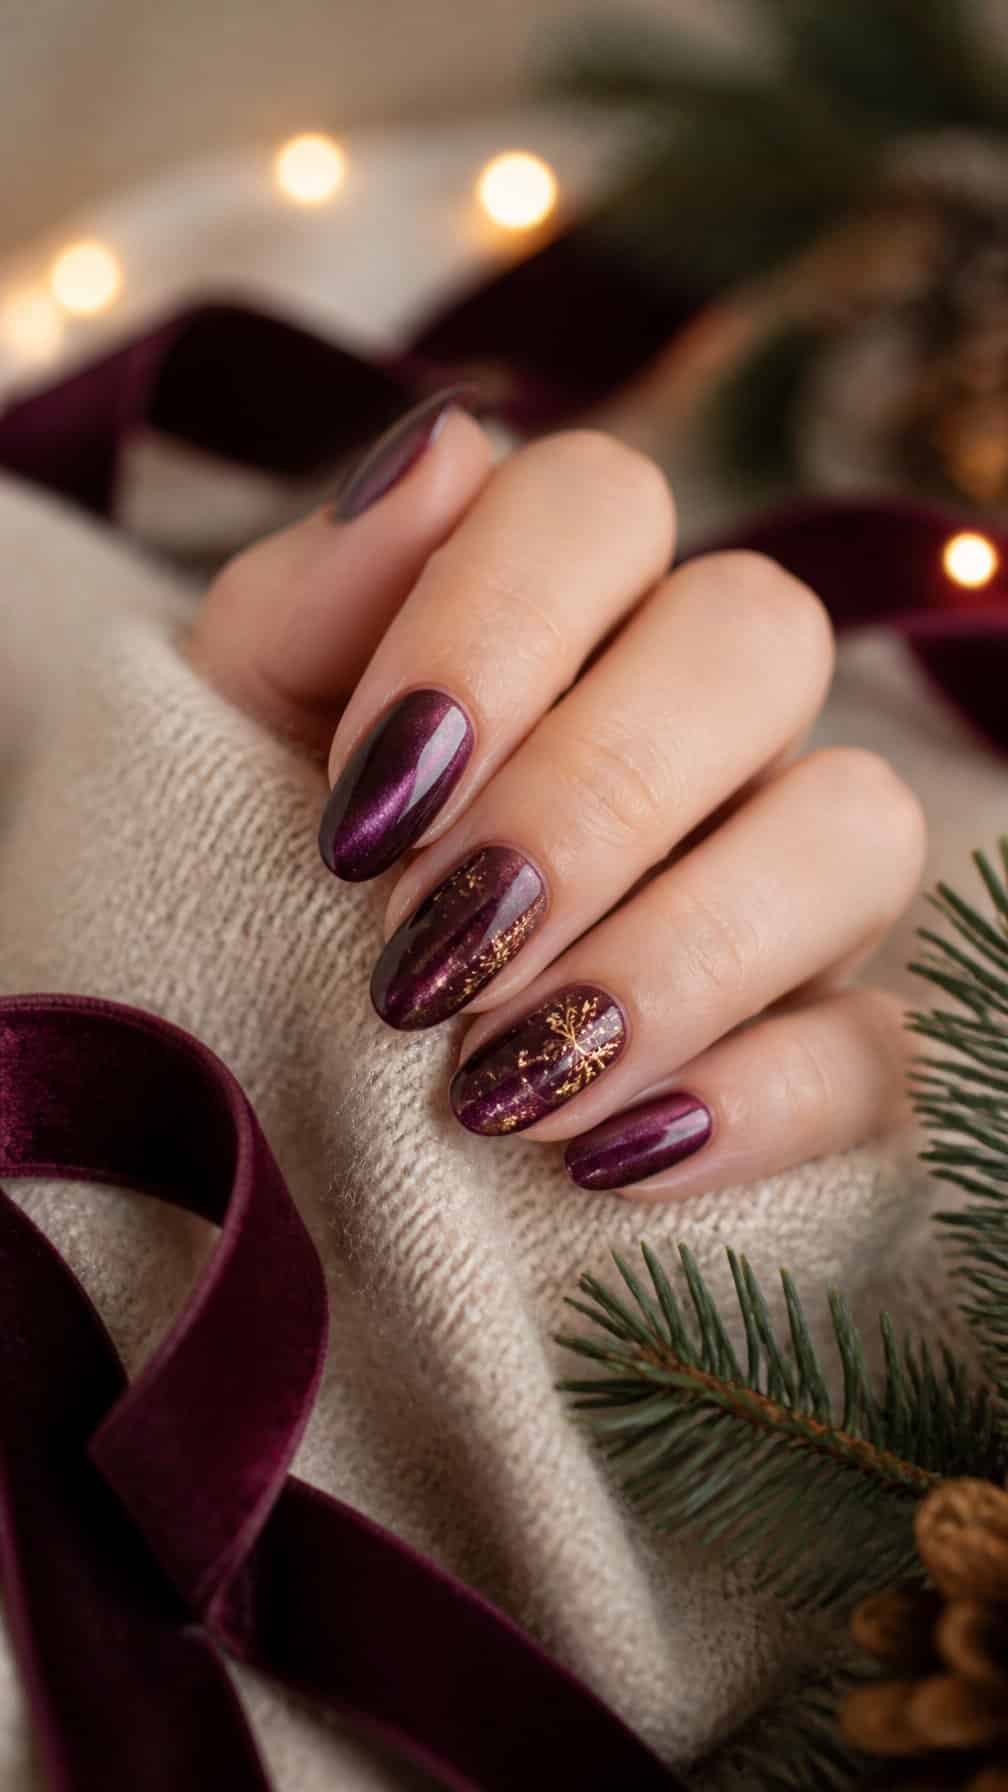
I would choose a deep plum polish with a velvet finish for a darker alternative to traditional holiday colors. Its soft, light-catching texture adds dimension without relying on glitter or bright shades.
I like pairing the finish with one or two accent nails featuring a fine silver star, a small crystal, or a delicate snowflake. Keeping the details minimal lets the rich plum color remain the focus while adding a clear Christmas reference.
A short almond or rounded-square shape suits this design well. I would use a magnetic velvet polish and move the magnet evenly across each nail before the polish sets, then seal the look with a compatible top coat.
8) Emerald and gold holly nails
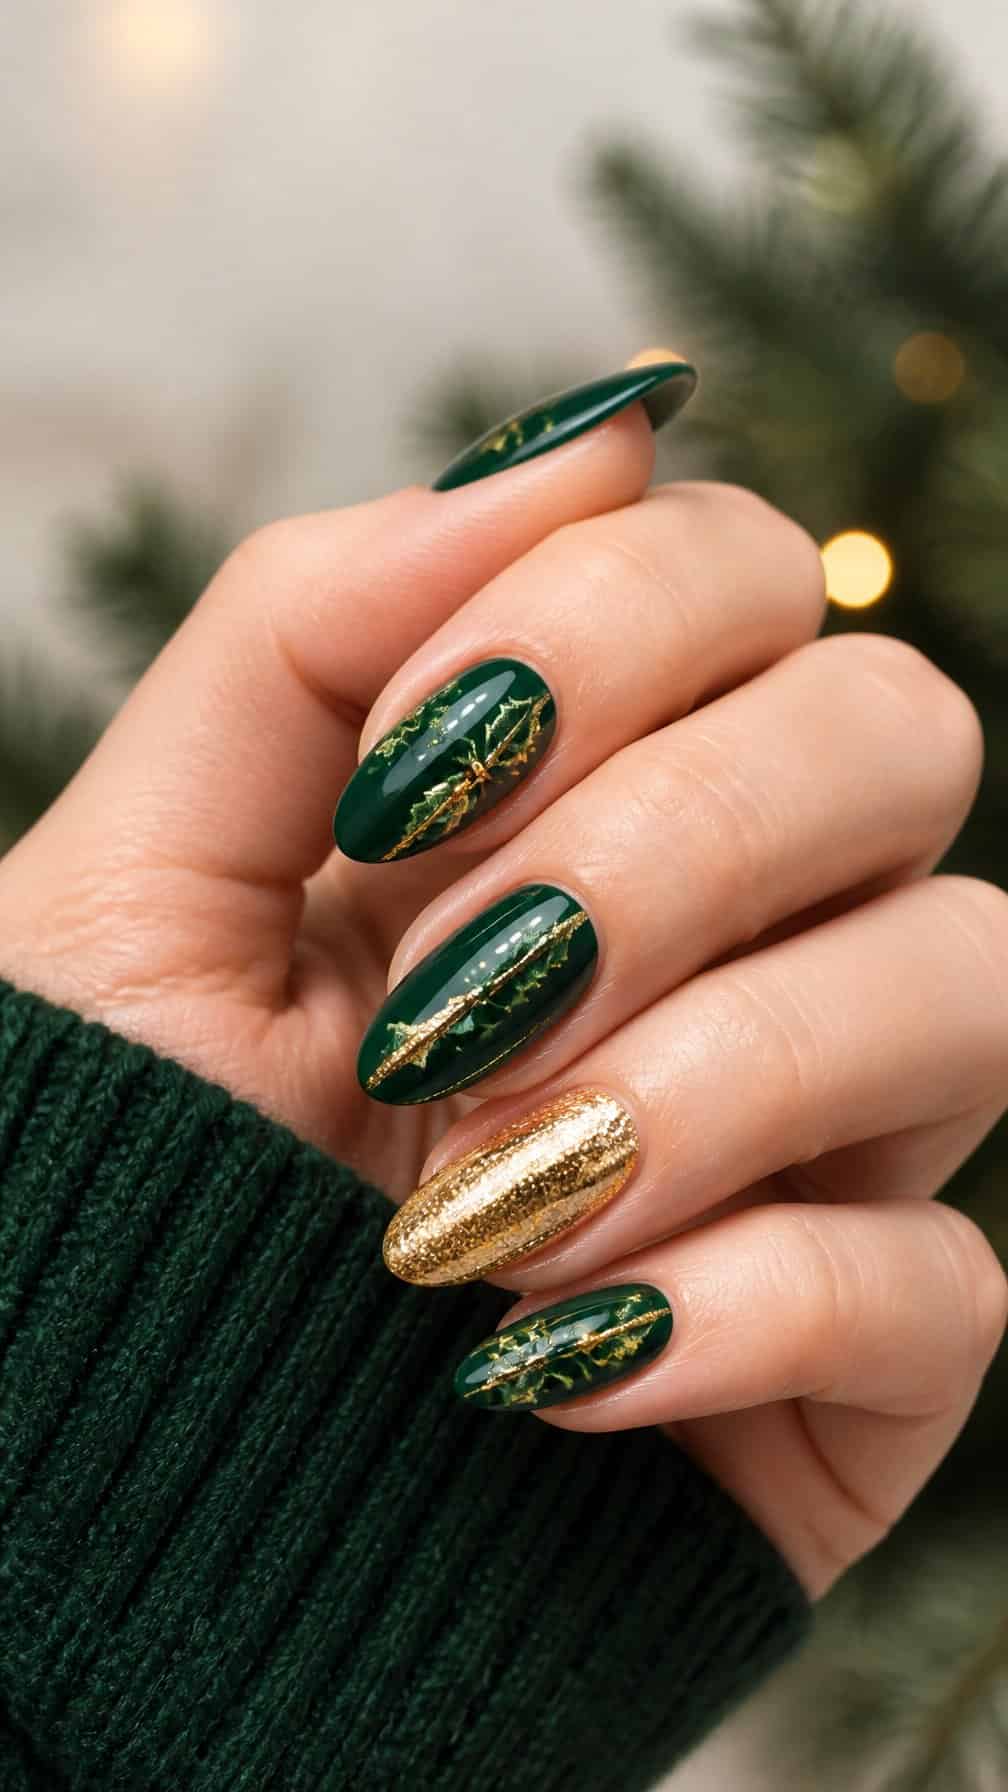
I would use a deep emerald base with small gold holly leaves and berries placed near the cuticle or on one accent nail. The contrast feels festive without relying on traditional red and green, while metallic details add definition against the dark polish.
For a cleaner finish, I would keep most nails solid emerald and reserve the holly design for two fingers. A thin gold outline can sharpen each leaf, while tiny berry clusters create detail without making the manicure look crowded.
9) Frosted lavender snowflake nails
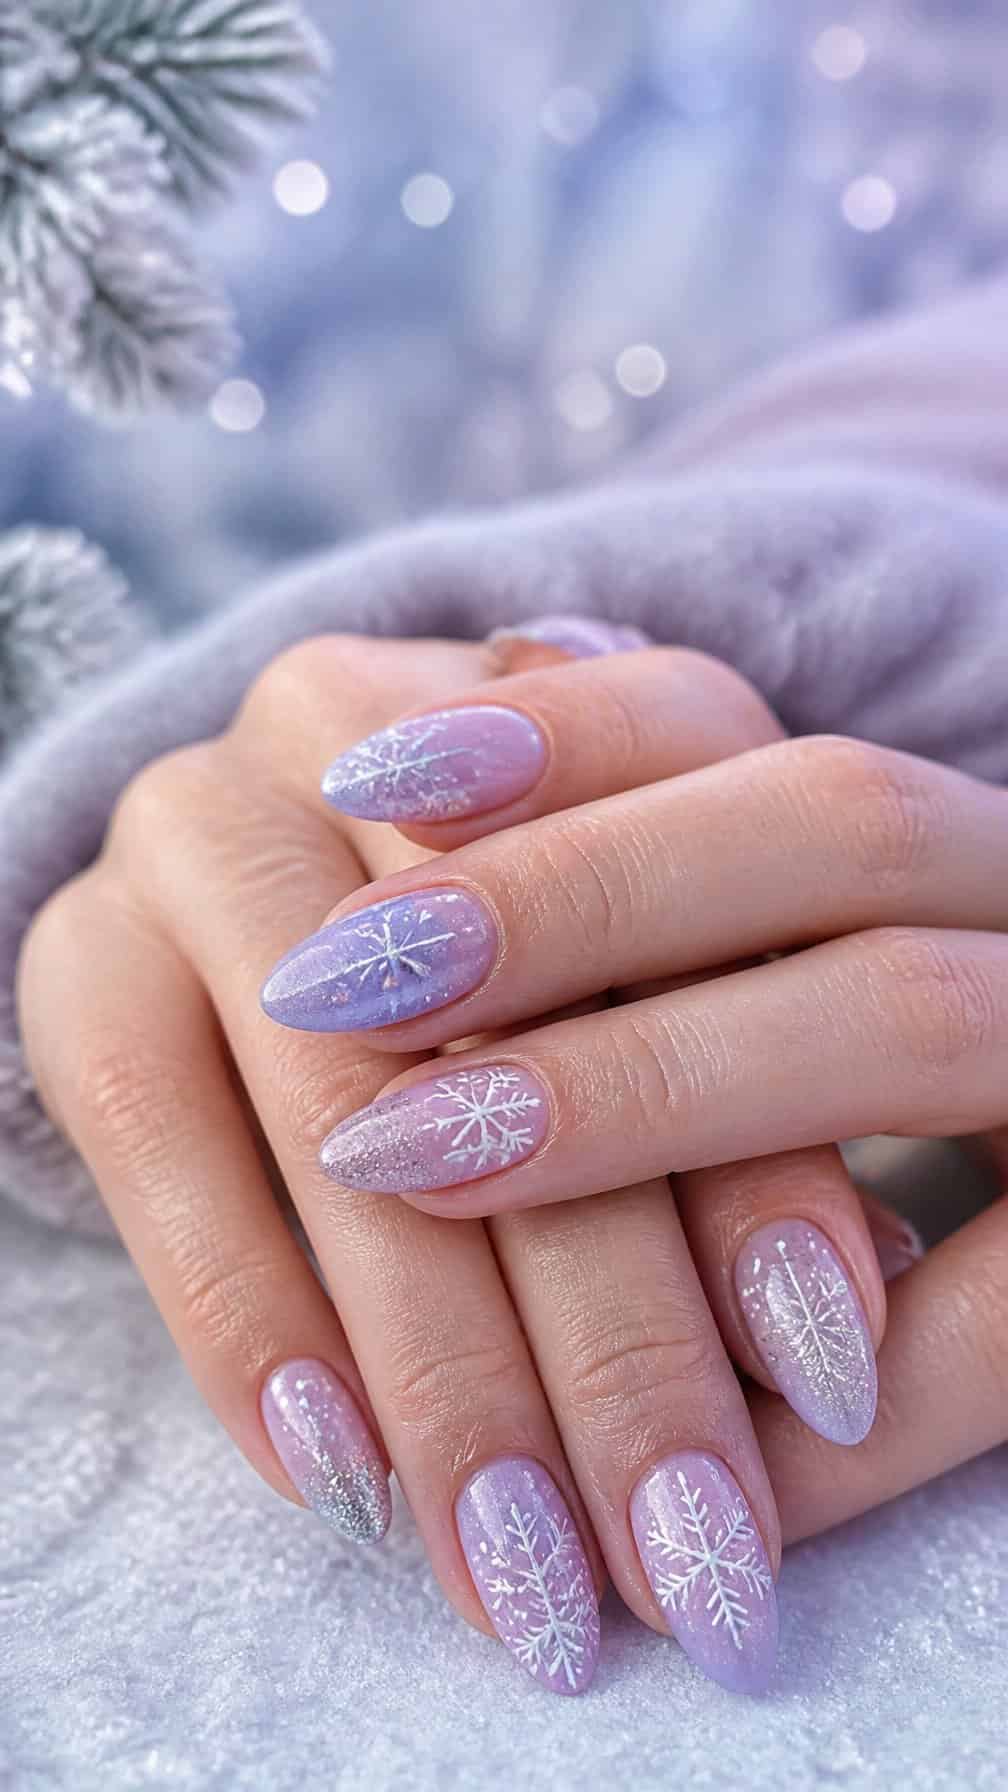
I like lavender as a softer alternative to traditional holiday colors. I would use a pale, frosted lavender base with a sheer shimmer, then add crisp white snowflakes on one or two accent nails.
For extra dimension, I would vary the snowflake sizes and place a few tiny white dots between them. A glossy topcoat keeps the design smooth, while a subtle chrome finish can create an icy effect without overpowering the delicate pattern.
10) Pearl white ornament nails
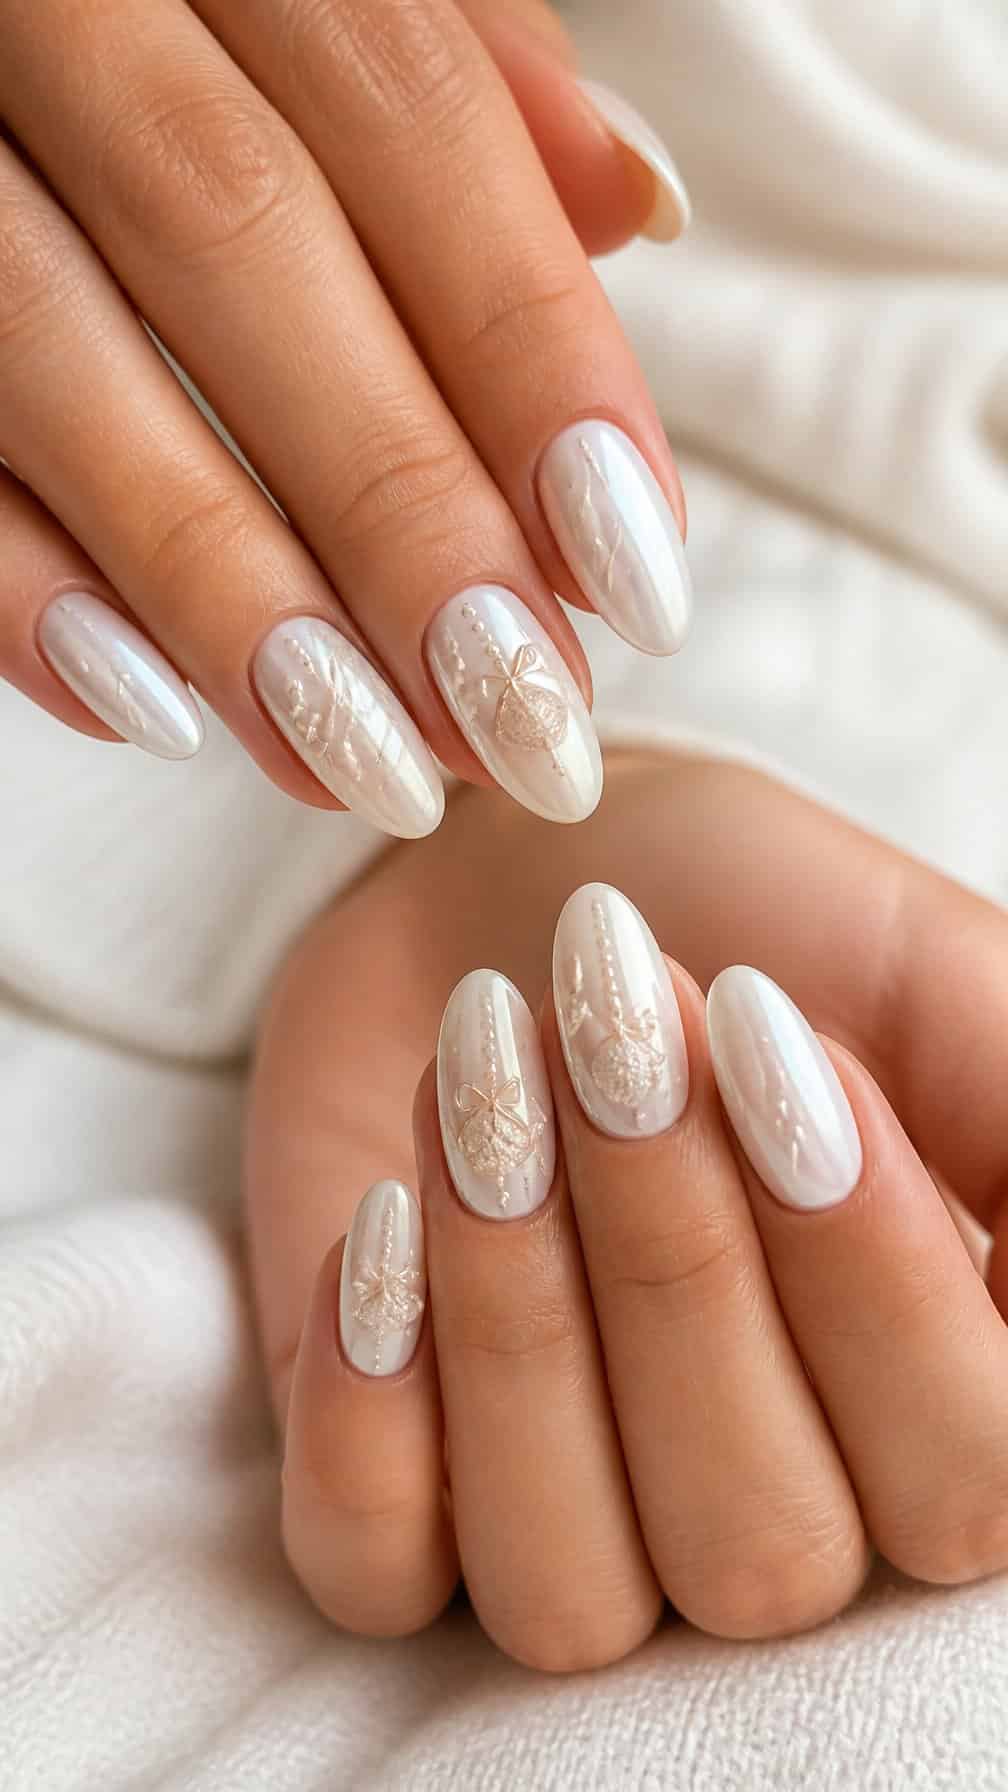
I would use a sheer pearl-white base to create a soft, frosted finish without relying on red or green. On two accent nails, I’d add delicate ornament outlines in silver, champagne, or icy blue, keeping the shapes small and evenly spaced.
A fine metallic line can define each bauble, while a tiny dot or short stripe adds detail without making the design busy. I’d finish with a glossy topcoat so the pearl shimmer stays smooth and the ornament accents remain crisp.
11) Black and silver winter nails
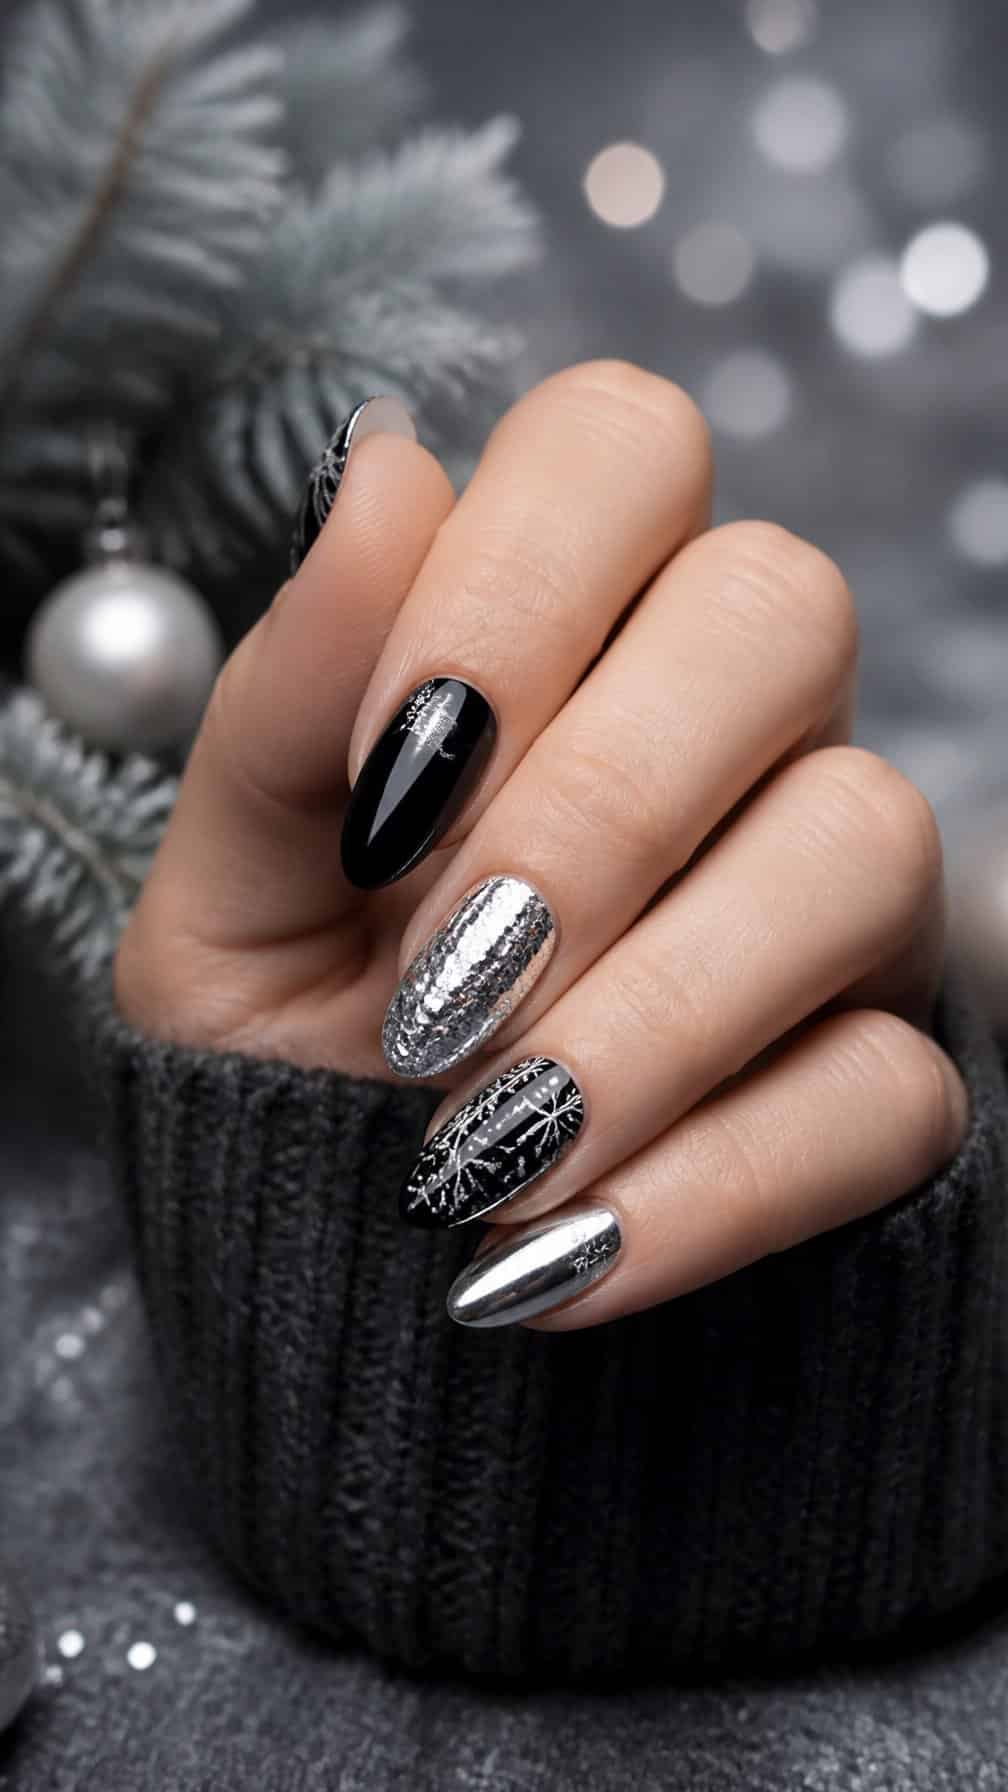
I like black and silver for a winter manicure because the contrast feels crisp without relying on traditional holiday colors. I would use glossy black polish as the base, then add thin silver lines, tiny stars, or scattered foil pieces to create a clean seasonal design.
For a softer finish, I would combine black cream polish with silver glitter on one or two accent nails. A matte topcoat over the black sections can make the metallic details stand out, while a glossy finish keeps the look polished and reflective.
I would keep the shapes simple, especially on shorter nails. Silver French tips, diagonal accents, or small snowflake details can add a winter touch without making the manicure look crowded.
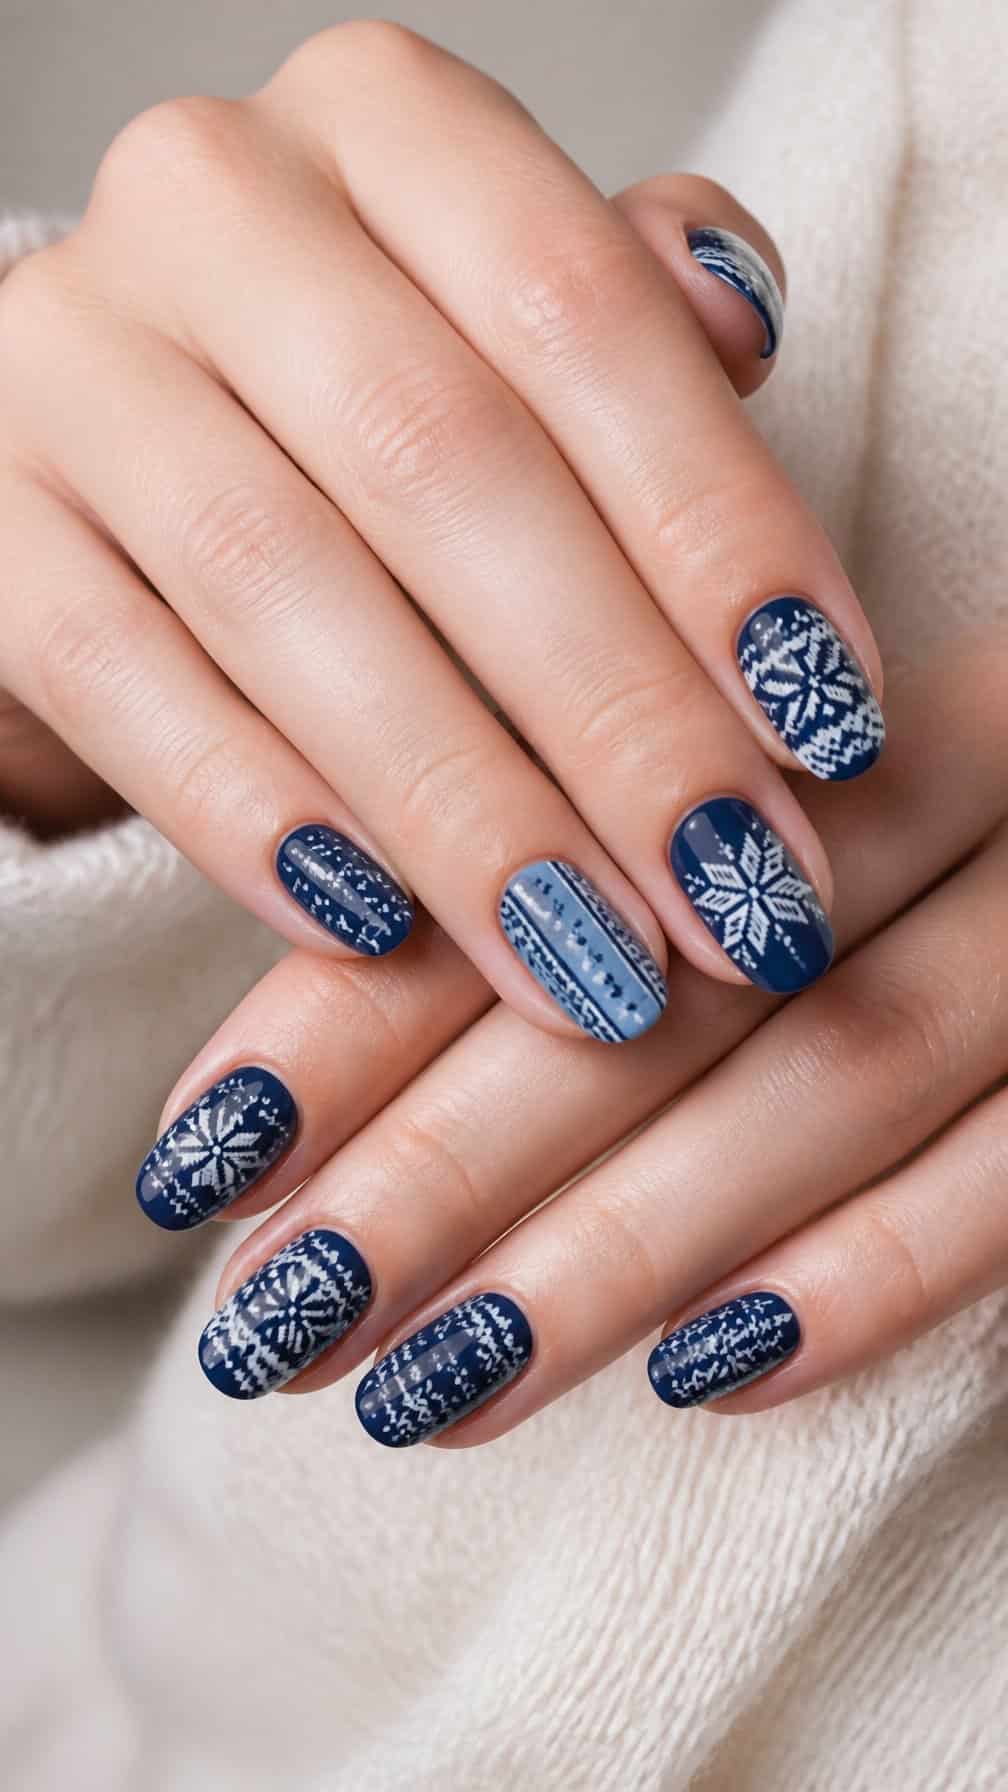
I like navy blue Fair Isle nails because they bring a winter-sweater pattern into a darker, more polished palette. I would use a navy base on each nail, then add thin white, pale blue, and silver details in repeating diamonds, dots, and snowflake shapes.
The pattern looks most balanced when I keep the lines fine and leave some navy visible between each motif. A glossy topcoat sharpens the contrast, while a matte finish gives the design a softer, knitted appearance. I would place the busiest pattern on two or three accent nails and keep the others simpler.
13) Copper glitter pinecone nails
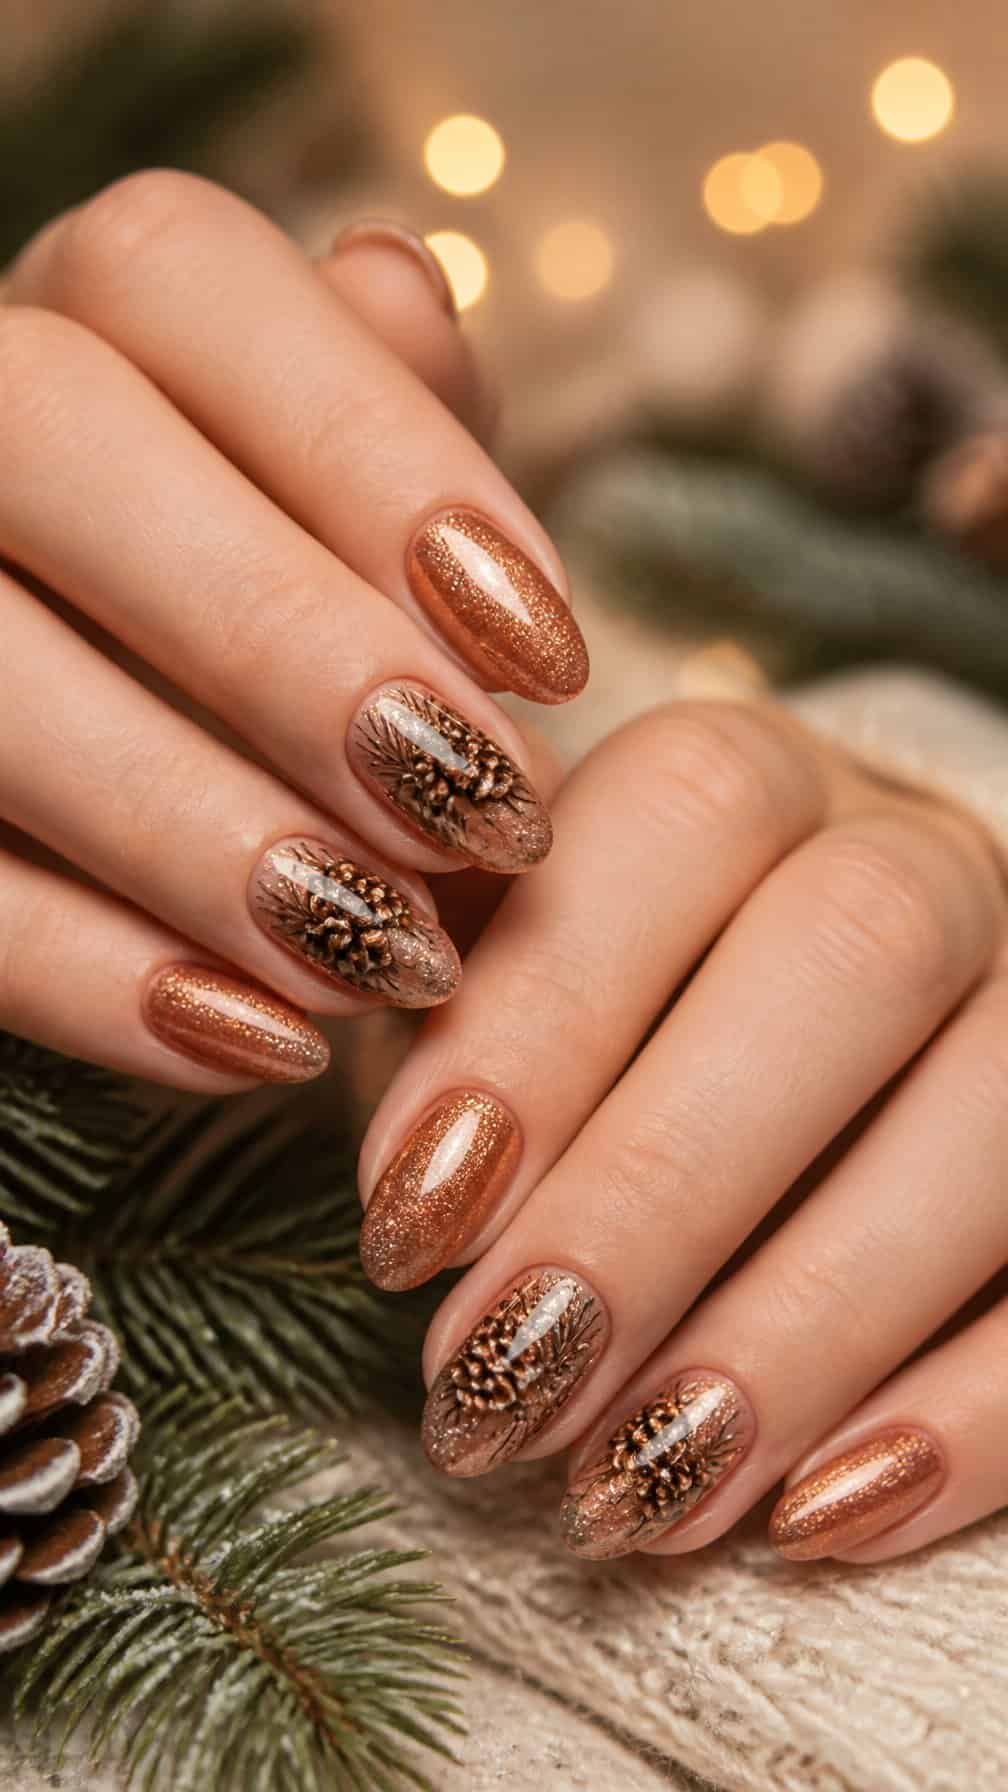
I like copper glitter as a warmer alternative to traditional holiday colors. I would use it across a sheer nude or soft beige base, then add small pinecone details in brown and muted bronze for a natural seasonal pattern.
A fine liner brush helps me shape the pinecones with short, overlapping strokes. I keep the designs on one or two accent nails and leave the remaining nails copper glitter, which gives the manicure structure without making every nail equally busy.
I would finish with a glossy top coat to smooth the texture and protect the glitter. For a softer look, I would choose fine copper shimmer; chunky glitter creates stronger sparkle and a more textured finish.
14) Blush pink candy cane nails
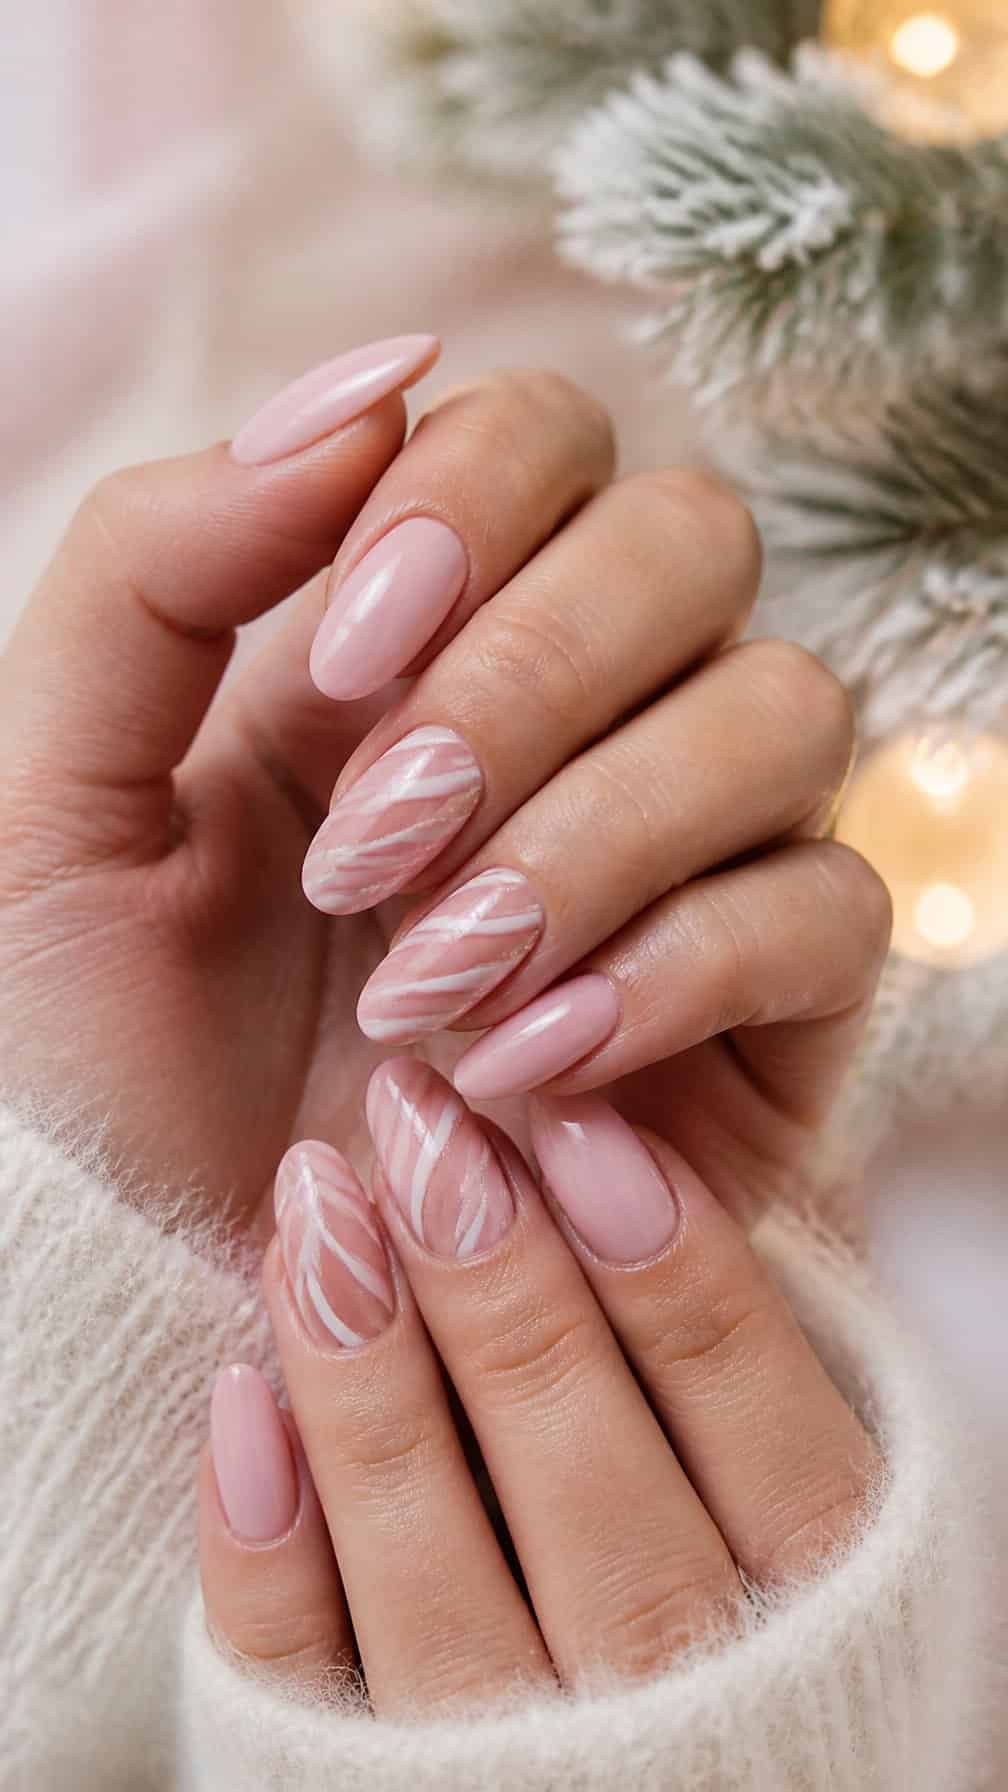
I like blush pink as a softer base for candy cane details. I would pair it with slim white and metallic gold stripes, keeping the lines slightly curved to follow each nail’s shape. This palette feels festive without relying on traditional red and green.
For a coordinated look, I would use candy cane accents on two or three nails and leave the others in sheer blush polish. A glossy top coat sharpens the contrast between the delicate striping and the clean background. Short or medium nails give the pattern enough space to stay defined.
15) Teal and silver gift-wrap nails
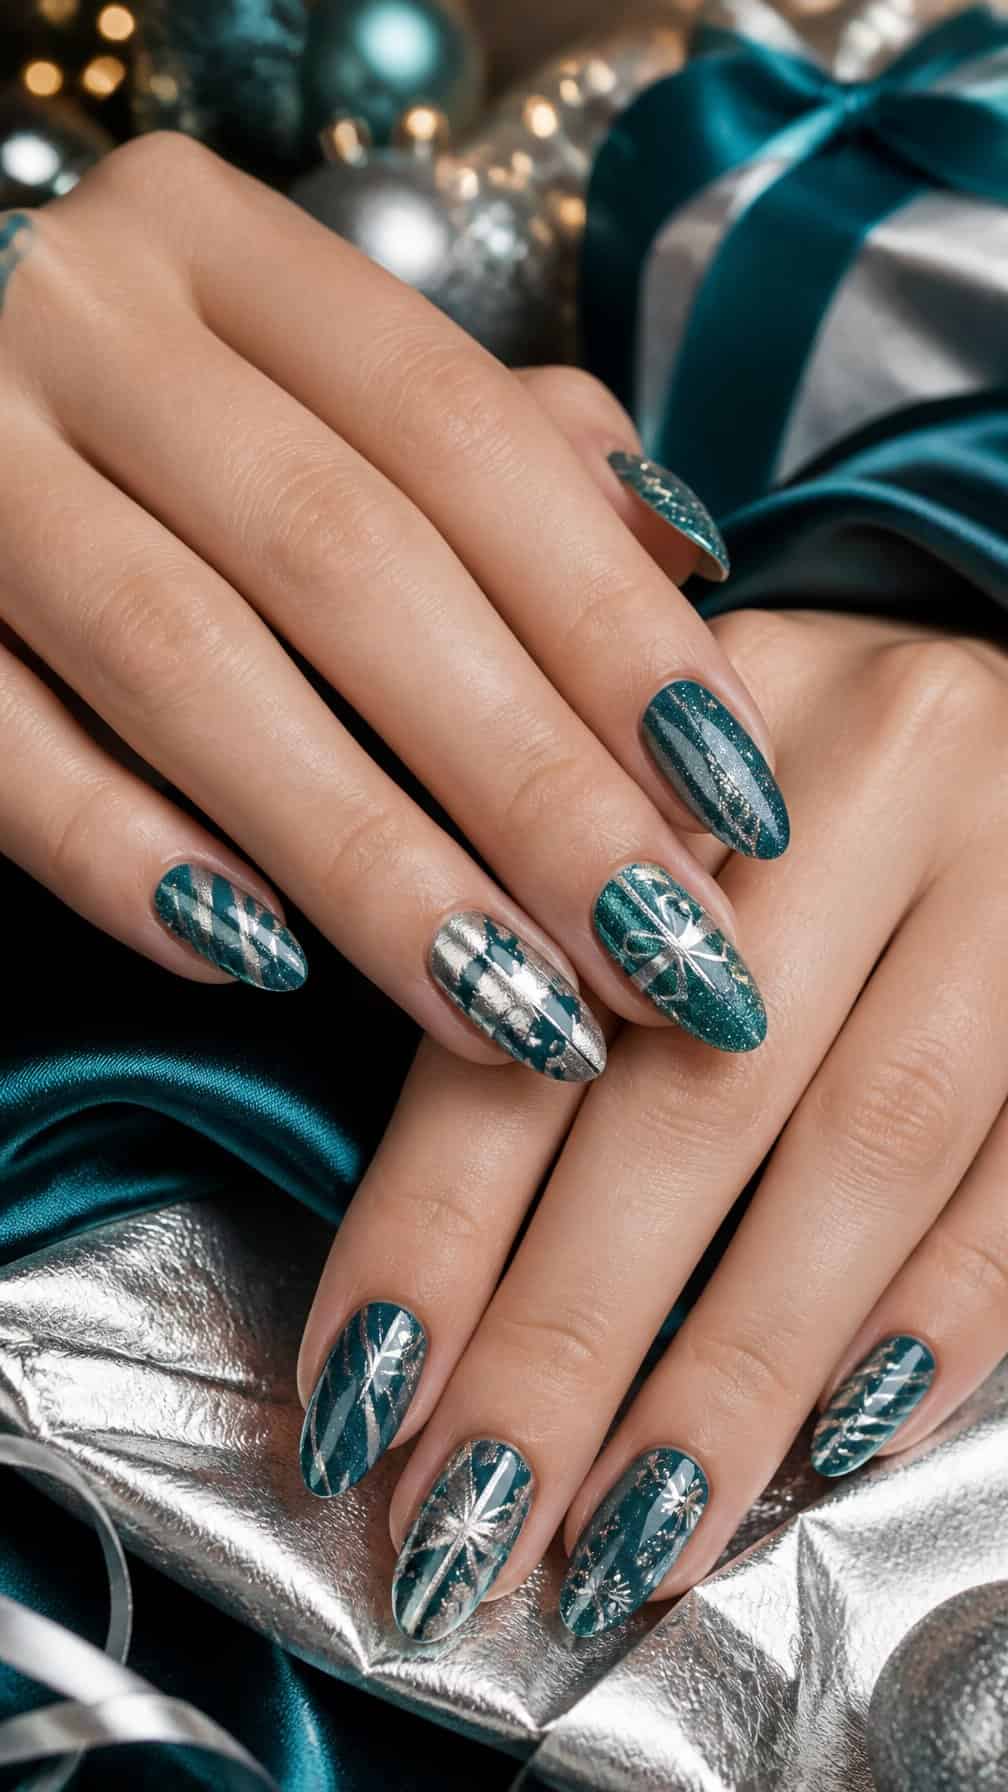
I would pair a deep teal base with thin silver lines that mimic ribbon on a wrapped present. Crossing two narrow strips over one or two accent nails creates a clean package pattern, while small silver squares suggest gift tags or metallic bows.
I would keep the remaining nails simple with solid teal polish or a single silver accent. A glossy topcoat helps the colors look crisp, while a matte teal finish with shiny silver details creates a subtle contrast. This design suits short and medium-length nails because the lines stay neat without overcrowding the surface.
16) Matte burgundy plaid nails
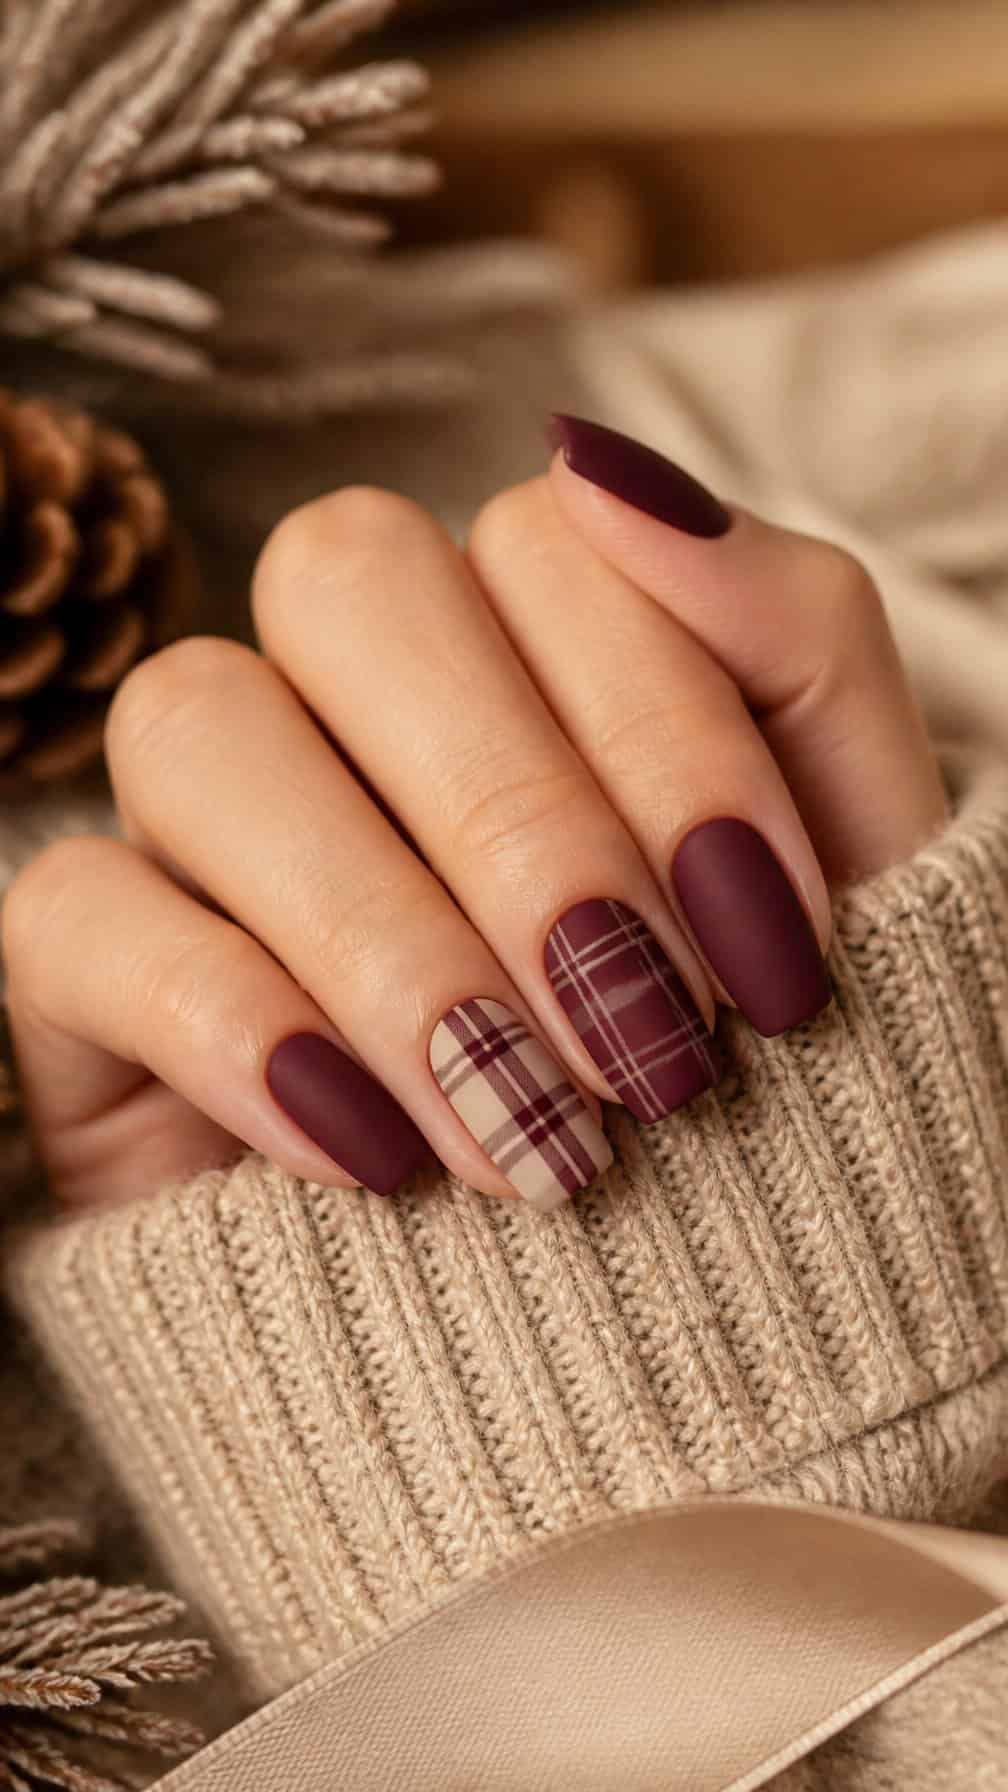
I like matte burgundy as a richer alternative to traditional holiday red. Its muted finish gives the color a modern look, while thin black, cream, or metallic-gold lines create a neat plaid pattern without making the design feel busy.
I would use the plaid on two or three nails and leave the others solid burgundy for balance. A short square or almond shape keeps the pattern structured, and a glossy topcoat on just one intersecting stripe adds subtle contrast to the matte base.
17) Opal aurora Christmas nails
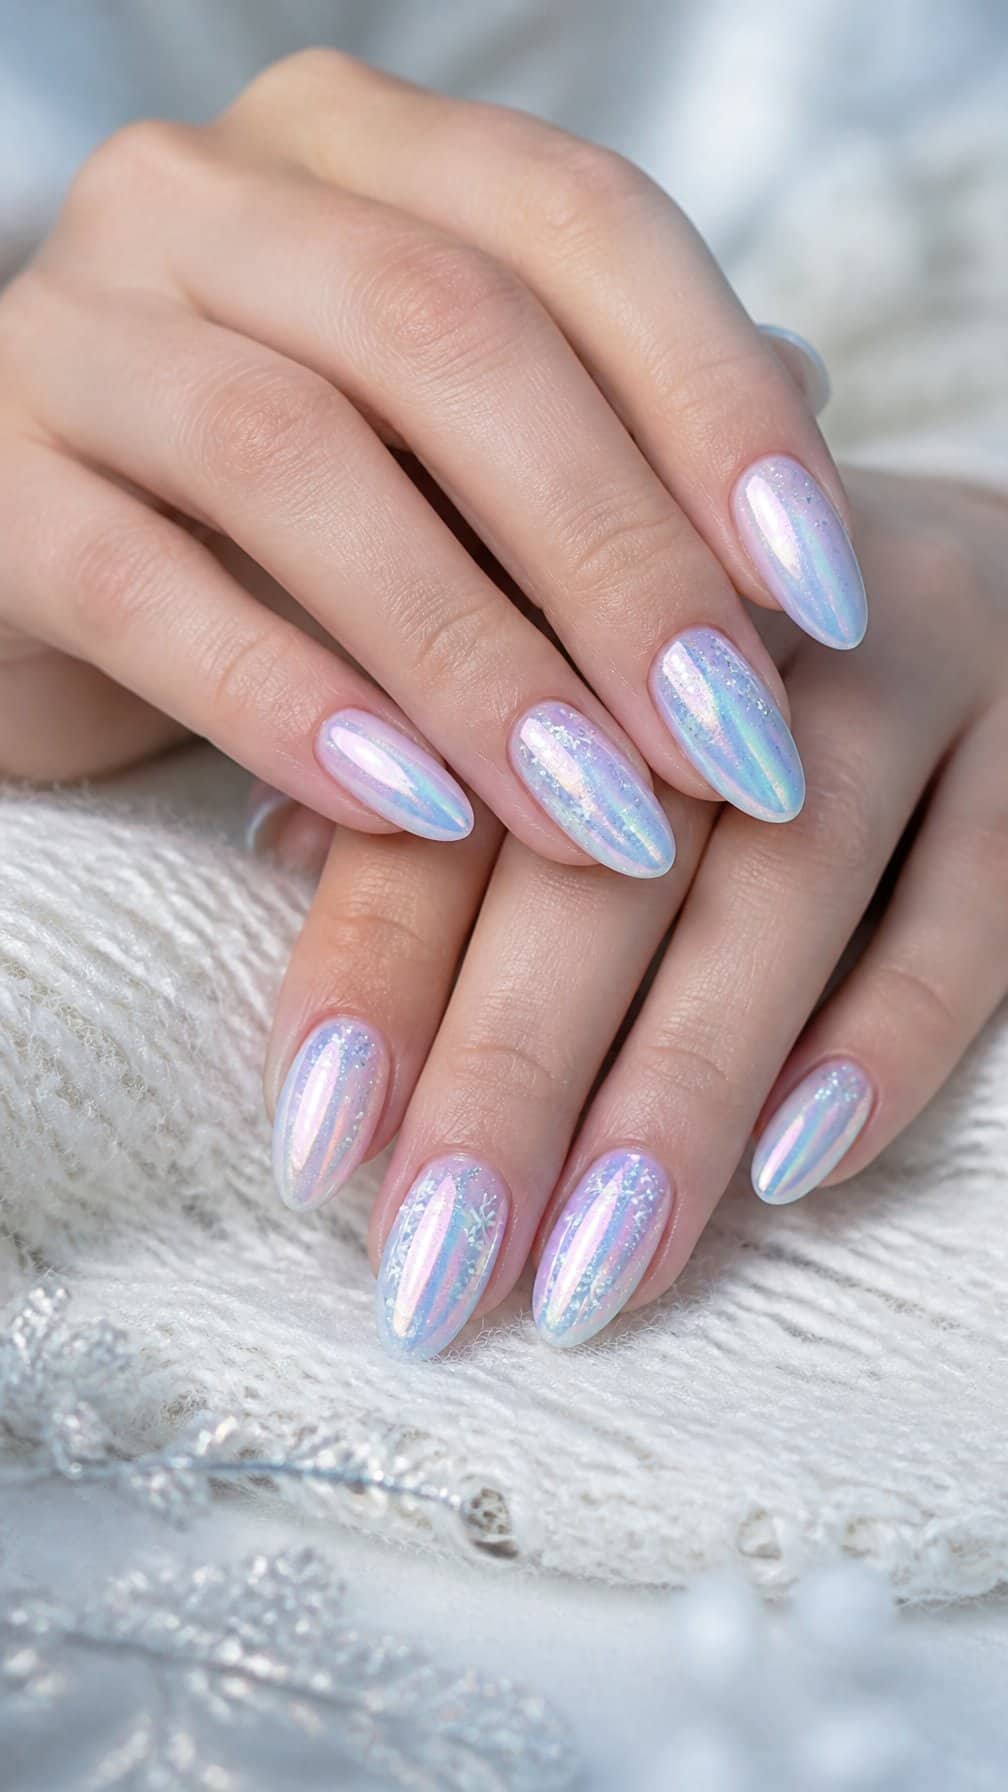
I like an opal base for a softer Christmas manicure that still catches the light. Iridescent polish shifts between icy blue, lavender, pink, and pale green, creating an aurora effect without relying on traditional red or green.
I would add fine white snowflakes, tiny silver stars, or a few crystal accents to strengthen the seasonal detail. A glossy finish keeps the colors luminous, while a sheer milky layer underneath gives the design a clean, wintery appearance.
18) Sage green mistletoe nails
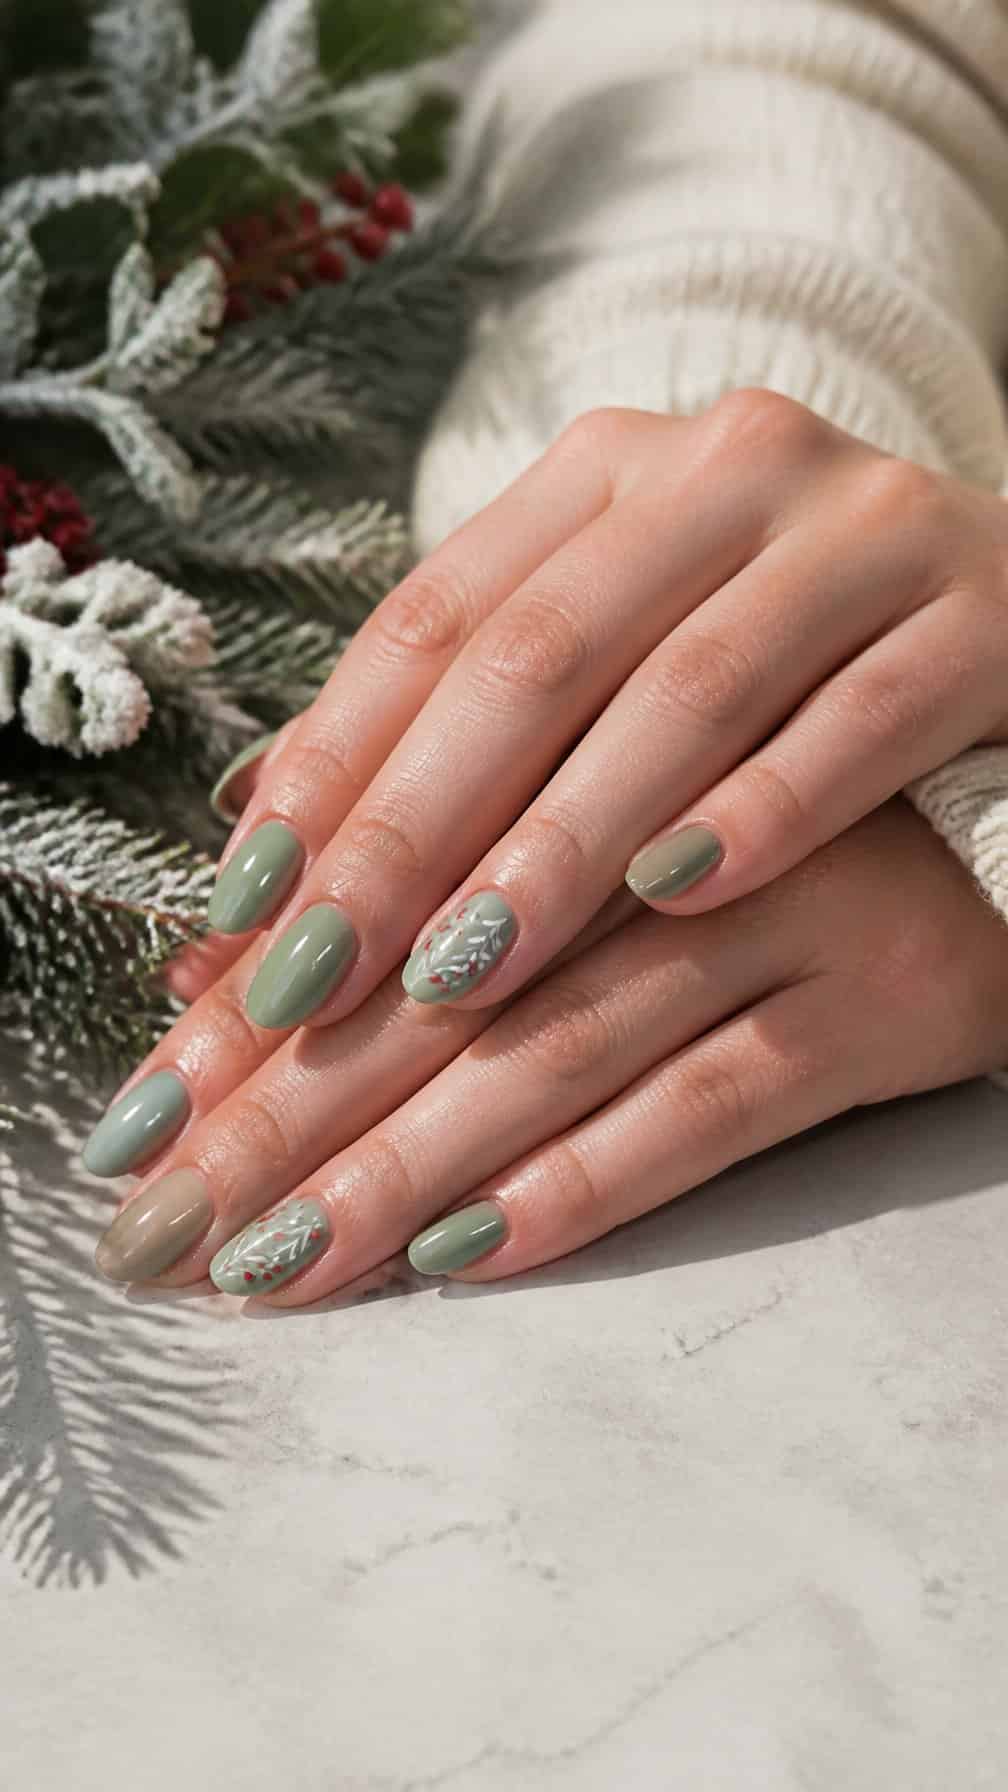
I like sage green as a softer alternative to traditional Christmas shades. I would use a muted sage base on each nail, then add small mistletoe branches in deep green with fine white berries.
A glossy finish keeps the design fresh, while a matte topcoat gives it a more understated look. I would place the branches near the cuticle or along one side of the nail so the pattern feels deliberate without covering the entire surface.
For extra detail, I might add tiny gold dots beside the leaves or use a sheer nude accent nail with a single mistletoe sprig. This design works especially well on short, rounded, or almond-shaped nails.
19) Gold foil Christmas tree nails
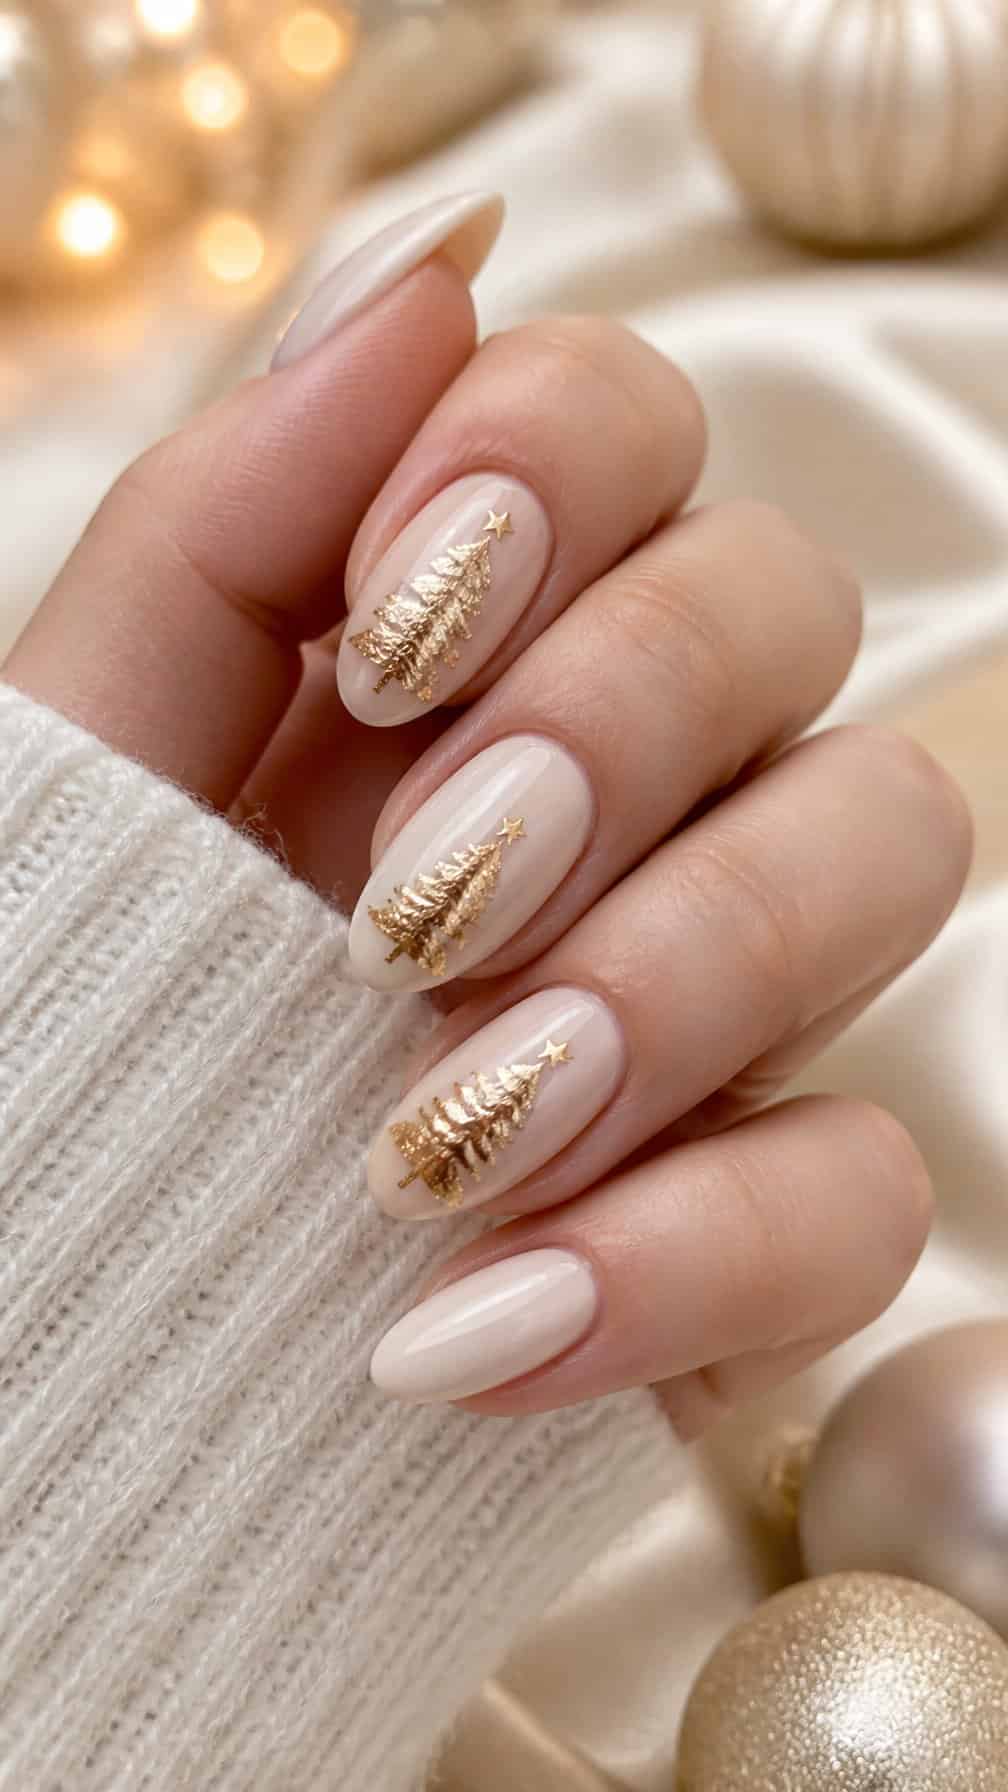
I like using sheer nude polish as the base for this design because it keeps the look light and lets the metallic details stand out. I place small pieces of gold foil in loose triangular shapes to suggest Christmas trees, then add tiny dots or short lines as understated ornaments.
A glossy top coat smooths the foil and gives the manicure a polished finish. I keep the trees on alternating nails or vary their sizes, which creates a cleaner, more modern arrangement than covering every nail with the same motif.
20) Cranberry and cream knit nails
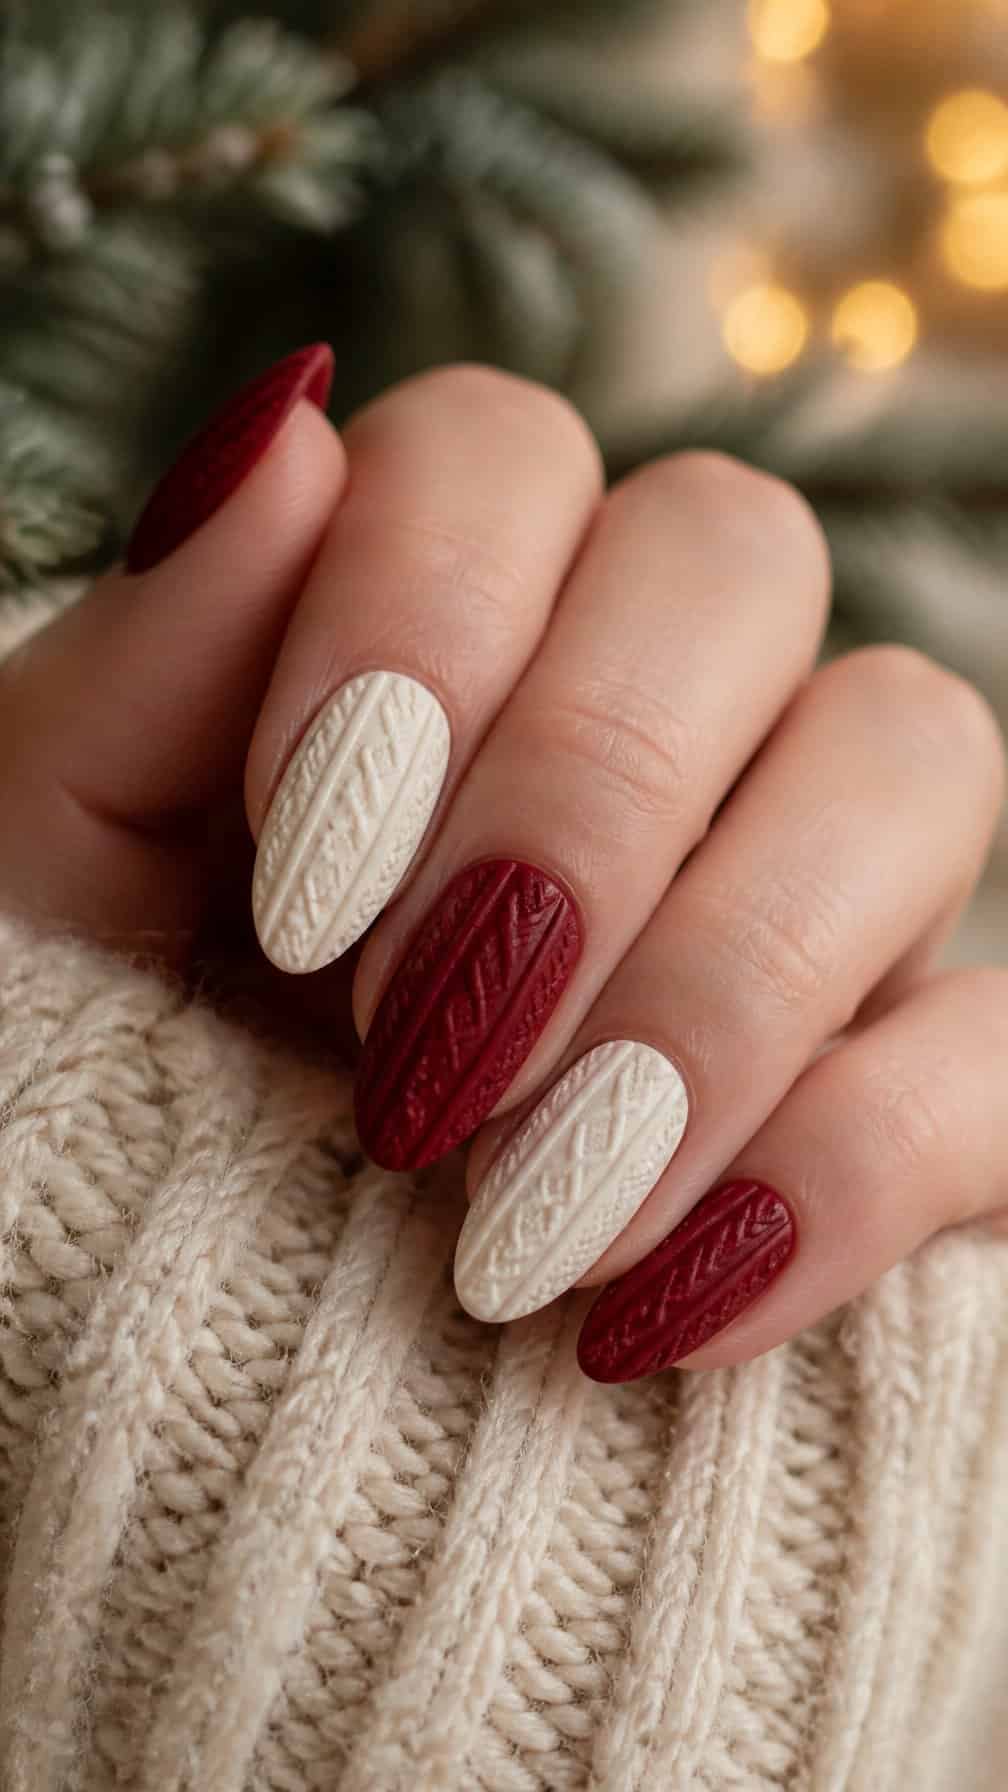
I pair deep cranberry polish with warm cream to create a softer Christmas manicure. On two or three nails, I add raised cable-knit lines over the cream base, while the remaining nails carry solid cranberry color or fine cream accents.
I keep the knit detail matte so it resembles the texture of a winter sweater. A glossy topcoat on the plain nails adds contrast, and short rounded or almond-shaped nails give the design a neat, wearable finish.
21) Icicle French tip nails
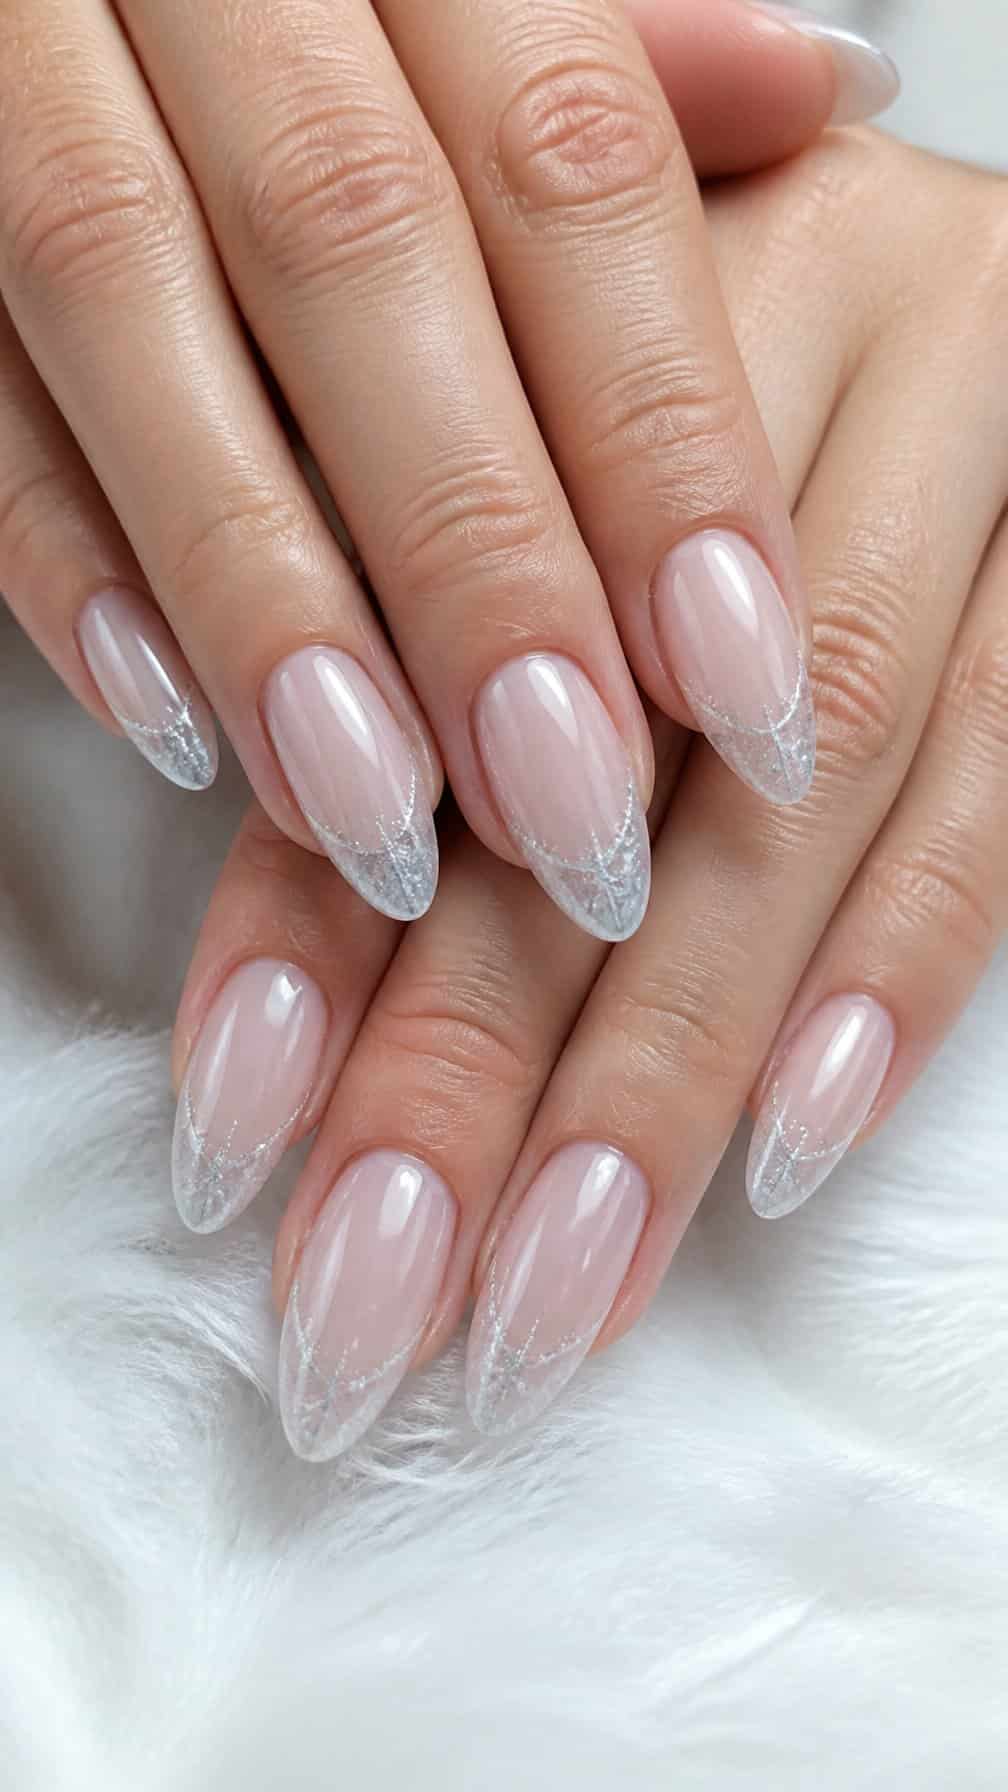
I like this wintry French manicure for its clean, delicate finish. I would use a sheer nude or pale blue base, then paint slim white tips with uneven points that resemble hanging icicles. The varied lengths keep the design from looking too uniform.
I would add a small amount of silver glitter along the tips or place a few crystal accents near the cuticle. This detail catches the light without covering the icy shape. A glossy topcoat helps the thin lines look crisp and polished.
22) Mocha gingerbread nails
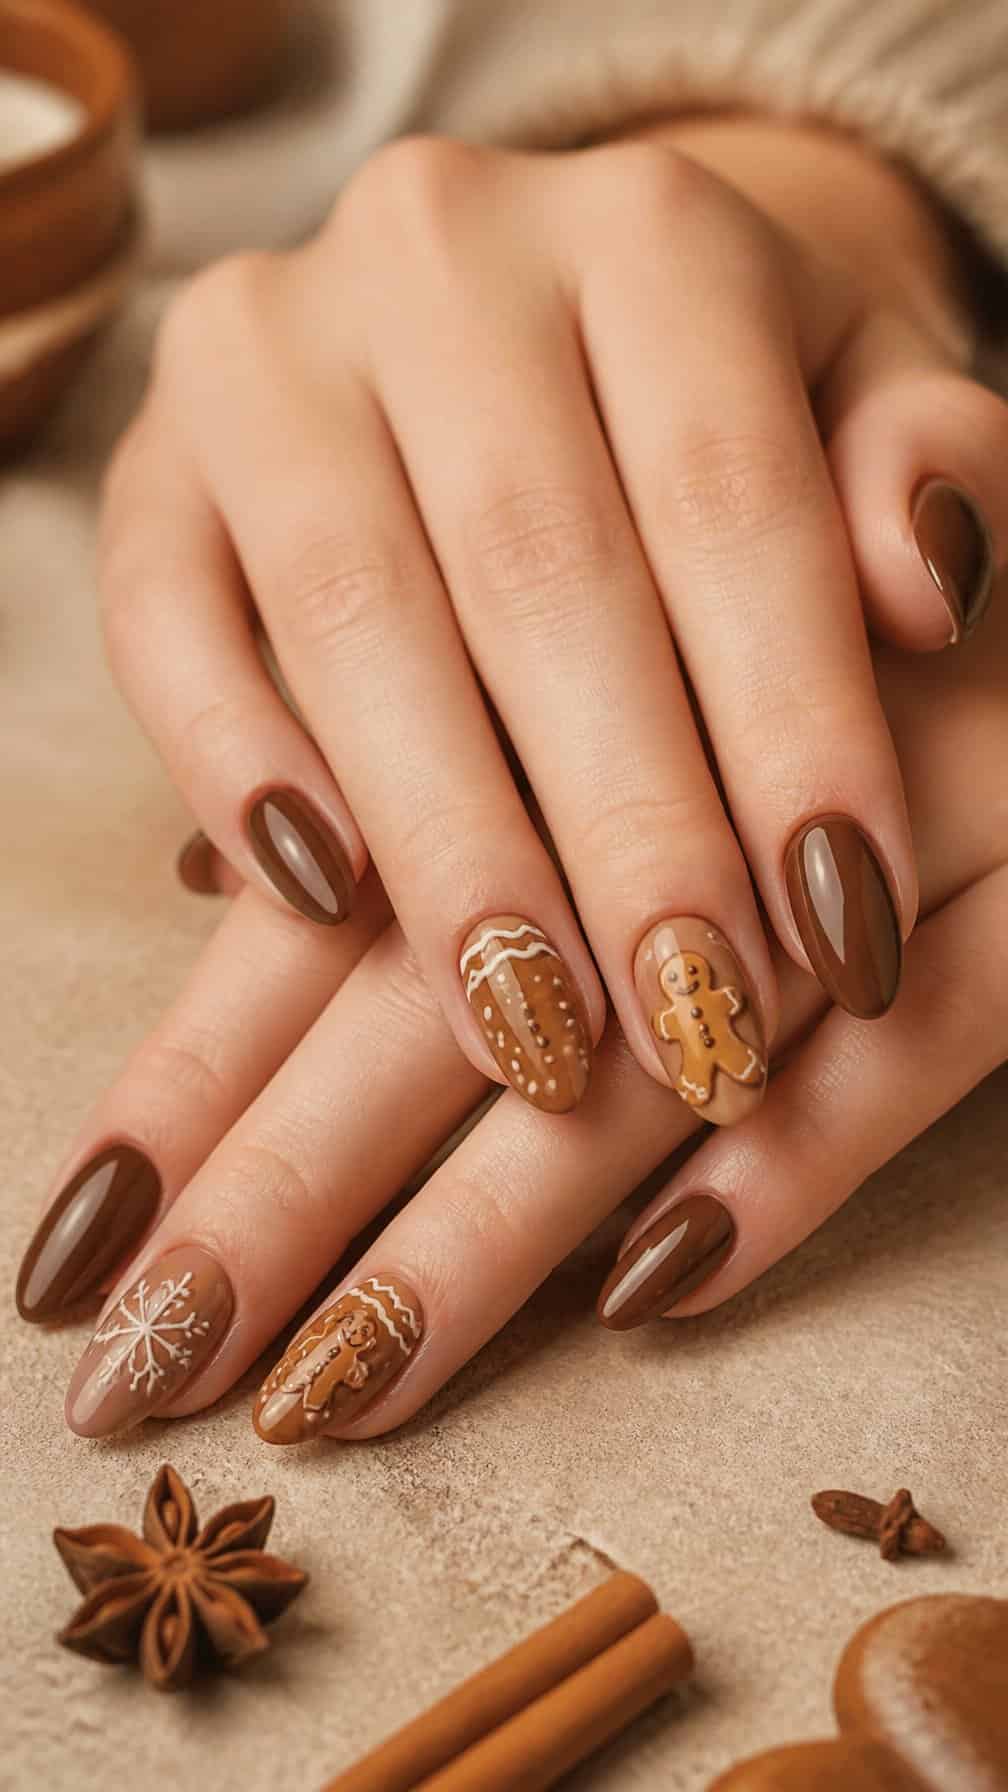
I would use warm mocha polish as the base, then add tiny gingerbread figures in caramel, cream, and deep brown. Simple dots can create eyes and buttons, while thin white lines suggest icing without making the design look crowded.
For a softer finish, I would combine glossy gingerbread accents with one or two matte mocha nails. A small candy-cane stripe, star, or white sprinkle detail adds a Christmas reference while keeping the palette neutral and wearable.
23) Holographic silver tinsel nails
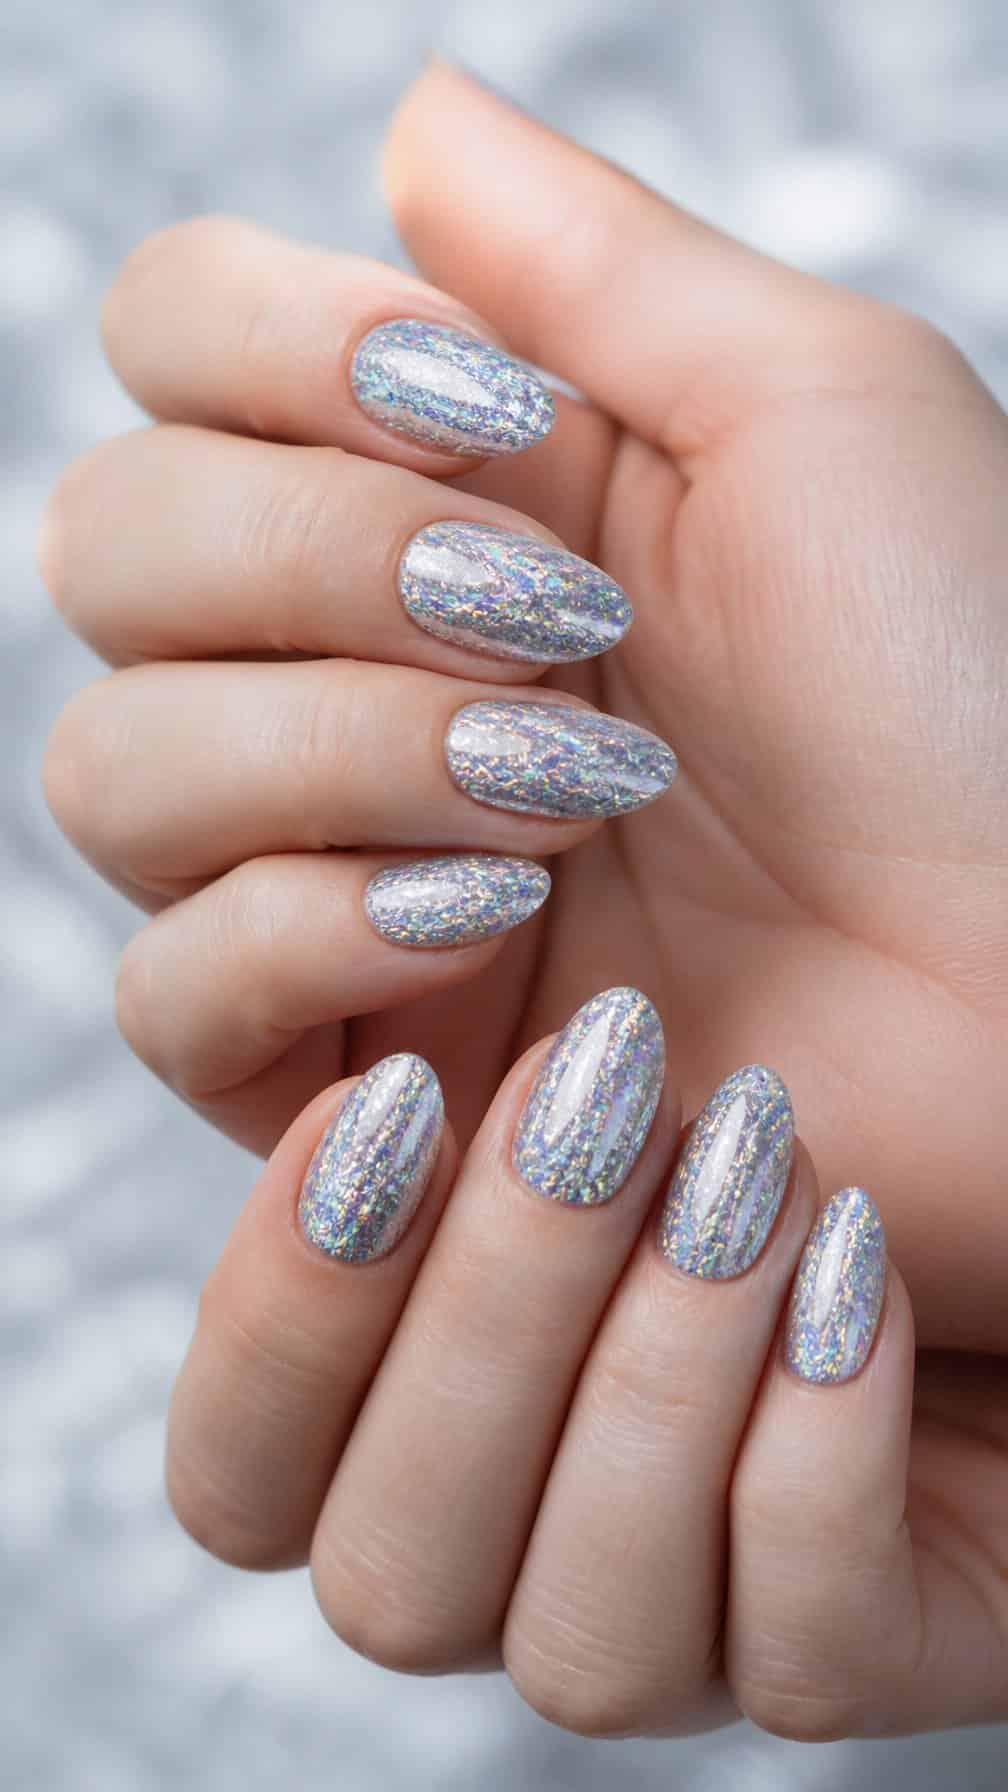
I like holographic silver tinsel nails for a festive look that feels bright without relying on traditional Christmas colors. I start with a sheer or cool-toned silver base, then add thin reflective strips or fine foil pieces in varied directions. The scattered placement creates the irregular sparkle of tinsel while keeping the design polished.
I usually leave some of the base visible so the holographic details catch the light without overwhelming the manicure. A glossy top coat smooths the texture and helps secure the foil. For a subtler version, I apply the tinsel effect only to two accent nails and keep the remaining nails metallic silver or softly translucent.
24) Dusty rose poinsettia nails
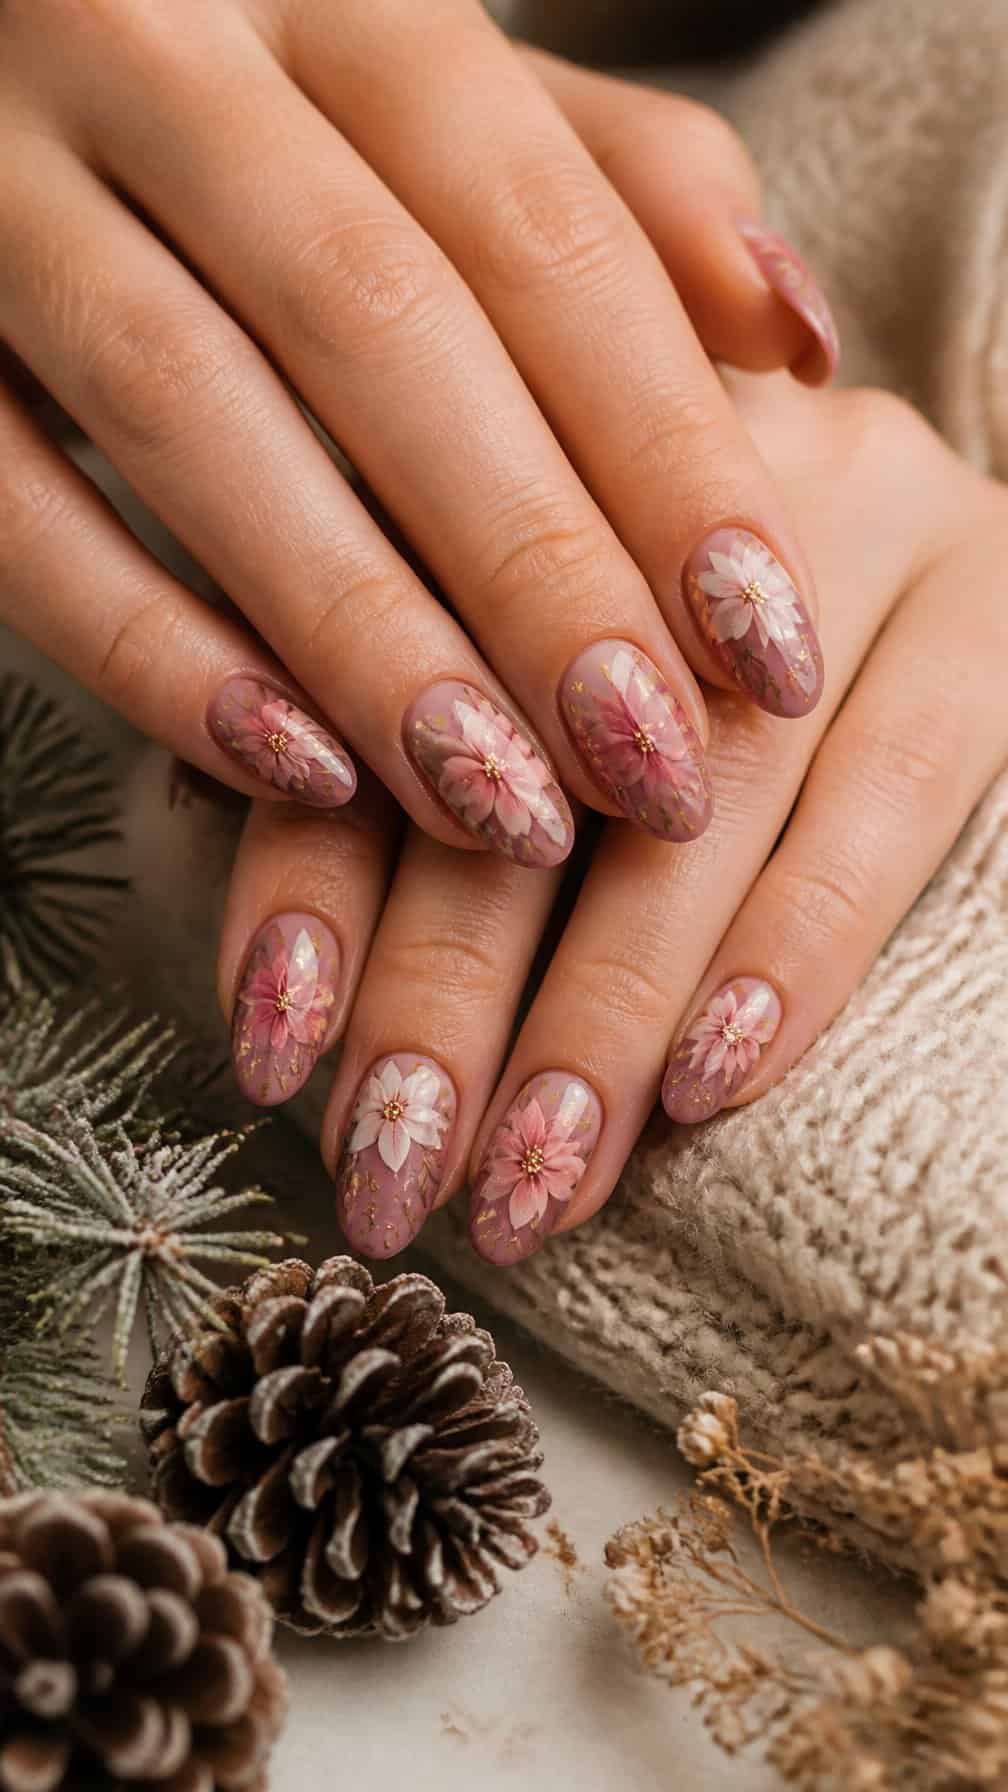
I like dusty rose as a softer alternative to traditional Christmas colors. Its muted pink tone creates a refined base for white poinsettias, while tiny gold dots add a subtle festive detail without making the design feel busy.
I would keep the flowers on two or three accent nails and leave the remaining nails in solid dusty rose. A glossy topcoat sharpens the floral outlines, although a satin finish gives the manicure a more understated look. This design works especially well on short, rounded, or almond-shaped nails.
25) Cobalt blue ornament nails
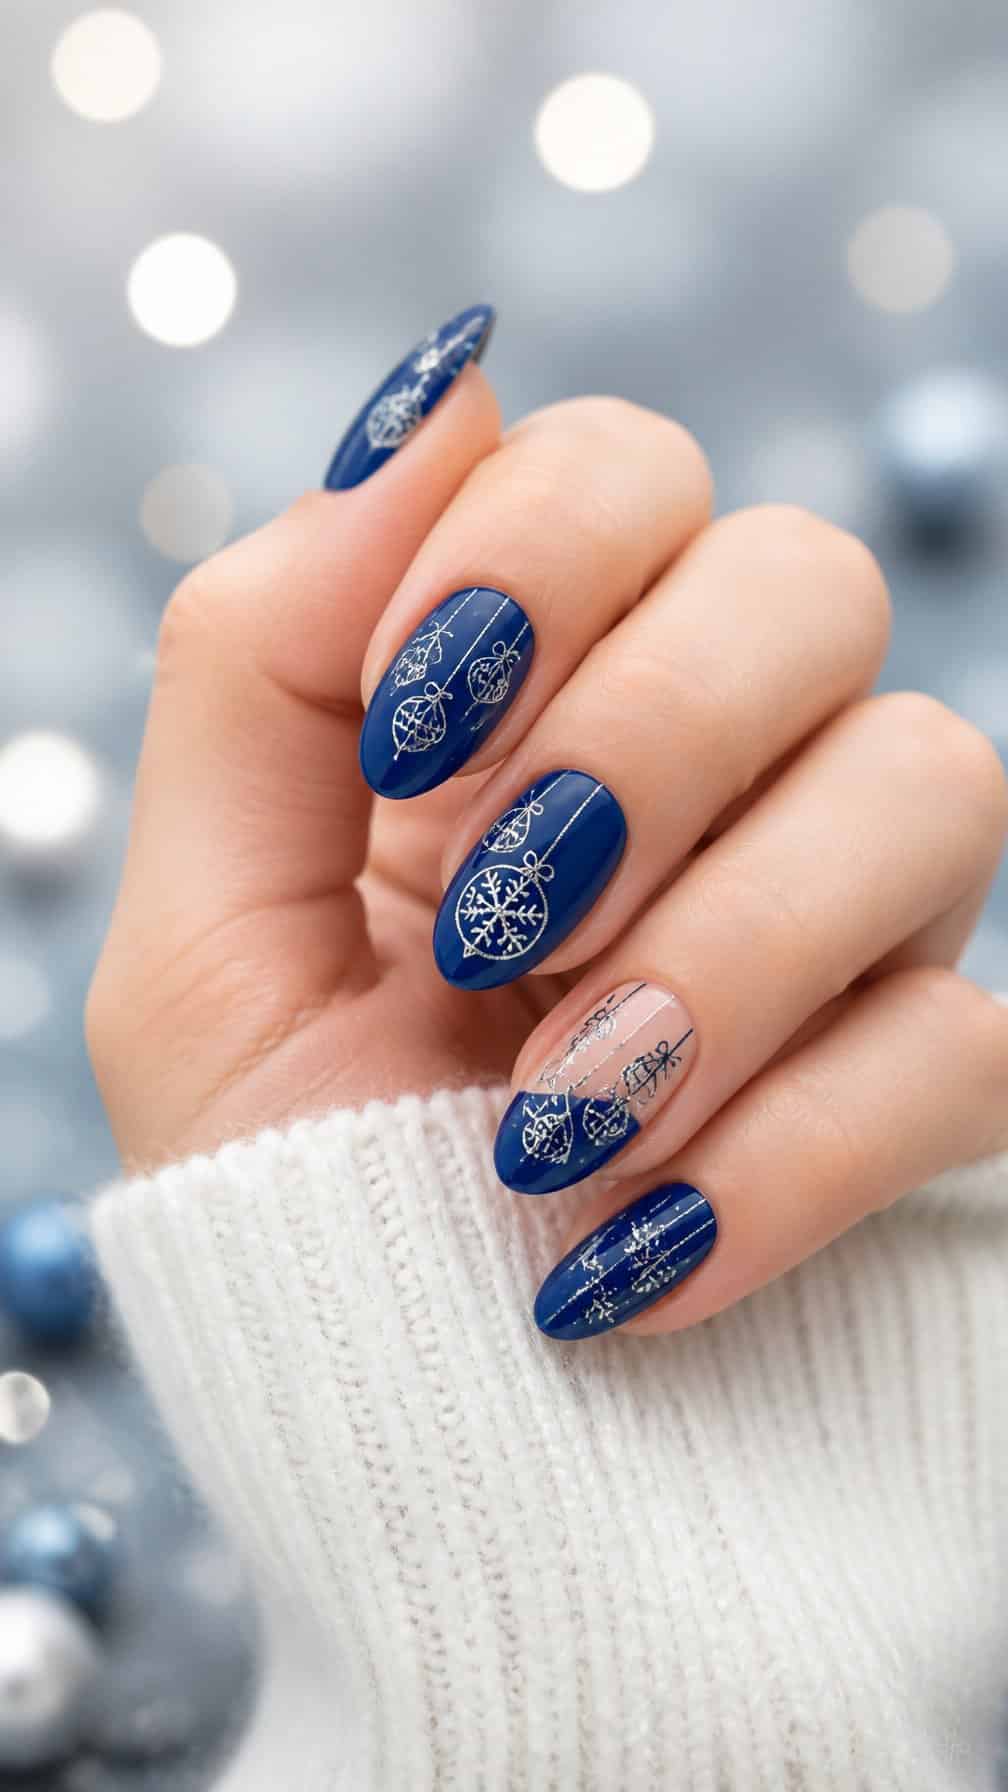
I use cobalt blue as a crisp alternative to traditional Christmas colors. I paint each nail with a glossy cobalt base, then add small ornament shapes in silver, white, and icy blue. Fine lines can suggest hanging hooks and delicate strings without crowding the design.
For a more polished finish, I place the ornaments on two or three accent nails and keep the remaining nails solid blue. I add a small amount of silver glitter to selected details rather than covering the entire manicure, which keeps the pattern clean and wearable.
26) White and gold star nails
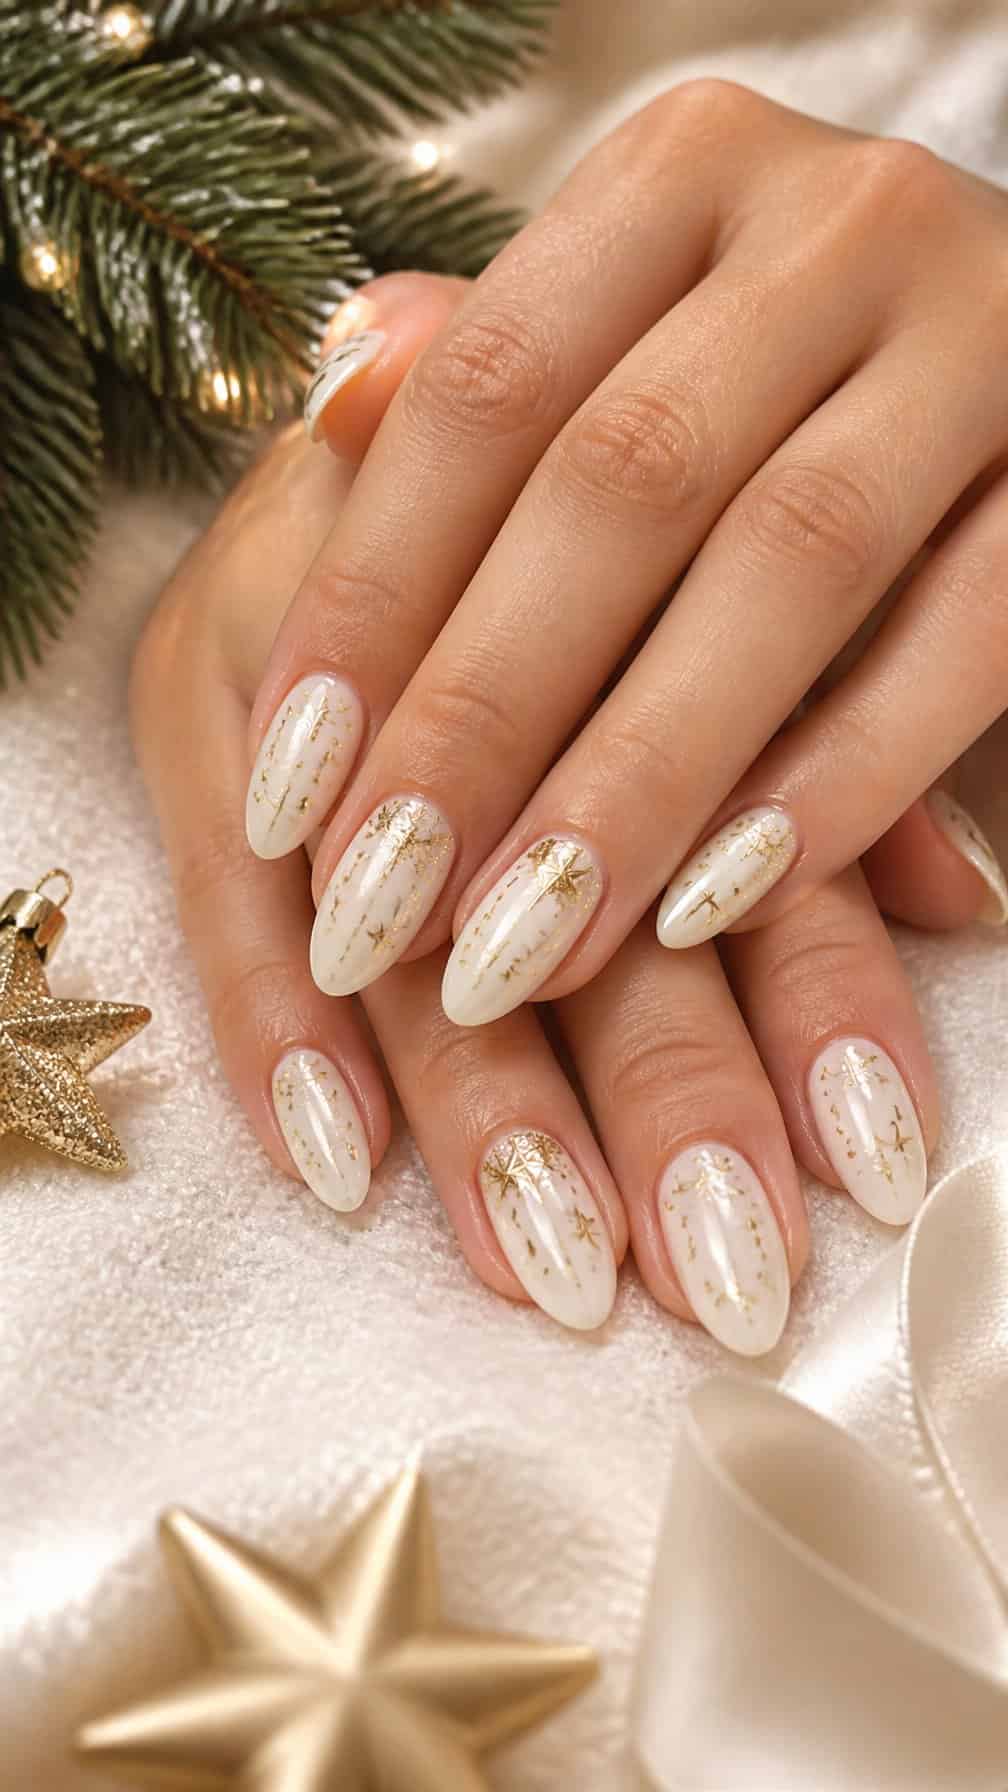
I like a white base for its clean, wintry look, then add small gold stars for a festive detail. I would use opaque white polish on every nail and place the stars unevenly, leaving enough open space to keep the design refined.
A sheer nude accent nail can soften the contrast, while a thin gold outline around one or two stars adds definition. I prefer metallic foil or gold glitter for the stars, depending on whether I want a crisp or sparkling finish.
A glossy topcoat brings out the gold and helps smooth raised decorations. For a more subtle version, I would paint tiny stars near the cuticle on only a few nails and leave the rest white.
27) Lilac Christmas sweater nails
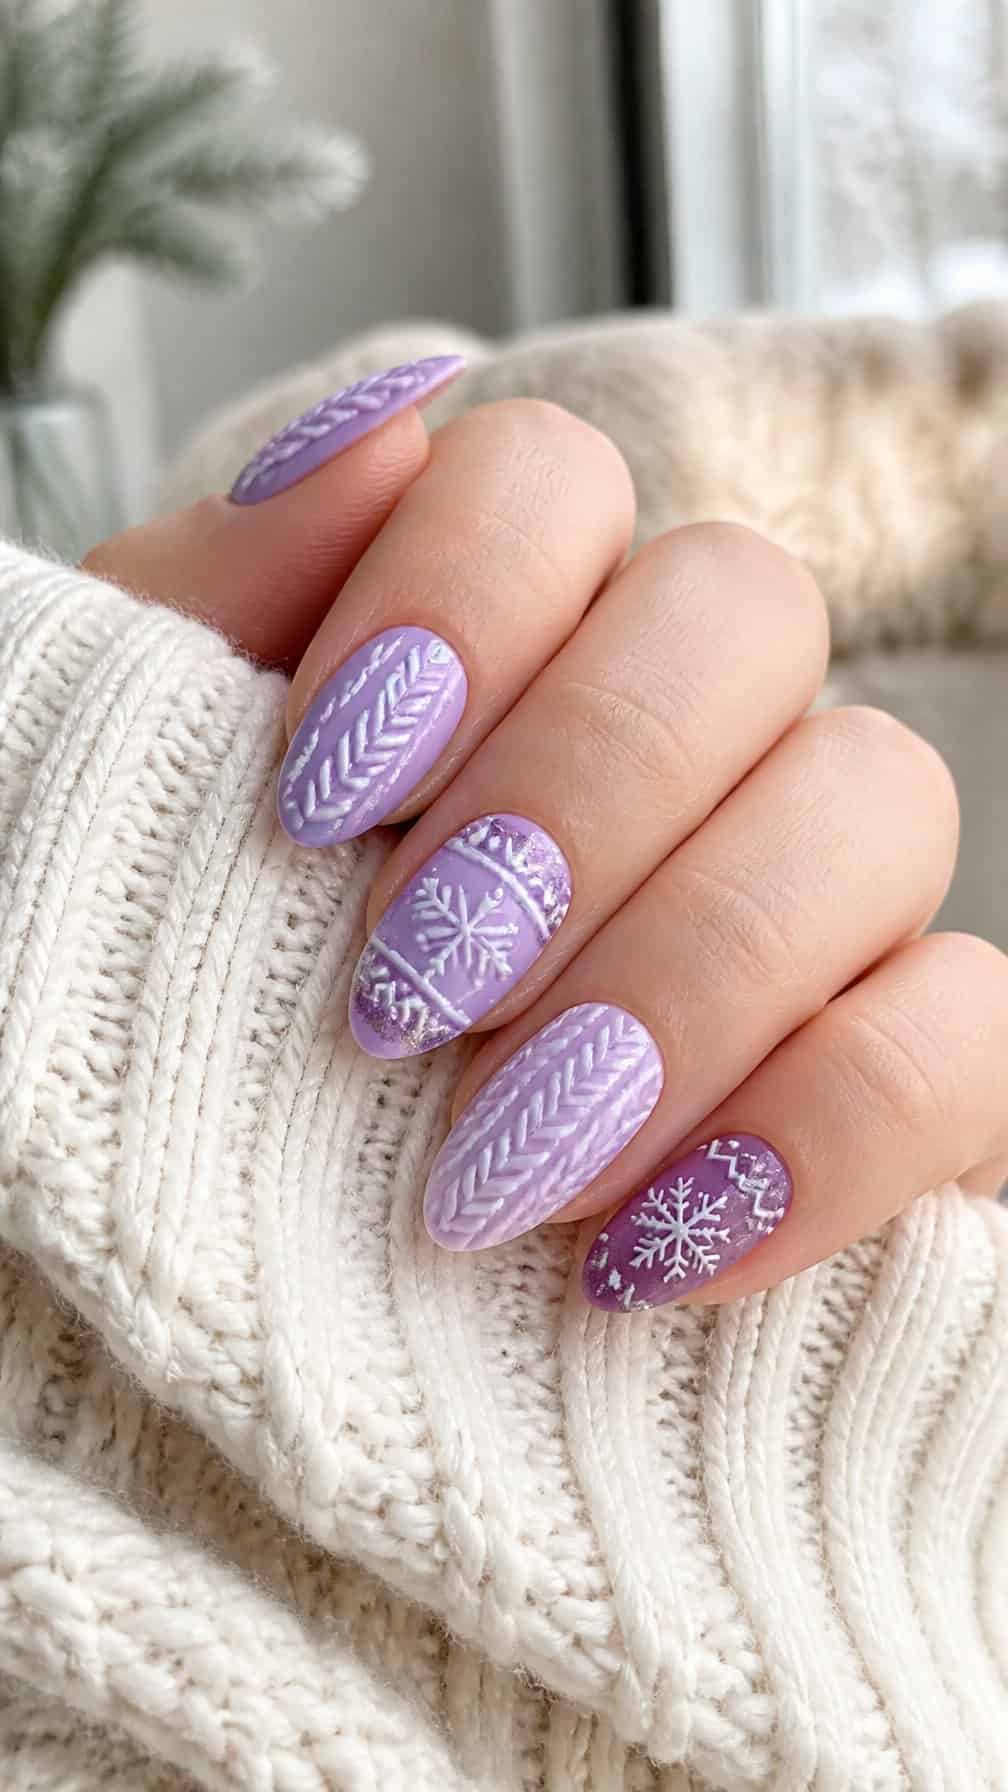
I like lilac as a softer alternative to traditional Christmas colors. I would use a muted lavender base on each nail, then add white sweater-knit details such as cables, diamonds, and tiny raised dots for a cozy texture.
A glossy finish keeps the design polished, while one or two matte accent nails make the raised pattern stand out. I would add small silver stars or white snowflakes sparingly so the manicure feels festive without competing with the sweater design.
28) Gunmetal glitter reindeer nails
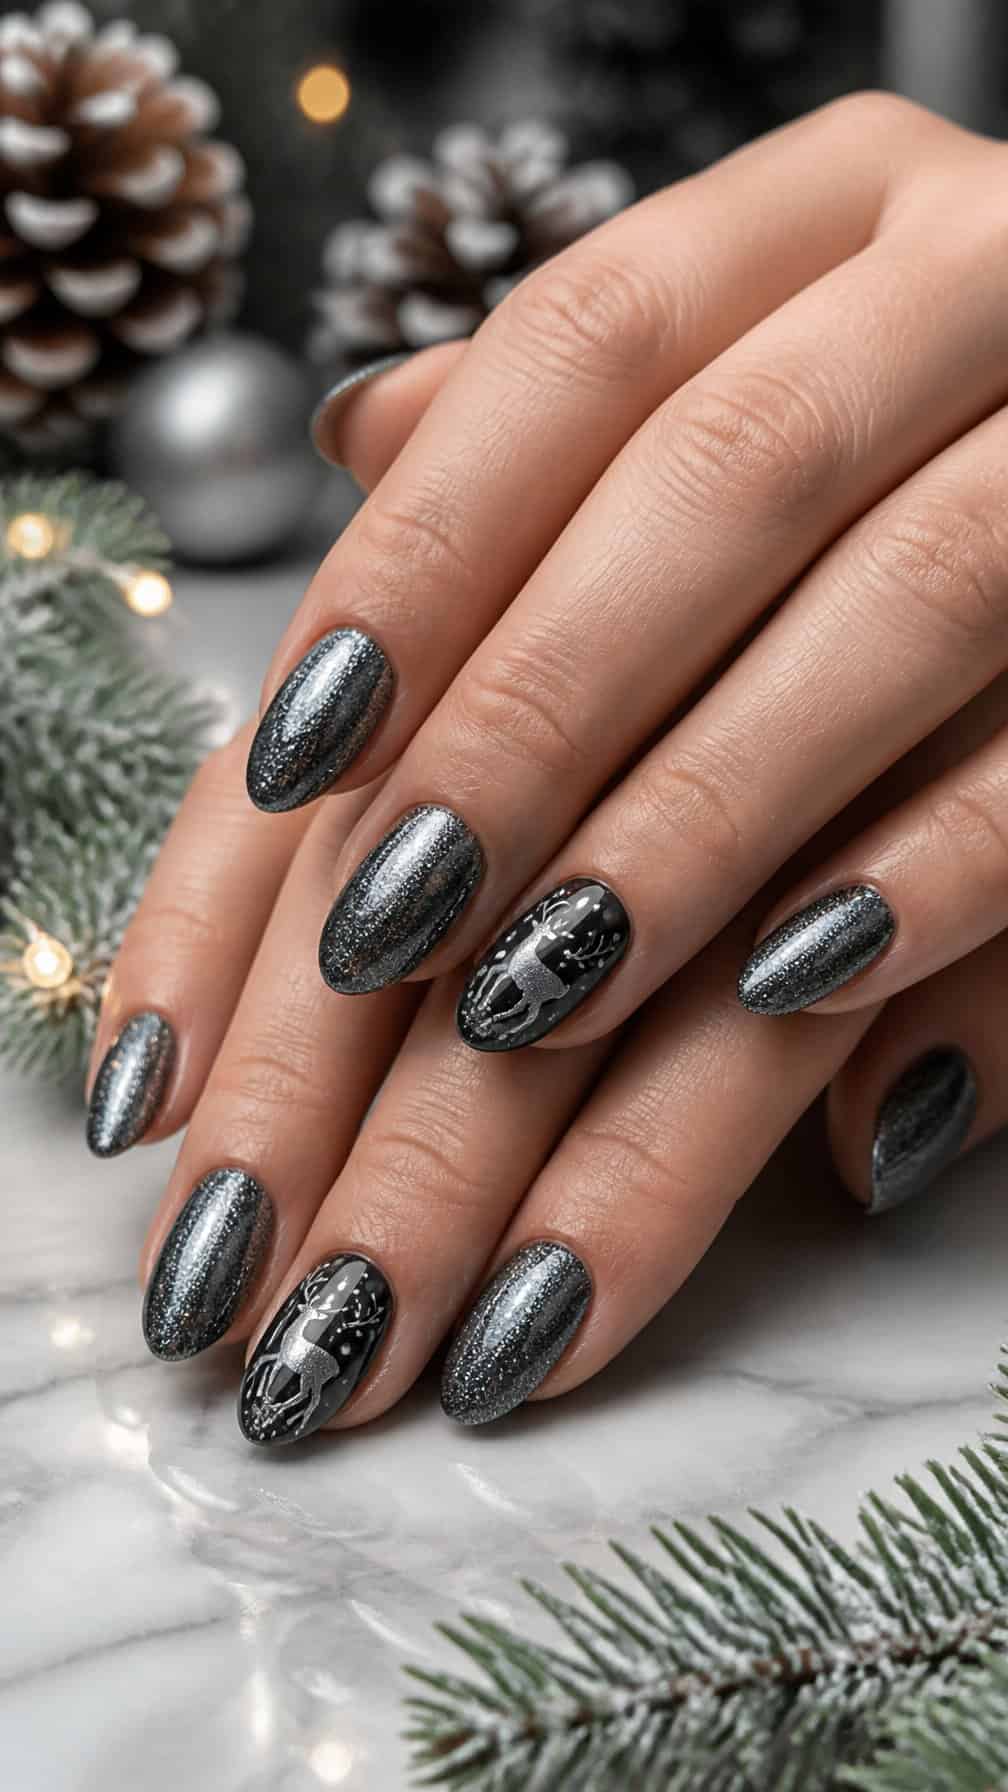
I use gunmetal polish as a cooler alternative to traditional holiday shades, choosing a fine glitter finish that reflects light without looking overly bright. The metallic gray works well on short or medium nails and pairs easily with silver jewelry.
For the accent nail, I add a small reindeer silhouette in black or deep brown. I keep the design simple, using antlers and a rounded head so the figure stays recognizable against the glittered background.
I finish with a clear topcoat to smooth the surface and protect the details. For a more refined look, I place the reindeer on one nail and use solid gunmetal on the remaining nails.
29) Terracotta winter berry nails
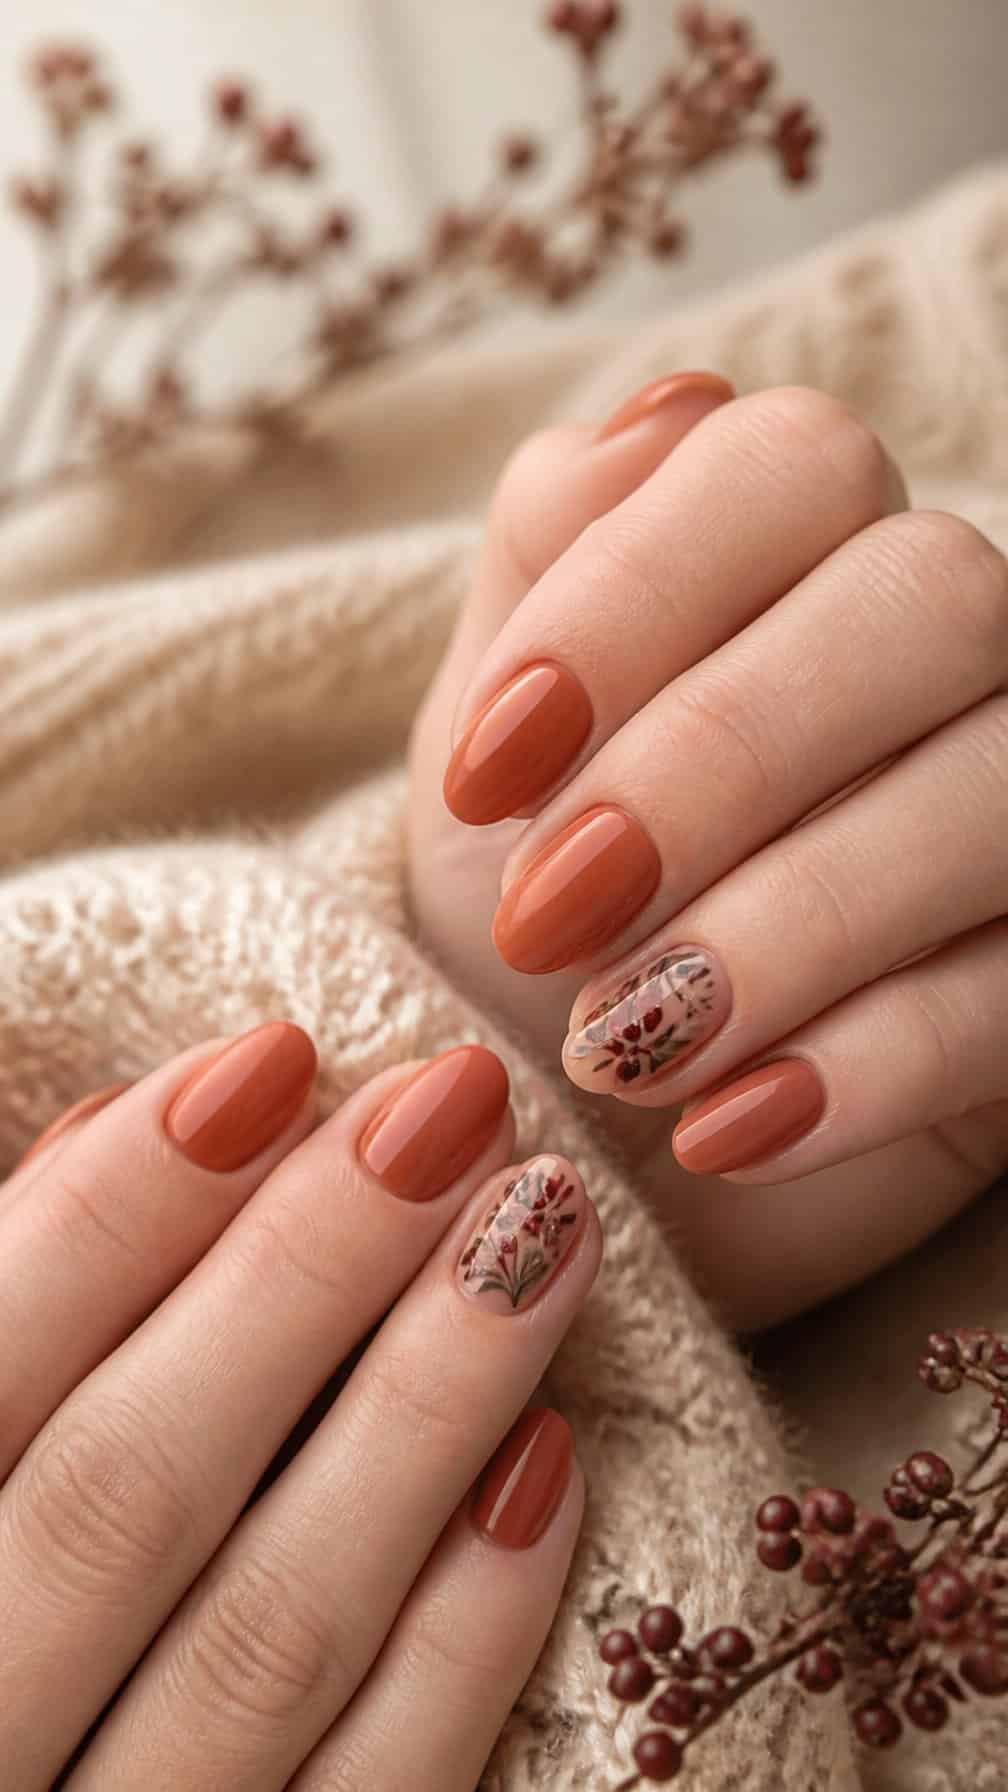
I like terracotta as a warmer alternative to traditional holiday red. I would use it as the base shade, then add small winter berries in cream, muted green, and deep brown for a natural, balanced design.
For a polished finish, I would place the berry clusters near the cuticle or along one side of each nail rather than covering the entire surface. Fine stems and tiny dots keep the pattern detailed without making it look crowded.
A glossy topcoat suits this palette, while a matte finish gives the terracotta a softer, modern appearance. I would keep the shapes slightly varied so the manicure feels hand-painted rather than overly uniform.
30) Clear nails with silver snowflakes
I like a clear base for a clean, understated holiday manicure. It keeps the natural nail visible while giving silver snowflakes enough contrast to stand out.
I would place one or two snowflakes on each nail rather than covering the entire surface. Fine silver lines create a delicate effect, while a small metallic accent near the cuticle adds subtle shine without introducing red or green.
A glossy topcoat helps the design look smooth and protects the thin details. I would keep the snowflakes slightly different in size and position so the set feels balanced rather than perfectly uniform.
Choosing a Festive Color Palette Beyond Traditional Holiday Shades
I create holiday-ready manicures with frosty neutrals, reflective metallics, rich jewel tones, and soft icy pastels. These combinations keep the seasonal mood while giving each nail design a more distinctive color balance.
Winter Neutrals and Metallic Accents
I use shades such as milky white, taupe, mushroom beige, soft gray, and pale blush as flexible bases for festive details. These colors suit short and long nails, and they make metallic accents look deliberate rather than overpowering.
For a polished winter effect, I pair cream with champagne gold, gray with silver, or taupe with rose gold. A thin metallic French tip, scattered foil, chrome stars, or one glitter accent nail adds holiday shine without covering the entire manicure.
Matte finishes create a softer appearance, while glossy topcoat makes metallic details stand out. I also like a sheer neutral base with silver snowflakes or fine gold lines because the design remains wearable after Christmas.
Jewel Tones and Icy Pastels
I choose jewel tones when I want more depth without relying on classic red or green. Sapphire blue, amethyst purple, garnet, teal, and smoky plum work especially well with gold foil, velvet magnetic polish, or small crystal details.
I balance these deeper colors with icy pastels, including frosted lavender, powder blue, pale mint, and cool pink. For example, sapphire and icy blue create contrast, while plum and frosted lavender produce a softer layered effect.
A mixed-color manicure can assign one shade to each nail, or I can use a jewel tone as the main color and reserve the pastel for French tips and snowflake details. I keep the artwork simple so the color contrast remains the main feature.
Making Holiday Nail Art Last Through the Season
I extend the life of festive manicures by pairing flexible polish with a properly sealed top coat. I also protect my nails from water, friction, and winter dryness so detailed designs stay neat for longer.
Selecting Durable Polish and Top Coats
I choose a base coat that smooths the nail and helps prevent staining from deep shades, glitter, or metallic pigments. For the color, I prefer thin layers over one thick coat; two light coats dry more evenly and resist dents better.
I seal the free edge with each color layer and finish with a quick-dry or gel-effect top coat. I apply it across the nail and lightly over the tip, where chips often start. A fresh top coat every two or three days can restore shine and protect hand-painted details.
I avoid applying polish over oily cuticles or damp nails. After cleaning the nail plate with alcohol, I let it dry completely before painting.
Protecting Nails From Chips and Dryness
I wear gloves when washing dishes, cleaning, or handling hot water for extended periods. Repeated soaking can soften polish and leave the natural nail more prone to bending, while household cleaners can dull the finish.
I apply cuticle oil at least once daily, concentrating on the cuticles and sidewalls. At night, I follow with a fragrance-free hand cream to reduce cracking caused by cold, dry air. I keep my nails slightly shorter if I plan to wear intricate Christmas designs for several weeks.
I also use my fingertips rather than my nails to open packages, scrape labels, or lift tabs. If a small chip appears, I smooth the edge with a fine nail file, dab on matching polish, and reseal the area with top coat.