

Soft glam makeup gives you a polished look without heavy coverage or harsh contrast. You can adapt it to bridal beauty, everyday makeup, evening events, and different skin tones while keeping the finish refined and natural-looking.

Save for later
Want to come back to this story? Save it with your email so it is easy to find again.
You can find a camera-ready look by balancing softly defined eyes, fresh complexion makeup, and carefully chosen blush and lip tones. Explore wearable color combinations, flattering finishes, and practical techniques that help your makeup appear smooth and balanced in photographs.
Table of Contents
- 1 1) Soft Matte Bridal Glam
- 2 2) Champagne Lid and Rosy Cheeks
- 3 3) Peach Monochromatic Glam
- 4 4) Rosy Bronze Soft Glam
- 5 5) Neutral Brown Smoky Eye
- 6 6) Glowy Skin and Nude Lips
- 7 7) Soft Cut Crease with Champagne Shimmer
- 8 8) Mauve Eyeshadow and Pink Blush
- 9 9) Bronzed Skin with Caramel Tones
- 10 10) Classic Winged Liner and Nude Lips
- 11 11) Taupe Eyeshadow with Rose Gold Highlight
- 12 12) Soft Plum Smoky Eye
- 13 13) Natural Freckles with Cream Blush
- 14 14) Candlelit Highlight and Peach Lips
- 15 15) Brown Liner with Glossy Nude Lips
- 16 16) Terracotta Eyeshadow and Warm Bronzer
- 17 17) Soft Halo Eye with Neutral Shimmer
- 18 18) Cool-Toned Taupe Glam
- 19 19) Champagne Inner-Corner Highlight
- 20 20) Rosewood Lip and Blushed Cheeks
- 21 21) Soft Copper Eyeshadow Look
- 22 22) Barely-There Base with Defined Brows
- 23 23) Dusty Rose Monochromatic Makeup
- 24 24) Subtle Black Liner with Soft Shadow
1) Soft Matte Bridal Glam
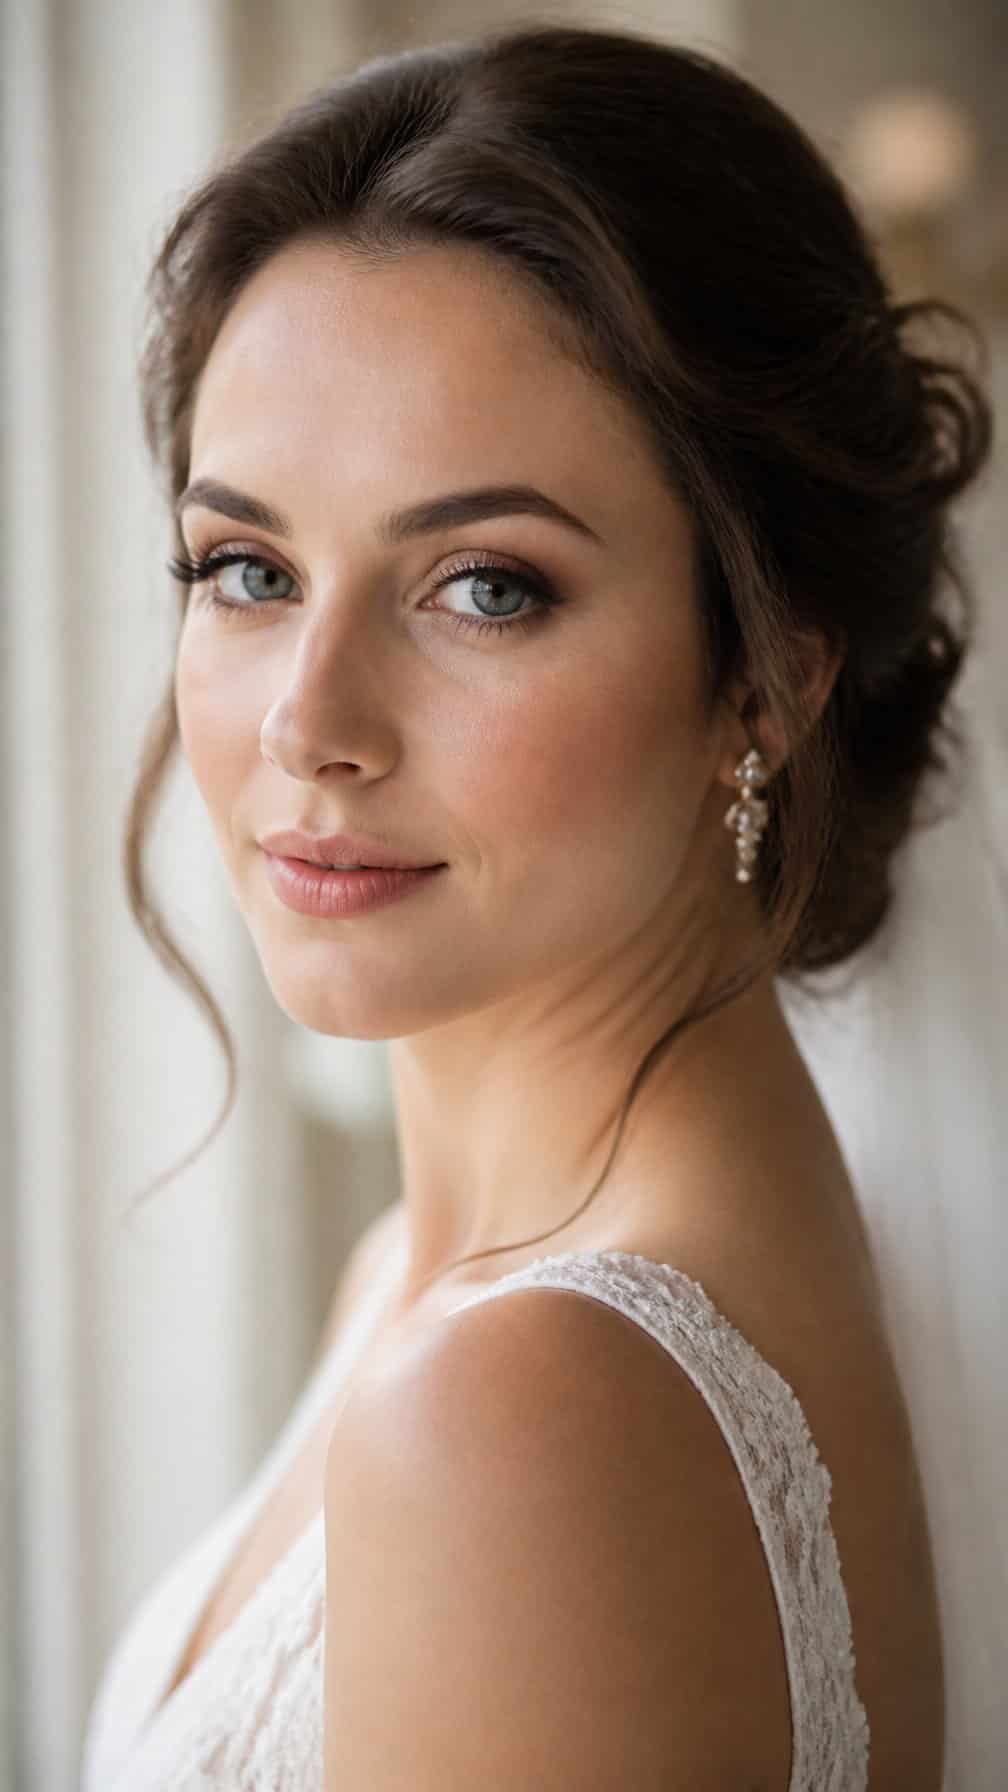
I create a smooth, softly matte base that photographs evenly without looking flat. I use medium, buildable coverage to refine redness while keeping natural skin texture visible, then set the center of the face and leave the outer cheeks slightly less powdered.
I shape the eyes with beige, taupe, and muted brown shadows, blending the edges for definition without harsh lines. A thin brown liner, curled lashes, and separated black mascara add structure while keeping the expression soft.
I pair the look with rose-beige blush and a muted pink or nude-rose lip. I lightly define the lip line, fill it with a satin formula, and check the makeup in both natural light and flash before making small touch-ups.
2) Champagne Lid and Rosy Cheeks
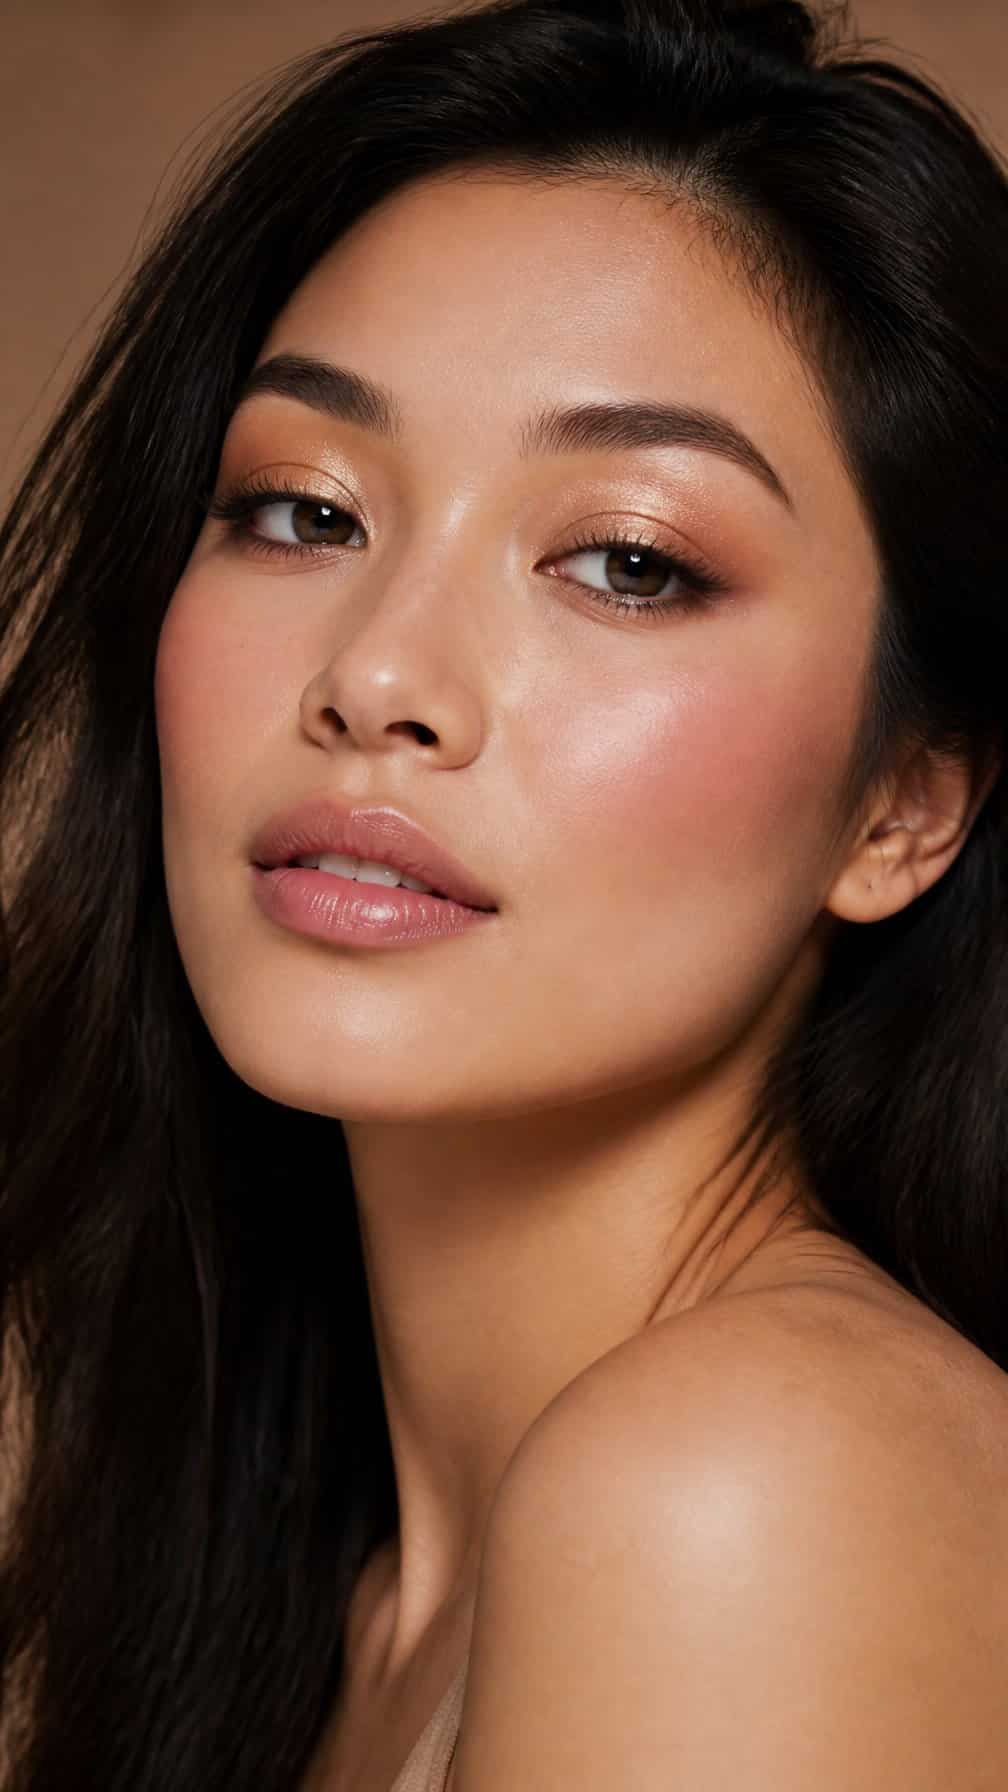
I sweep a champagne shimmer across my lids, concentrating the lightest shade at the inner corners and center of each lid. I keep the finish softly reflective rather than glittery, so the eyes catch light without appearing harsh in photographs.
I blend a muted rose blush over my cheeks, moving from the apples toward the temples for a diffused edge. A small amount across the bridge of my nose connects the color naturally, while a satin finish adds dimension without emphasizing texture.
I finish with softly defined lashes, brushed brows, and a rosy nude lip that echoes the cheek color. This balance keeps my complexion fresh and polished while allowing the champagne eyeshadow to remain the focal point.
3) Peach Monochromatic Glam
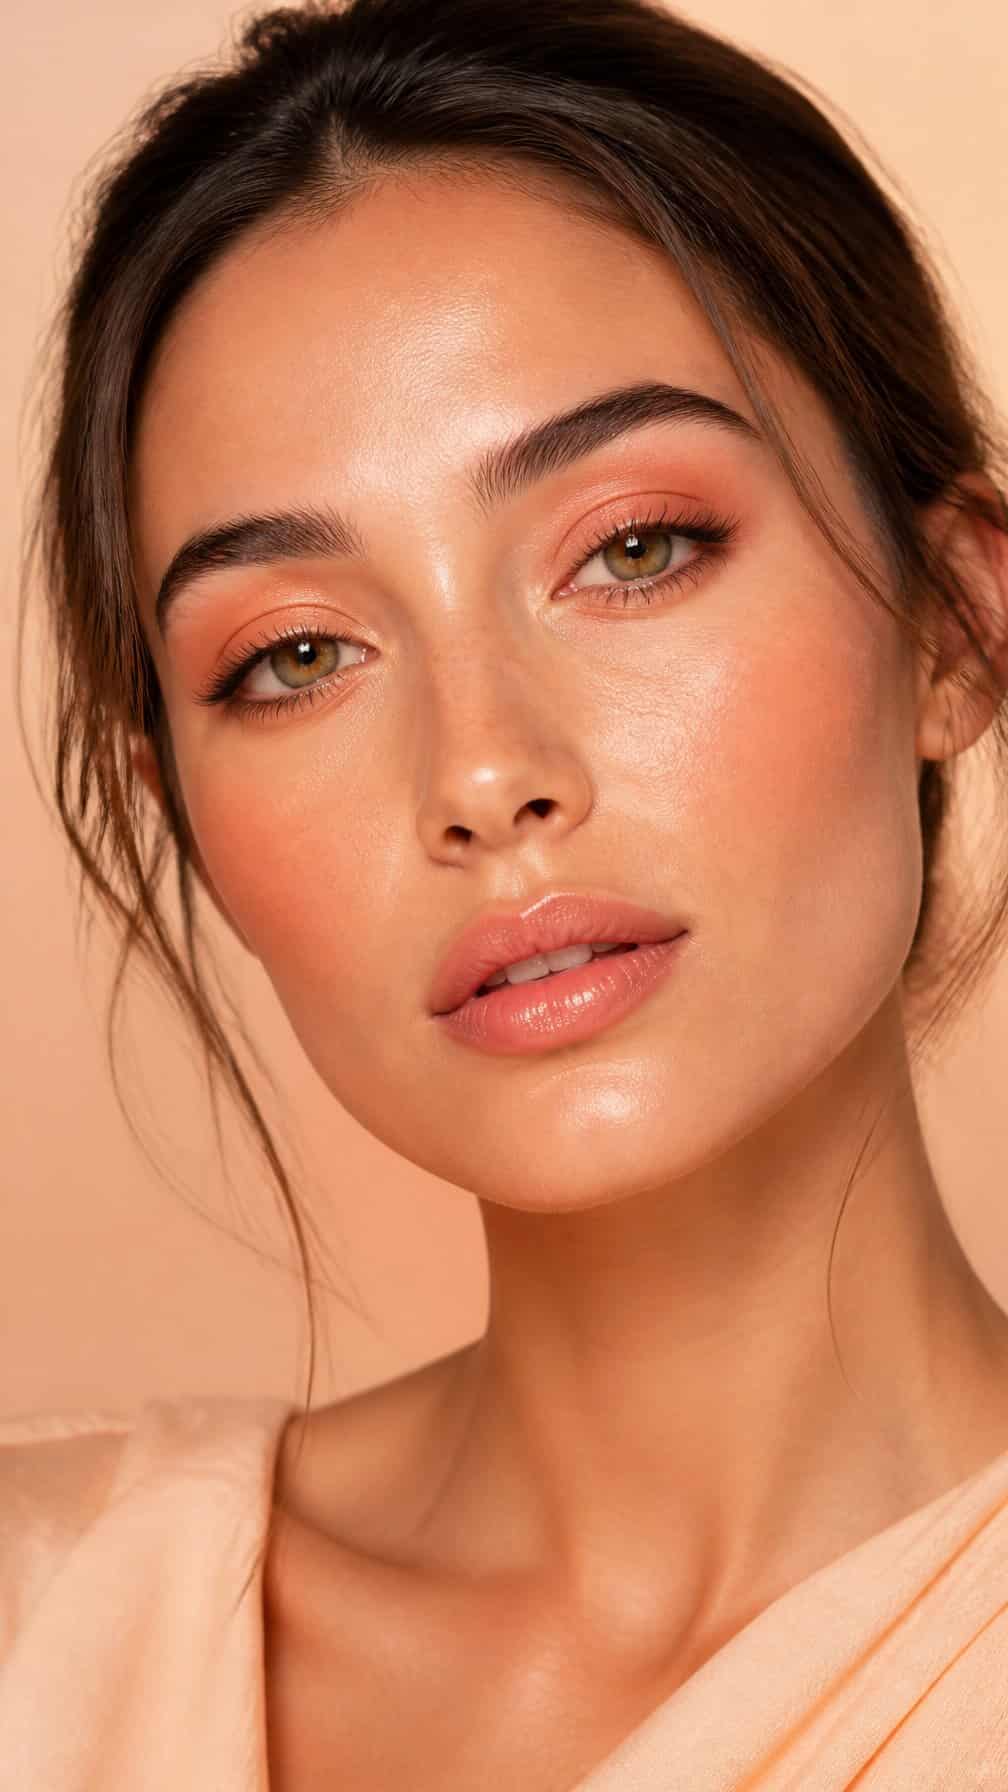
I build this look around warm peach tones across the eyes, cheeks, and lips. I sweep a soft peach shadow over the lids, deepen the outer corners with a muted terracotta shade, and blend the edges until the color looks diffused rather than stark.
I add peach blush high on the cheeks and extend it slightly toward the temples for a lifted effect. A subtle satin highlight on the cheekbones catches light without creating harsh reflections in photographs.
For balance, I use a peachy nude lip with a defined liner and a satin or glossy finish. I keep the skin softly perfected with lightweight coverage, targeted concealer, and a natural-looking setting powder through the center of the face.
4) Rosy Bronze Soft Glam
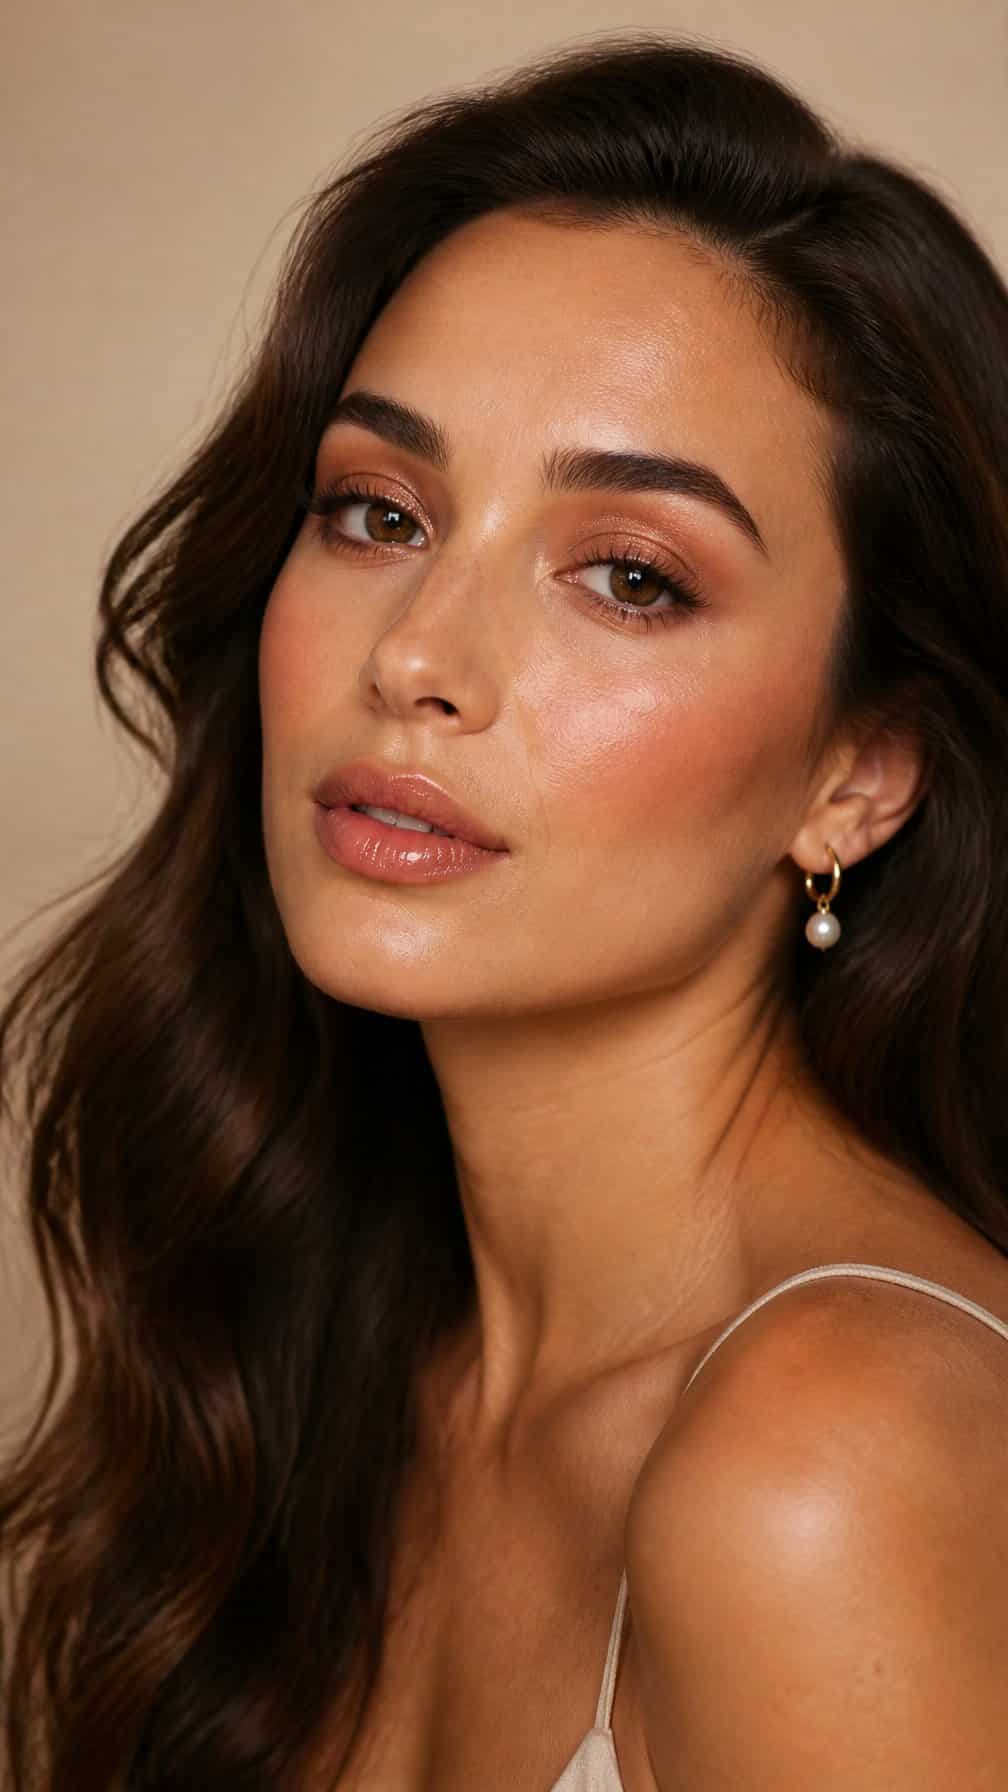
I blend a warm bronze shadow across my lids, then add a muted rose shade through the crease for gentle dimension. I keep the edges softly diffused so the colors appear polished rather than heavily defined in photographs.
I use a satin highlight on the inner corners and the center of the lids to catch light without creating strong glare. A thin brown liner and separated lashes frame my eyes while preserving the look’s softness.
For my cheeks, I choose a rose-bronze blush and sweep it slightly upward along the cheekbones. I finish with a neutral rose lip liner, creamy lipstick, and a small amount of gloss at the center for balanced definition.
5) Neutral Brown Smoky Eye

I blend matte taupe, warm brown, and soft espresso shadow across my lids to create gentle definition without harsh edges. I keep the darkest shade close to the lash line, then soften the crease with a clean brush for a seamless gradient.
I use a satin beige on the inner corners and center of the lid to catch light naturally in photographs. Brown liner along my upper lashes adds structure while remaining softer than black, and I finish with separated, lengthening mascara.
For balance, I sweep a small amount of taupe beneath my lower lashes and connect it to the outer corner. I pair the eye look with softly sculpted cheeks, brushed brows, and a neutral rose lip.
6) Glowy Skin and Nude Lips

I keep the complexion fresh with lightweight foundation, targeted concealer, and a soft cream highlighter on the high points of my face. I choose a nude lip close to my natural tone, adding a satin balm or gloss for subtle dimension without distracting from the skin.
For photographs, I balance glow with a small amount of translucent powder around my nose and forehead. I softly define my eyes with taupe shadow and brown mascara, which keeps the look polished while preserving its gentle, luminous finish.
7) Soft Cut Crease with Champagne Shimmer
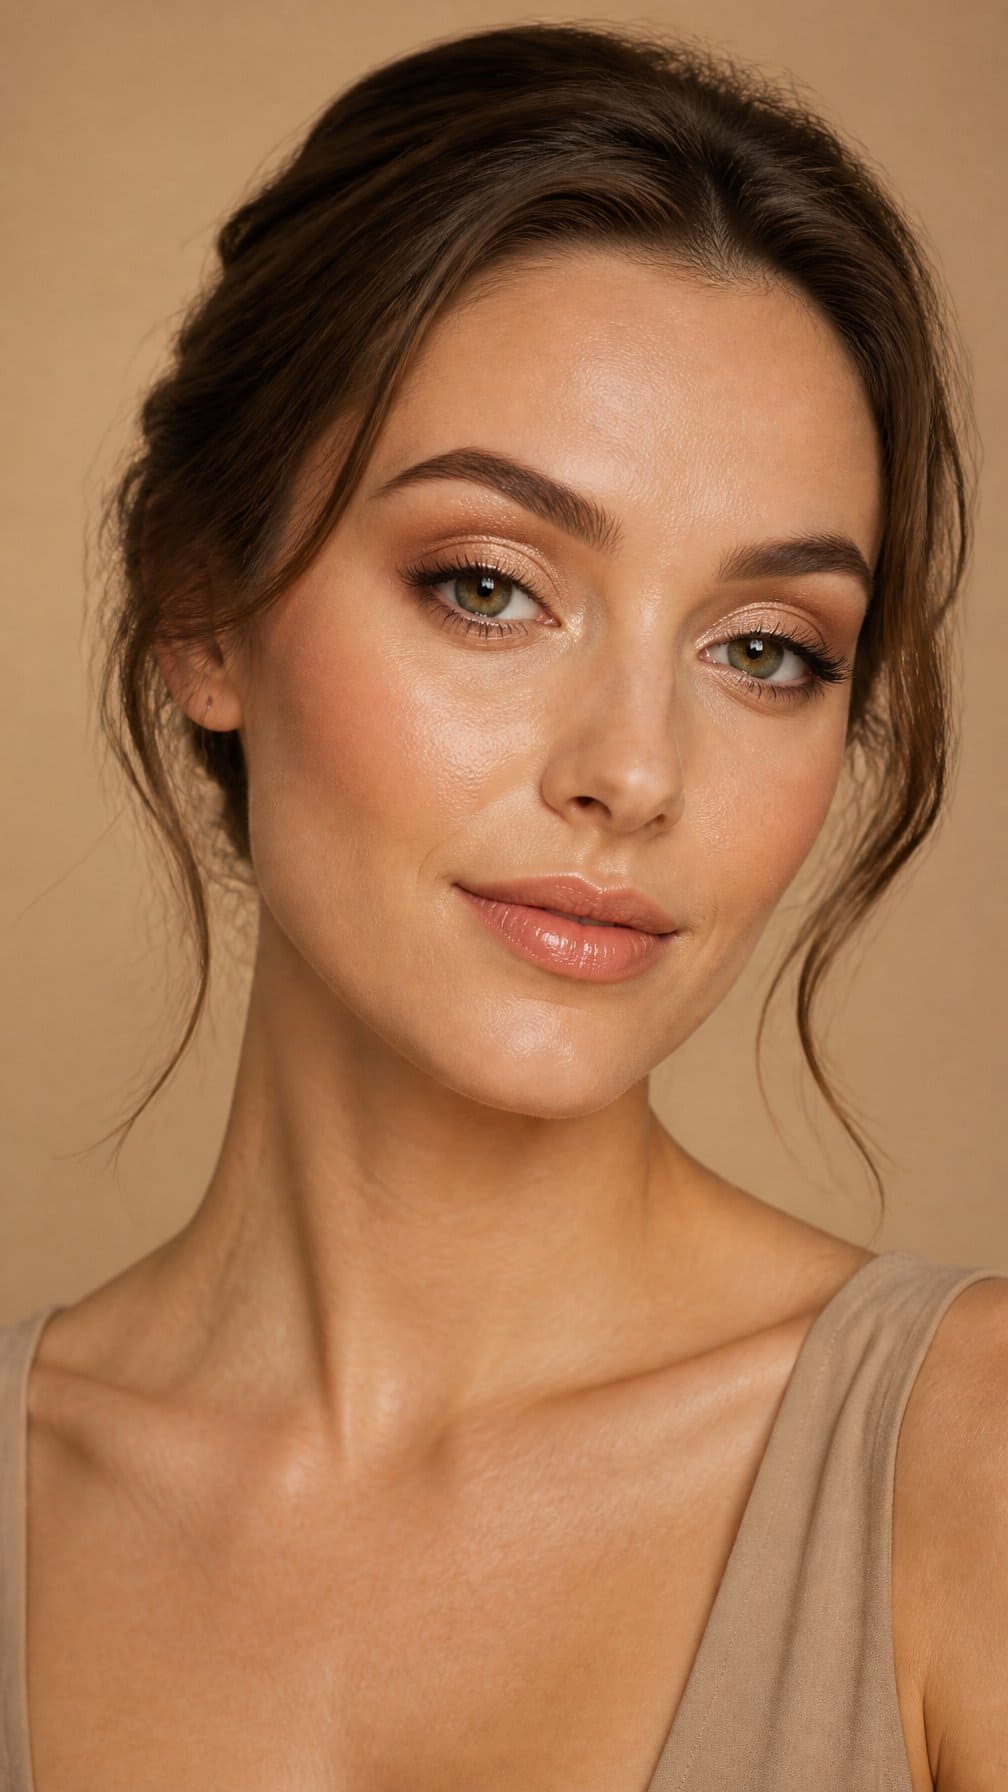
I define the crease with a matte taupe or soft brown shade, keeping the edges diffused rather than sharply outlined. I place champagne shimmer on the lid, concentrating it at the center to catch light when I look toward the camera.
I blend the transition shade slightly above my natural crease so the color remains visible in photographs. A thin brown liner, curled lashes, and separated mascara add definition without overpowering the reflective eyeshadow.
I keep the rest of the makeup balanced with softly sculpted cheeks, peachy blush, and a satin nude-pink lip. For photos, I check the shimmer under the intended lighting and remove any fallout before applying concealer.
8) Mauve Eyeshadow and Pink Blush
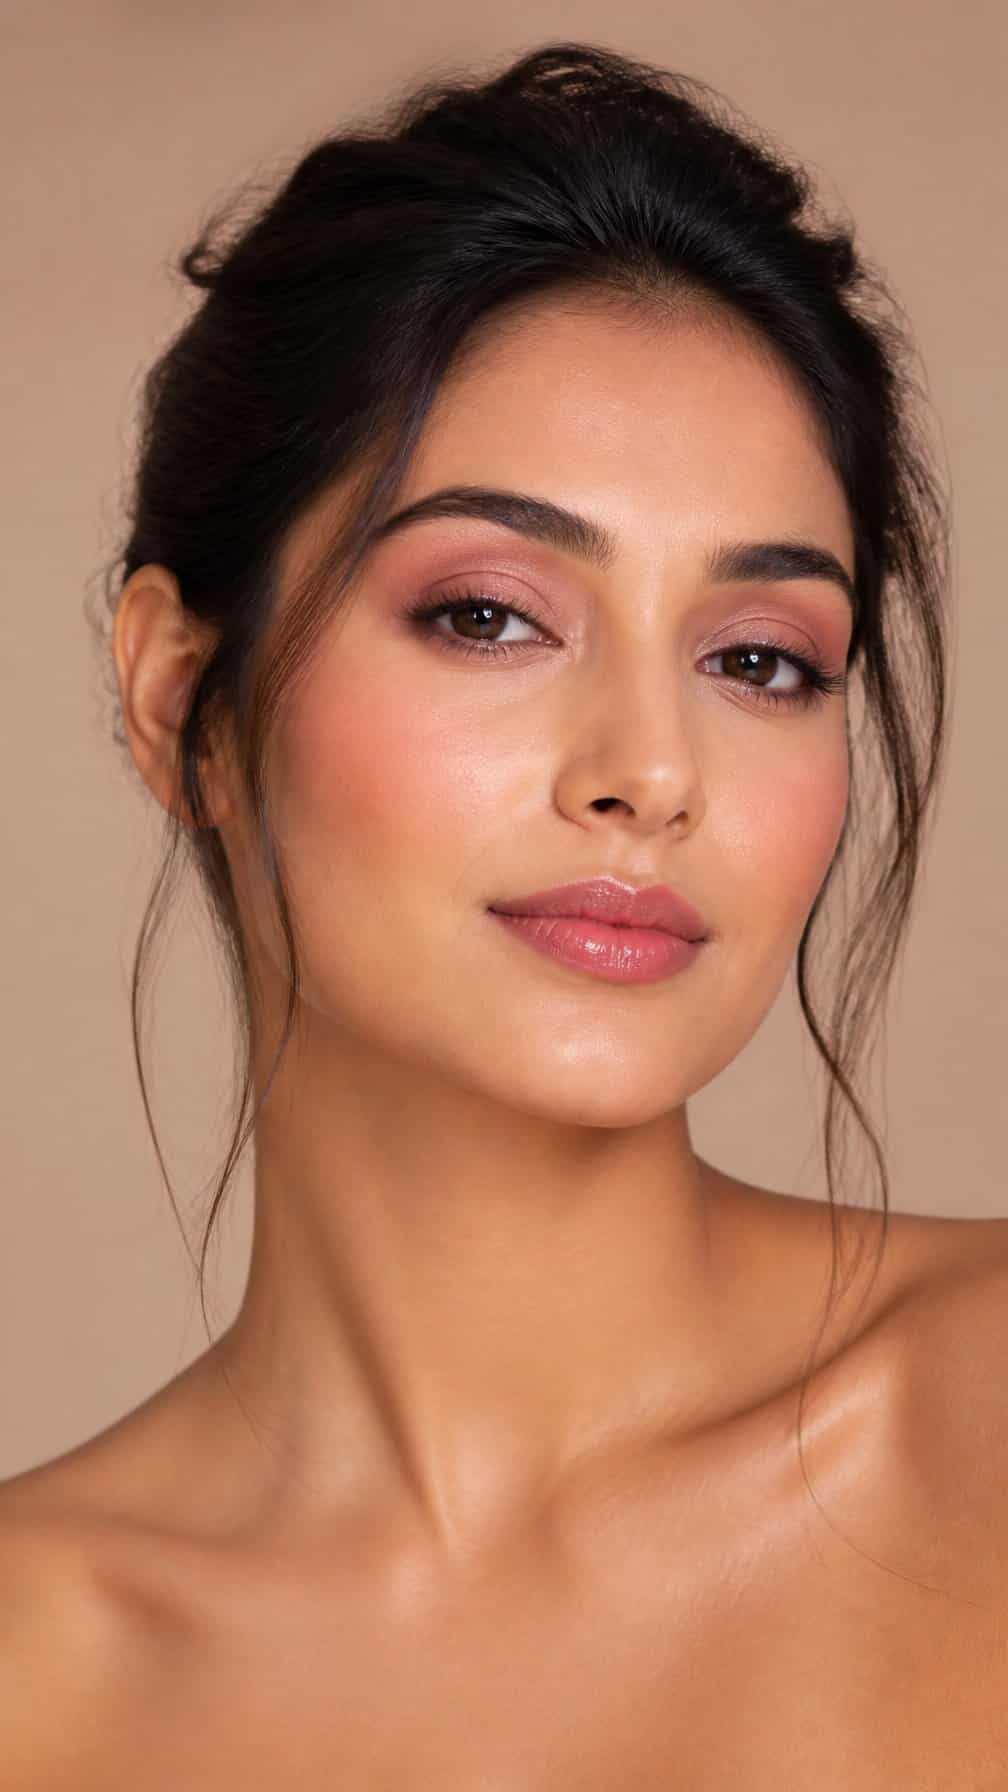
I sweep a soft mauve shadow across my lids and blend it slightly above the crease for gentle definition. The muted purple tone adds dimension without overpowering the eyes, while a satin finish catches light evenly in photographs.
I place pink blush on the apples of my cheeks and blend it toward my temples. This placement gives my complexion a fresh, balanced look and connects the cool eye color with the rest of my makeup. I keep the blush buildable to preserve natural skin texture.
9) Bronzed Skin with Caramel Tones
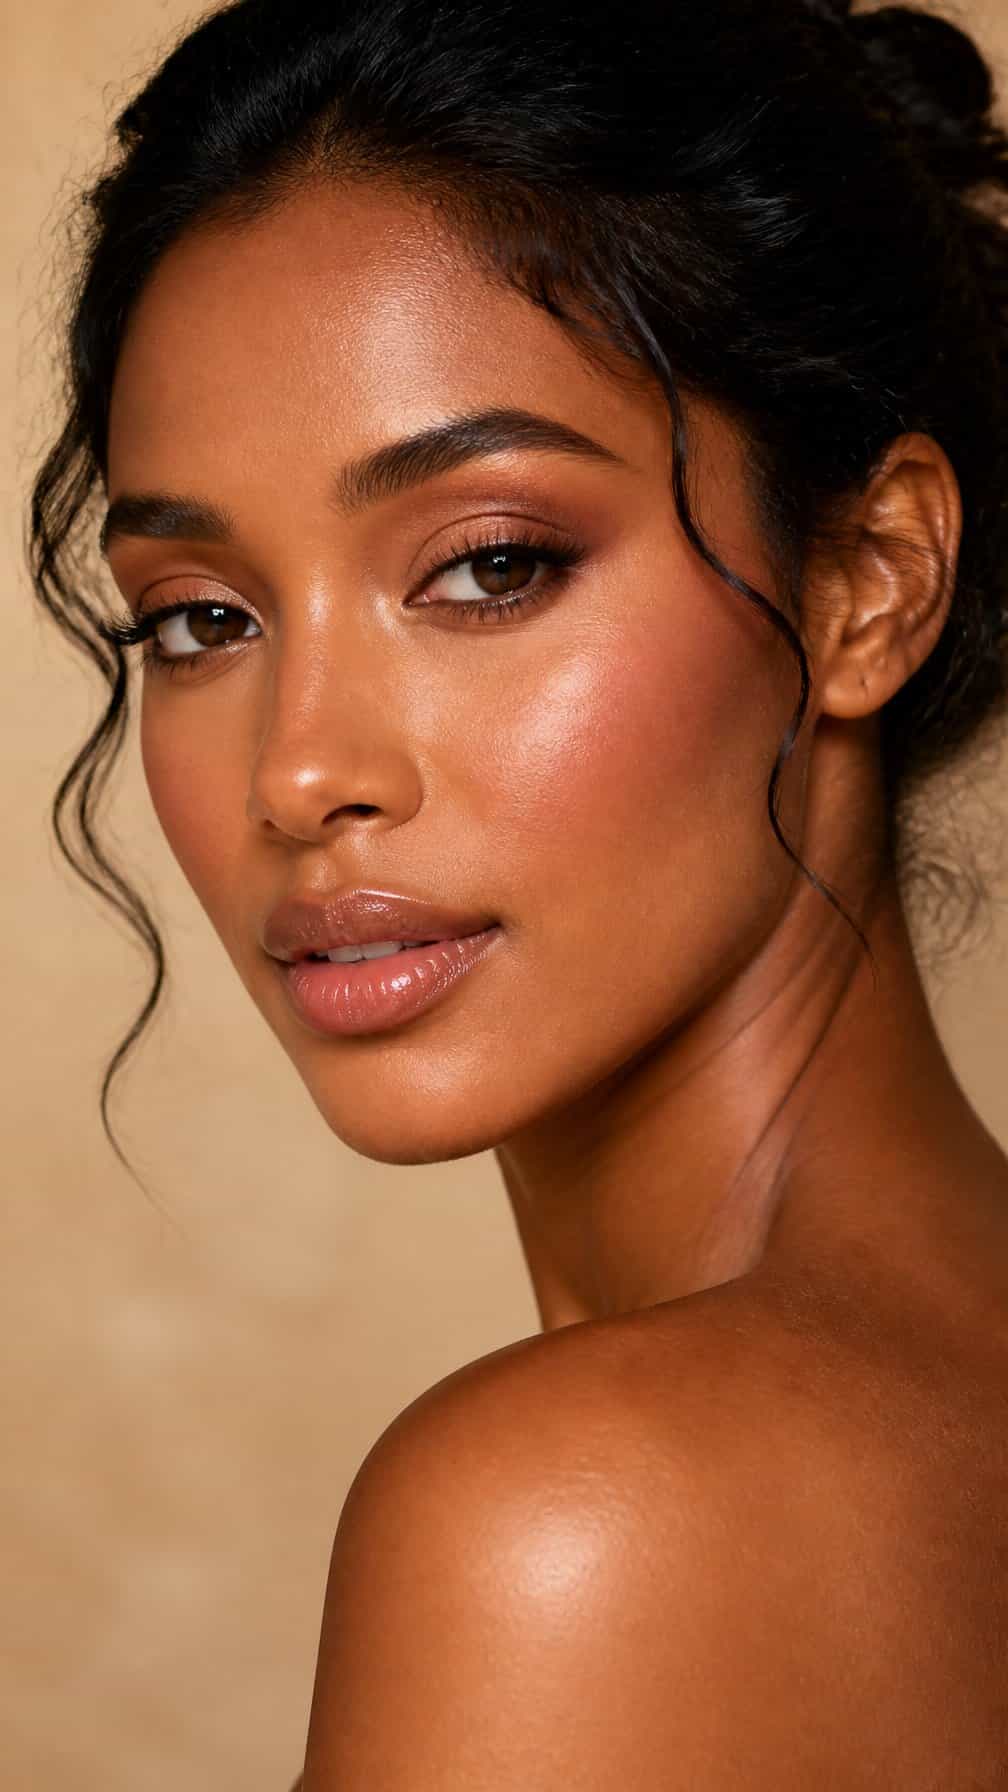
I warm my complexion with a sheer caramel bronzer across the forehead, cheekbones, nose, and jawline. I keep the layer light so my natural skin texture remains visible, then blend the edges carefully into the hairline and neck.
For added dimension, I tap a soft golden highlight onto the tops of my cheeks and the bridge of my nose. I choose a satin finish rather than strong shimmer, which helps the skin reflect light evenly in photographs.
I pair the complexion with caramel-toned eyeshadow, softly smoked along the crease and lower lash line. A brown pencil liner and fluttered lashes define my eyes without competing with the bronzed skin, while a warm nude gloss keeps the look balanced.
10) Classic Winged Liner and Nude Lips
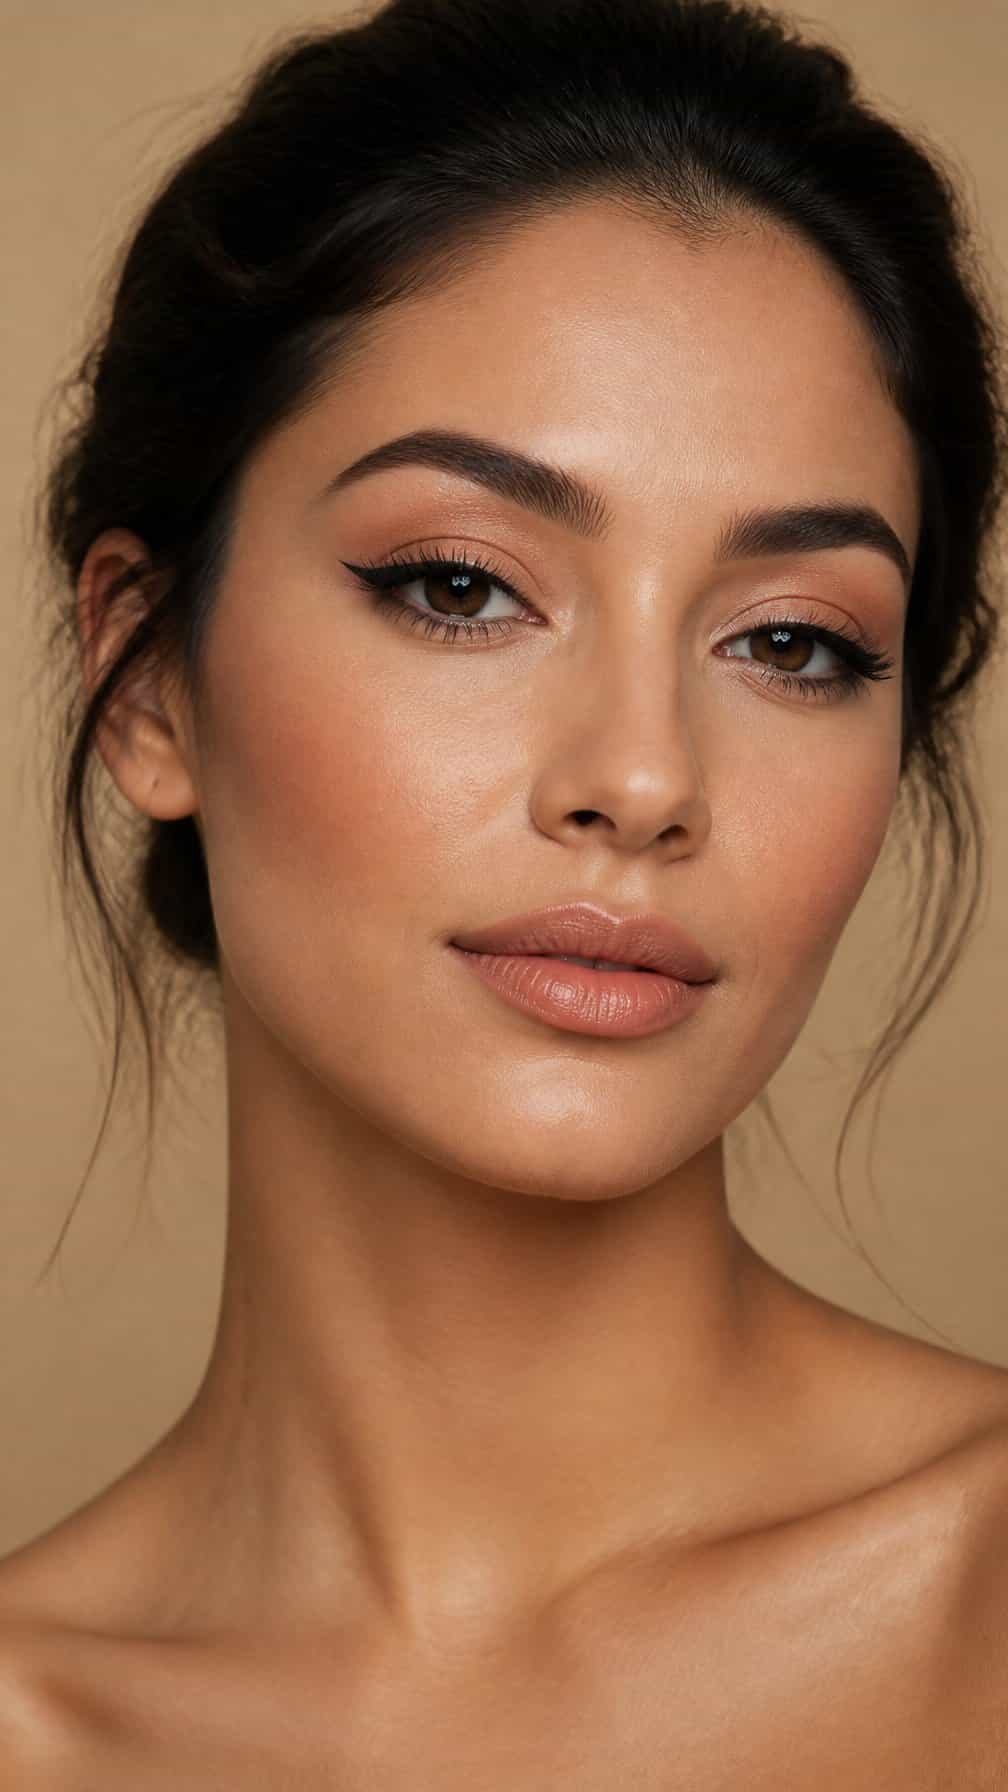
I pair a softly defined wing with a nude lip to create clean structure without making the makeup look severe. I keep the liner thin near the inner corner, then extend it slightly upward from the outer lash line for a balanced shape that remains visible in photos.
I use a satin or softly matte nude lipstick close to my natural lip tone, adding a touch of liner to refine the edges. Lightly blended neutral eyeshadow, groomed brows, and subtle cheek color keep the look polished while preserving gentle contrast.
11) Taupe Eyeshadow with Rose Gold Highlight
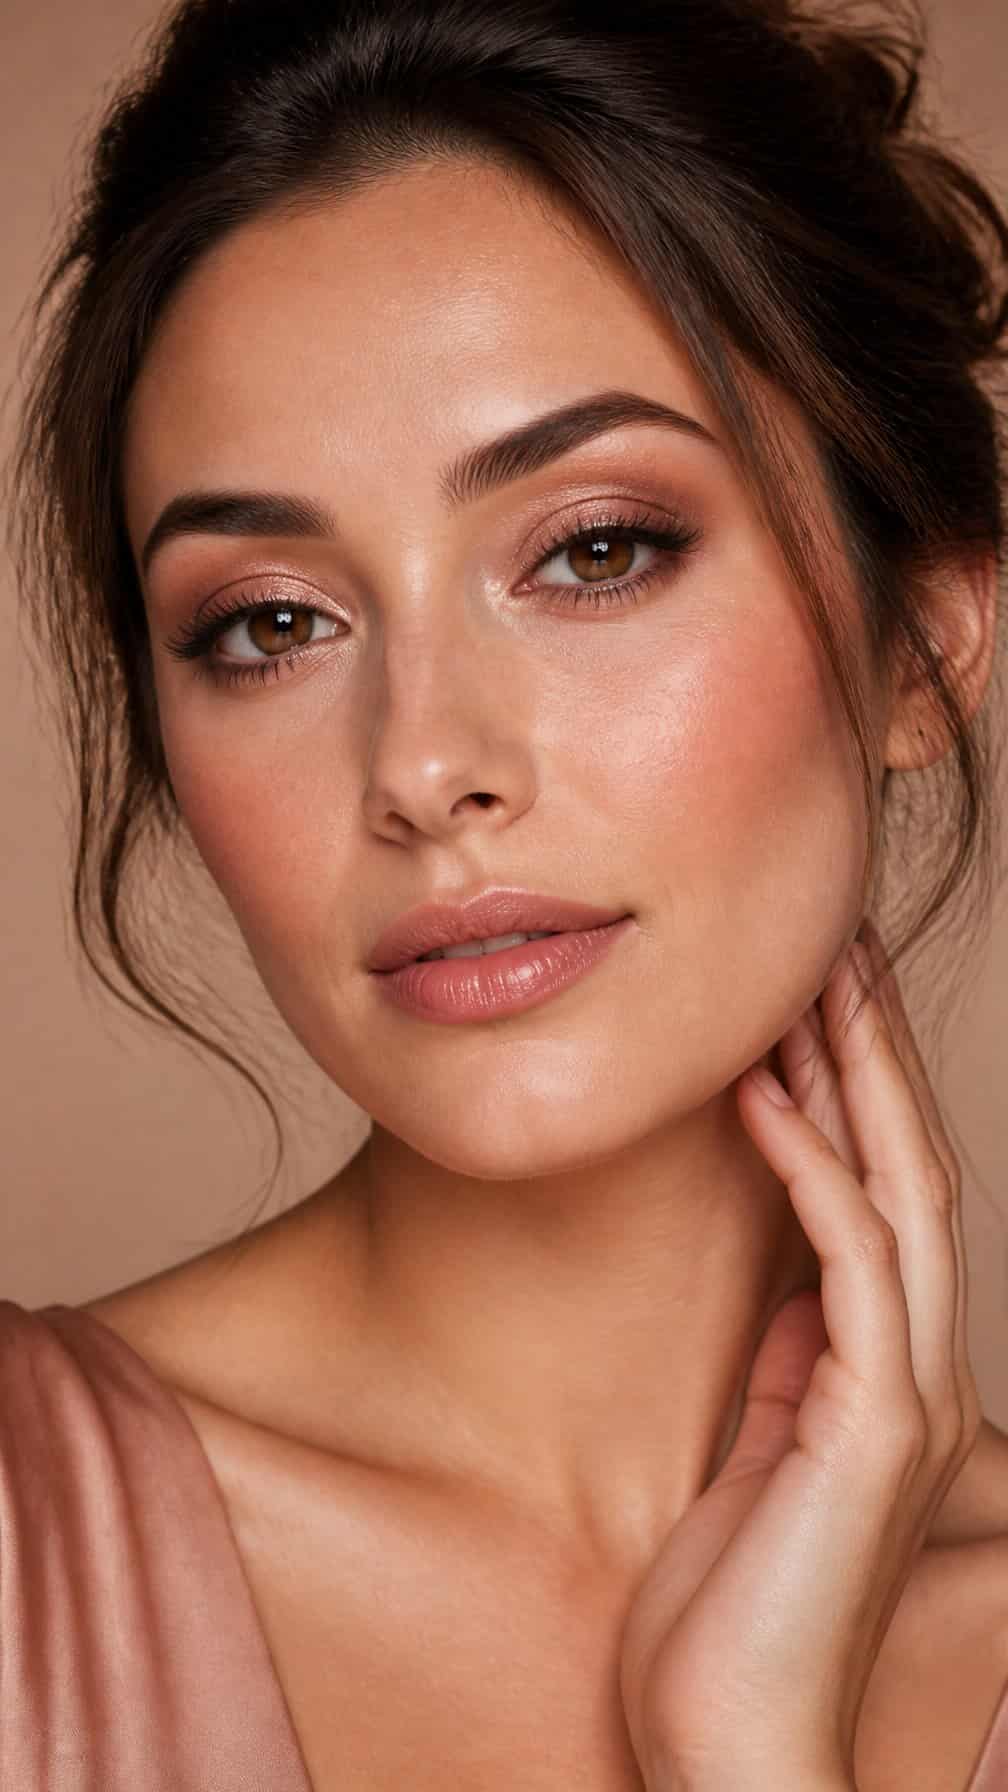
I blend a cool taupe shadow through my crease and across the outer lid, keeping the edges softly diffused. The muted tone adds definition without overpowering the eyes, which helps the makeup remain balanced in close-up photos.
I press rose gold shimmer onto the center of the lid and inner corner, then soften the border with a clean brush. I keep the shimmer finely milled to prevent visible texture and add a controlled glow under flash photography.
I finish with brown liner, curled lashes, and a light coat of mascara. I pair the eyes with softly sculpted cheeks and a rosy nude lip so the rose gold highlight stays the focal point.
12) Soft Plum Smoky Eye
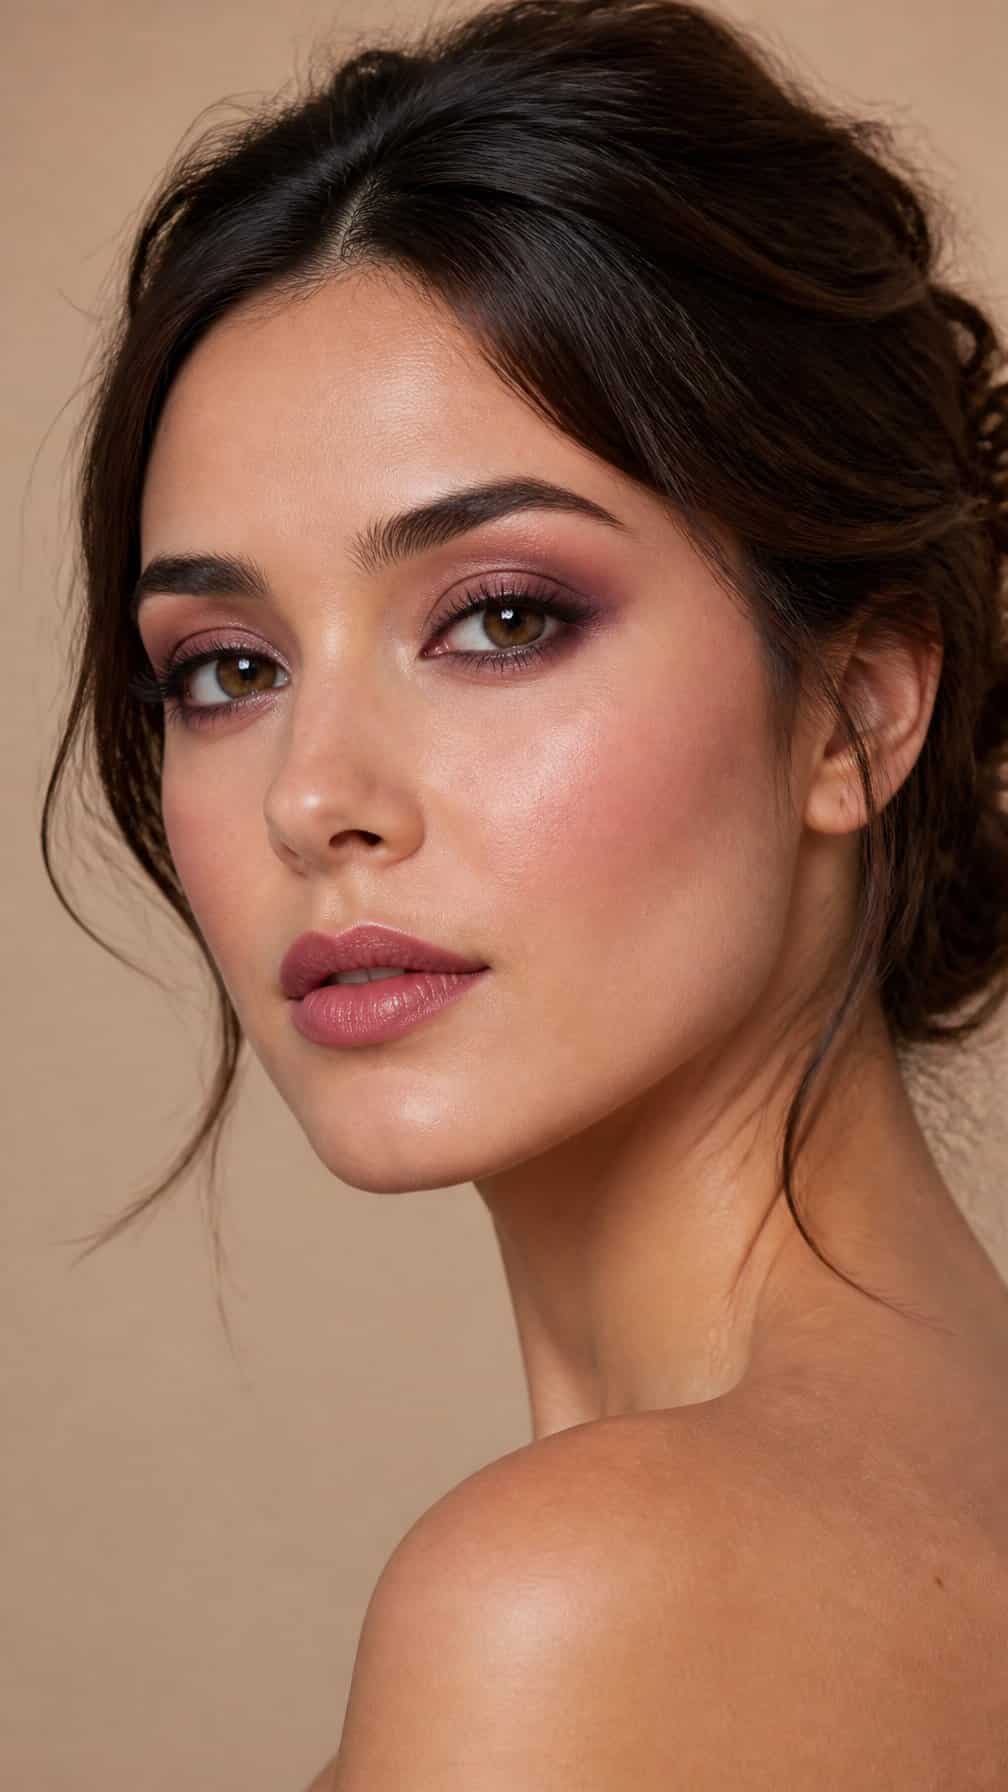
I build this look with muted plum shadow concentrated along the lash line and outer corner, then blend it softly into the crease. I keep the edges diffused rather than sharply defined, which gives the eyes depth while preserving a polished finish in photographs.
I pair the eyeshadow with softly curled lashes and brown-black mascara to maintain balance. A thin plum or espresso liner adds definition without making the look too heavy, while a satin champagne shade on the inner corner brings controlled brightness.
I finish with fresh skin, softly groomed brows, and a muted rose or mauve lip. I keep blush close to the natural cheek color so the plum tones remain the focal point without competing with the rest of the makeup.
13) Natural Freckles with Cream Blush
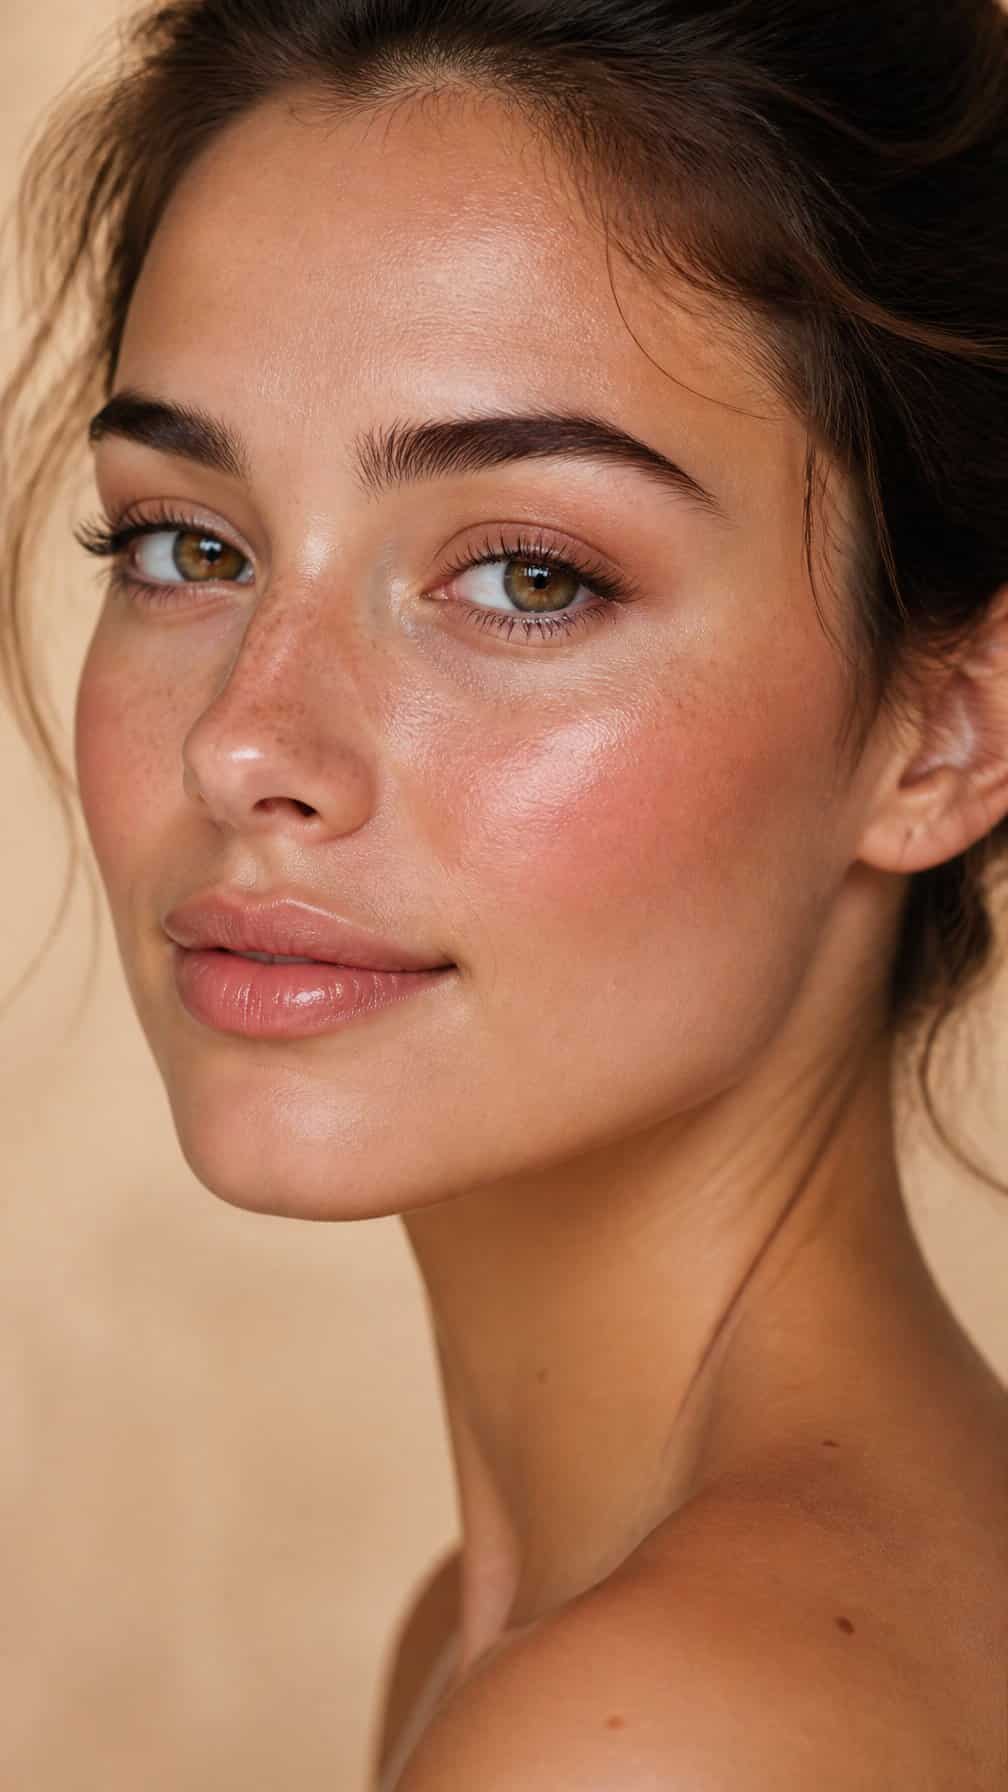
I keep the base sheer so natural freckles remain visible, then tap a cream blush onto the apples of my cheeks and blend it toward my temples. A muted peach, soft rose, or warm terracotta shade adds color without covering the skin’s texture.
I apply blush with my fingers or a damp sponge, using light layers to maintain a fresh finish. If I need extra definition for photos, I add a small amount across the bridge of my nose, then set only the areas prone to shine.
For believable freckles, I leave existing ones exposed rather than drawing over them. When I add a few with a fine brow pencil, I vary their size and spacing, then press gently with a fingertip to soften the edges.
14) Candlelit Highlight and Peach Lips
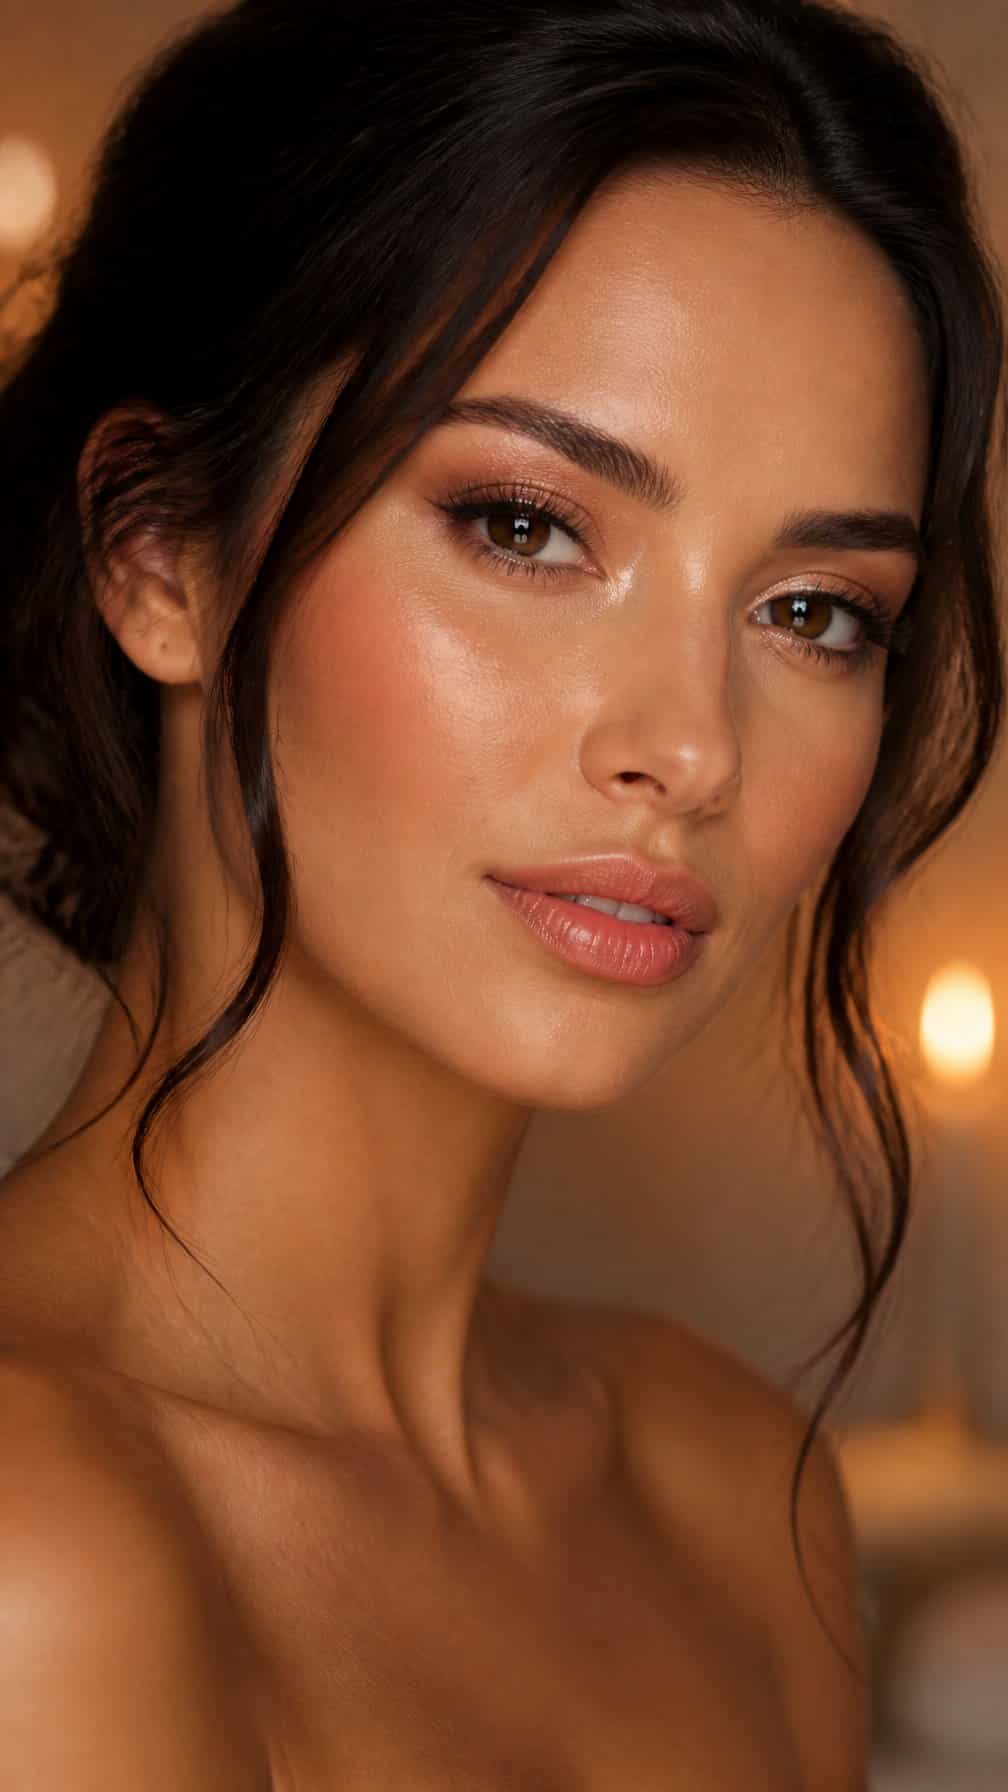
I create a soft, candlelit effect by placing a finely milled champagne highlighter on the high points of my cheekbones, brow bones, and the bridge of my nose. I blend the edges carefully so the sheen appears diffused rather than metallic, especially under direct flash.
I pair the luminous skin with a muted peach blush swept across my cheeks and slightly over the nose. A peach-toned lip liner defines my shape, while a satin peach lipstick adds color without looking heavy or overly glossy.
I keep the eyes understated with warm beige shadow, curled lashes, and a thin brown liner close to the upper lash line. This balance lets the highlight catch the light while keeping my features defined in photographs.
15) Brown Liner with Glossy Nude Lips
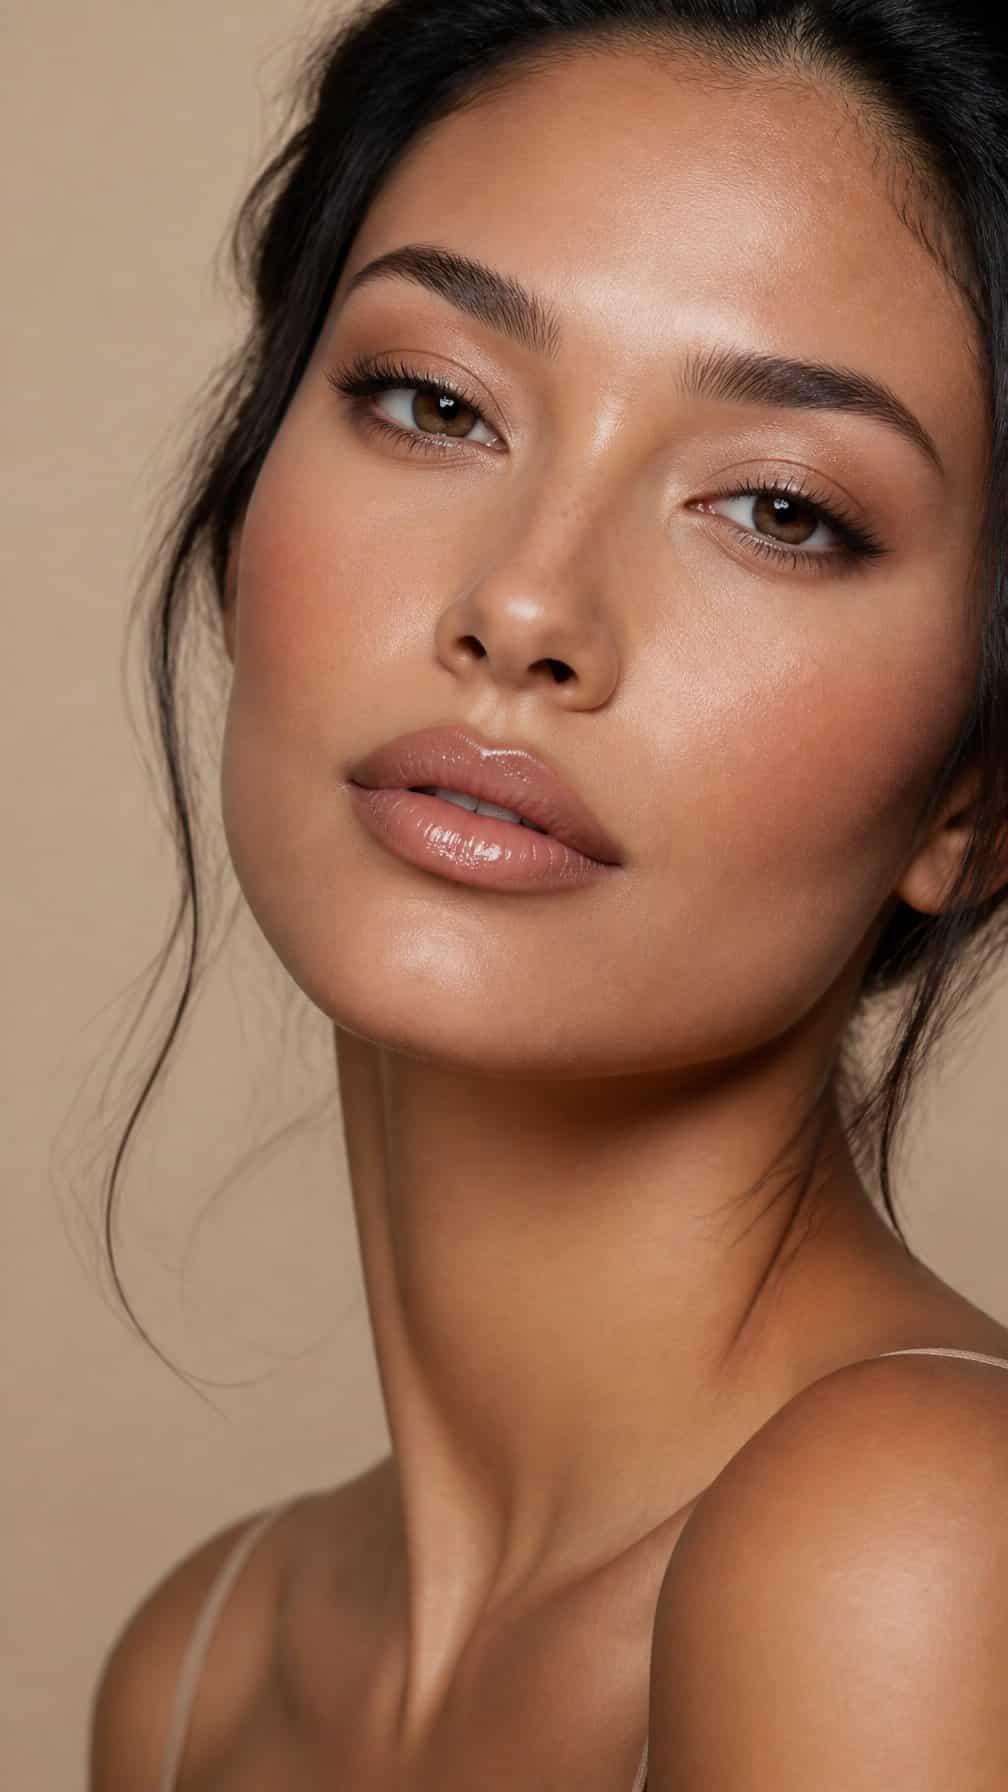
I define the eyes with a softly smudged brown liner, keeping the edge close to the lash line for gentle depth. I add neutral brown shadow through the crease and finish with separated lashes, which keeps the look polished without making it appear heavy in photos.
For the lips, I choose a nude shade that complements my undertone, then layer clear or lightly tinted gloss over the center. I lightly blur the lip edges with concealer and add a touch of beige-pink blush to keep the complexion balanced under flash.
16) Terracotta Eyeshadow and Warm Bronzer
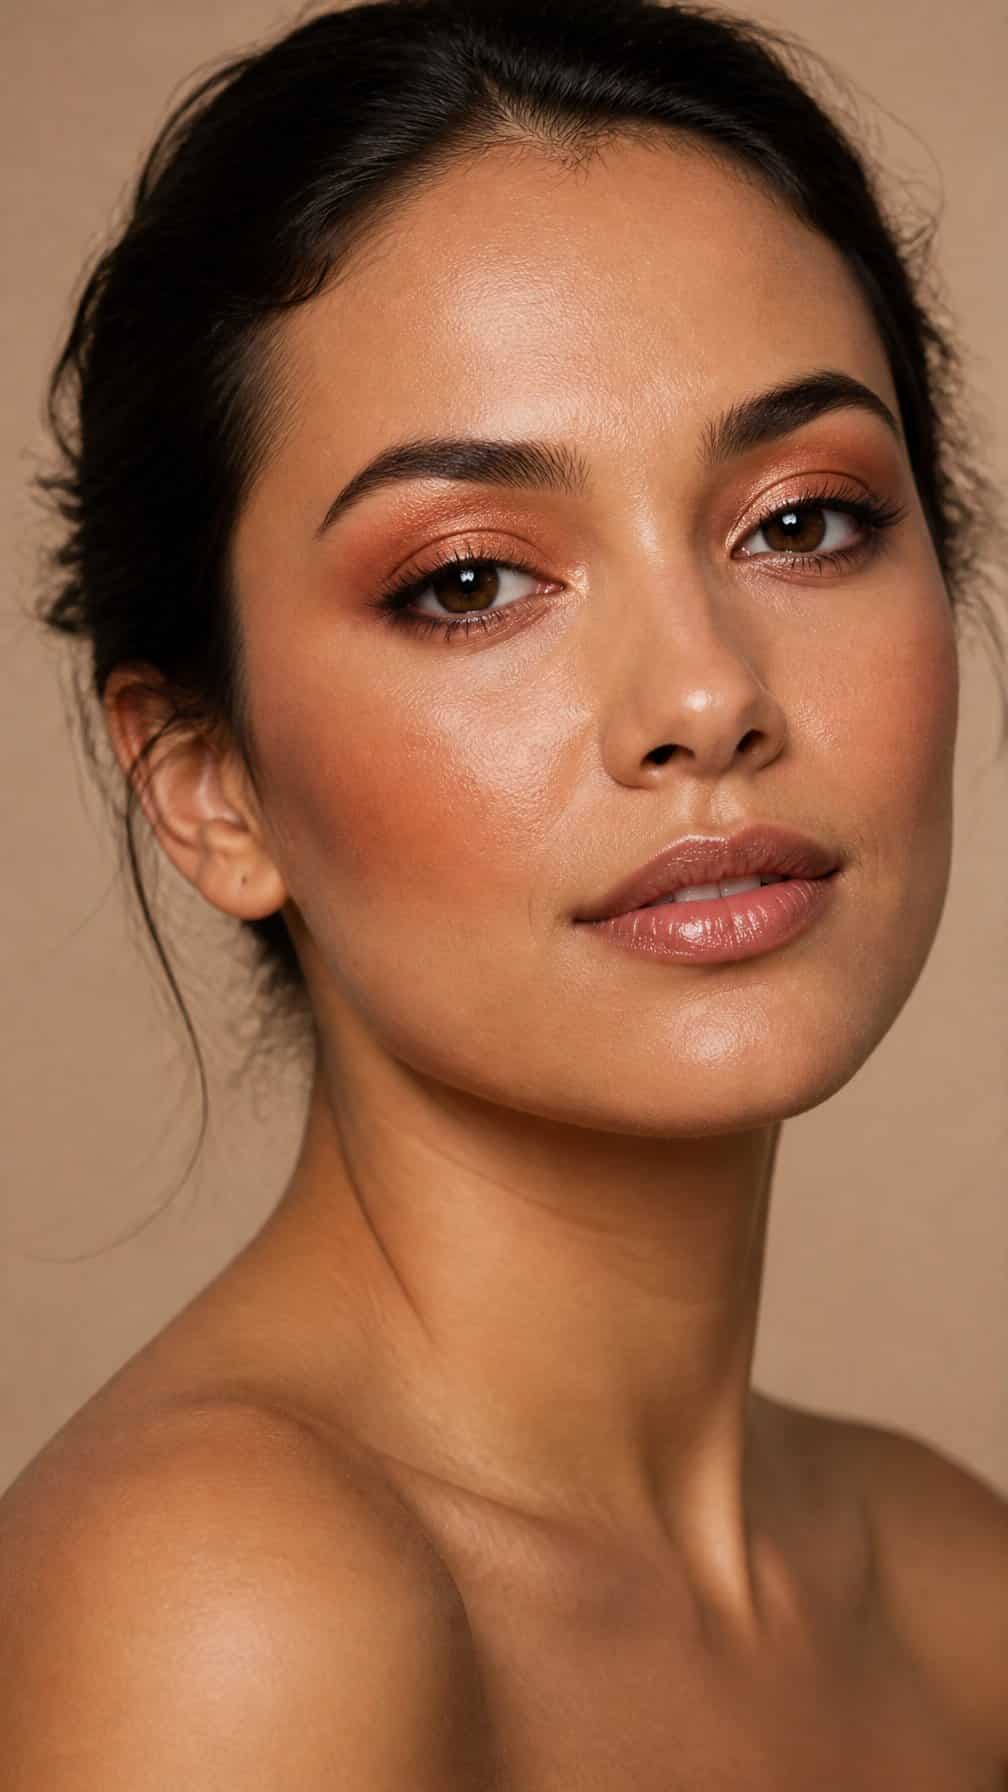
I sweep terracotta eyeshadow across my lids, keeping the color softly diffused through the crease. Its earthy red-orange tone adds warmth without looking overly vivid, while a satin finish catches light gently in photographs.
I blend warm bronzer along my cheekbones, temples, and the bridge of my nose to connect the eye and complexion tones. I keep the edges sheer and build gradually, which helps the makeup retain dimension under flash photography.
For balance, I use a neutral brown pencil close to my upper lash line and finish with softly curled lashes. I pair the look with peachy-nude blush and a muted caramel lip, keeping the skin fresh rather than heavily powdered.
17) Soft Halo Eye with Neutral Shimmer
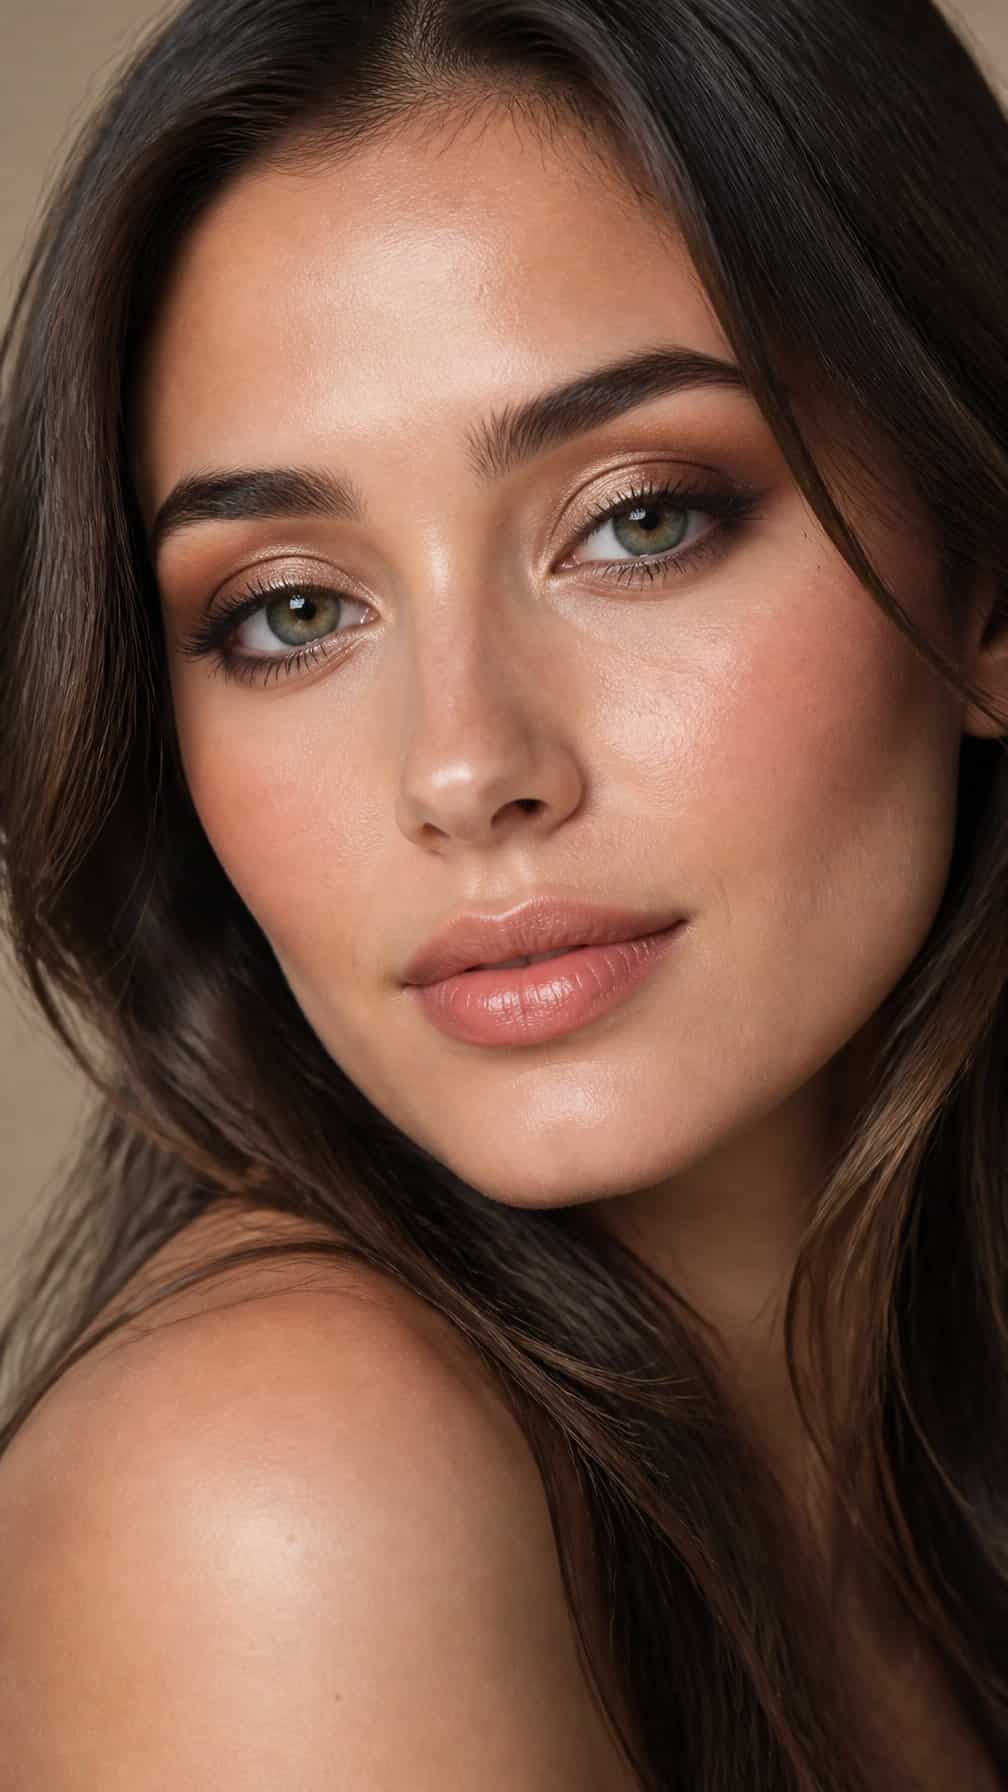
I keep the eyelid’s center slightly brighter than the inner and outer corners, using a soft champagne or taupe shimmer with a satin finish. I blend matte beige-brown through the crease and deepen both corners gradually, which creates dimension without making the eye look heavily outlined.
I prefer a small, precise brush for the shimmer so the reflective pigment stays centered in photographs. I soften the edges with a clean blending brush, then add a thin brown liner close to the lashes and finish with separated mascara. This placement catches light naturally while keeping the makeup polished and balanced.
18) Cool-Toned Taupe Glam
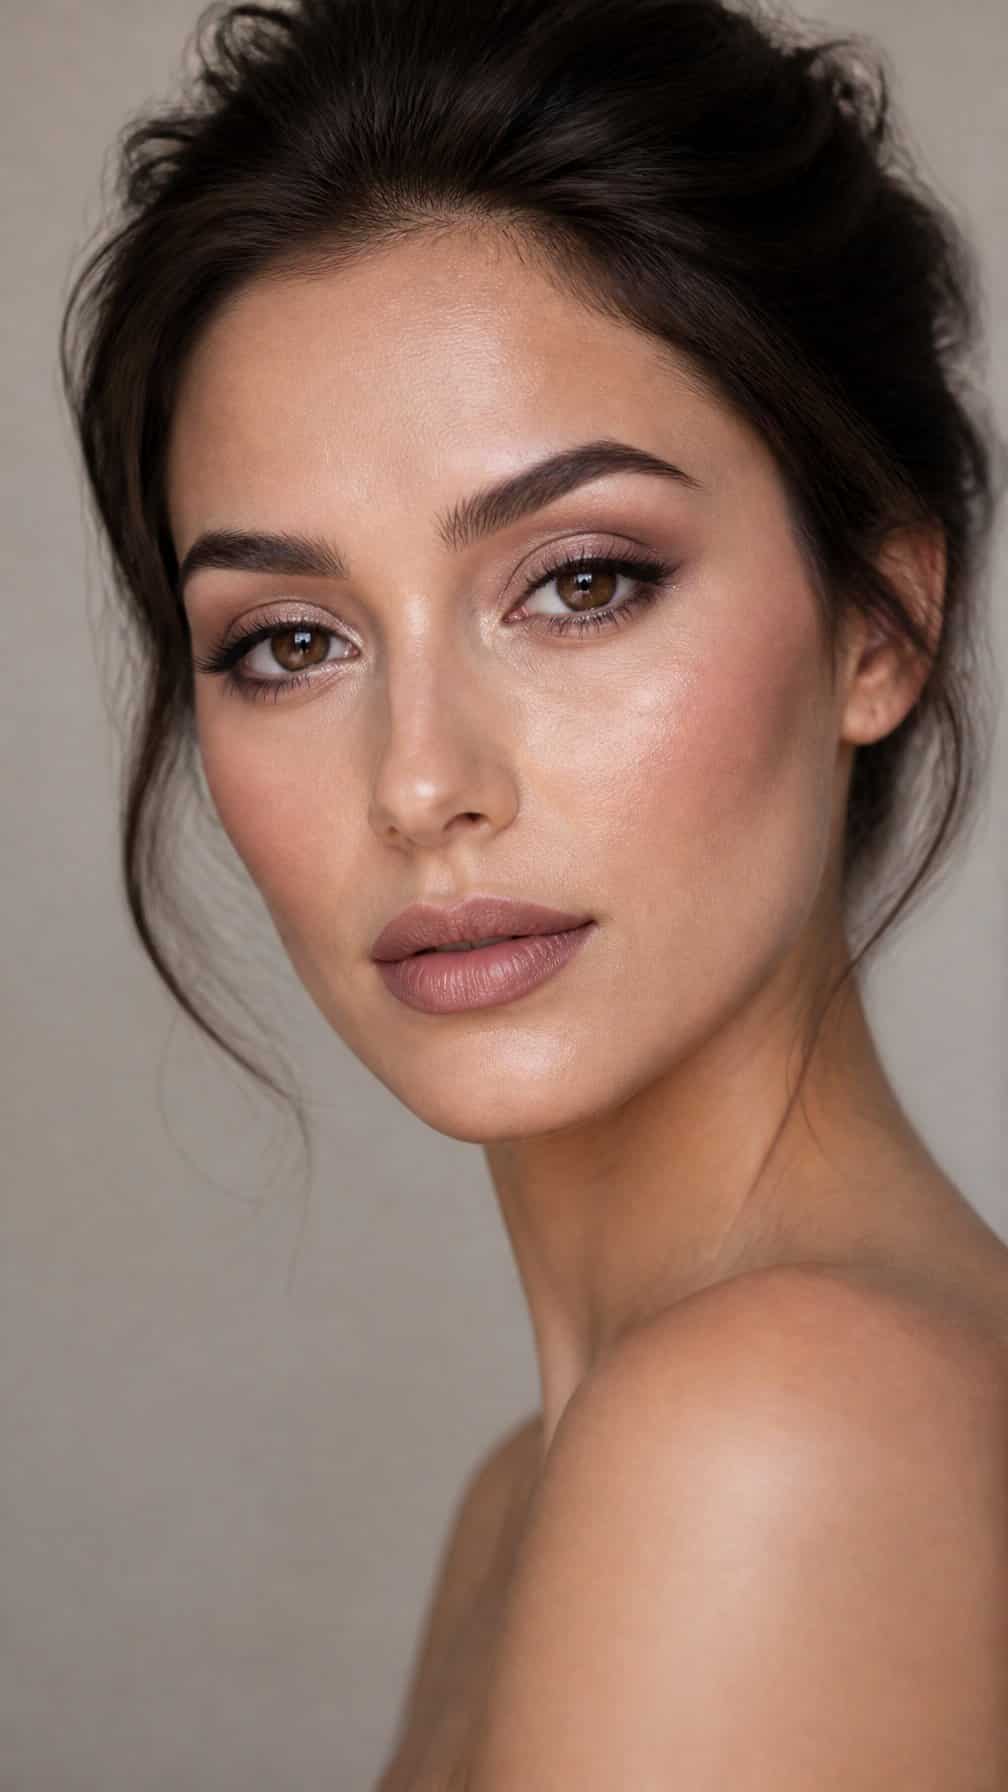
I use cool taupe eyeshadow to create a polished, softly sculpted look without harsh contrast. I sweep a pale taupe across the lid, deepen the outer corner with a muted mushroom shade, and blend the edges toward the brow bone.
I keep the eyeliner thin and slightly extended, then add separated lashes that define the eyes without overpowering them. A neutral pink blush and mauve-rose lip complement the cooler tones, while a small amount of satin highlight on the cheekbones catches light naturally in photographs.
For a cohesive finish, I choose a foundation with a natural skinlike texture and set only the areas prone to shine. This keeps the makeup refined while preserving dimension and realistic skin detail.
19) Champagne Inner-Corner Highlight
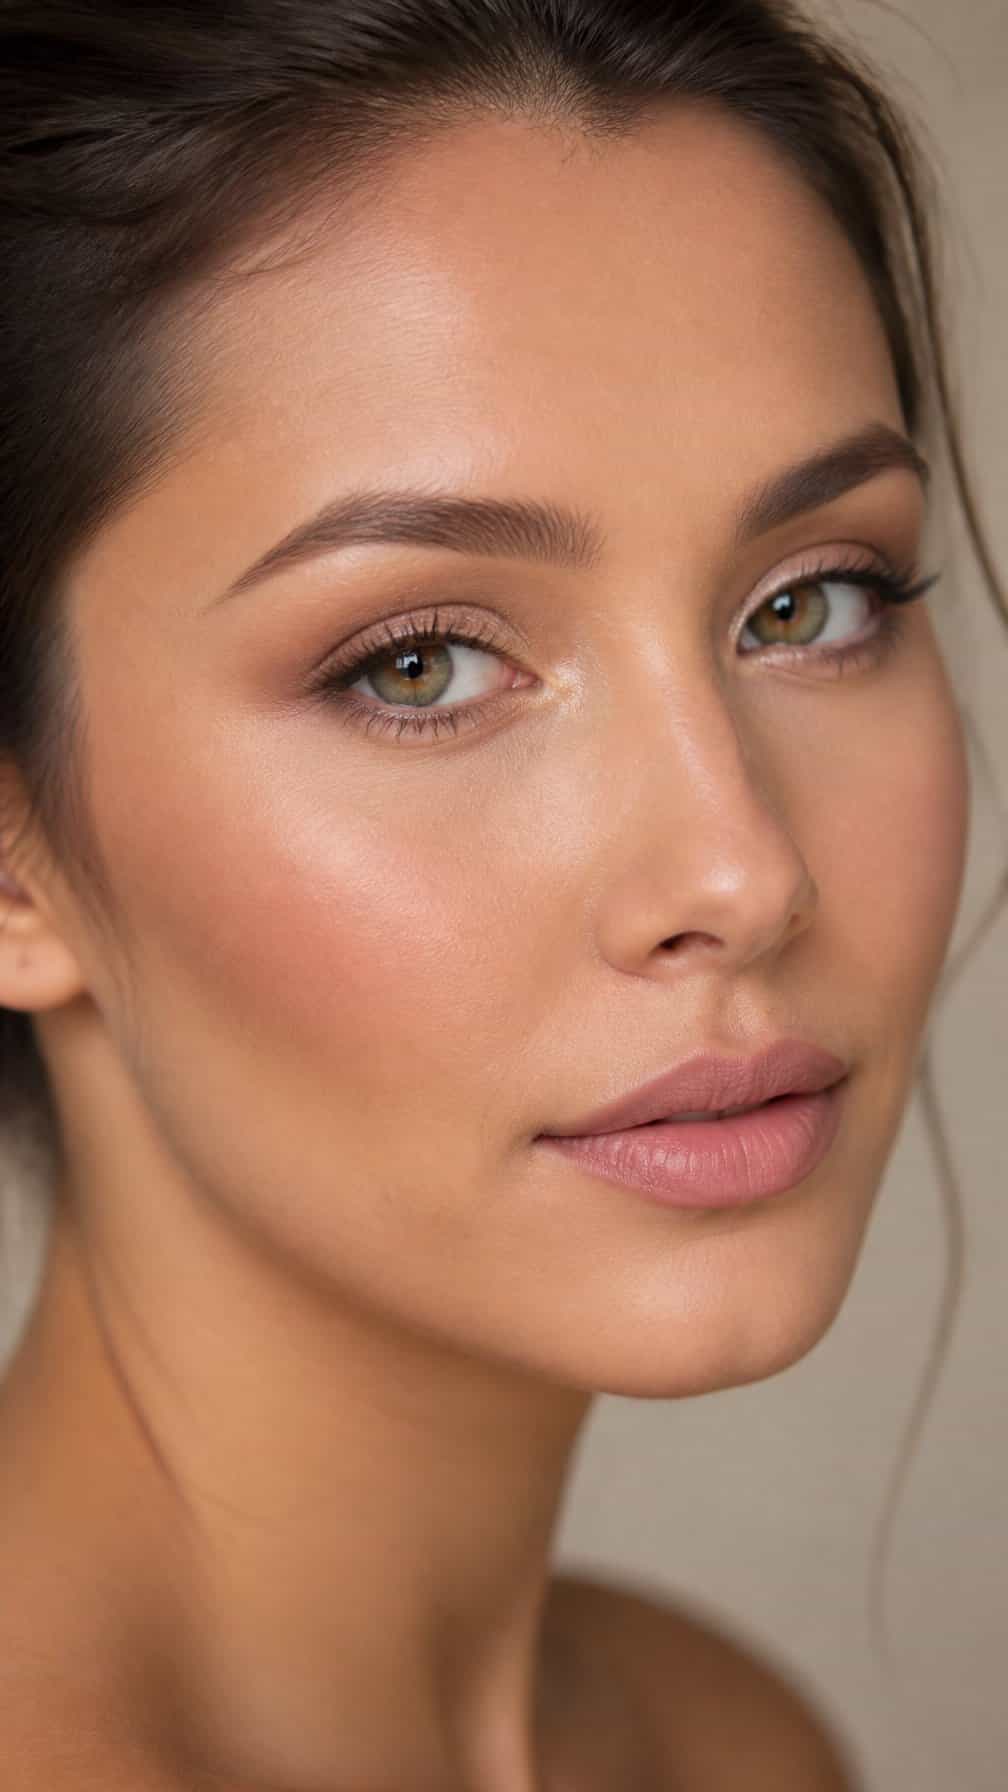
I place a small amount of champagne shimmer at the inner corners after applying my eyeshadow. The warm, pale tone brightens the eye area without overpowering soft brown, taupe, or rose shades.
I use a precise brush for a focused highlight and blend the edges lightly so the color transitions smoothly. For photographs, I prefer a finely milled formula with moderate shine; it catches light around the eyes while keeping the finish polished rather than glittery.
20) Rosewood Lip and Blushed Cheeks
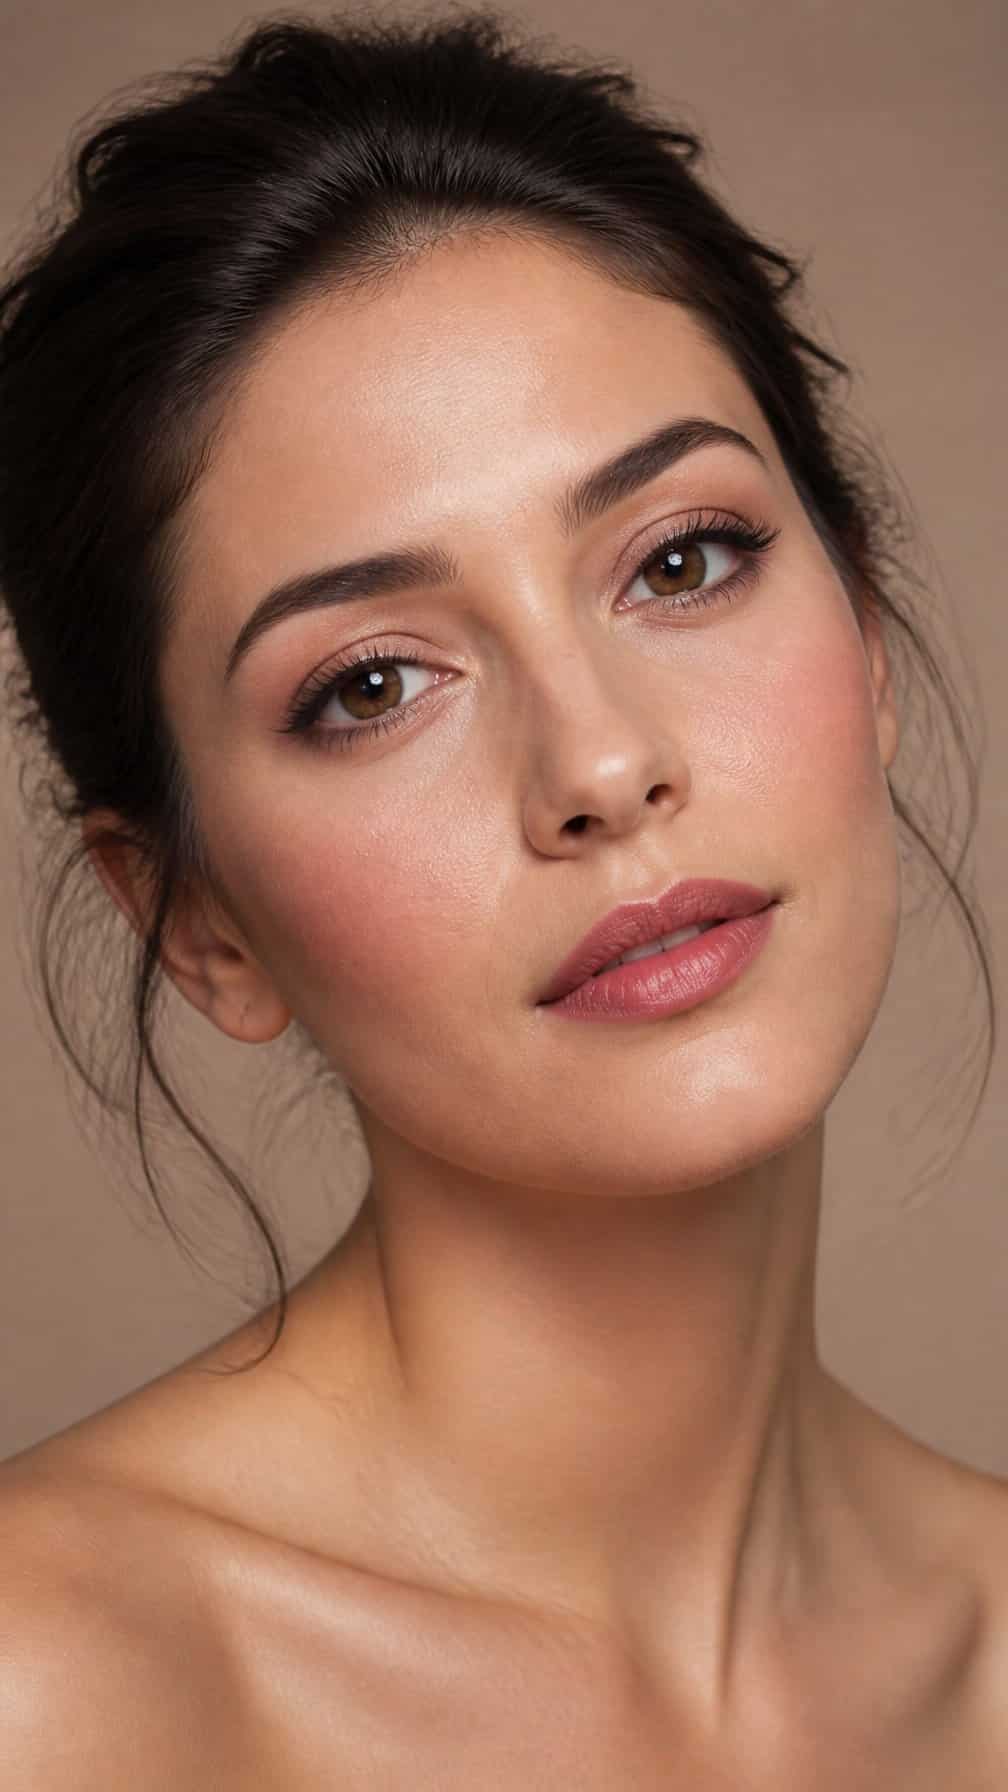
I pair a muted rosewood lipstick with softly flushed cheeks for balanced, camera-friendly definition. The brown undertone keeps the lip grounded, while a satin or cream blush adds natural dimension without looking overly bright.
I apply the blush slightly above the apples of my cheeks and blend it toward the temples. This placement gives my face gentle structure, especially under direct lighting, while preserving a soft finish.
For photographs, I lightly define my lip edges with a matching pencil before tapping lipstick over the center. I keep the rest of my makeup polished but restrained, using softly blended neutral eyeshadow and subtle mascara to let the warm rose tones stay cohesive.
21) Soft Copper Eyeshadow Look
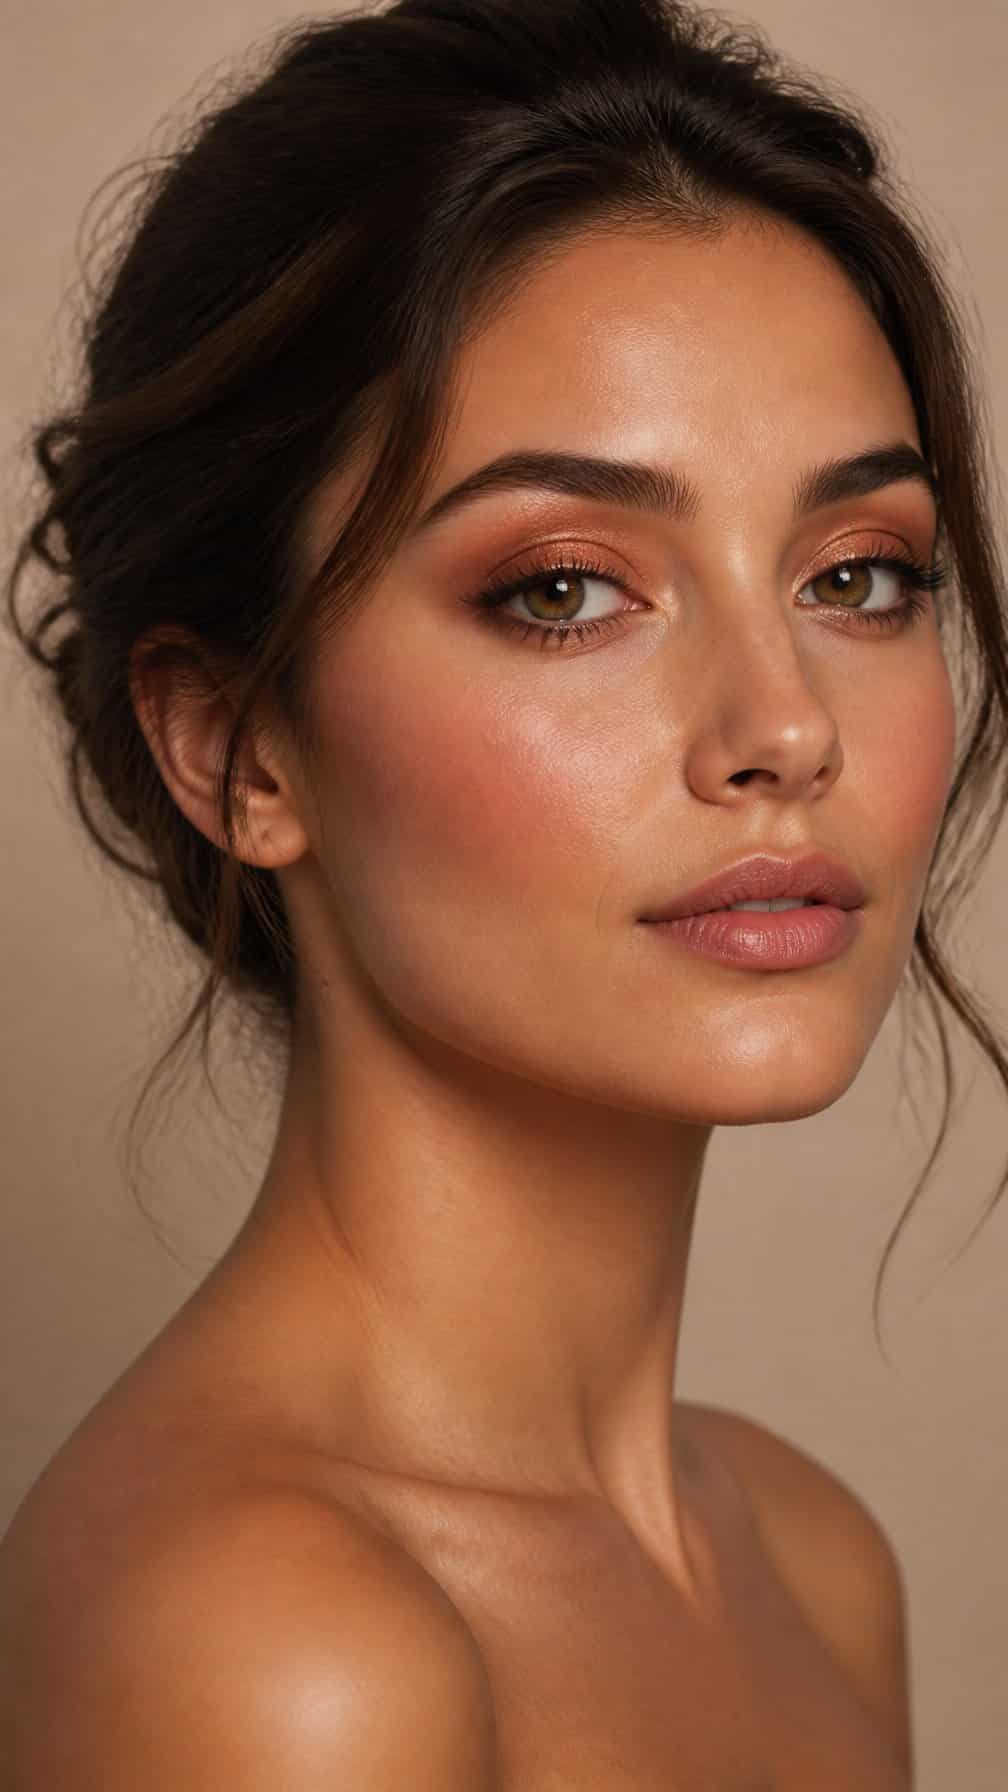
I build this look around a softly blended copper shade that adds warmth without overpowering the face. I sweep it across the lids, deepen the outer corners with muted brown, and keep the edges diffused for a smooth finish in photographs.
I prefer a satin or finely shimmered formula because it catches light without creating harsh reflections. I define the upper lash line with brown liner, add mascara, and balance the eyes with peach blush and a neutral rose lip.
For a polished result, I blend the copper slightly above the crease and check the makeup under natural light. I keep the base even and lightly set, which helps the warm tones remain clear in close-up photos.
22) Barely-There Base with Defined Brows
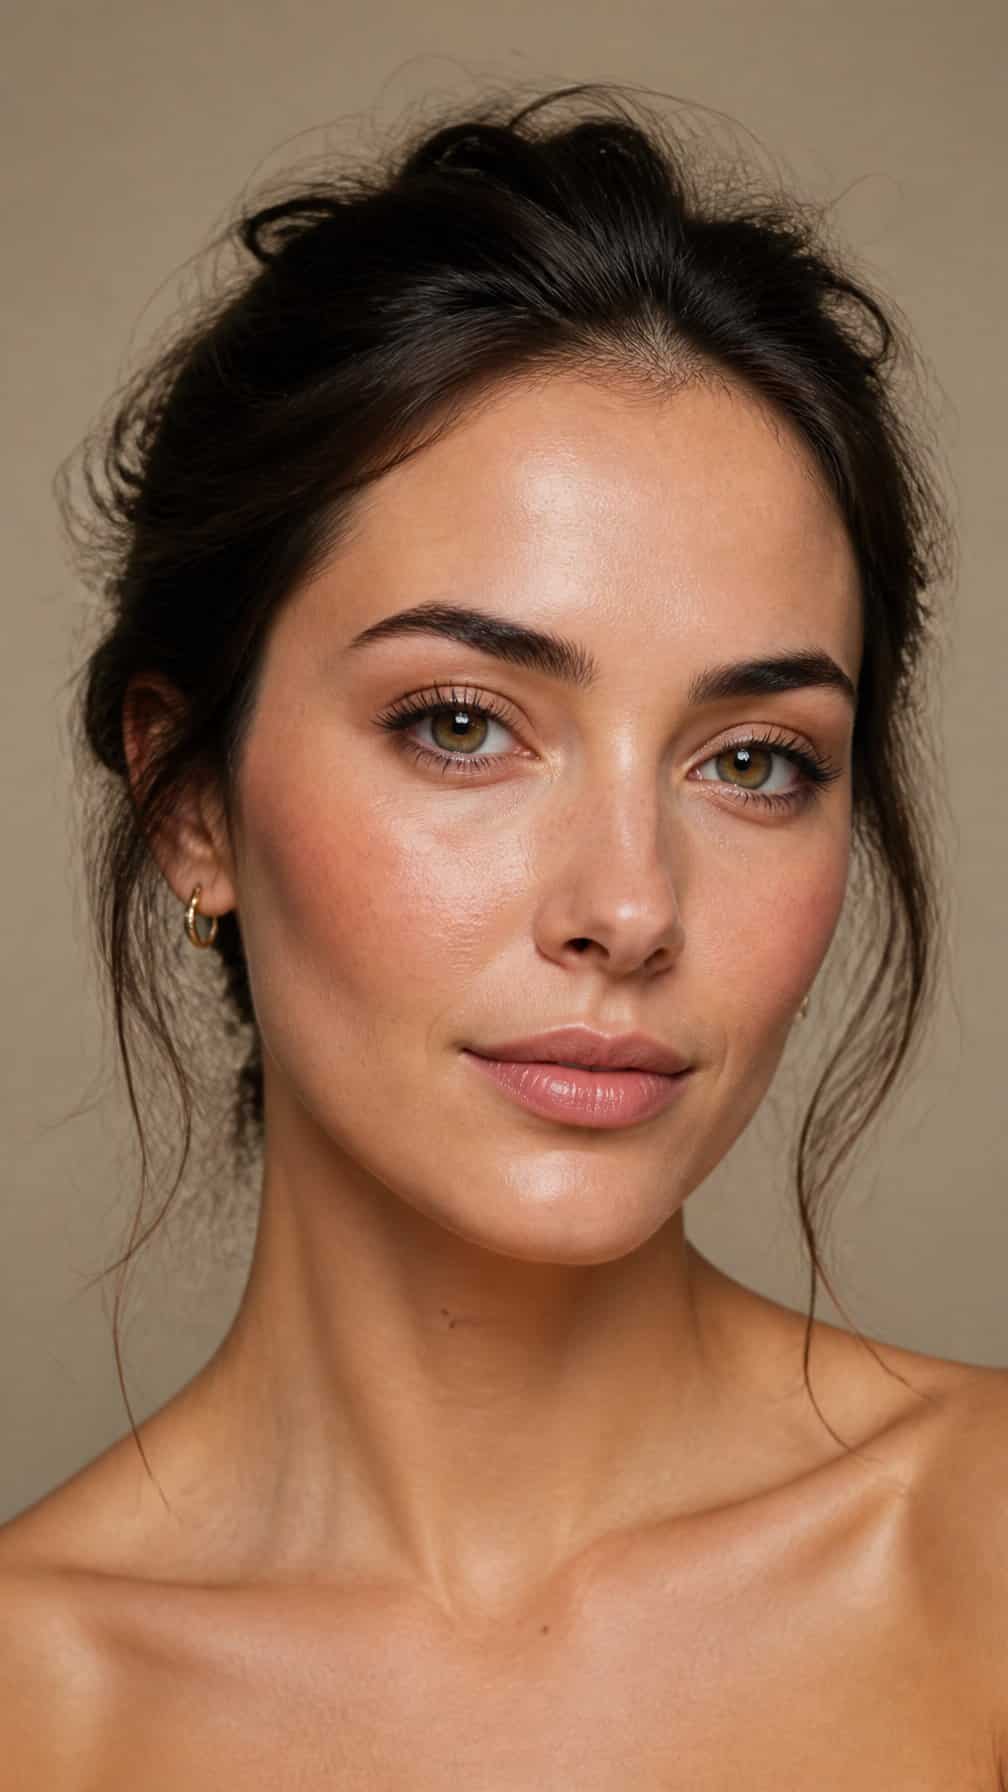
I start with a sheer, skin-like base that evens tone without hiding natural texture. I apply concealer only where needed, then set the center of my face lightly so the finish stays fresh under camera lighting.
I brush my brows upward and define their shape with fine, hairlike strokes, keeping the front softly diffused. A neutral taupe shade adds structure without making them look overly dense or severe.
I finish with muted blush, a soft brown tightline, curled lashes, and a satin lip close to my natural color. This balance keeps my features clear in photos while preserving a relaxed, barely-made-up effect.
23) Dusty Rose Monochromatic Makeup
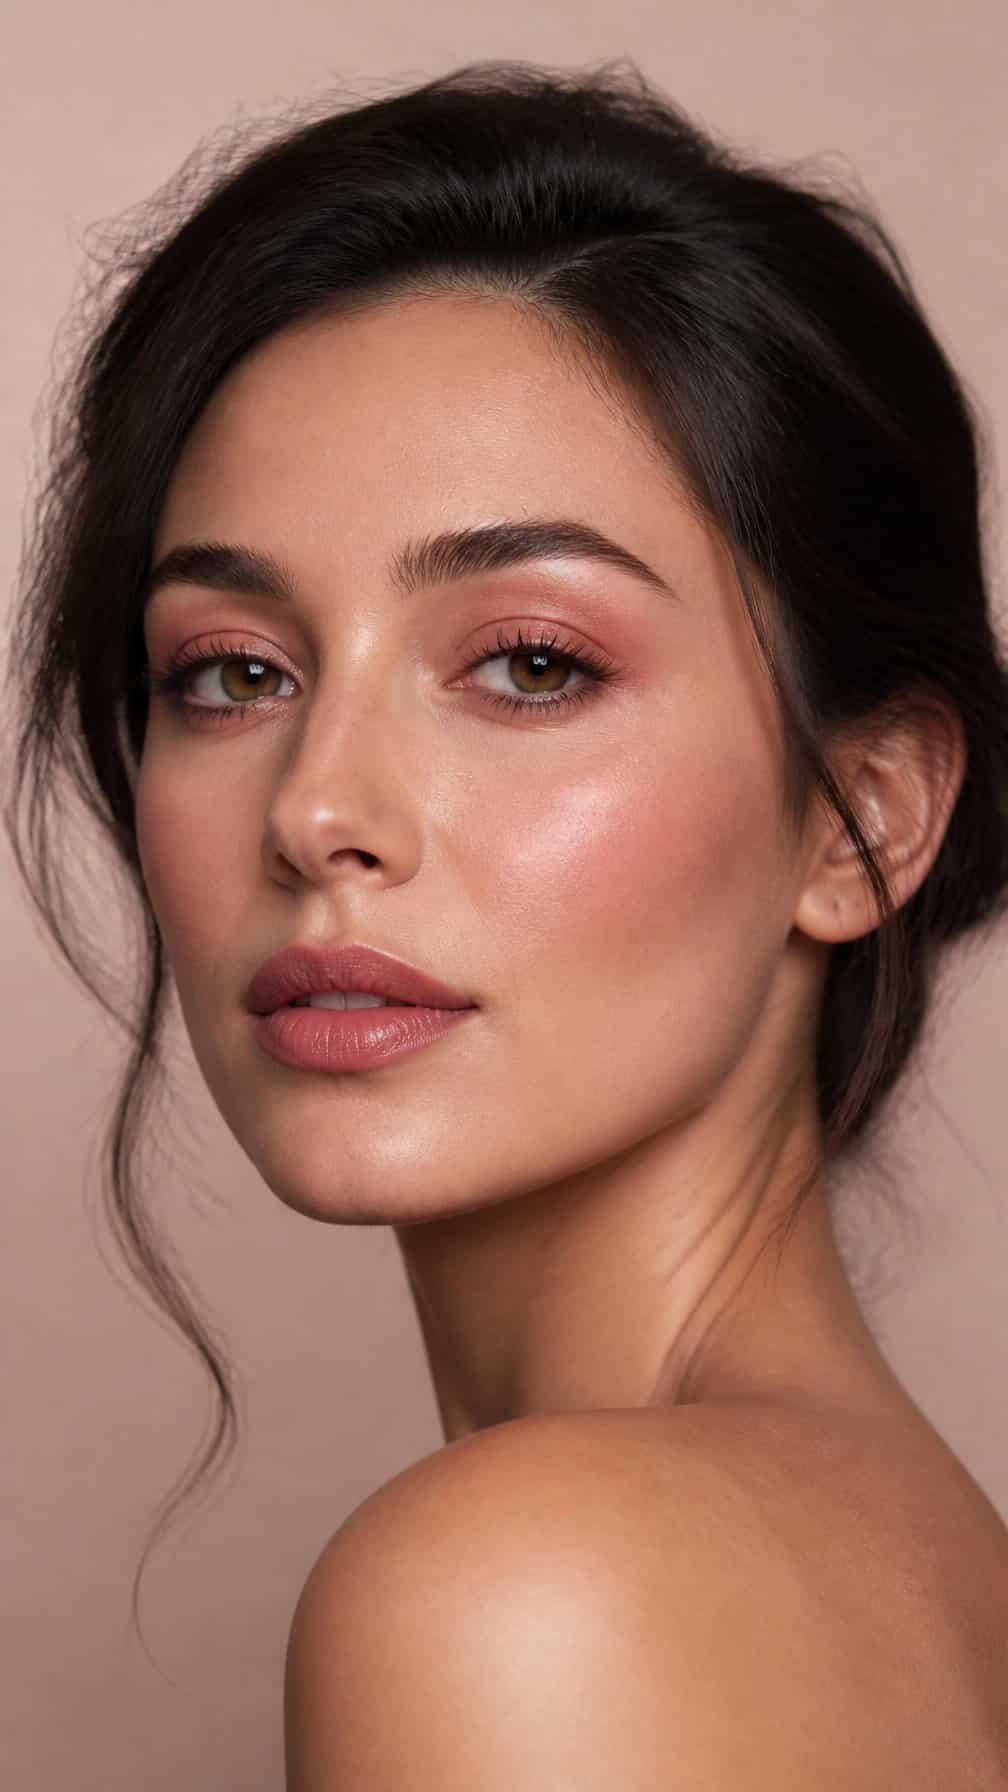
I use dusty rose across the eyes, cheeks, and lips to create a coordinated look with gentle definition. A matte or satin rose shadow through the crease adds shape, while a lighter shade on the lid keeps the eyes open in photographs.
I sweep a muted rose blush slightly upward along the cheekbones, blending the edges so the color appears soft rather than concentrated. I finish with a rose-toned lip liner and satin lipstick, then add a small amount of neutral gloss at the center for dimension.
I keep the base even and lightly luminous, since heavy powder can flatten the subtle color shifts. Soft brown mascara and a finely blended brown liner define the eyes without competing with the monochromatic palette.
24) Subtle Black Liner with Soft Shadow
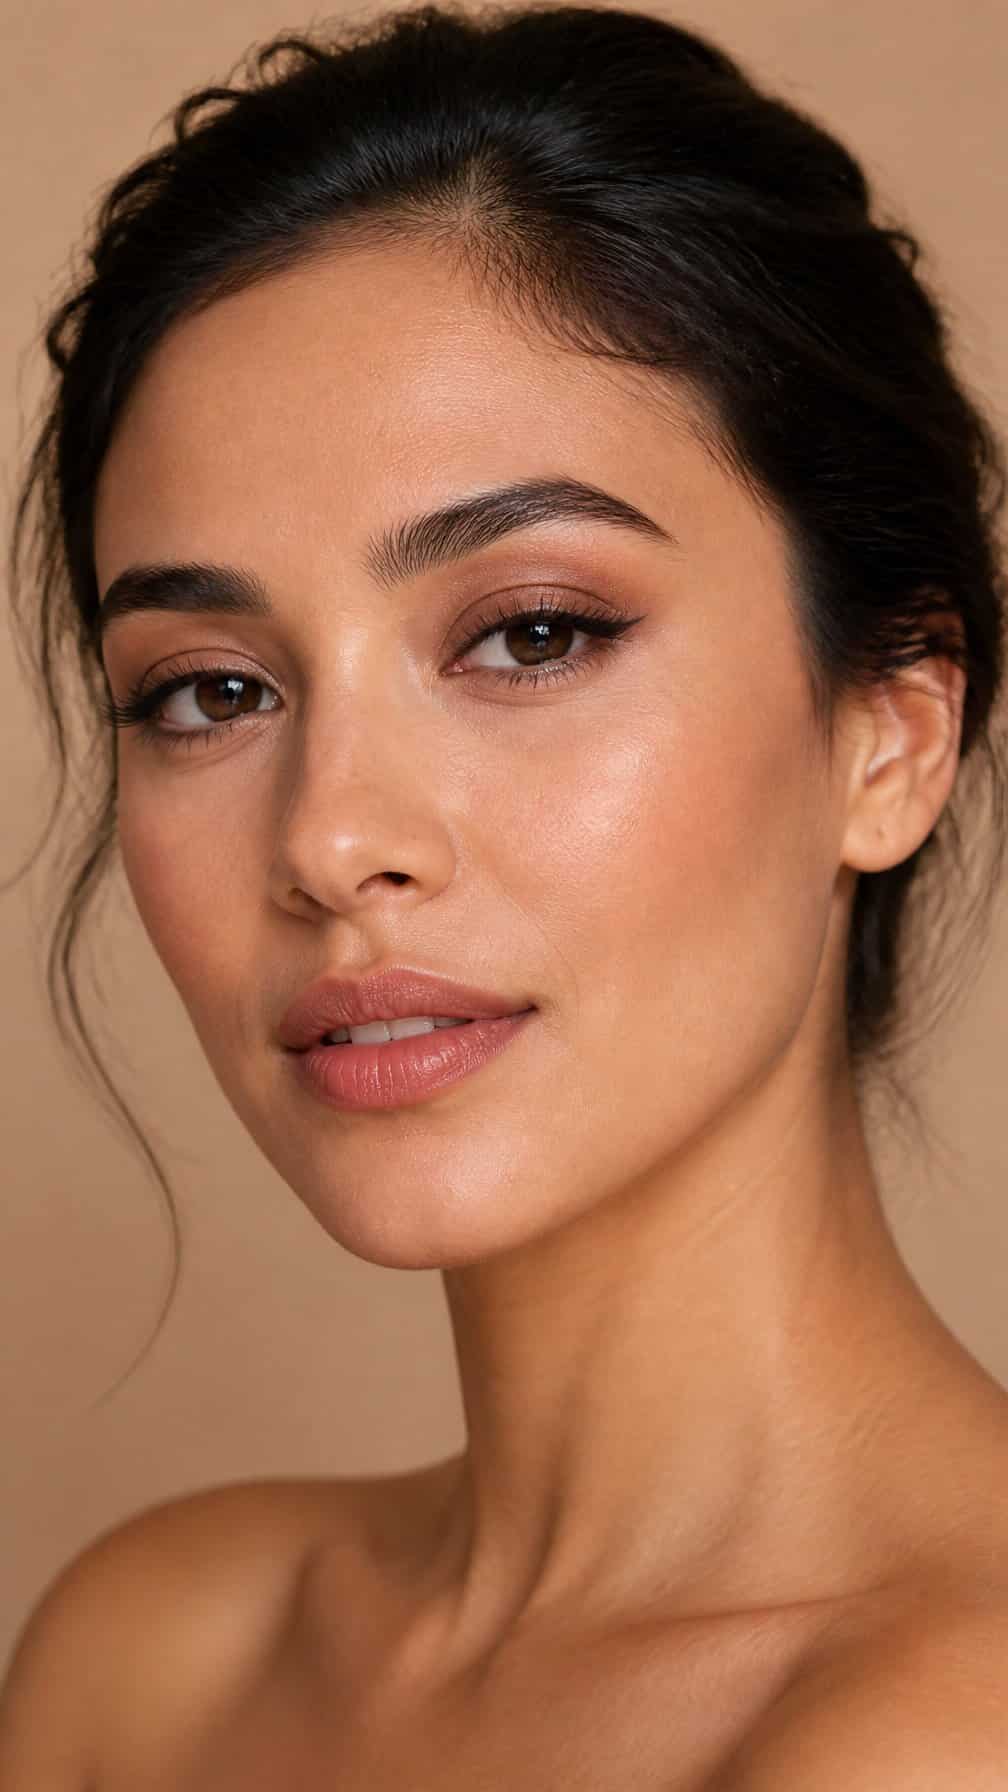
I keep the black liner thin and close to the upper lash line, extending it slightly at the outer corner. A softly blended taupe or warm brown shadow adds definition without competing with the liner or creating harsh contrast in photographs.
I use a matte or satin finish on the lid and place a touch of lighter shadow near the inner corner. This combination keeps my eyes looking polished under direct light while preserving gentle dimension around the crease.
For balanced definition, I softly smudge the lower lash line with the same neutral shadow rather than adding more black. I finish with separated, lifted lashes and lightly defined brows so the eye makeup remains refined from every angle.


