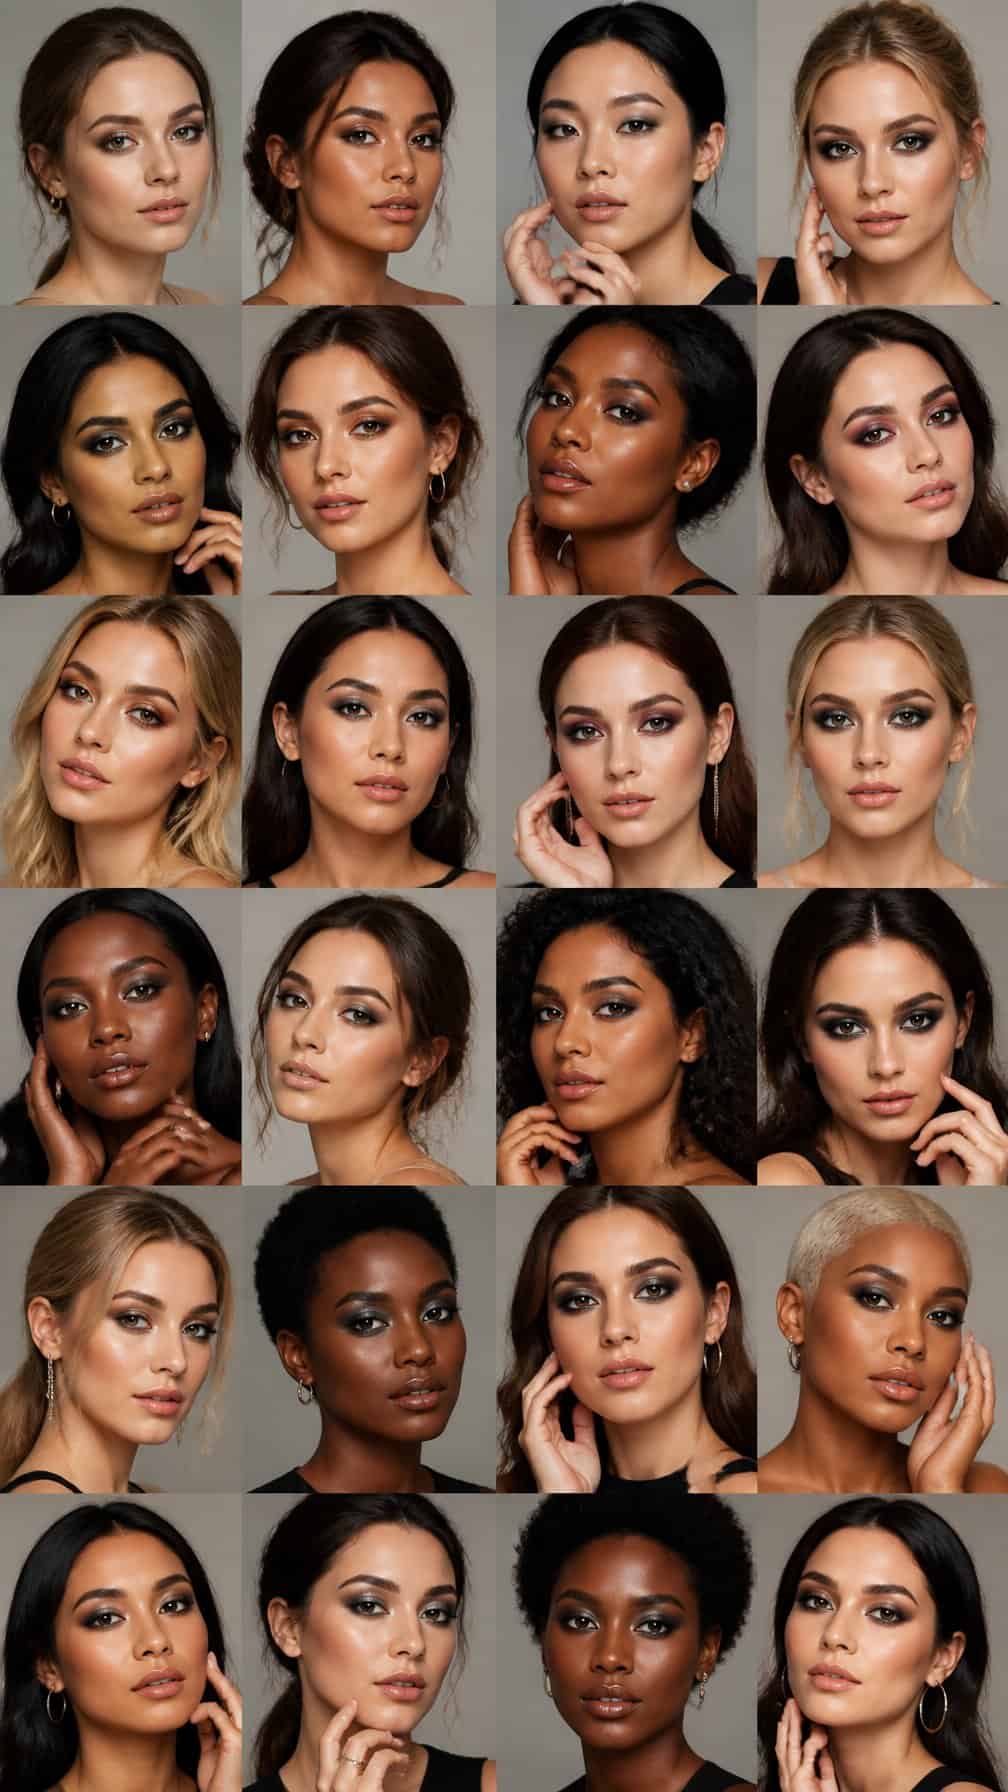
A smokey eye can suit a quiet daytime look or a more defined evening style, depending on the colors, finish, and placement you choose. I’ll guide you through a range of options, from soft neutrals and warm metallics to deeper jewel tones and structured shapes.
Save for later
Want to come back to this story? Save it with your email so it is easy to find again.
You can use these 22 smokey eye looks to match your makeup with your style, occasion, and comfort level. I’ll also cover practical techniques, color placement, preparation, and tips that help your eye makeup stay polished.
Table of Contents
- 1 1) Soft Taupe Smokey Eye
- 2 2) Champagne and Brown Smokey Eye
- 3 3) Matte Nude Smokey Eye
- 4 4) Warm Caramel Smokey Eye
- 5 5) Soft Plum Smokey Eye
- 6 6) Bronze Smokey Eye
- 7 7) Copper Smokey Eye
- 8 8) Rose Gold Smokey Eye
- 9 9) Mauve Smokey Eye
- 10 10) Terracotta Smokey Eye
- 11 11) Chocolate Brown Smokey Eye
- 12 12) Classic Black Smokey Eye
- 13 13) Charcoal Gray Smokey Eye
- 14 14) Silver Smokey Eye
- 15 15) Gunmetal Smokey Eye
- 16 16) Navy Blue Smokey Eye
- 17 17) Emerald Green Smokey Eye
- 18 18) Burgundy Smokey Eye
- 19 19) Purple Smokey Eye
- 20 20) Teal Smokey Eye
- 21 21) Halo Smokey Eye
- 22 22) Cut-Crease Smokey Eye
- 23 Smokey Eye Techniques And Color Placement
- 24 Blending For Seamless Depth
- 25 Choosing Shades For Eye Color
- 26 Balancing Matte And Shimmer Finishes
- 27 Application Prep And Long-Wear Tips
- 28 Priming The Eyelids
- 29 Preventing Fallout And Creasing
- 30 Pairing Liner And Mascara With Intensity
1) Soft Taupe Smokey Eye
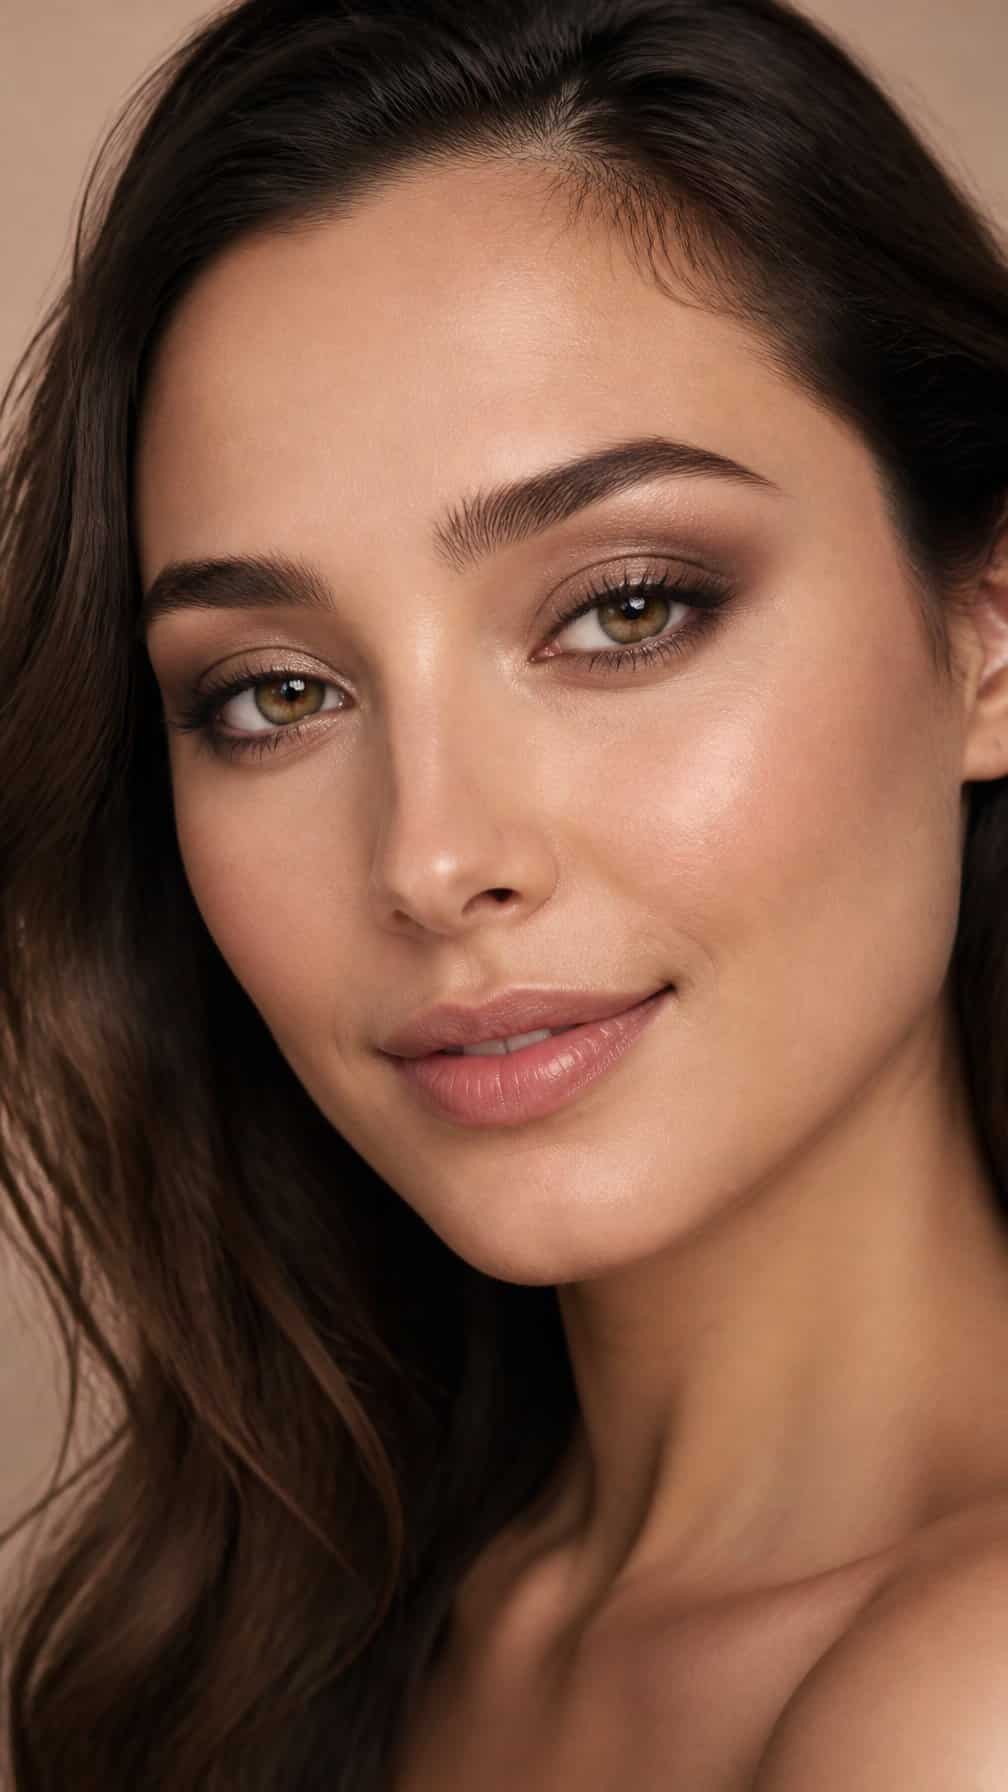
I use matte taupe on the crease and outer corner to create gentle definition without making the eyes look heavy. A lighter beige on the lid keeps the look balanced, while a small amount of taupe along the lower lash line adds cohesion.
I blend the edges carefully so no harsh lines remain, then apply brown mascara for a softer finish. This combination works well for daytime makeup, neutral outfits, and occasions when I want subtle dimension with a polished appearance.
2) Champagne and Brown Smokey Eye
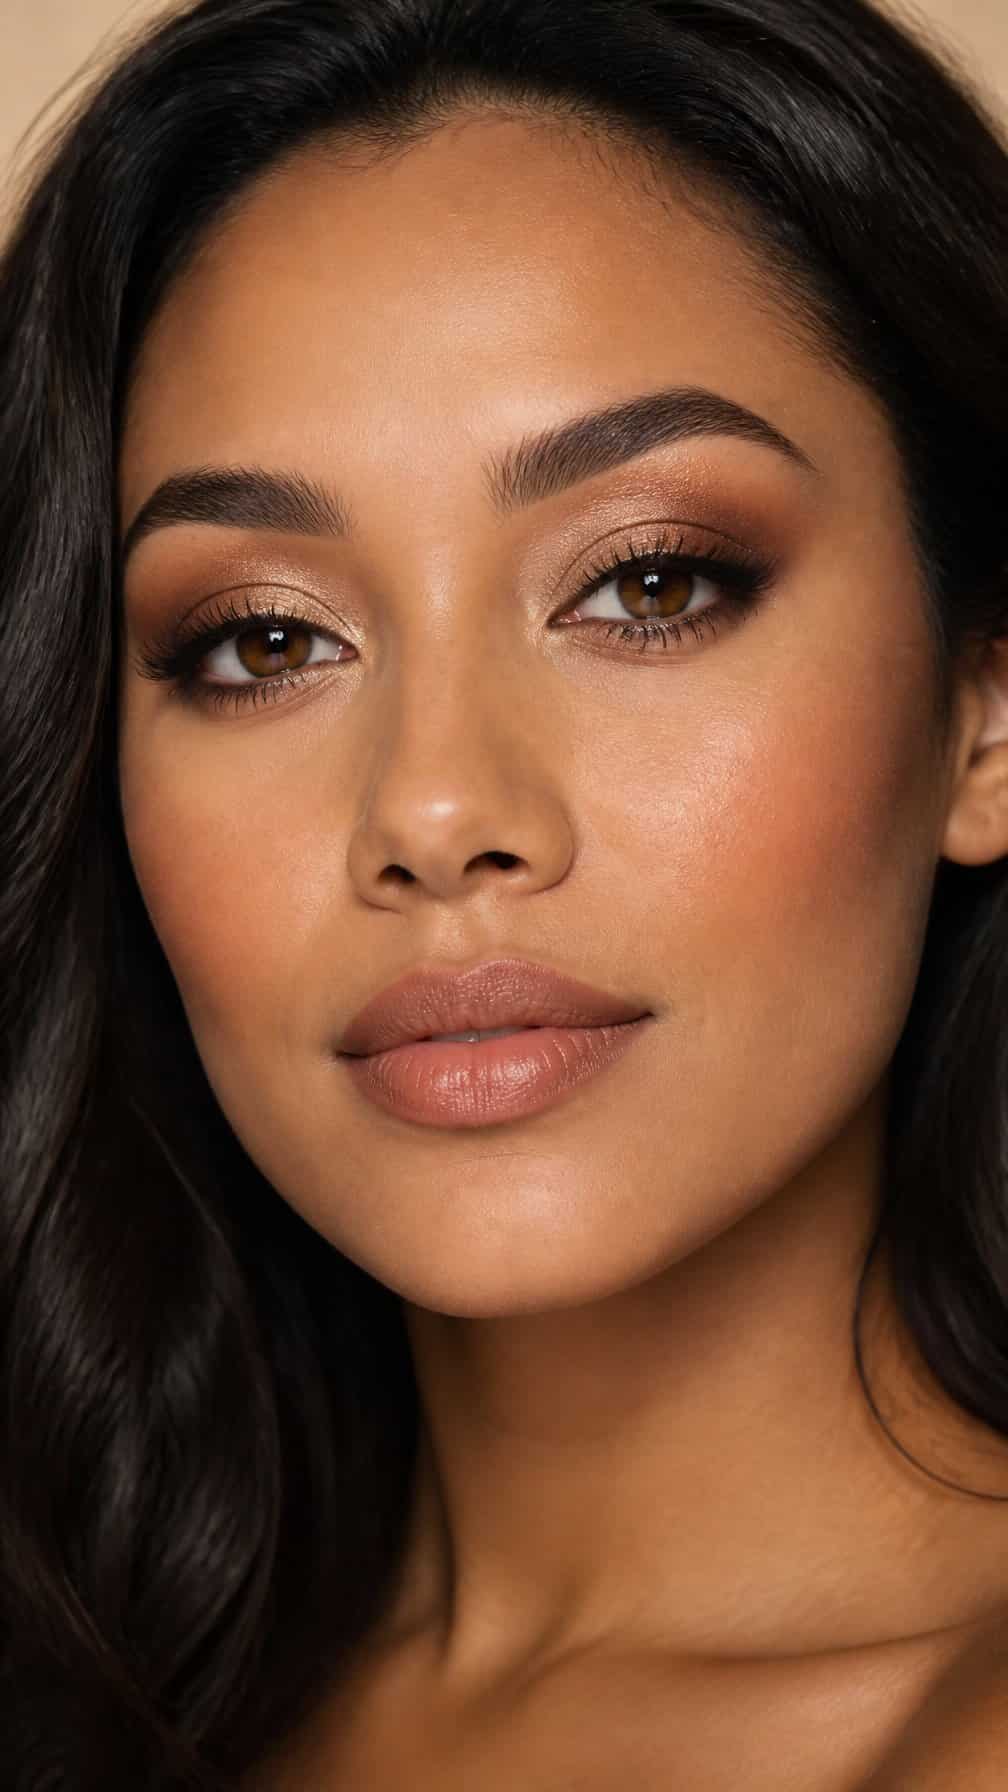
I build this look around a champagne shimmer on the inner lid and center, then blend a medium brown through the crease. I deepen the outer corner with a matte espresso shade, keeping the edges soft rather than sharply defined.
I usually pair the eyeshadow with brown eyeliner along the upper lash line and add mascara to separate the lashes. A small touch of champagne beneath the brow’s highest point can brighten the look without making it overly glossy.
I prefer peachy nude blush and a warm nude lip with this combination. The lighter shimmer suits daytime makeup, while extra espresso shadow along the lower lash line creates more definition for evening wear.
3) Matte Nude Smokey Eye
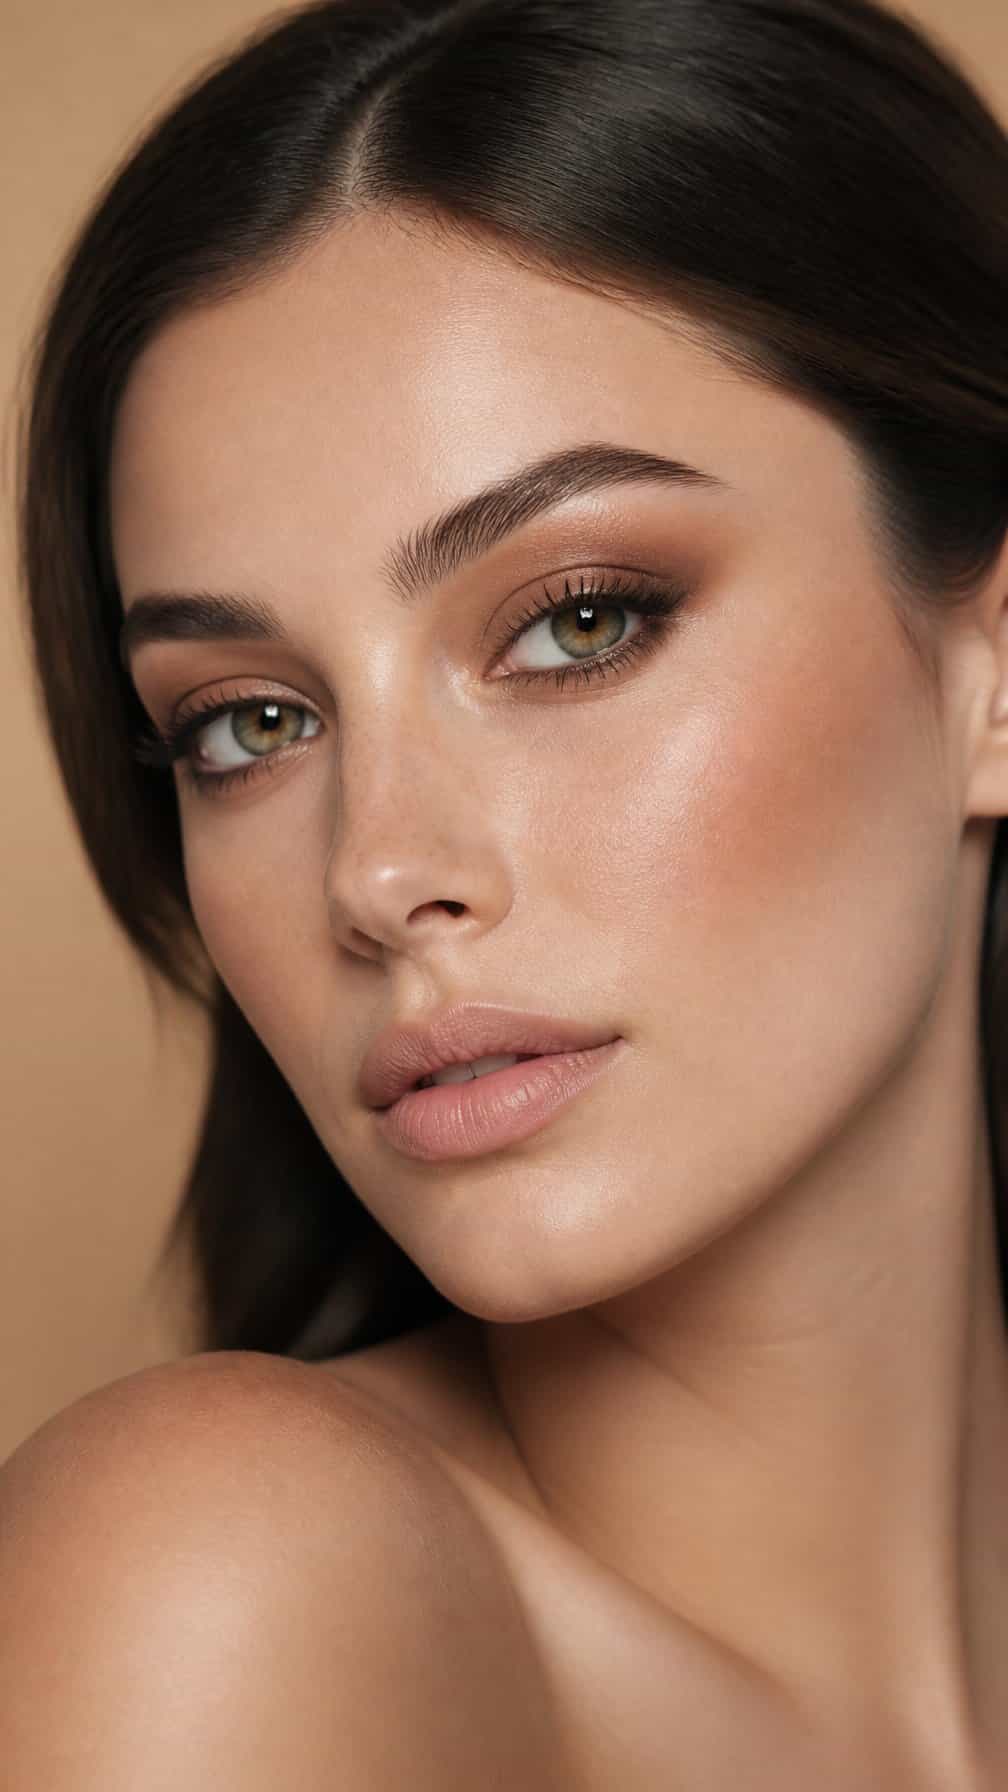
I build this look with matte beige, tan, and soft brown shadows for gentle definition without shimmer. I sweep the lightest shade across my lid, deepen the crease with tan, then blend medium brown along the outer corner and lower lash line.
I keep the edges diffused and add a slightly deeper brown near the lashes to create shape. A brown or black mascara finishes the look, while a nude pencil on the waterline keeps my eyes looking open.
This palette works well for daytime makeup and pairs easily with neutral blush and lipstick. I use a small blending brush to soften any harsh lines before adding more pigment.
4) Warm Caramel Smokey Eye
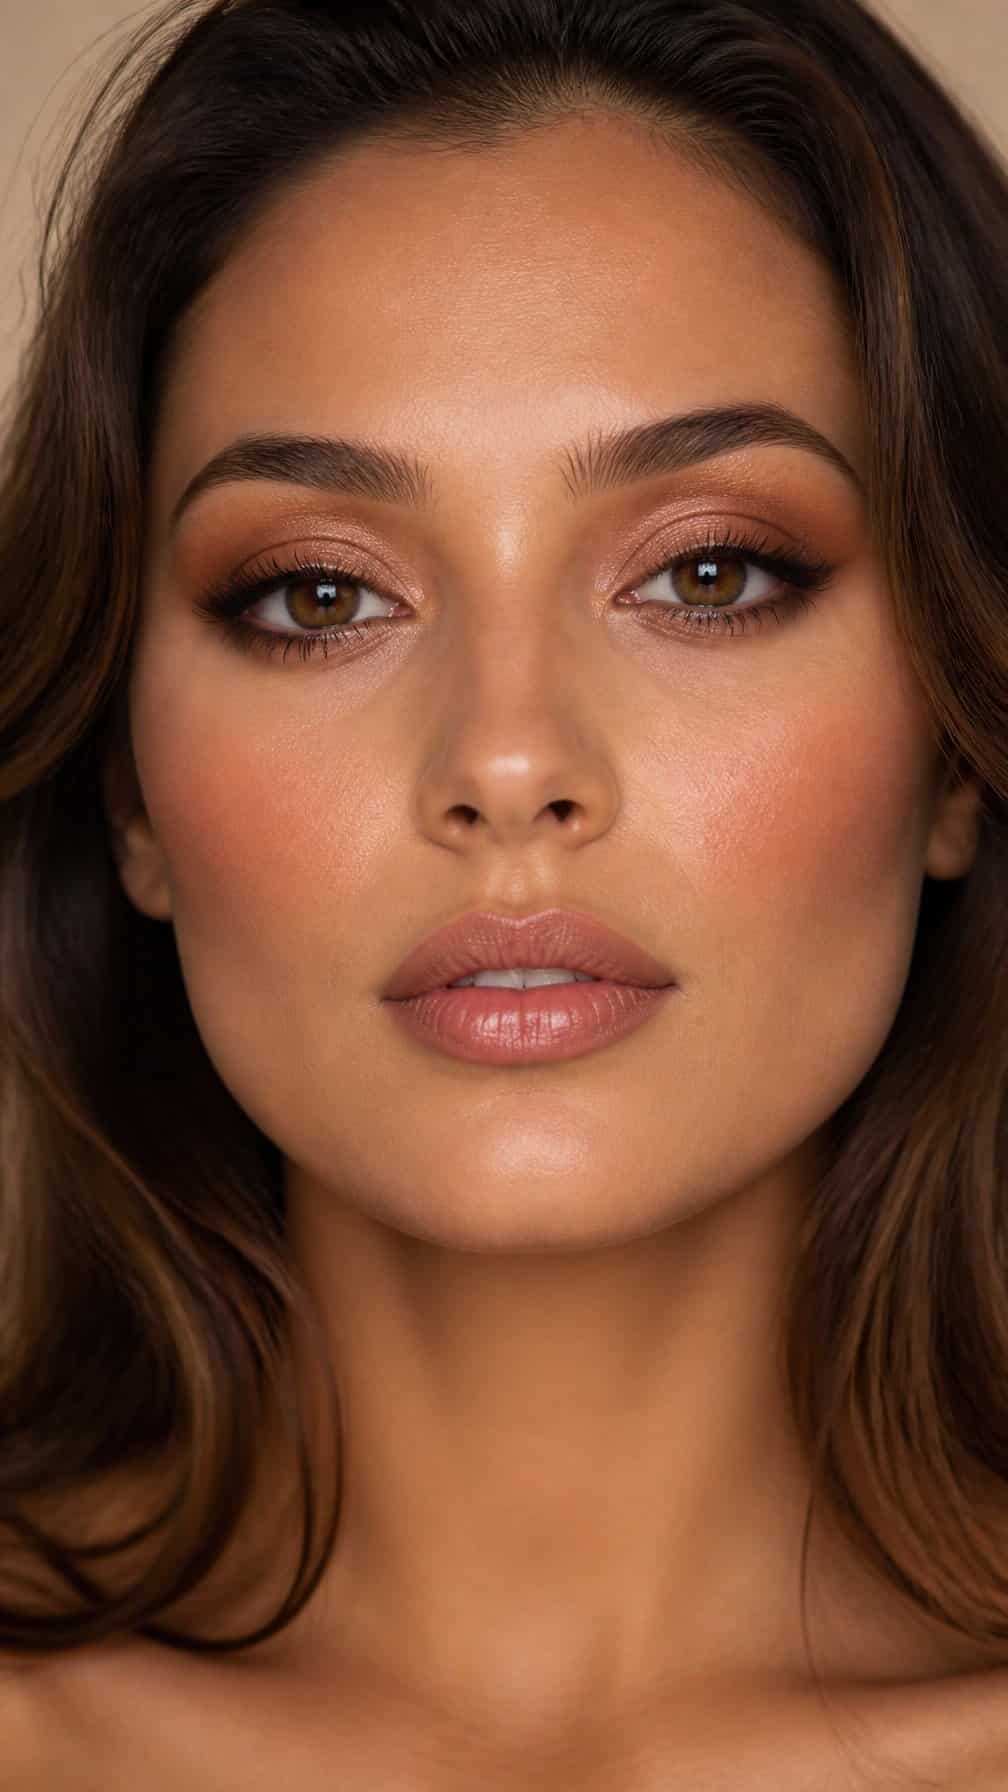
I build this look with caramel, amber, and soft brown shadows for a warm finish that stays wearable. I sweep the lightest shade across the lid, deepen the outer corner with medium brown, and blend the edges until the colors transition smoothly.
I add a darker brown along the upper lash line instead of using black, which keeps the result softer. A touch of satin caramel on the center of the lid catches light without overpowering the blend.
I finish with mascara and lightly defined brows. For balance, I pair the eye makeup with peach or warm nude tones on my cheeks and lips.
5) Soft Plum Smokey Eye
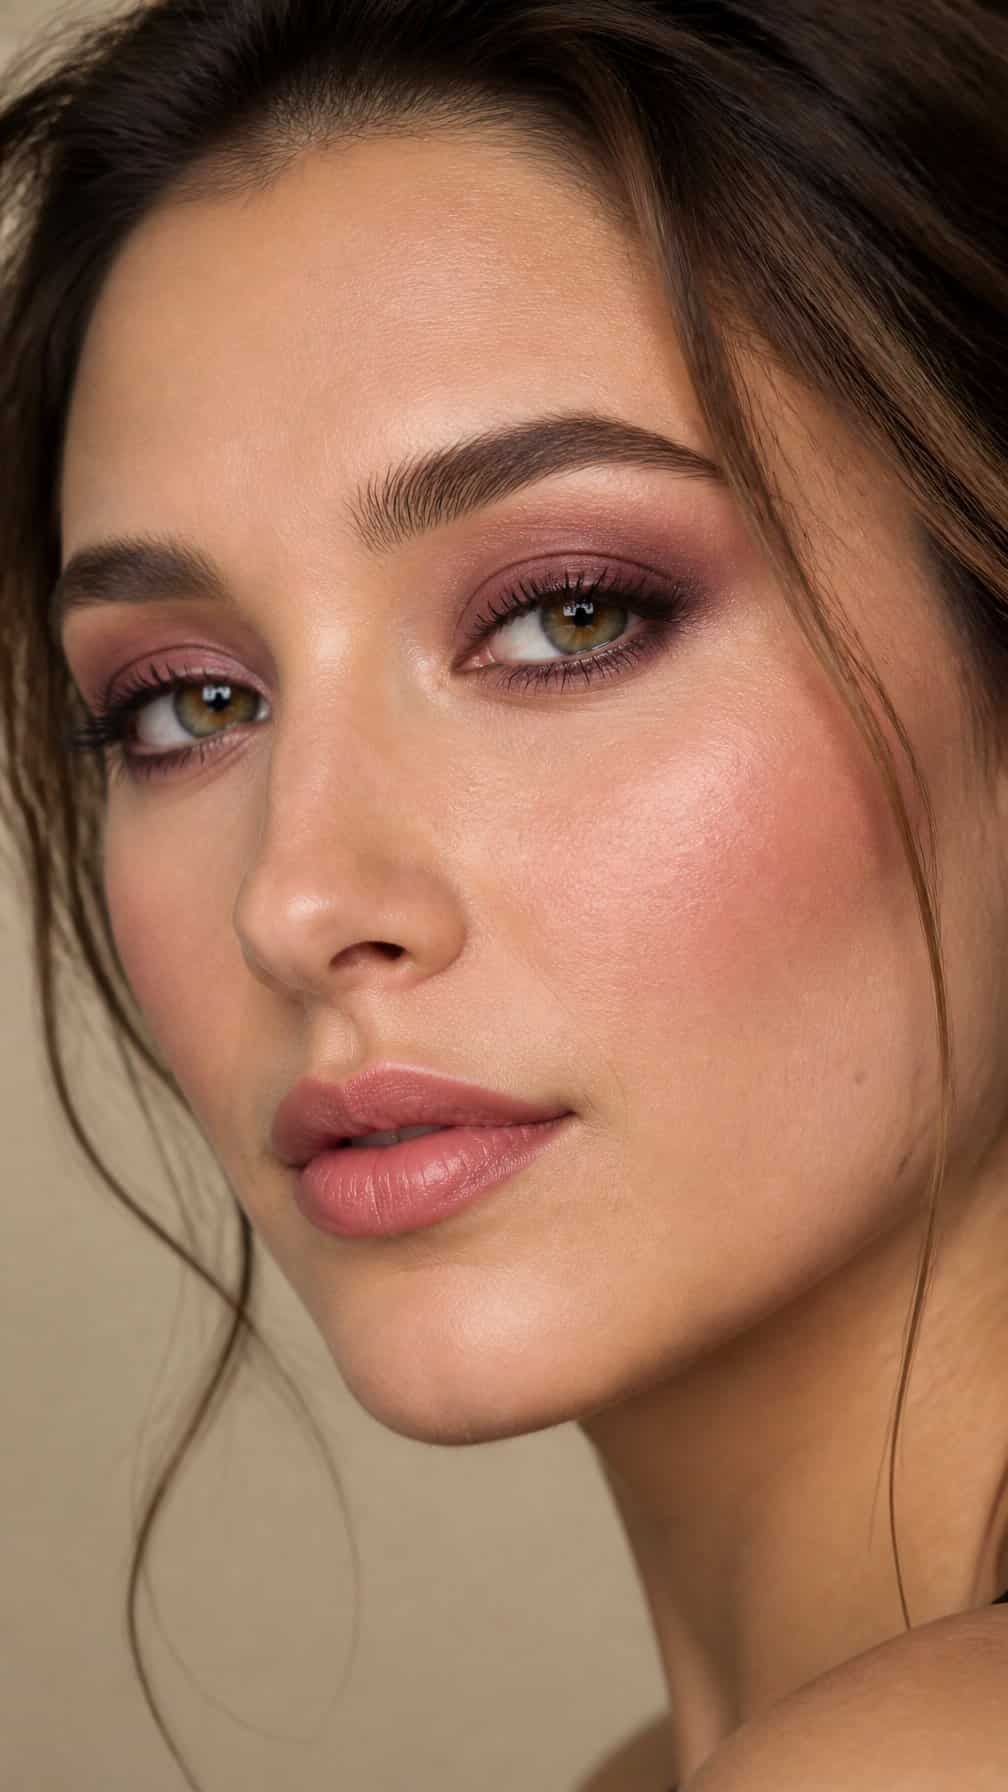
I build this look with muted plum, mauve, and soft brown shades for gentle definition. I sweep the lightest mauve across the lid, deepen the outer corner with plum, and blend the edges until they look diffused rather than sharp.
I add a small amount of plum shadow along the lower lash line, keeping the color closest to the lashes. A matte finish creates a soft effect, while a satin shade at the center of the lid adds subtle dimension without making the look too bold.
I finish with black or deep brown mascara and softly defined brows. When I want more intensity, I press plum pencil into the upper lash line before blending it into the shadow.
6) Bronze Smokey Eye
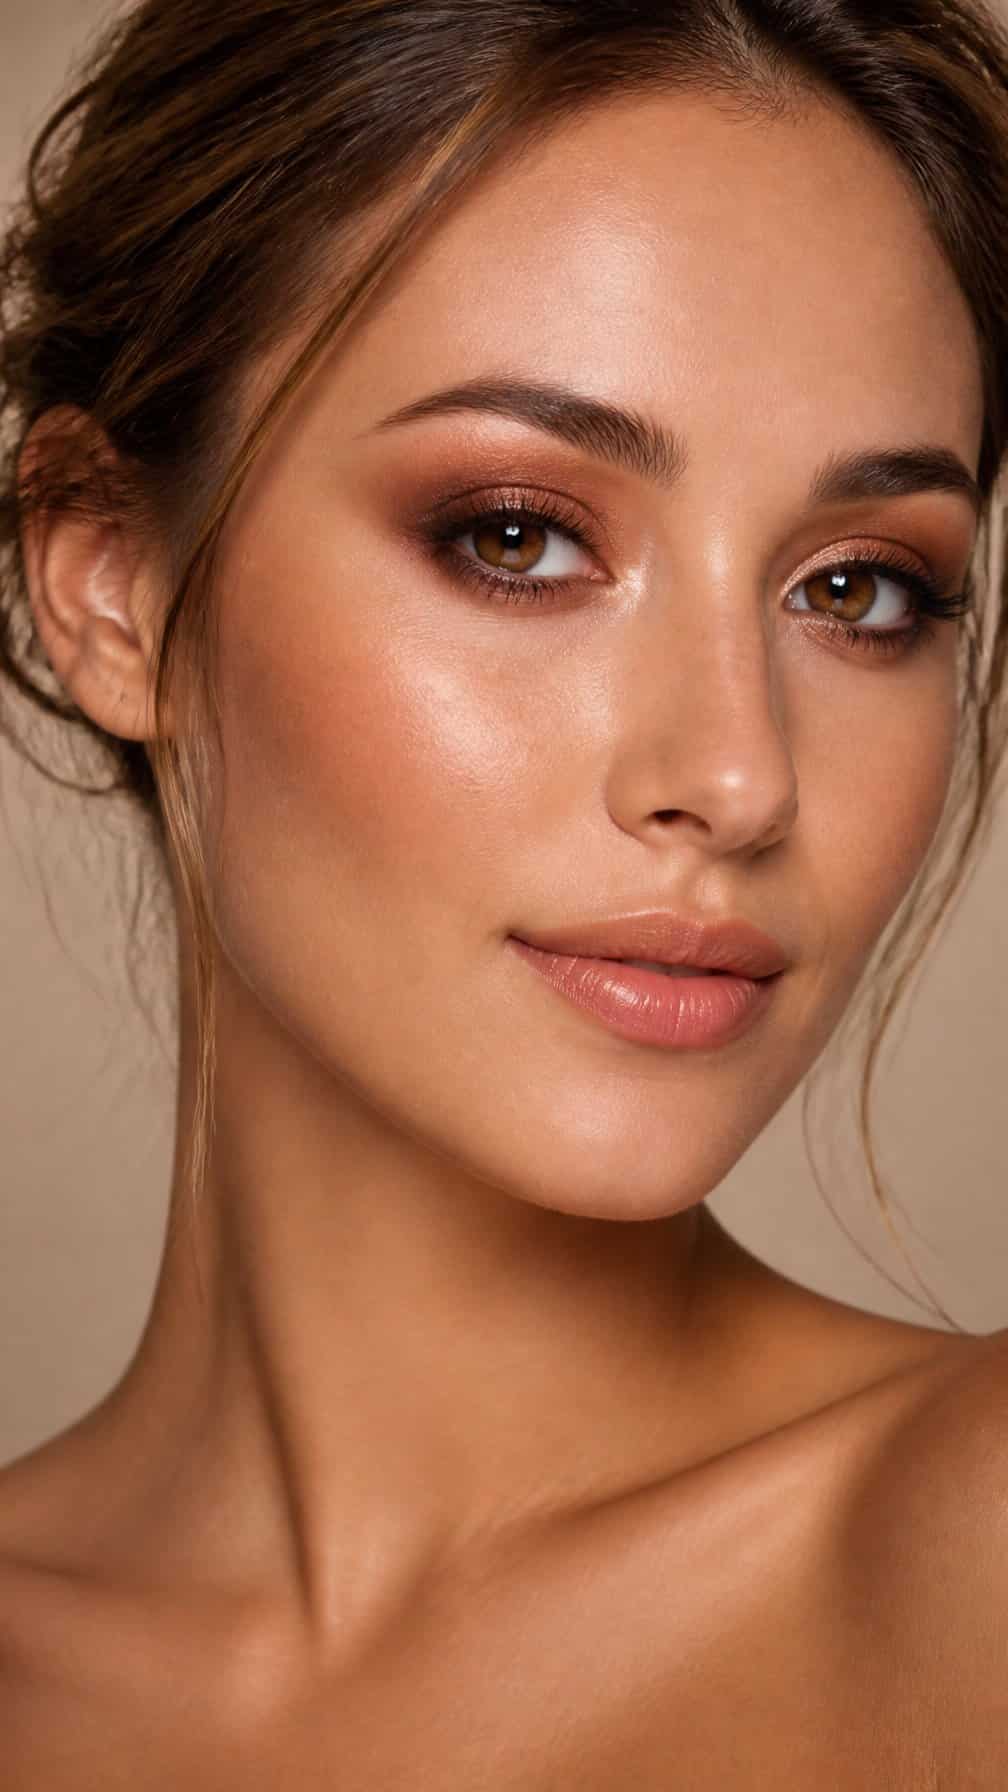
I blend a warm bronze shadow across my lids, then deepen the outer corners with a soft brown shade. This combination creates definition while keeping the finish wearable for daytime or evening makeup.
I press a metallic bronze shadow onto the center of each lid to add focused shine. I use a smaller brush along the lower lash line and connect it to the outer corner, keeping the edges softly diffused rather than sharply outlined.
I finish with black or dark brown mascara, depending on the intensity I want. I keep the rest of my makeup balanced with softly defined brows, neutral blush, and a natural lip.
7) Copper Smokey Eye
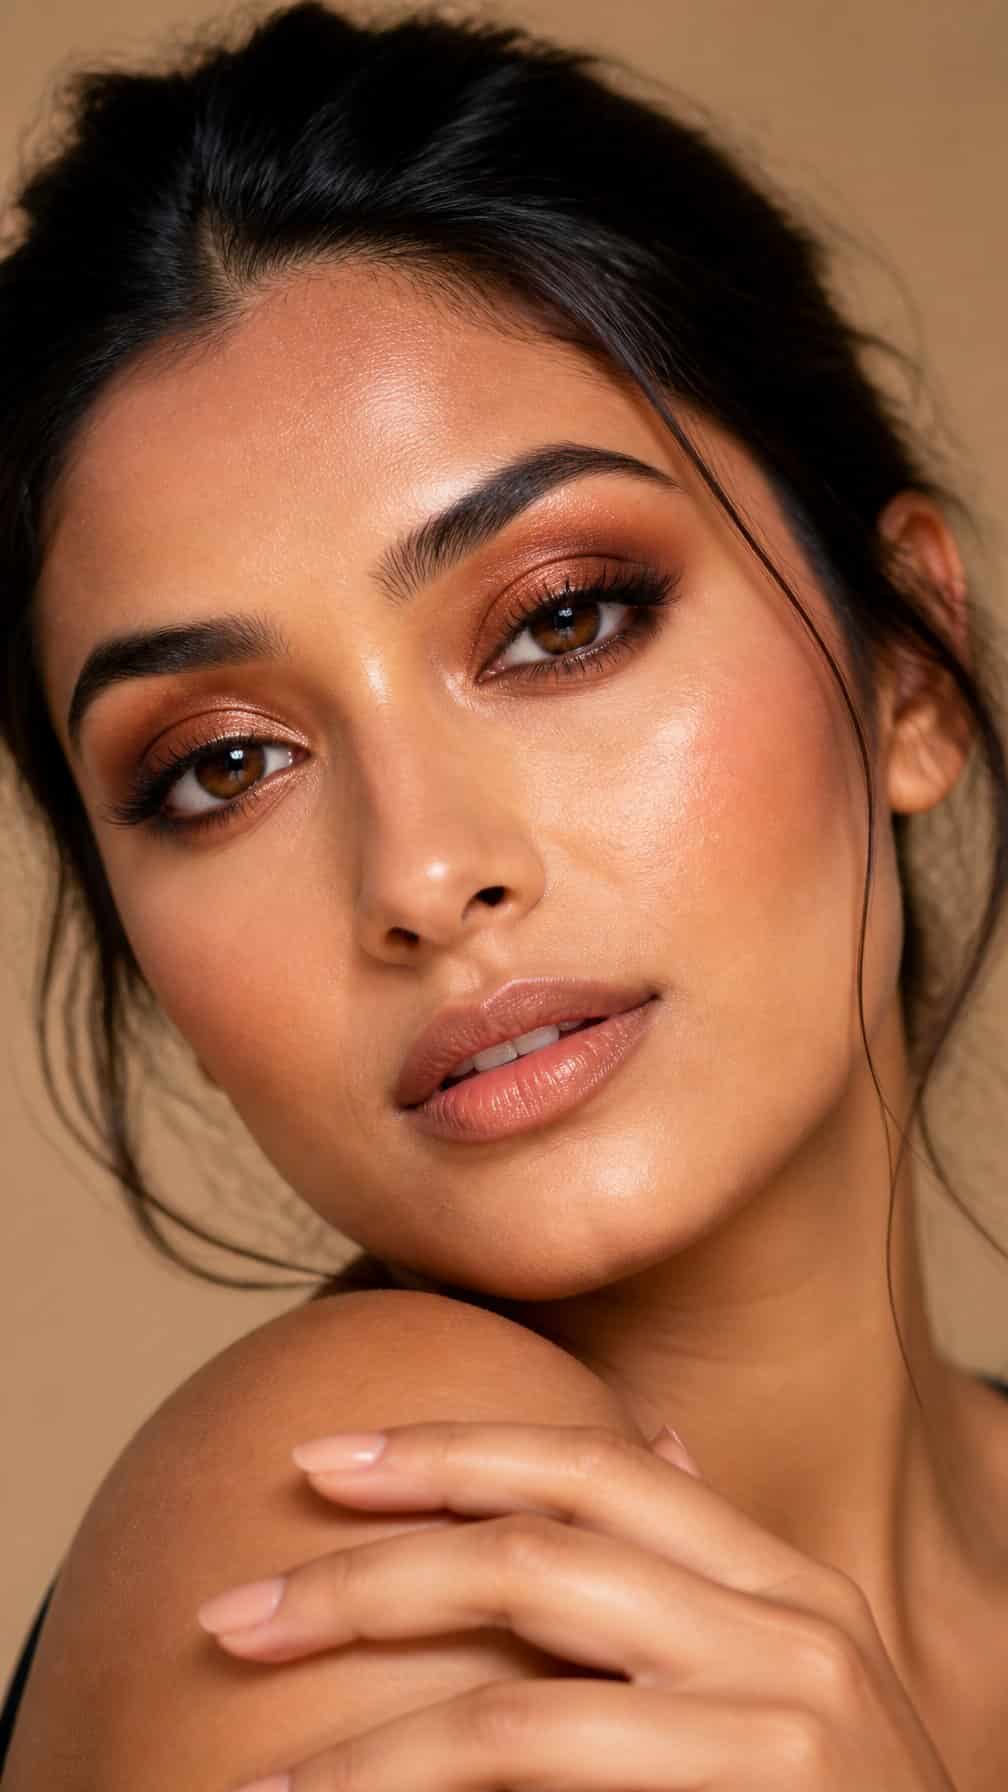
I build this look with warm copper shadow across the lid, then deepen the outer corner with matte brown. I blend the shades through the crease to keep the transition soft while preserving the metallic center.
I usually press the copper pigment onto the lid with a fingertip or flat brush for stronger coverage. A thin line of dark brown along the upper lashes adds definition without overpowering the warm tones.
I finish with mascara and lightly smudge the remaining shadow beneath the lower lashes. I keep the rest of my makeup neutral so the copper remains the main focus.
8) Rose Gold Smokey Eye
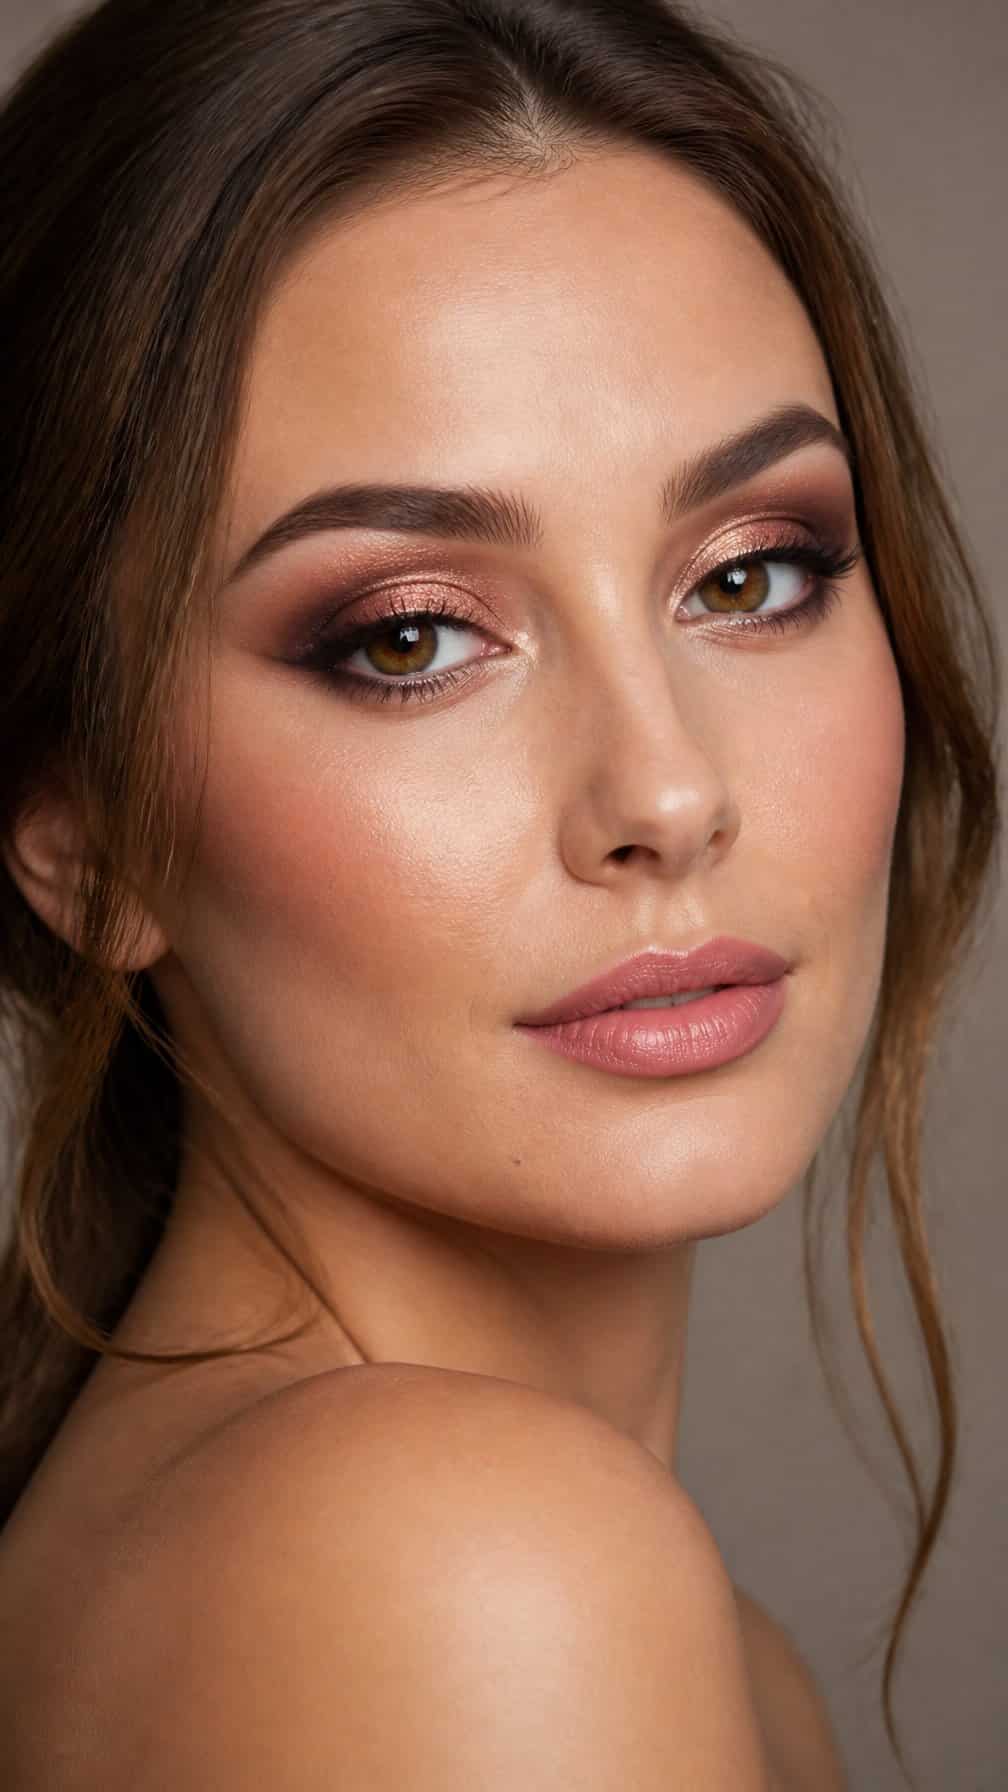
I blend a warm rose-gold shimmer across my eyelid, keeping the brightest color near the center to catch the light. I deepen the outer corner with soft brown shadow rather than black, which preserves the look’s warmth and keeps the edges wearable.
I sweep the same brown beneath my lower lashes and connect it to the outer corner. A thin line of brown eyeliner defines my eyes without overpowering the metallic finish, while mascara adds separation and lift.
I use a small, dense brush to press the shimmer onto the lid instead of brushing it across. This technique gives the pigment a smoother finish and helps limit fallout.
9) Mauve Smokey Eye
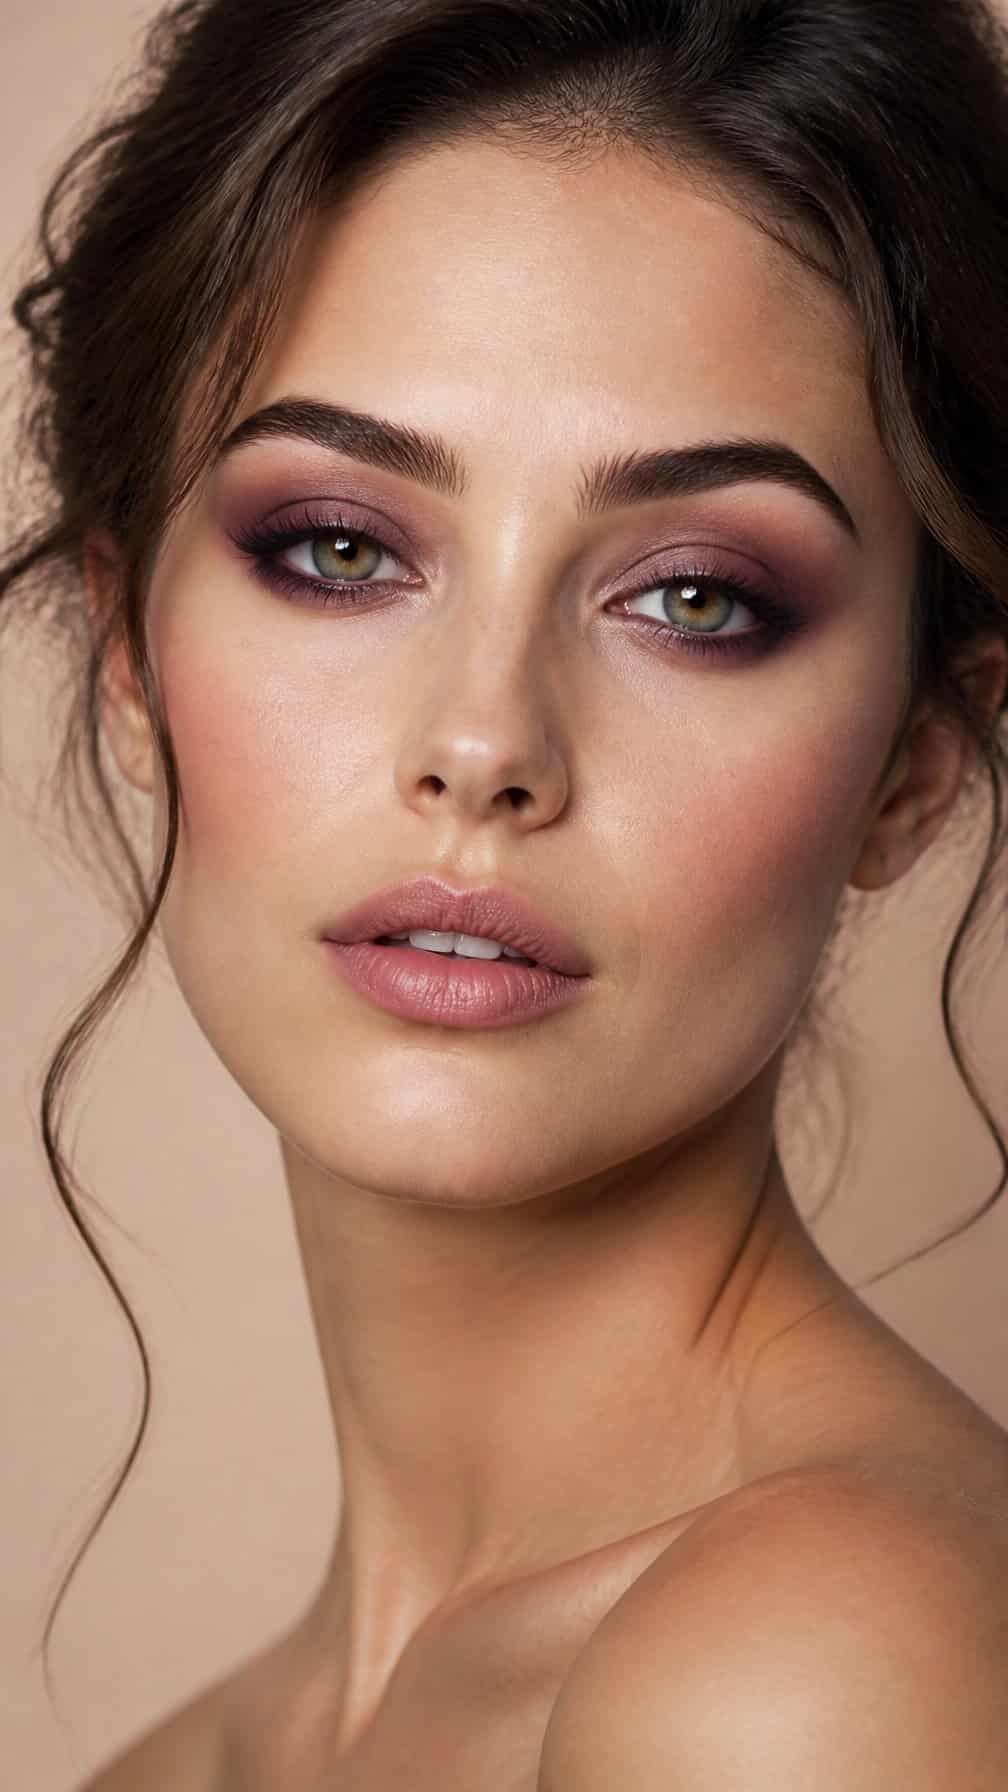
I use muted mauve shadows to create a soft smokey eye with a cool, polished finish. I sweep a pale mauve shade across the lid, then blend a deeper plum tone into the crease and outer corner. A matte taupe-brown shade can soften the edges without overpowering the purple tones.
I keep the lower lash line balanced by smudging the deeper shade beneath the outer half of the eye. I add a thin line of dark brown eyeliner and finish with mascara, keeping the inner corner bright. This combination suits both daytime makeup and evening looks.
10) Terracotta Smokey Eye
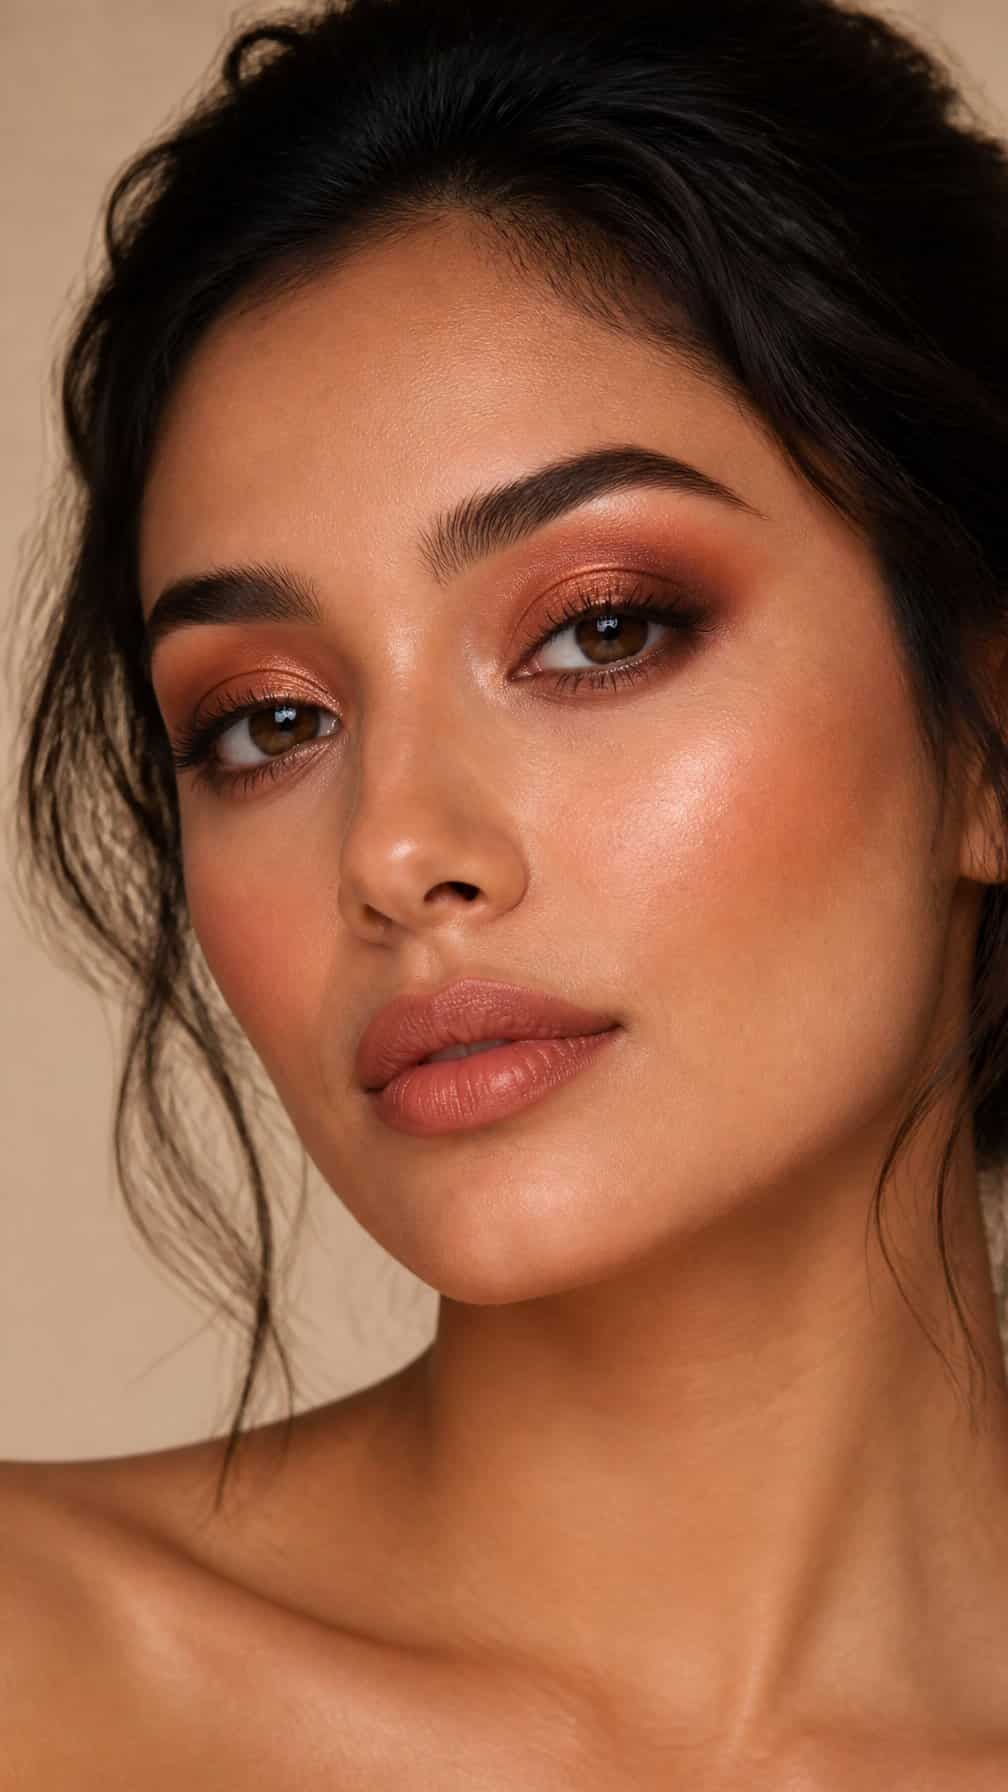
I build this look with warm terracotta, rust, and soft brown shadows. I sweep terracotta through the crease, deepen the outer corner with brown, and blend the edges until the colors transition smoothly.
I keep the lid slightly brighter with a satin copper or muted peach shade. A thin line of brown eyeliner defines the upper lash line without overpowering the warm tones, while mascara adds separation and length.
I balance the eye makeup with softly groomed brows and a muted nude or warm rose lip. I prefer a satin finish because it complements the earthy palette without making the look appear too heavy.
11) Chocolate Brown Smokey Eye
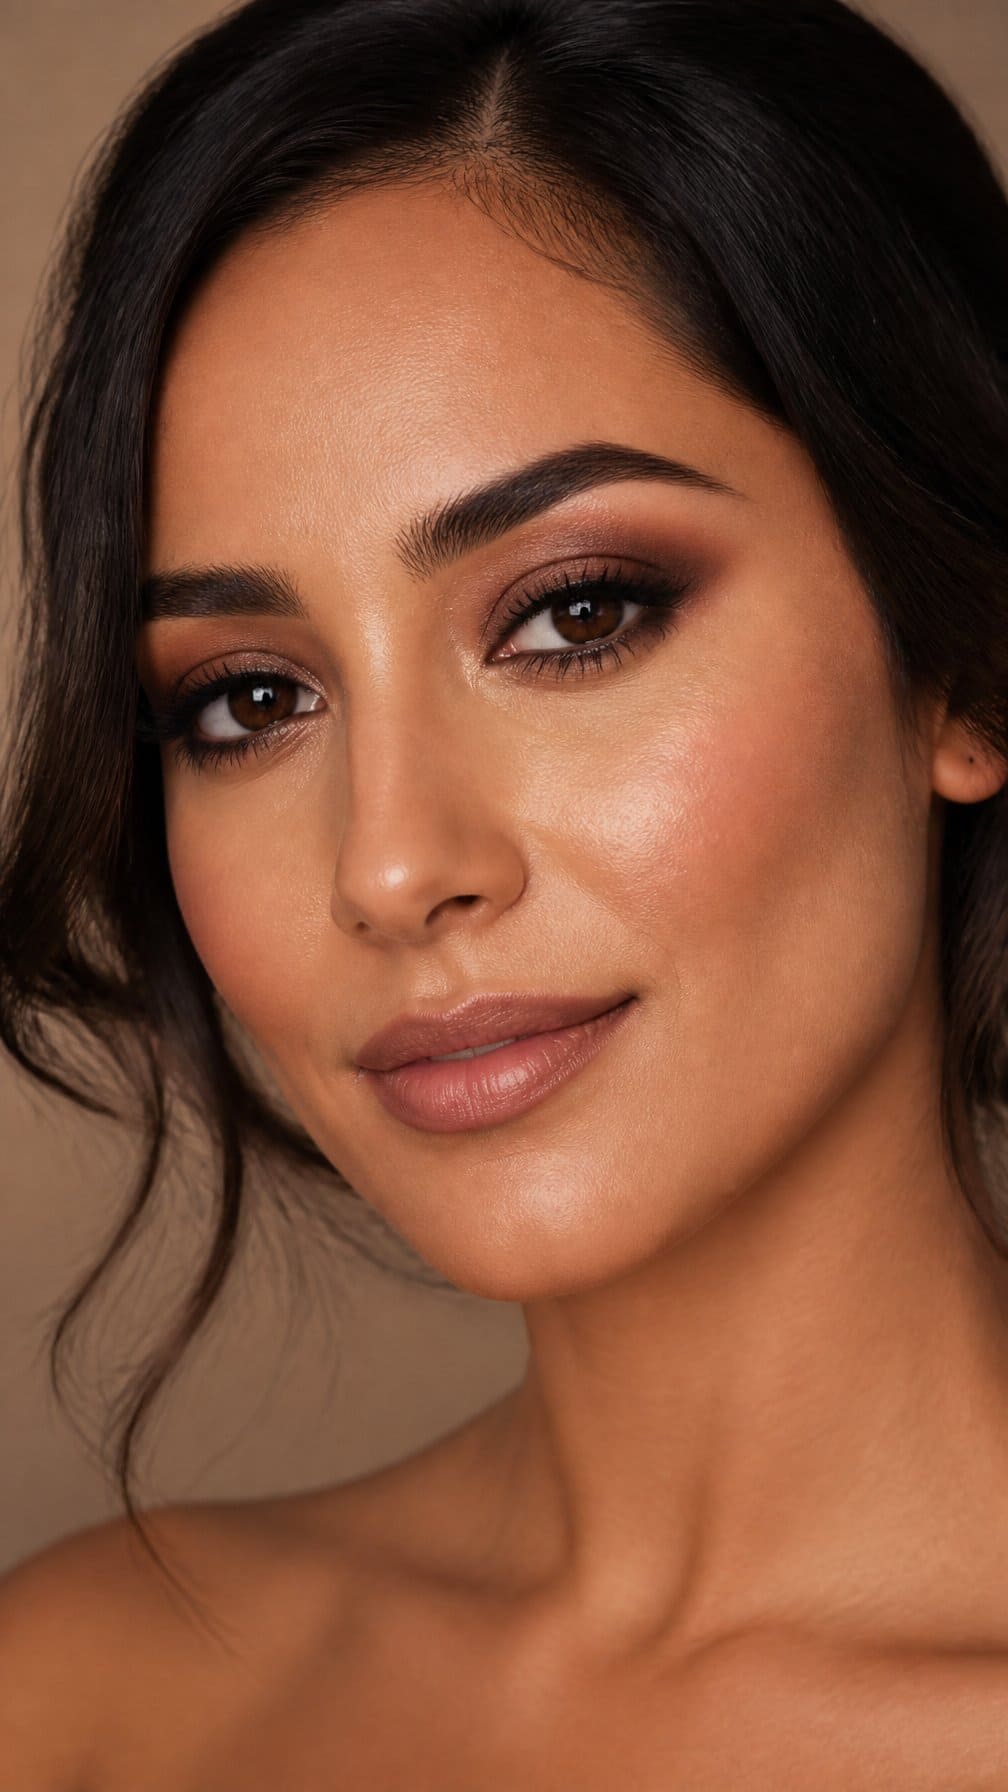
I use warm chocolate-brown shadows to create a softer alternative to a black smokey eye. I place a medium brown shade through the crease, deepen the outer corner with espresso, and blend the edges until the transition looks smooth.
For added dimension, I press a satin bronze shadow onto the center of the lid. I keep the lower lash line balanced with a small amount of brown shadow, then define the lashes with brown or black mascara.
This look works well with peach, nude, or warm rose makeup. I prefer a softly defined brow and a neutral lip so the layered brown tones remain the main focus.
12) Classic Black Smokey Eye
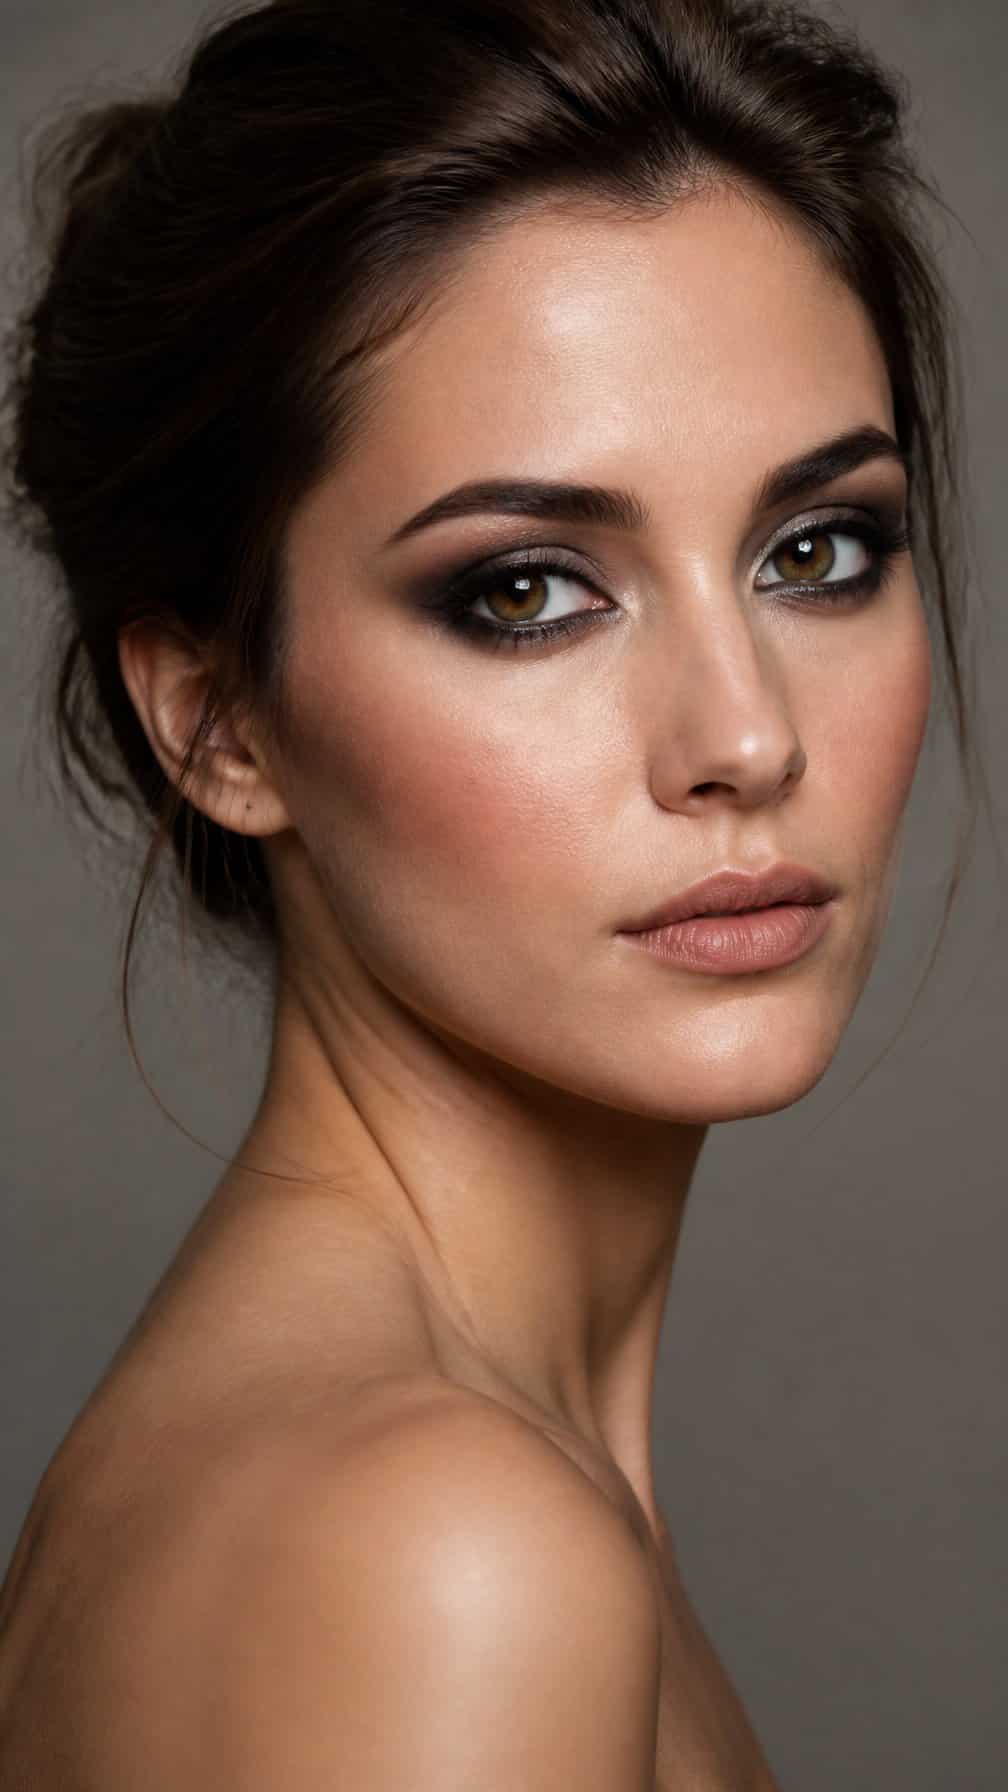
I build this look with matte black shadow along the lash line, then blend it upward into charcoal and soft gray. I keep the deepest pigment close to the lashes so the eyes look defined without losing their shape.
I use a small blending brush to soften the edges and add black shadow beneath the lower lashes for balance. A touch of satin highlight on the inner corners brightens the look, while black mascara completes the definition.
I prefer a neutral or softly matte complexion with this eye makeup. A nude, rose, or muted mauve lip keeps the focus on the eyes without competing with the dark shadow.
13) Charcoal Gray Smokey Eye
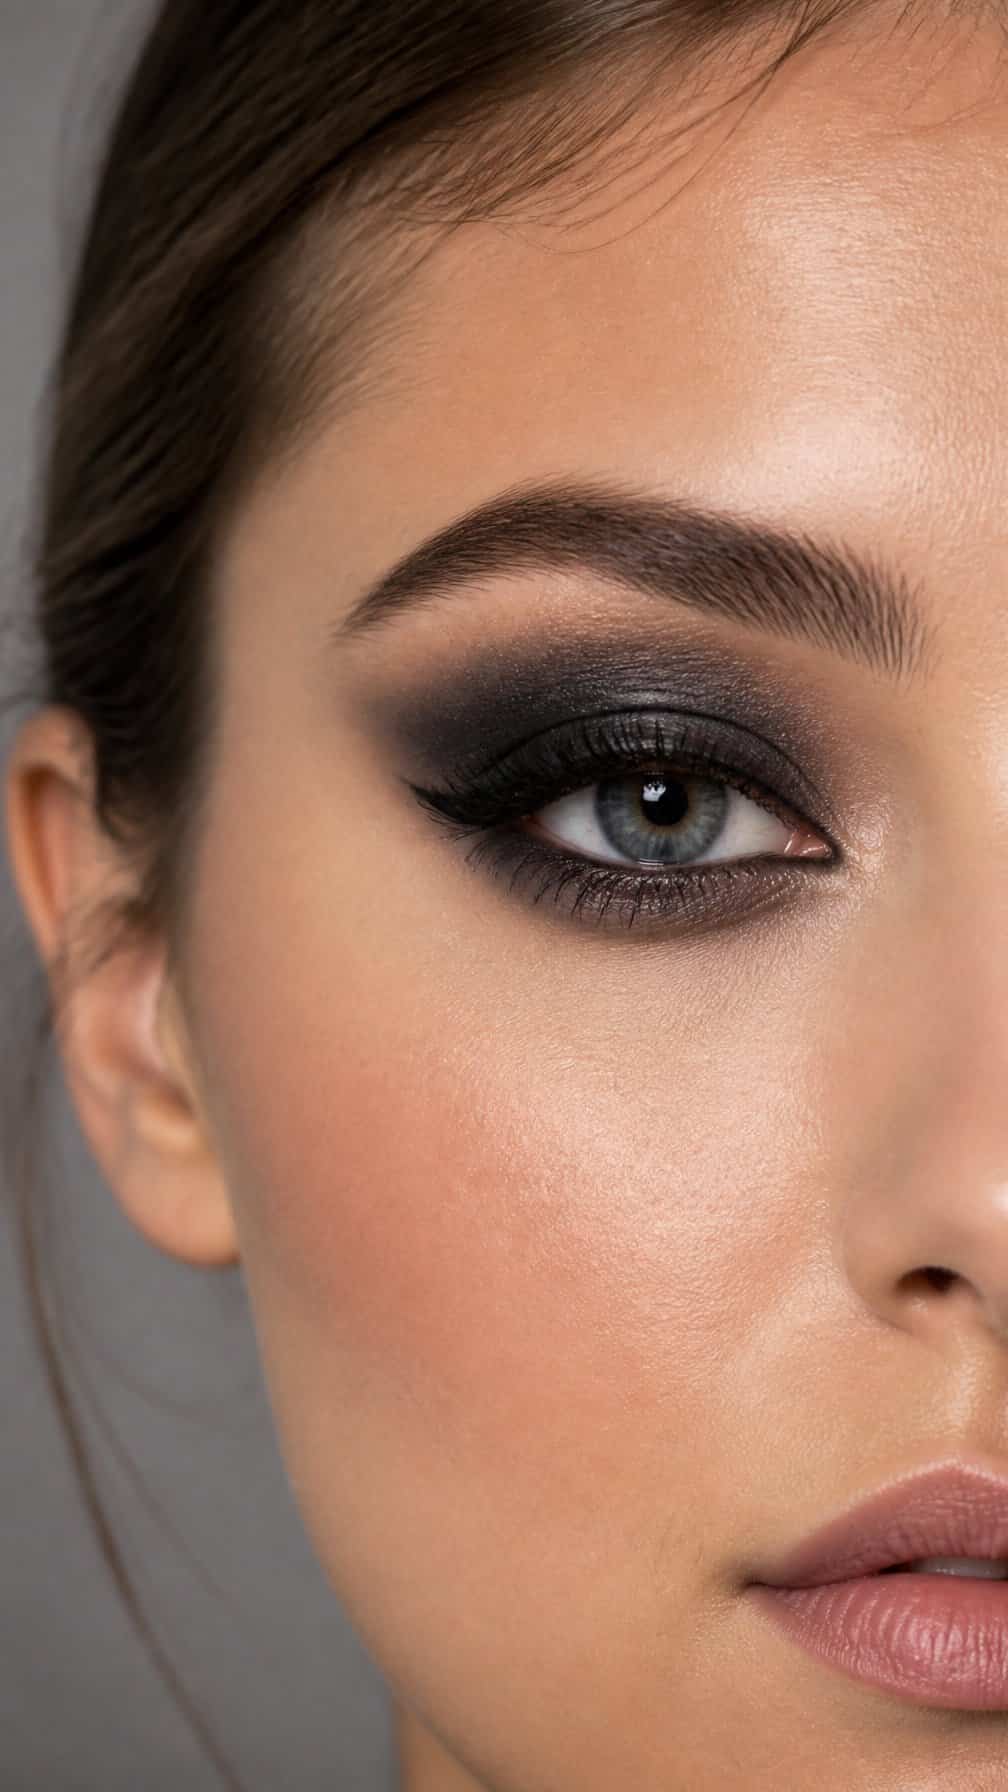
I build this look with charcoal shadow across the lid, then soften the edges with a medium gray shade. I keep the deepest color close to the lash line so the eyes look defined without appearing overly heavy.
I usually pair the shadow with black or dark gray eyeliner and blend it into the outer corner. A small amount of pale gray or soft taupe beneath the brow adds separation, while mascara completes the shape without competing with the smoky finish.
I prefer neutral foundation and a muted rose or nude lip with this eye makeup. That balance keeps the charcoal tones central and makes the look suitable for evening events or a polished daytime style.
14) Silver Smokey Eye
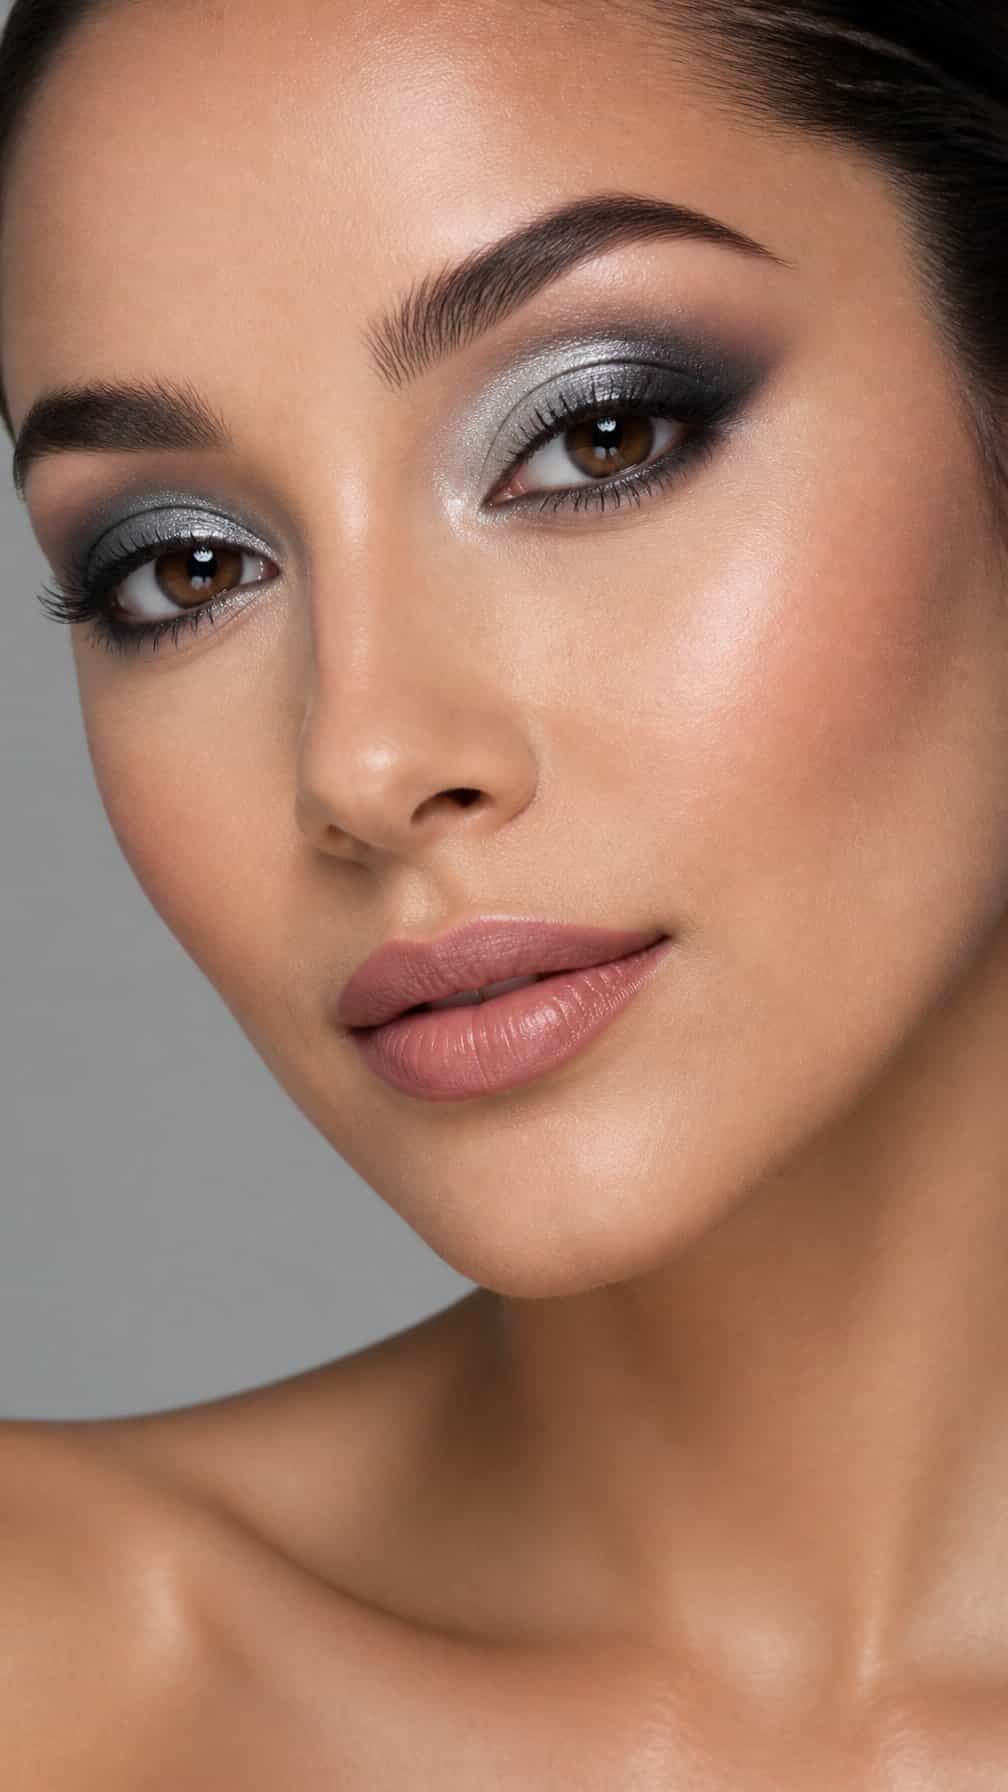
I build this look around metallic silver shadow, placing it across the lid and blending a charcoal shade into the crease. I soften the edges carefully so the contrast looks polished rather than harsh.
I keep the inner corner bright and trace a slim line of dark shadow along the upper lash line. Smudging the same shade beneath the lower lashes connects the eye makeup without making it feel too heavy.
I finish with curled lashes and lengthening mascara, or I add a narrow strip of lashes for more definition. I balance the cool tones with neutral blush and a muted rose or nude lip.
15) Gunmetal Smokey Eye
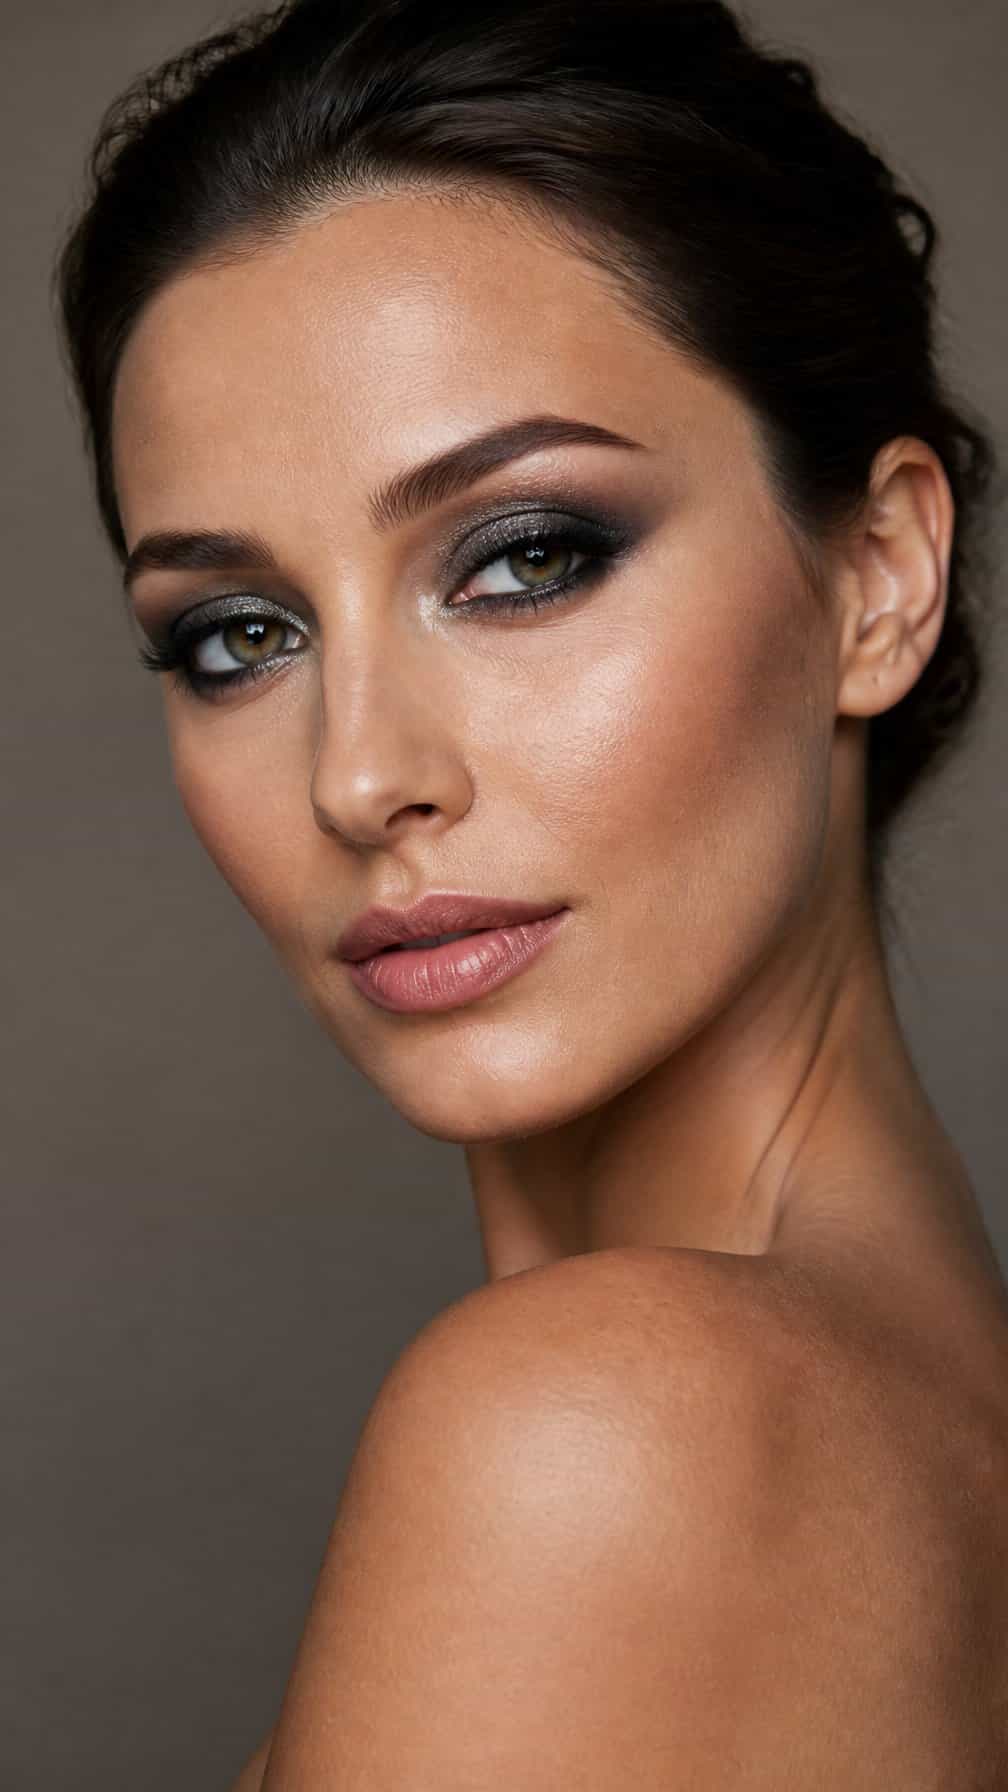
I build this look with a cool gunmetal shadow across the lids, then soften the edges into a muted charcoal crease. I keep the inner corners lightly highlighted so the darker tones remain defined rather than flat.
I line the upper lash line with a black pencil and smudge it into the shadow for a diffused finish. I add mascara to the upper and lower lashes, balancing the metallic eyes with softly groomed brows and a neutral lip.
For a more restrained version, I apply gunmetal only along the outer half of the lid and blend it toward the center. I use a matte gray-brown transition shade to keep the shimmer controlled and the shape polished.
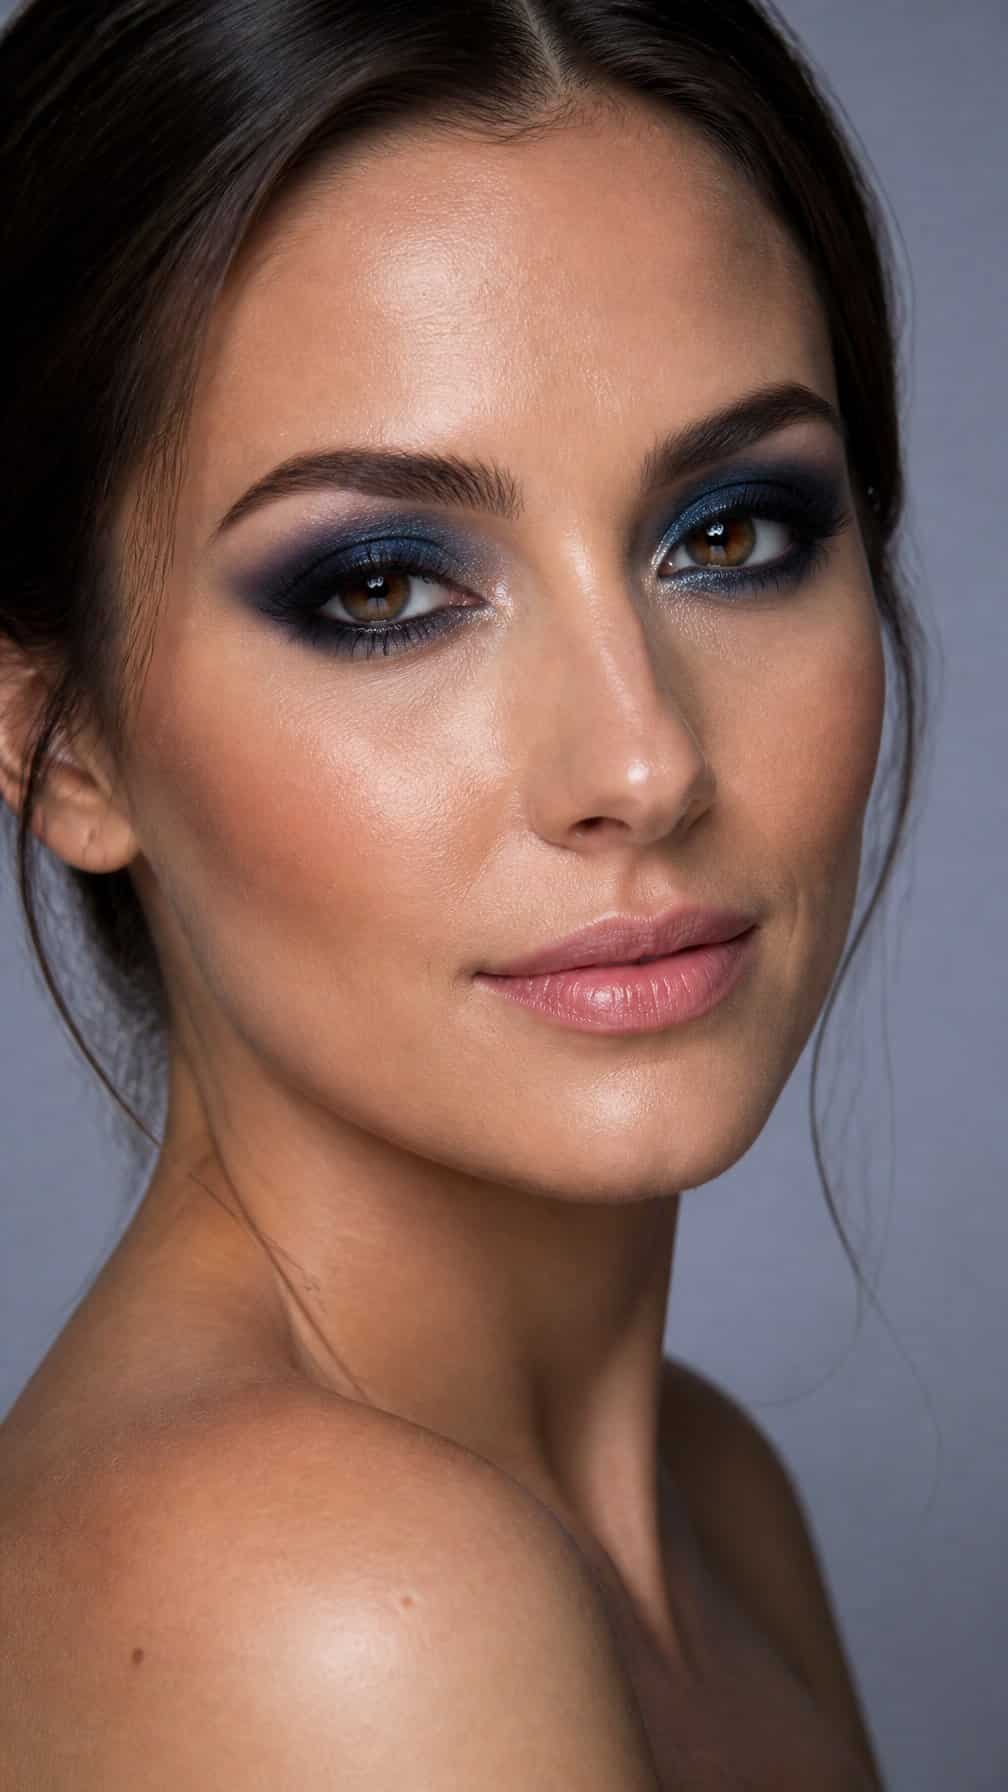
I build this look with navy shadow across the lid, then soften the edges with a medium blue or charcoal shade. I keep the deepest color close to the lash line so the eyes look defined without appearing too heavy.
I usually pair the shadow with black or navy eyeliner and several coats of mascara. A matte finish creates a refined effect, while a small amount of satin shadow at the inner corner adds controlled brightness.
I balance the stronger eye makeup with softly shaped brows and a neutral lip. For a more structured result, I clean the outer edge with concealer and keep the lower lash line lightly blended rather than fully shaded.
17) Emerald Green Smokey Eye
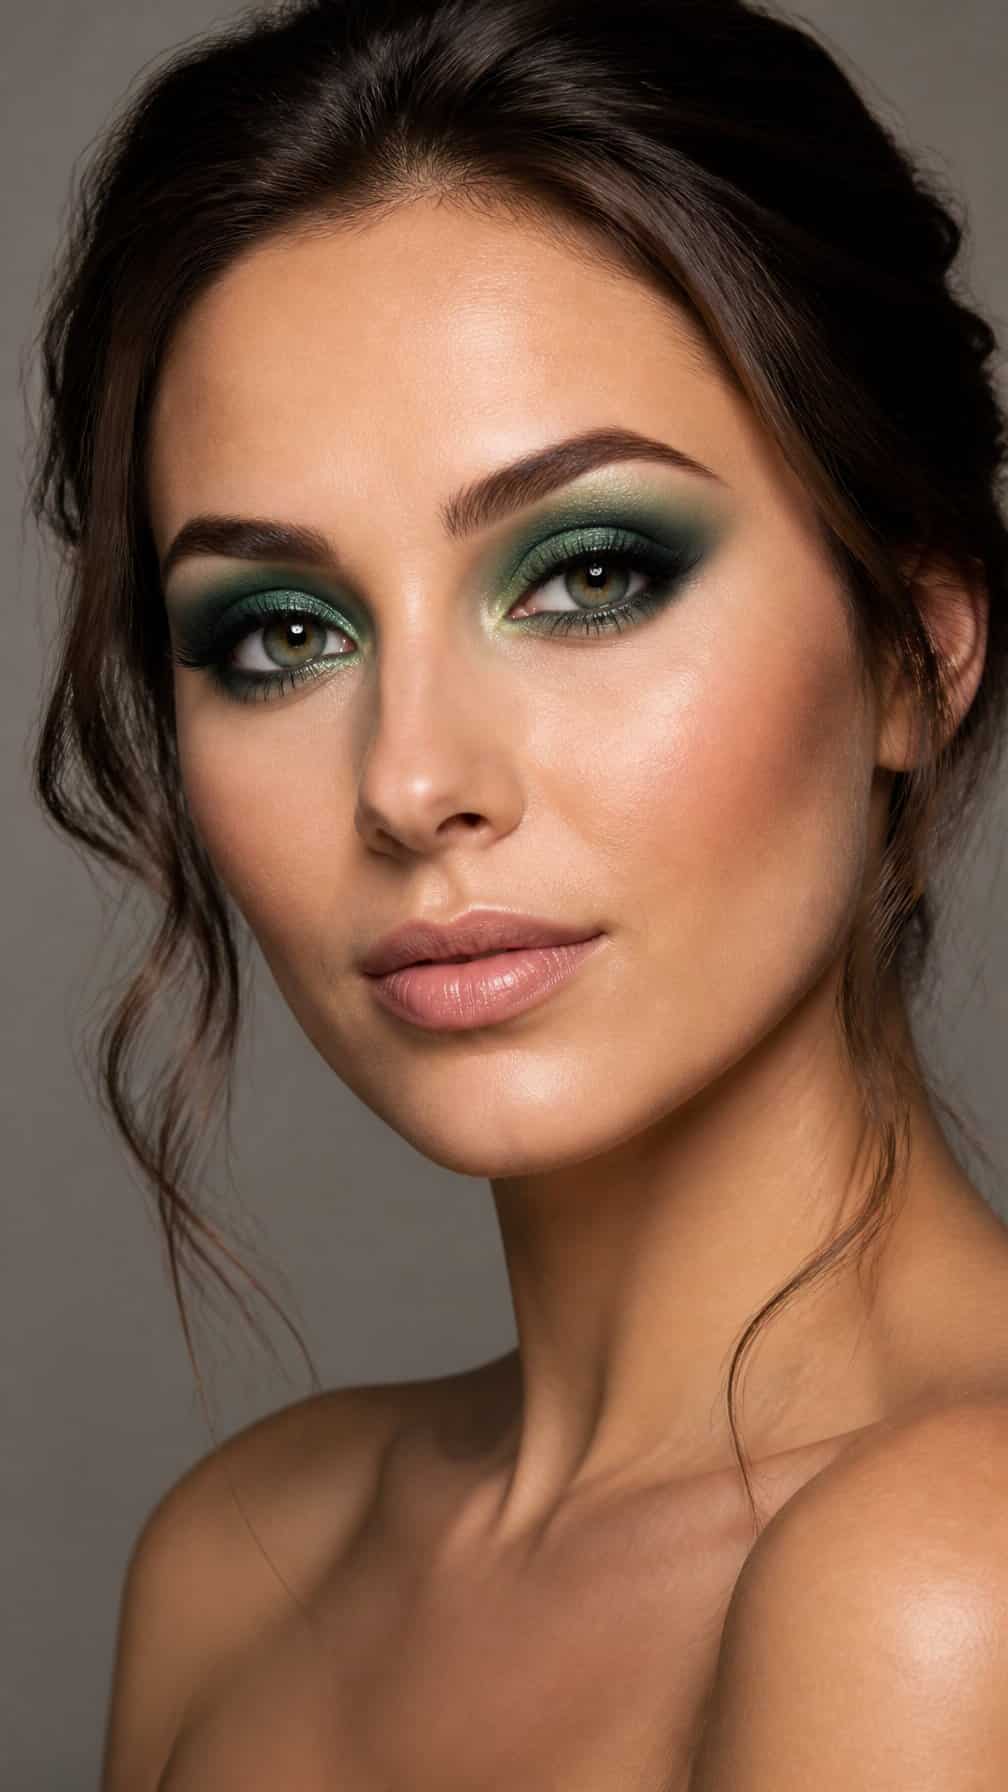
I build this look with emerald shadow across the lid, then deepen the outer corner with charcoal or deep brown. I blend the shades through the crease to soften the edges while keeping the green visible. A touch of emerald along the lower lash line connects both sides without making the eye appear too heavy.
I prefer a satin or softly metallic finish for this color because it catches light without overwhelming the darker shading. I finish with black eyeliner and mascara, keeping the rest of my makeup balanced with neutral blush and a muted nude lip.
18) Burgundy Smokey Eye
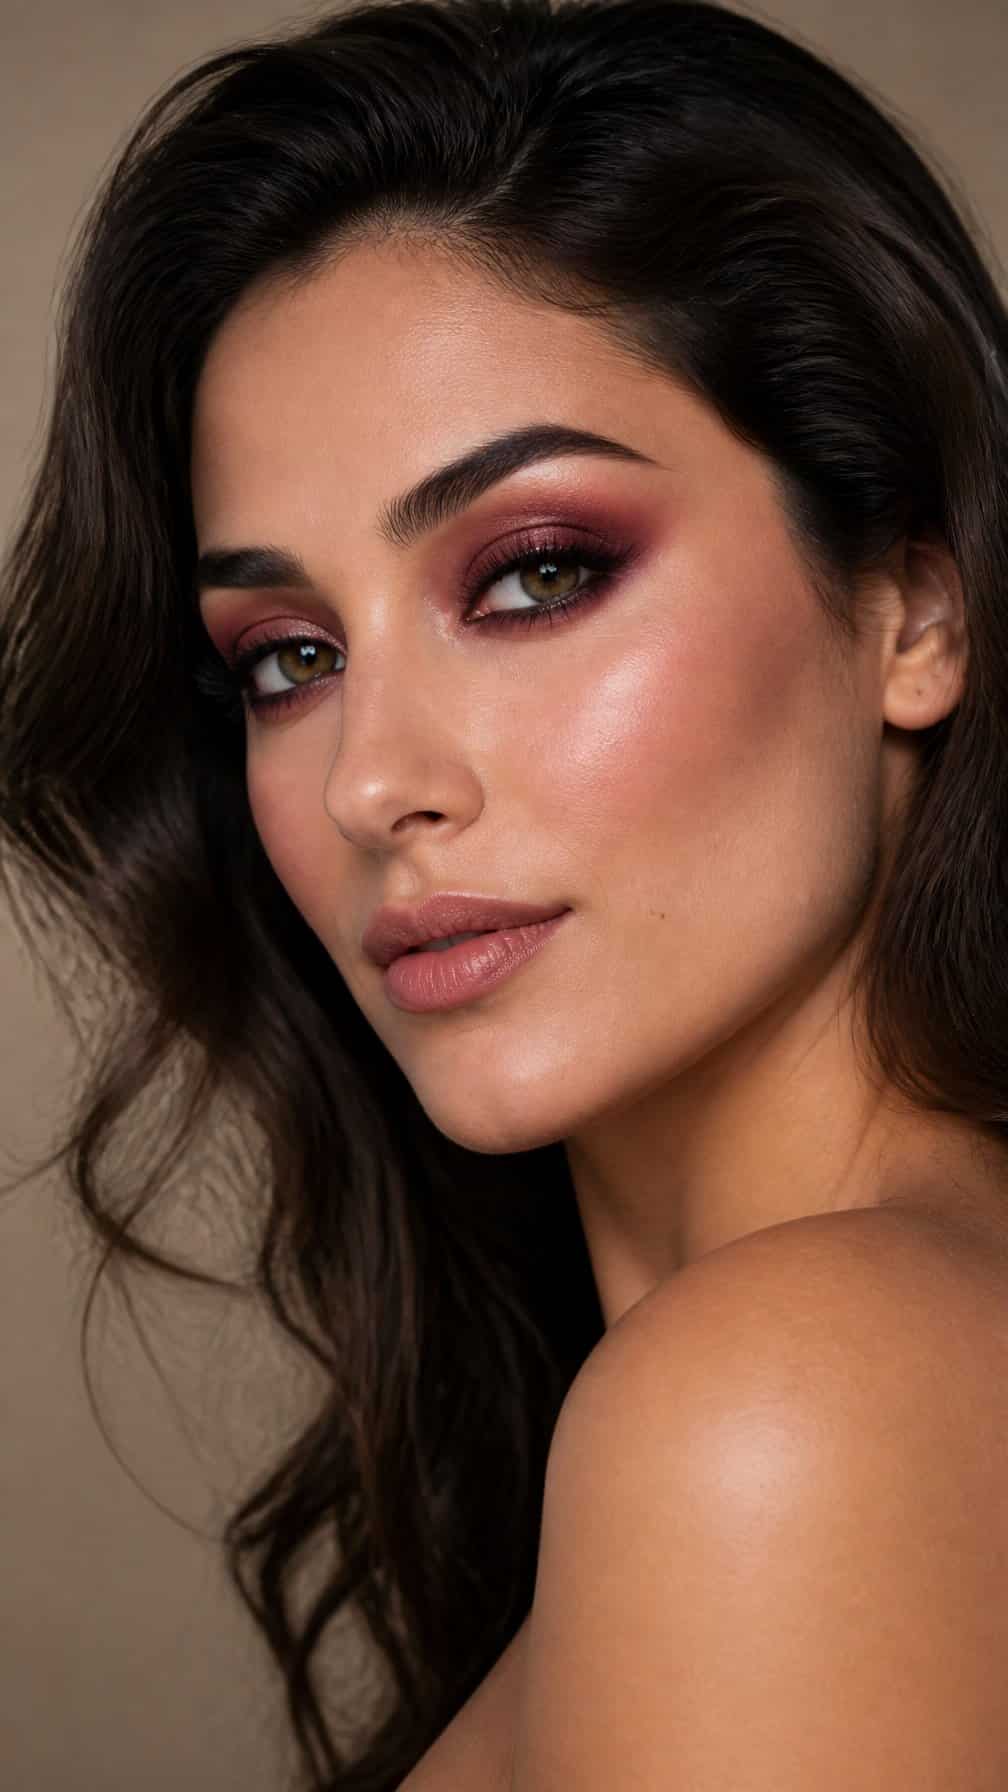
I build this look with burgundy shadow across the lid, then blend a deeper plum shade into the crease and outer corner. I keep the edges soft so the color looks diffused rather than harsh. A small amount of champagne shimmer on the inner corner adds controlled brightness.
I usually pair the eyes with black or dark brown liner, concentrating it along the upper lash line. Several coats of mascara define the lashes without competing with the red-based tones. I balance the makeup with softly shaped brows and a muted nude or berry lip.
19) Purple Smokey Eye
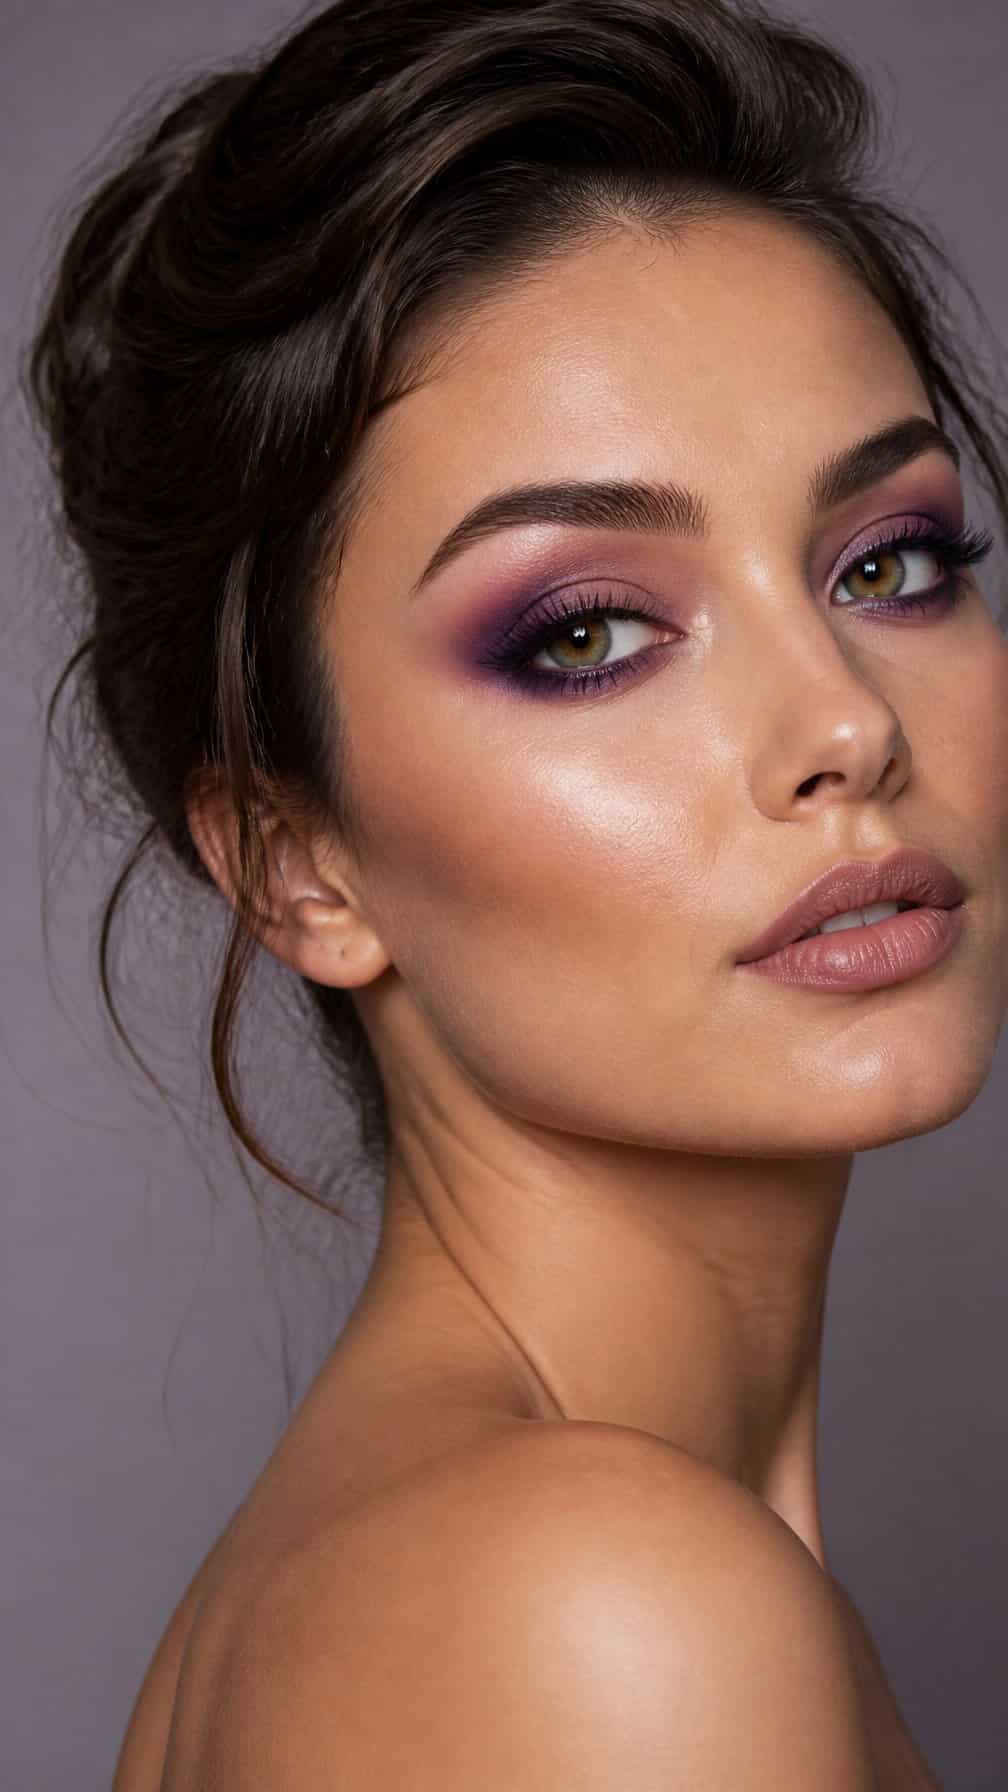
I build this look with a muted purple shadow across the lid, then deepen the outer corner with plum or charcoal. I blend the shades into the crease to keep the edges soft while preserving enough definition for the eyes to stand out.
I usually pair the shadow with a thin black or deep-brown liner and several coats of mascara. A matte base creates a polished finish, while a small touch of lavender shimmer at the center of the lid adds controlled dimension.
20) Teal Smokey Eye
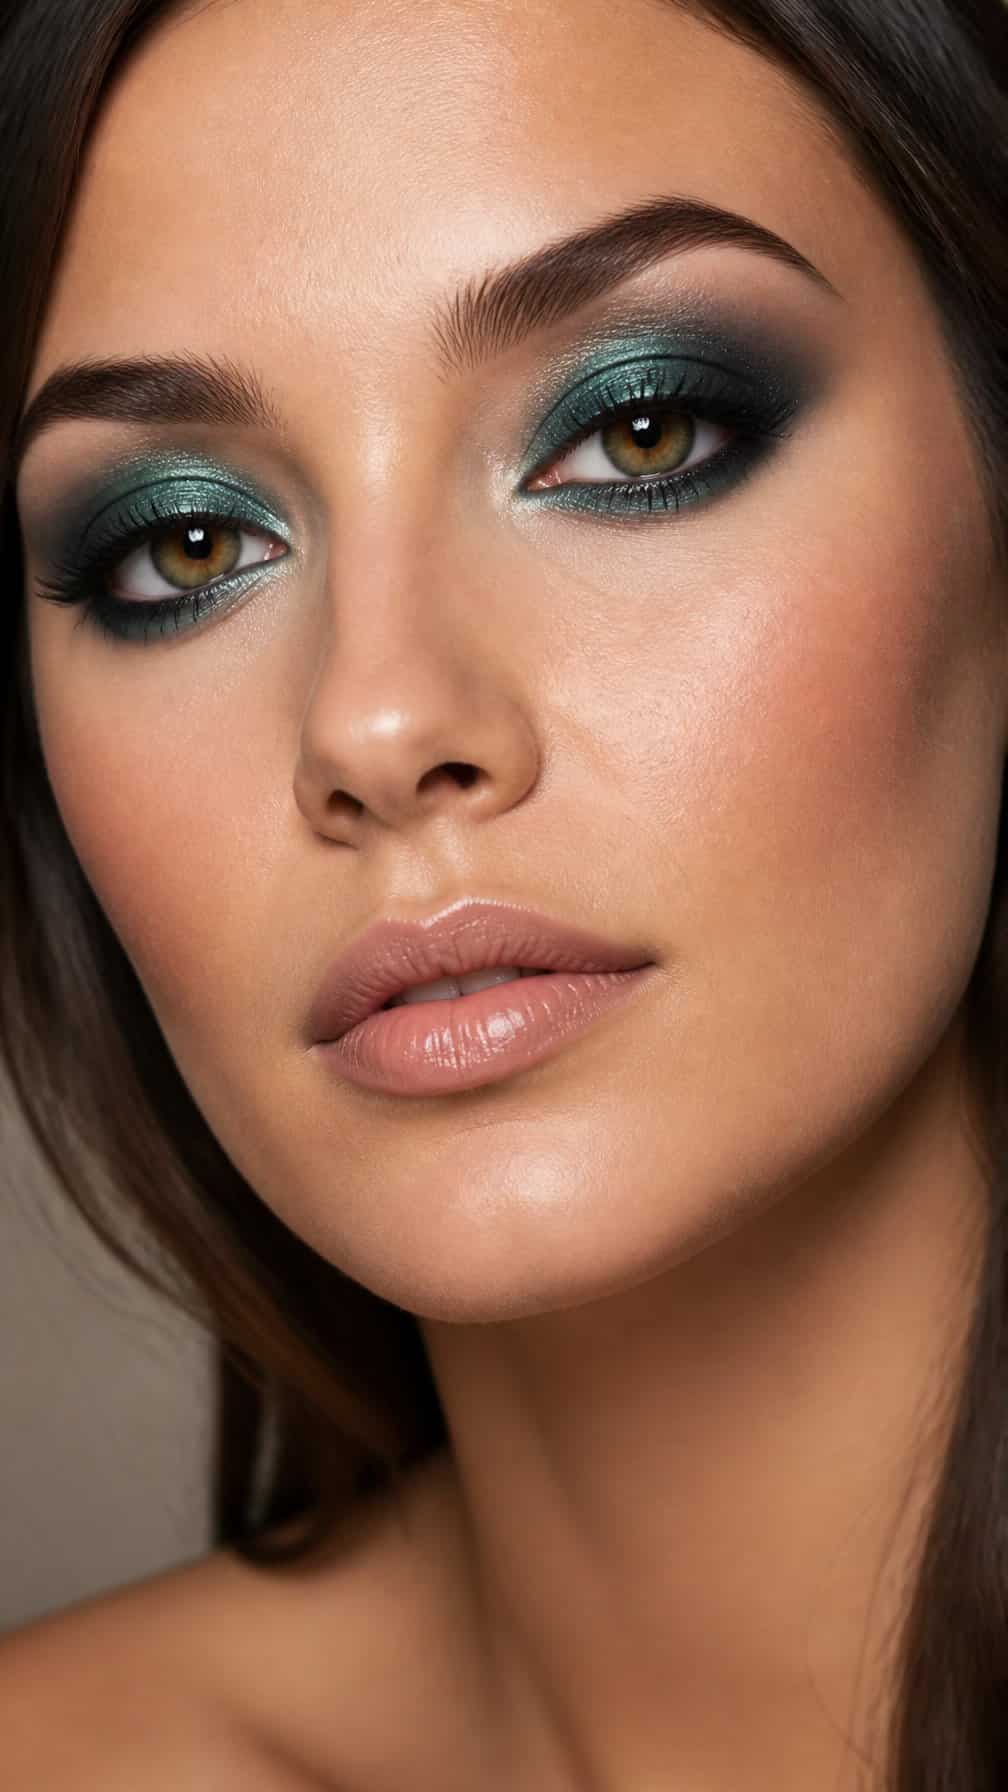
I use teal shadow to give the classic smoky eye a cooler, more colorful finish. I blend a deep teal through the outer corner and crease, then soften the edges with a muted brown or charcoal shade.
I press a brighter teal onto the center of the lid to add controlled dimension without making the look appear too bright. A thin line of black or dark teal along the upper lashes defines the eyes, while a small amount of the deeper shade along the lower lash line keeps the balance.
I finish with mascara and a neutral lip so the eye makeup remains the main focus. For a softer result, I use satin formulas; metallic teal creates a more noticeable evening look.
21) Halo Smokey Eye
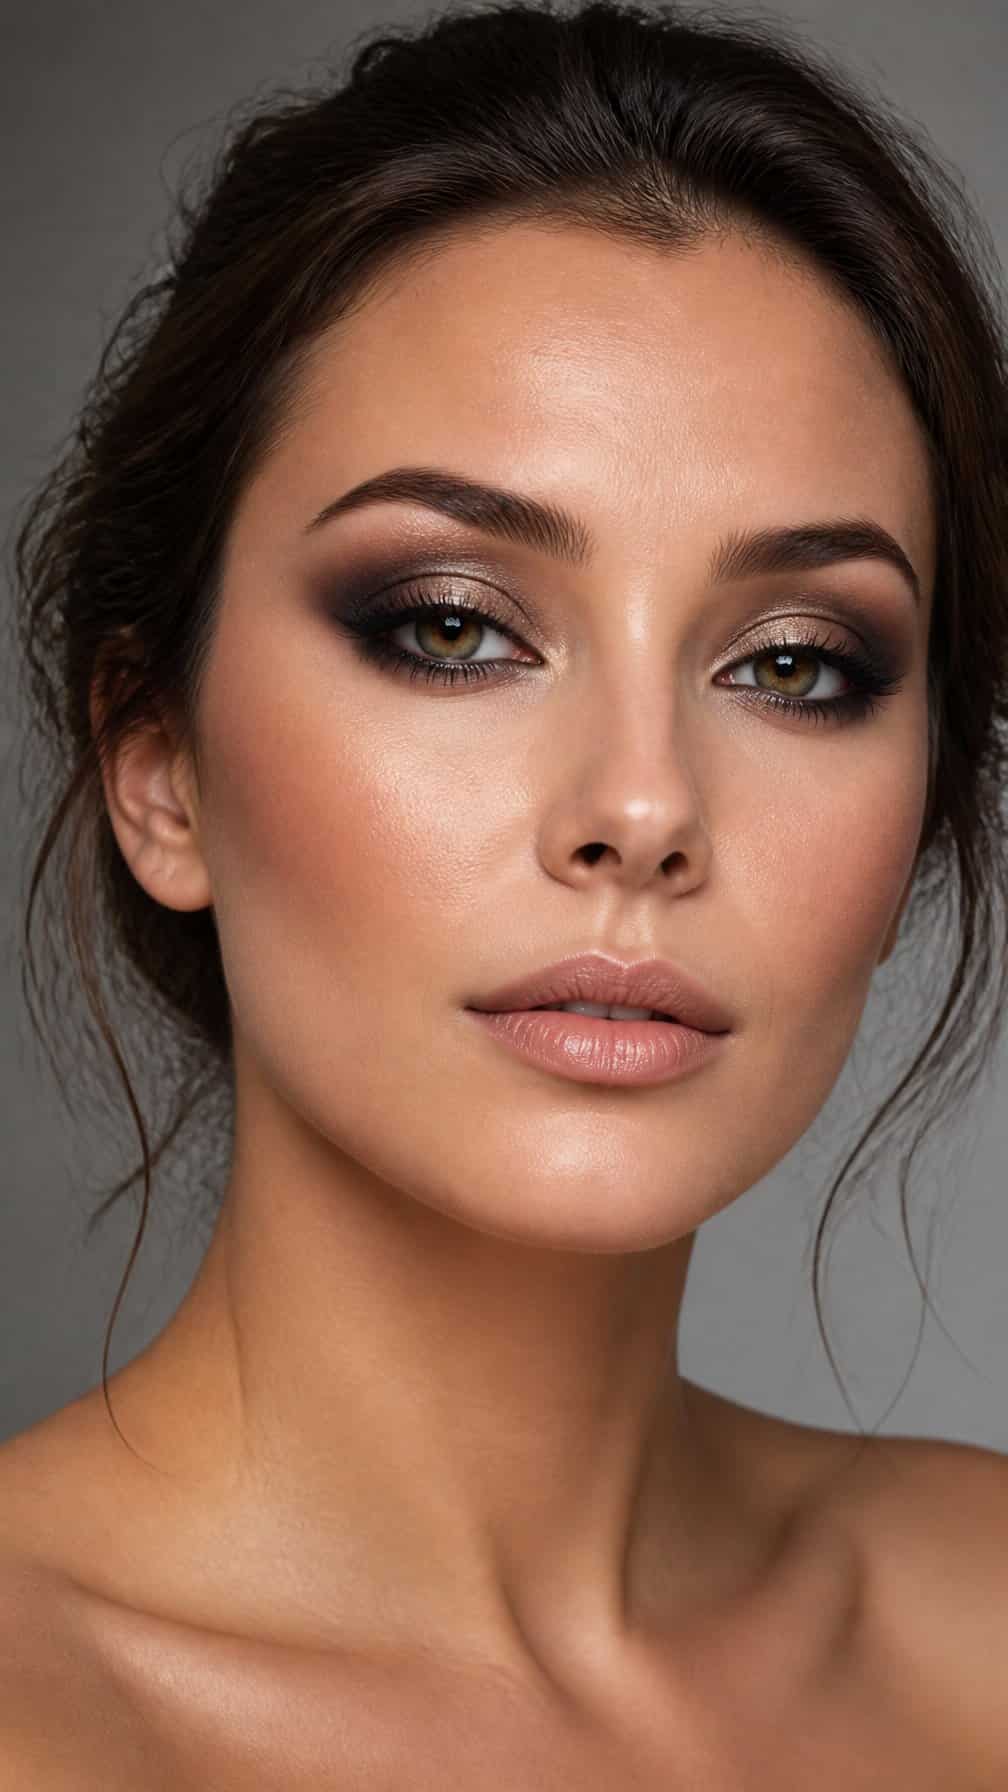
I build this look by placing a lighter shimmer on the center of the lid and deeper shadow in the inner and outer corners. The contrast creates a rounded highlight while keeping the edges softly blended.
I start with a matte transition shade, then layer charcoal, brown, or plum along both corners. I connect the shades through the crease without covering the central shimmer, and I repeat the same placement along the lower lash line.
I keep the inner-corner and brow-bone highlights controlled so the halo effect remains defined. A thin coat of mascara suits a softer finish, while fuller lashes add intensity without changing the shadow placement.
22) Cut-Crease Smokey Eye
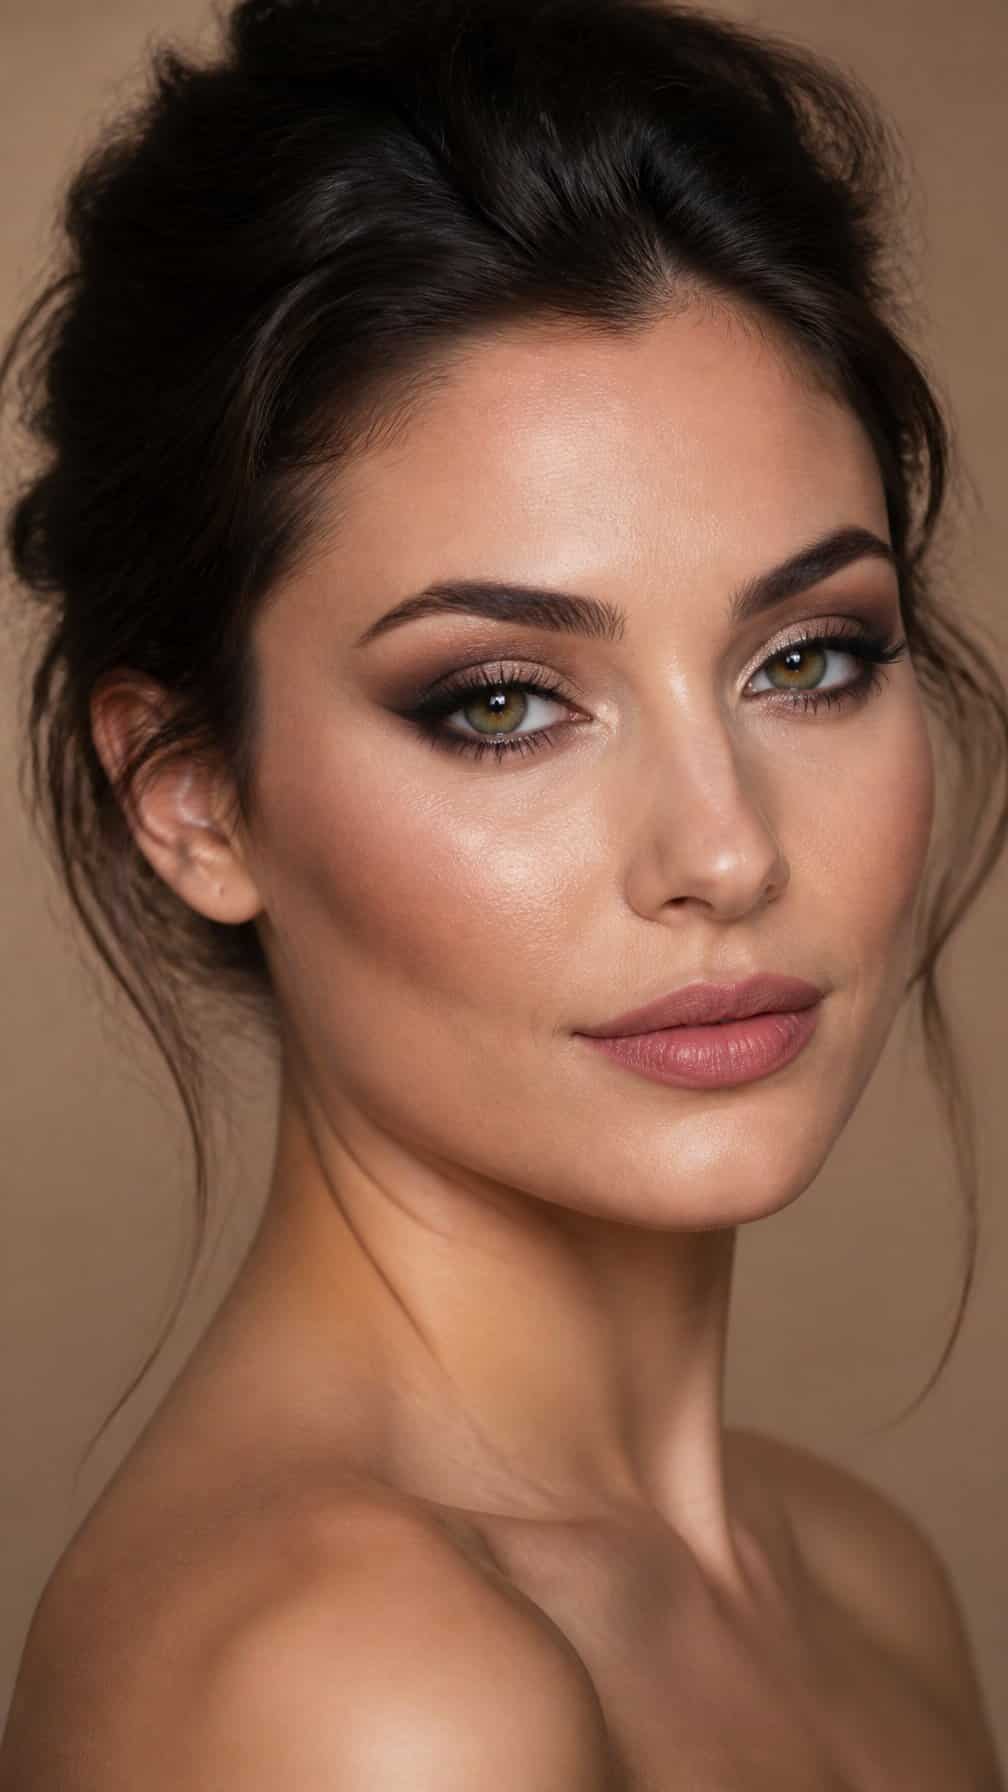
I define the crease with a clean, precise line before blending darker shadow above it. This creates visible separation between the lid and socket while keeping the smokey effect controlled. I use matte brown or charcoal in the crease, then soften the edges without covering the cut-crease shape.
I apply a lighter shimmer or satin shade across the lid to emphasize the contrast. I keep the inner corner bright and deepen the outer corner with a small, angled brush for structure. A thin winged liner and defined lashes complement the graphic shape without competing with it.
Smokey Eye Techniques And Color Placement
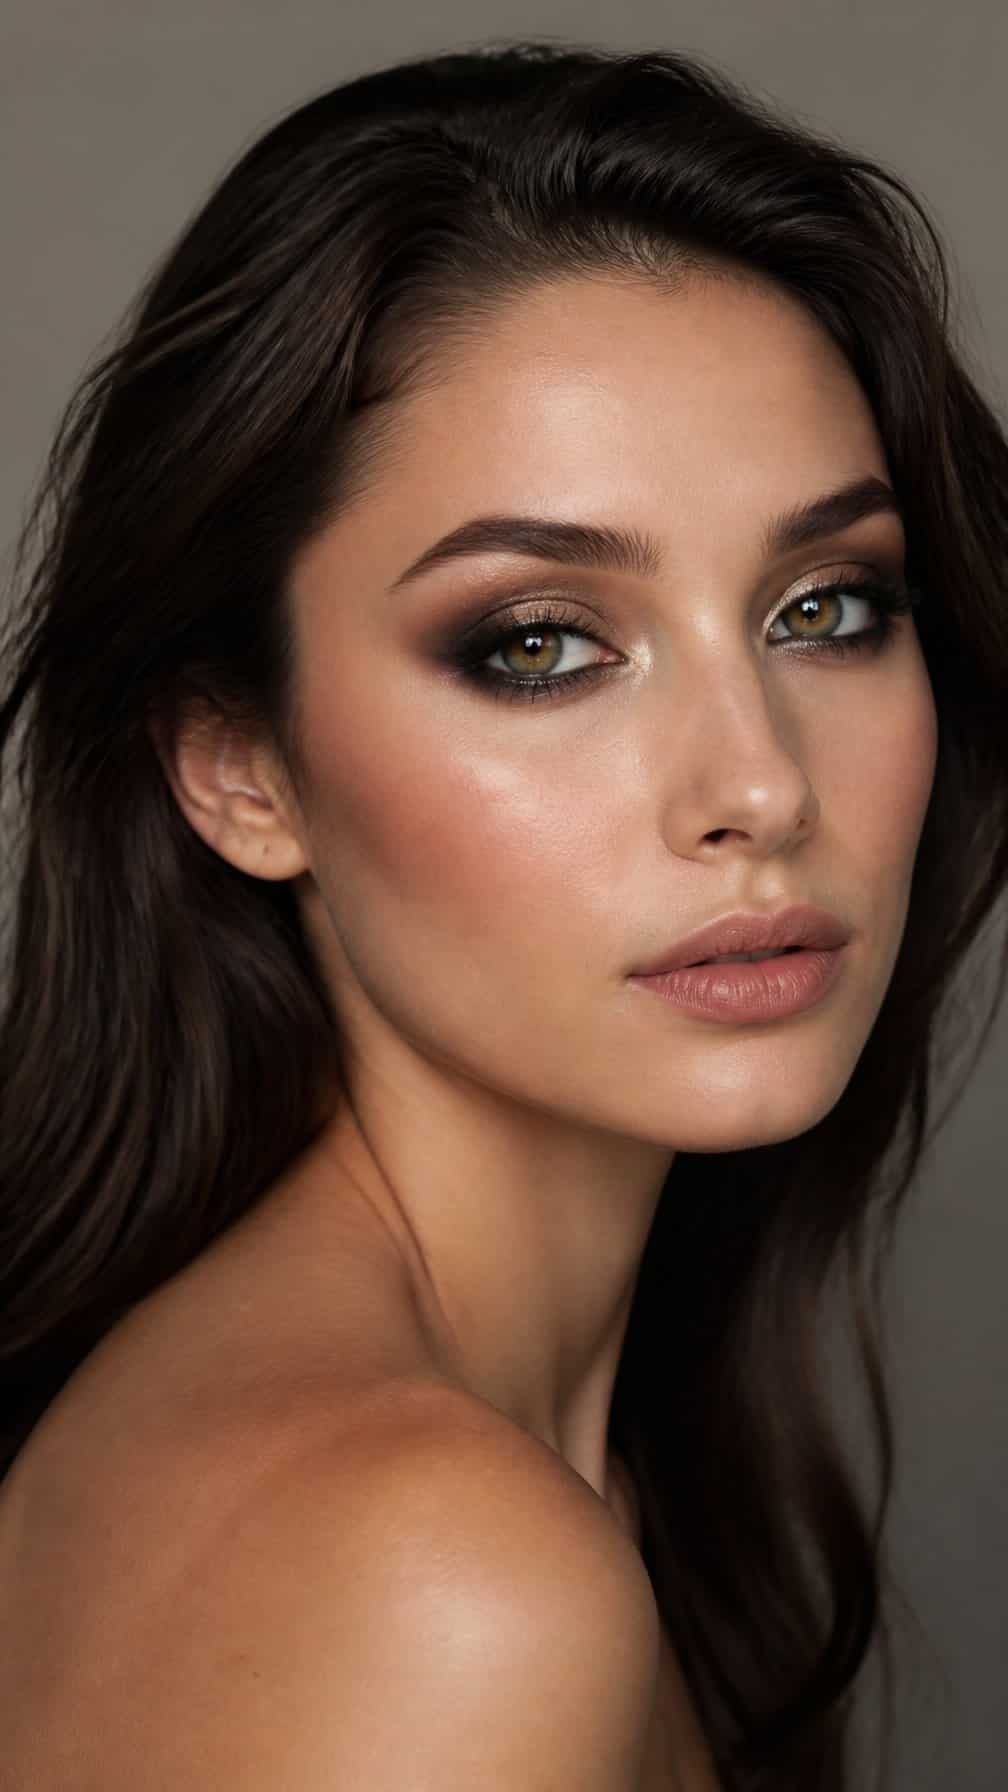
I build smokey eyes by controlling intensity, placement, and finish rather than applying dark shadow everywhere. Clean transitions, eye-specific color choices, and deliberate contrast help me create looks that range from softly defined to distinctly dramatic.
Blending For Seamless Depth
I start with a light transition shade above the crease, then place medium color through the crease and outer corner. I keep the darkest shade close to the lash line and outer V, where it adds definition without making the entire lid look heavy.
I use a clean, tapered brush to soften the upper edge with small circular motions. Instead of dragging dark pigment across the lid, I add it gradually and blend between each layer. This preserves color intensity while preventing muddy patches.
For a lifted shape, I angle the outer-corner shadow toward the end of my eyebrow. I soften the lower lash line with the same order—light transition, medium shade, then a narrow line of the darkest color—leaving the inner corner lighter.
Choosing Shades For Eye Color
I choose colors that create contrast with my iris while keeping the depth appropriate for the occasion. Bronze, copper, and warm brown tones can emphasize blue eyes; plum, mauve, and burgundy add definition without relying on black.
For green eyes, I use aubergine, rose-brown, and reddish bronze shades. Brown eyes work well with nearly any smokey palette, while navy, charcoal, olive, and bronze create different types of contrast. Hazel eyes can shift depending on placement: olive and khaki bring out green tones, while bronze and copper highlight gold.
I also consider skin undertone. Warm complexions often suit caramel, terracotta, and bronze transitions, while cool complexions can support taupe, slate, and muted plum. Neutral browns remain useful when I want the eye color to remain the focus.
Balancing Matte And Shimmer Finishes
I use matte shadows to create structure, especially in the crease, outer corner, and lower lash line. Their lack of reflection makes depth easier to control and keeps the shape visible in photographs.
I place shimmer where I want light to catch, usually on the center of the lid or inner corner. A metallic bronze or champagne shade can brighten the eye, while satin taupe adds subtle dimension without looking glittery.
For a balanced finish, I pair one or two matte shades with a single reflective accent. I press shimmer onto the lid with a fingertip or flat brush rather than sweeping it broadly. If the look becomes too reflective, I soften the edges with a matte transition shade.
Application Prep And Long-Wear Tips
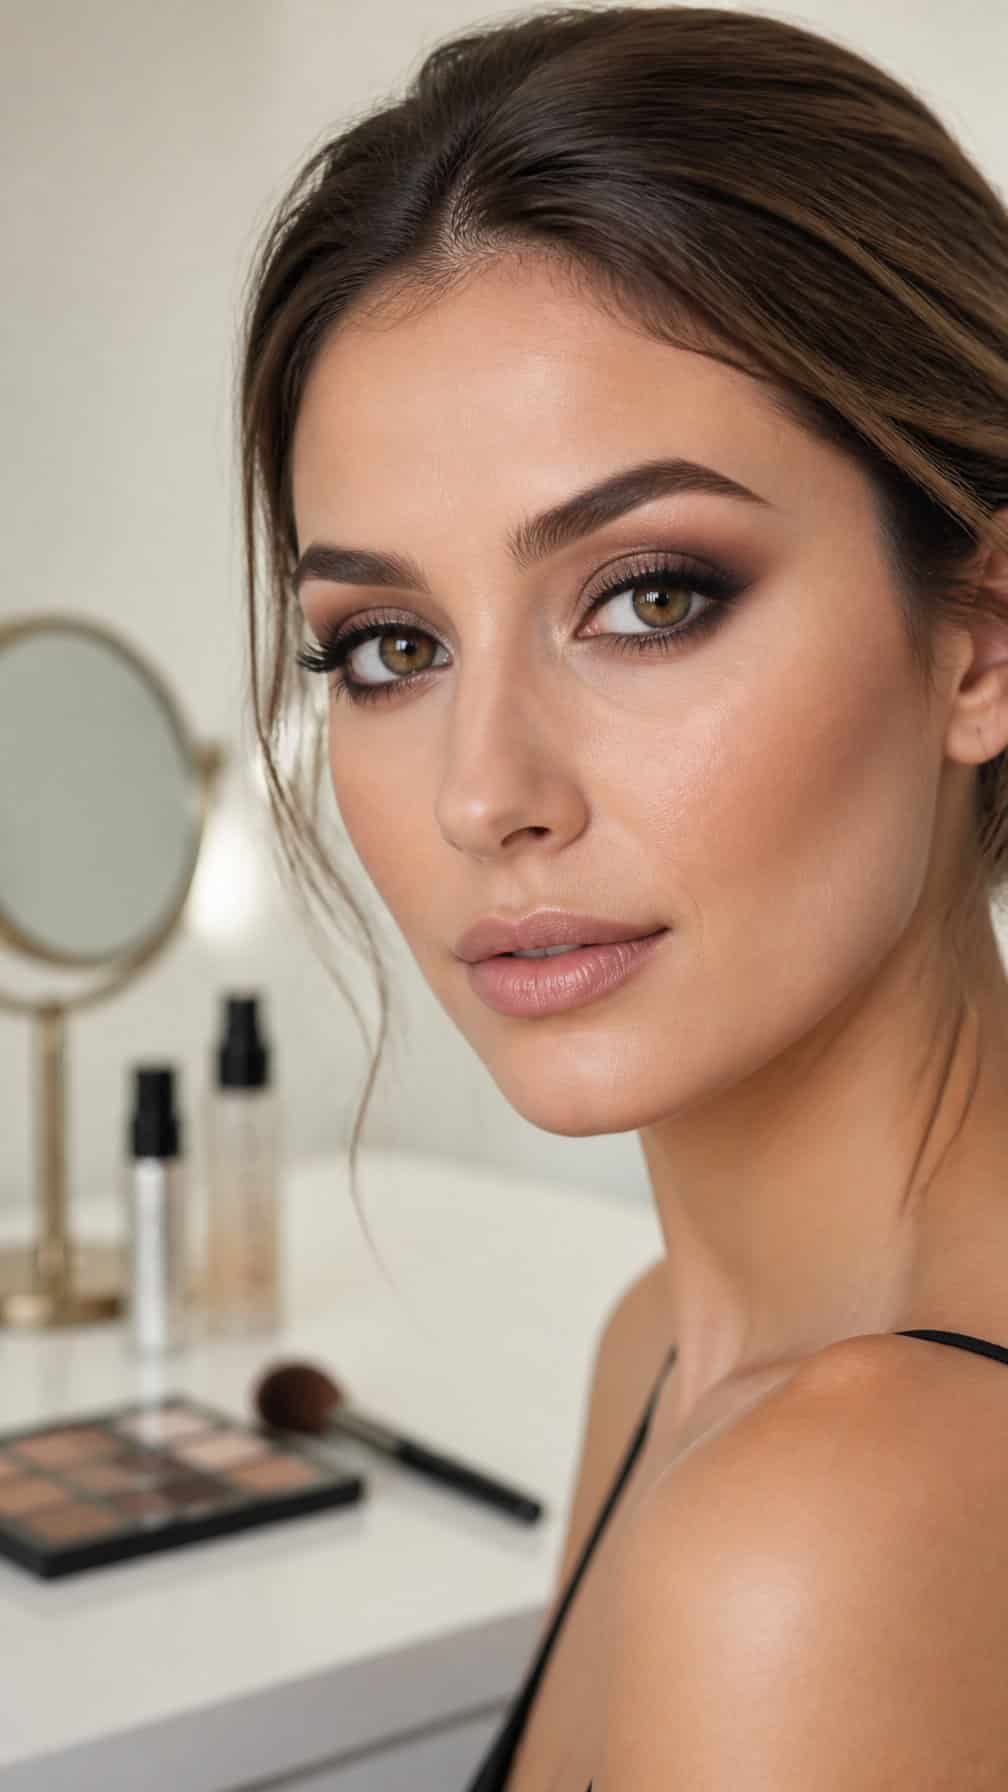
I create a smooth, controlled base by removing excess oil, applying a thin layer of primer, and setting only where needed. I also manage powder placement, lash-line pressure, liner thickness, and mascara choice so each look keeps its intended level of softness or definition.
Priming The Eyelids
I start with clean, dry eyelids and remove skincare residue with a cotton swab or tissue. I apply a rice-grain-sized amount of eyelid primer from the lash line to the brow bone, then blend it into a thin, even film.
For oily lids, I let the primer set for 30–60 seconds before adding shadow. If the product feels tacky, I press a small amount of matte skin-toned shadow over the crease area while leaving the lid slightly grippy for pigment.
I avoid applying eye cream directly beneath the primer because it can thin the base and encourage creasing. For dry lids, I use a lightweight moisturizer earlier, allow it to absorb fully, and apply less powder to preserve a smooth finish.
Preventing Fallout And Creasing
I tap excess shadow from the brush before placing it on the eye, especially with black, navy, plum, or metallic formulas. I prefer pressing pigment onto the lid before blending the edges, which limits loose powder and keeps the strongest color near the lash line.
For extra protection, I apply loose setting powder beneath the eyes before using dark shadow, then sweep it away with a clean brush. I remove any fallout before concealer so stray pigment does not stain the base.
I build coverage in thin layers rather than applying a heavy coat at once. A light press of translucent powder through the crease can reduce transfer, but I keep powder away from metallic areas because it can dull their reflective finish.
Pairing Liner And Mascara With Intensity
I match liner placement to the shadow’s depth. With a soft brown or taupe smoky eye, I use a brown pencil along the upper lashes and smudge it before it sets. For a deeper charcoal or black look, I tightline the upper lashes and add a thin liquid or gel line at the outer corner.
I keep the lower lash line lighter when the upper lid carries strong pigment. A short, smudged line adds balance without closing in the eyes; black liner across the full lower rim creates a denser effect.
I curl the lashes before mascara, then apply one separating coat and a second coat mainly at the roots. I choose lengthening mascara for subtle looks and a volumizing formula for dramatic styles, checking the lower lashes with a smaller brush to prevent clumps.