
If you have hooded eyes, then you've probably noticed that typical eye makeup tutorials don't work for you.
You'll follow the tutorial perfectly, and the result will look beautiful, but the moment you open your eyes, the makeup disappears.
It turns out that this eye shape requires proper placement so that the color and eyeliner remain visible when you open your eyes.
Save for later
Want to come back to this story? Save it with your email so it is easy to find again.
In this article, I'll cover makeup looks for hooded eyes to suit every taste, such as soft everyday styles, bold colors, graphic shapes, lashes, and long-wear finishes.
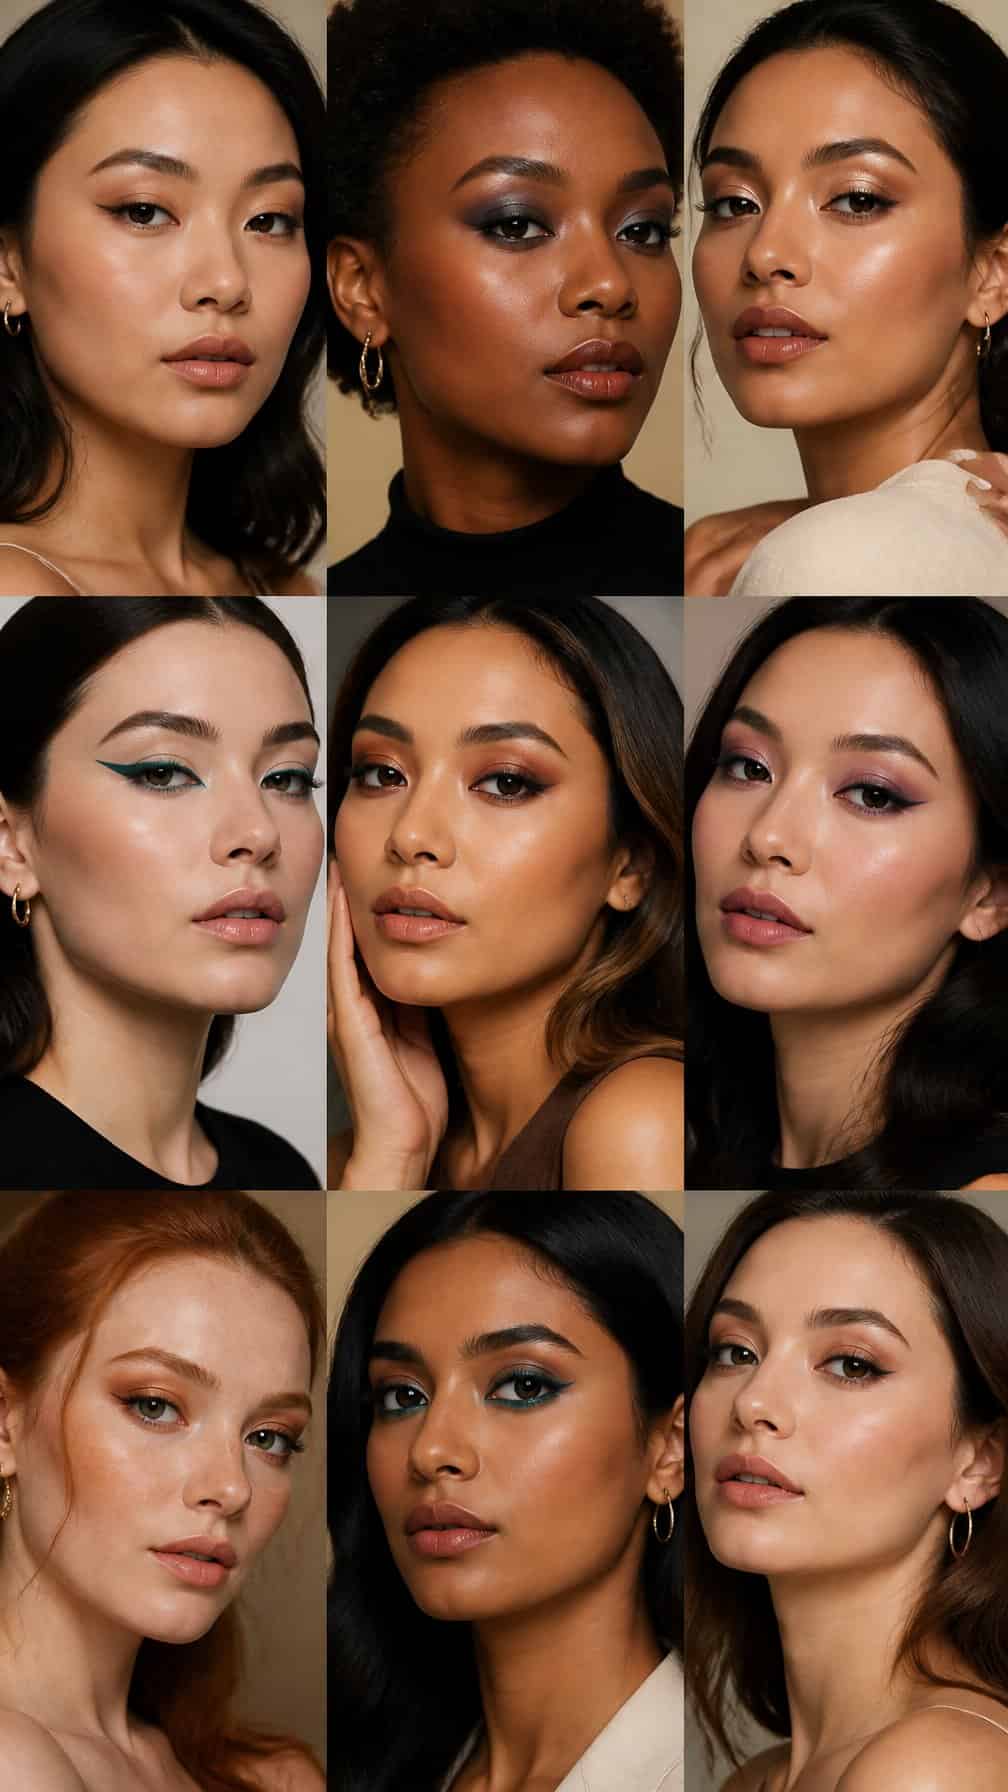
Table of Contents
- 1 1) Matte Cut-Crease Hooded Eye Makeup
- 2 2) Soft Smoky Brown Hooded Eye Look
- 3 3) Bright Inner-Corner Hooded Eye Makeup
- 4 4) Siren Eye Makeup for Hooded Eyes
- 5 5) Half-Cut Crease with Shimmer
- 6 6) Graphic Liner Above the Crease
- 7 7) Winged Liner with a Lifted Outer Corner
- 8 8) Floating Crease Hooded Eye Look
- 9 9) Halo Eye Makeup for Hooded Eyes
- 10 10) Smudged Lash-Line Smoky Eye
- 11 11) Reverse Cat-Eye Hooded Eye Makeup
- 12 12) Monochromatic Rose Hooded Eye Look
- 13 13) Bronze Foiled Hooded Eye Makeup
- 14 14) Taupe Everyday Hooded Eye Look
- 15 15) Colorful Blue Hooded Eye Makeup
- 16 16) Purple Smoky Hooded Eye Look
- 17 17) White Eyeliner Hooded Eye Makeup
- 18 18) Negative-Space Liner Above the Crease
- 19 19) Tightlined Hooded Eye Makeup with False Lashes
- 20 20) Soft Glam Hooded Eye with Cluster Lashes
1) Matte Cut-Crease Hooded Eye Makeup
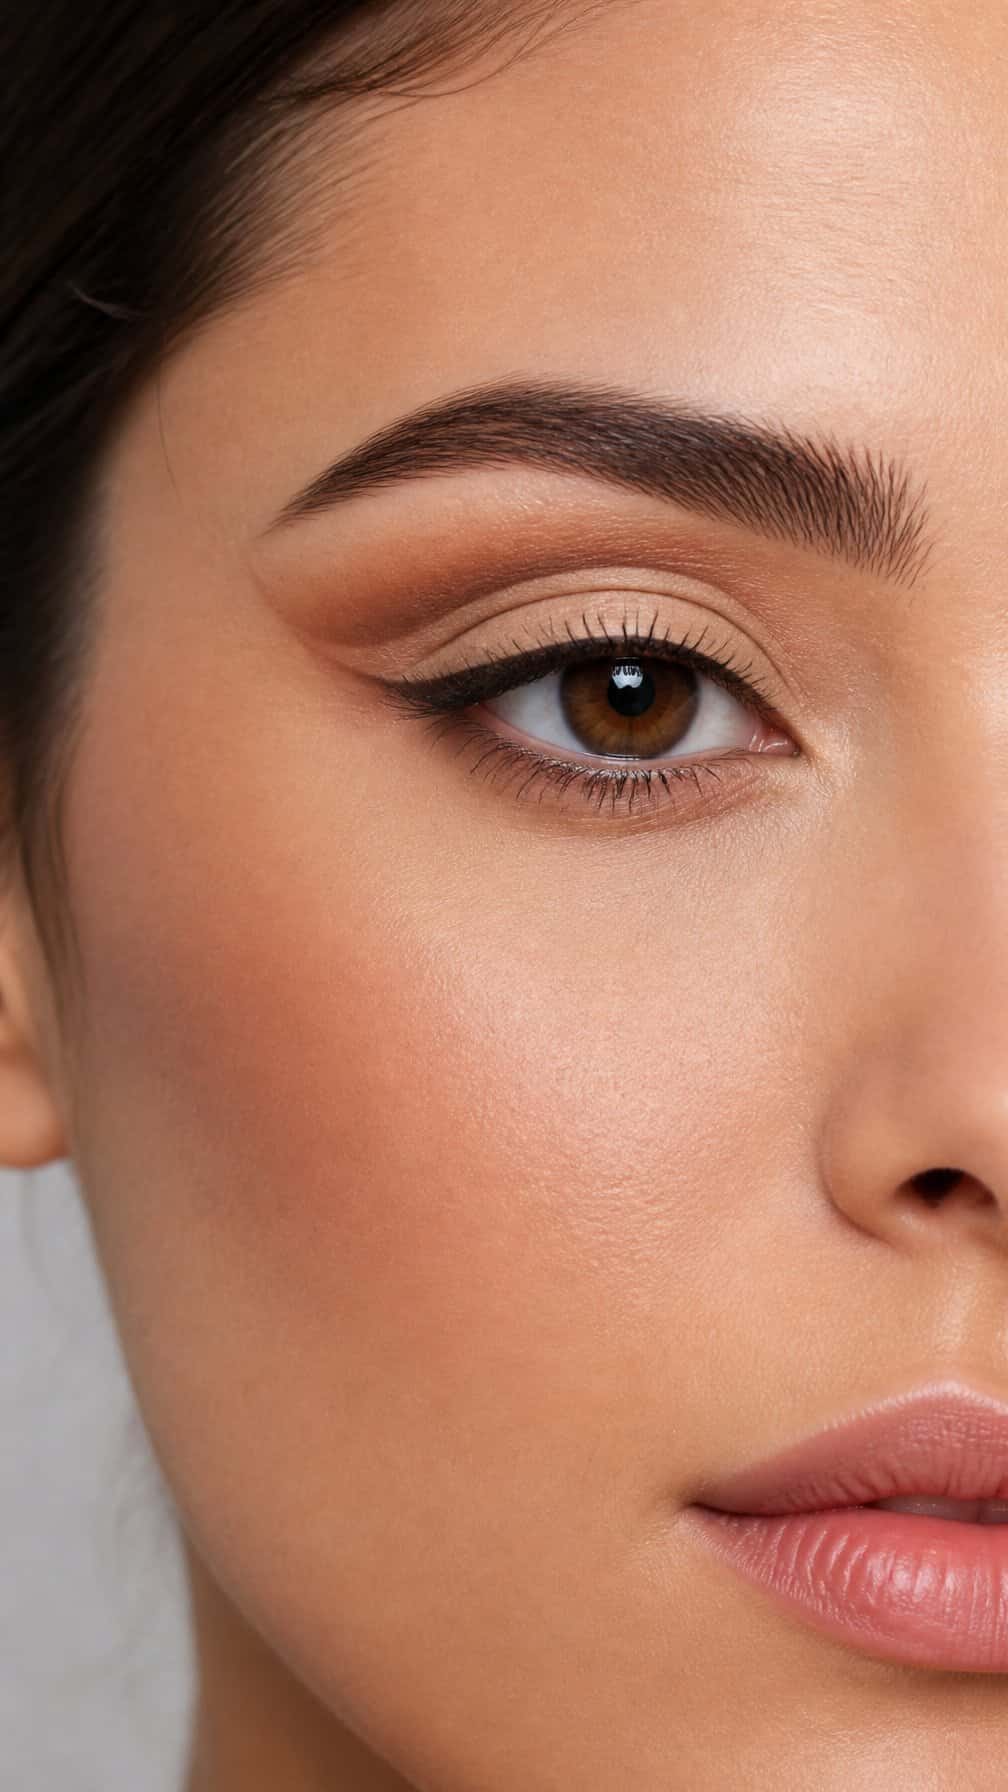
This look emphasizes color contrast, a defined structure, and a matte finish. Brown shades, being neutral tones, make the structure the protagonist.
Apply the medium brown shade above the natural fold so that the contrast remains visible. Blend the upper part of the structure with a lighter shade.
Extend the brown shades to the outer corner while keeping the lid light, creating a defined wing with the shades above the hooded fold.
Finish with a thin line of liner along the upper lash line, with a small wing extending outward; curl your lashes and apply mascara, focusing on the outer lashes.
2) Soft Smoky Brown Hooded Eye Look
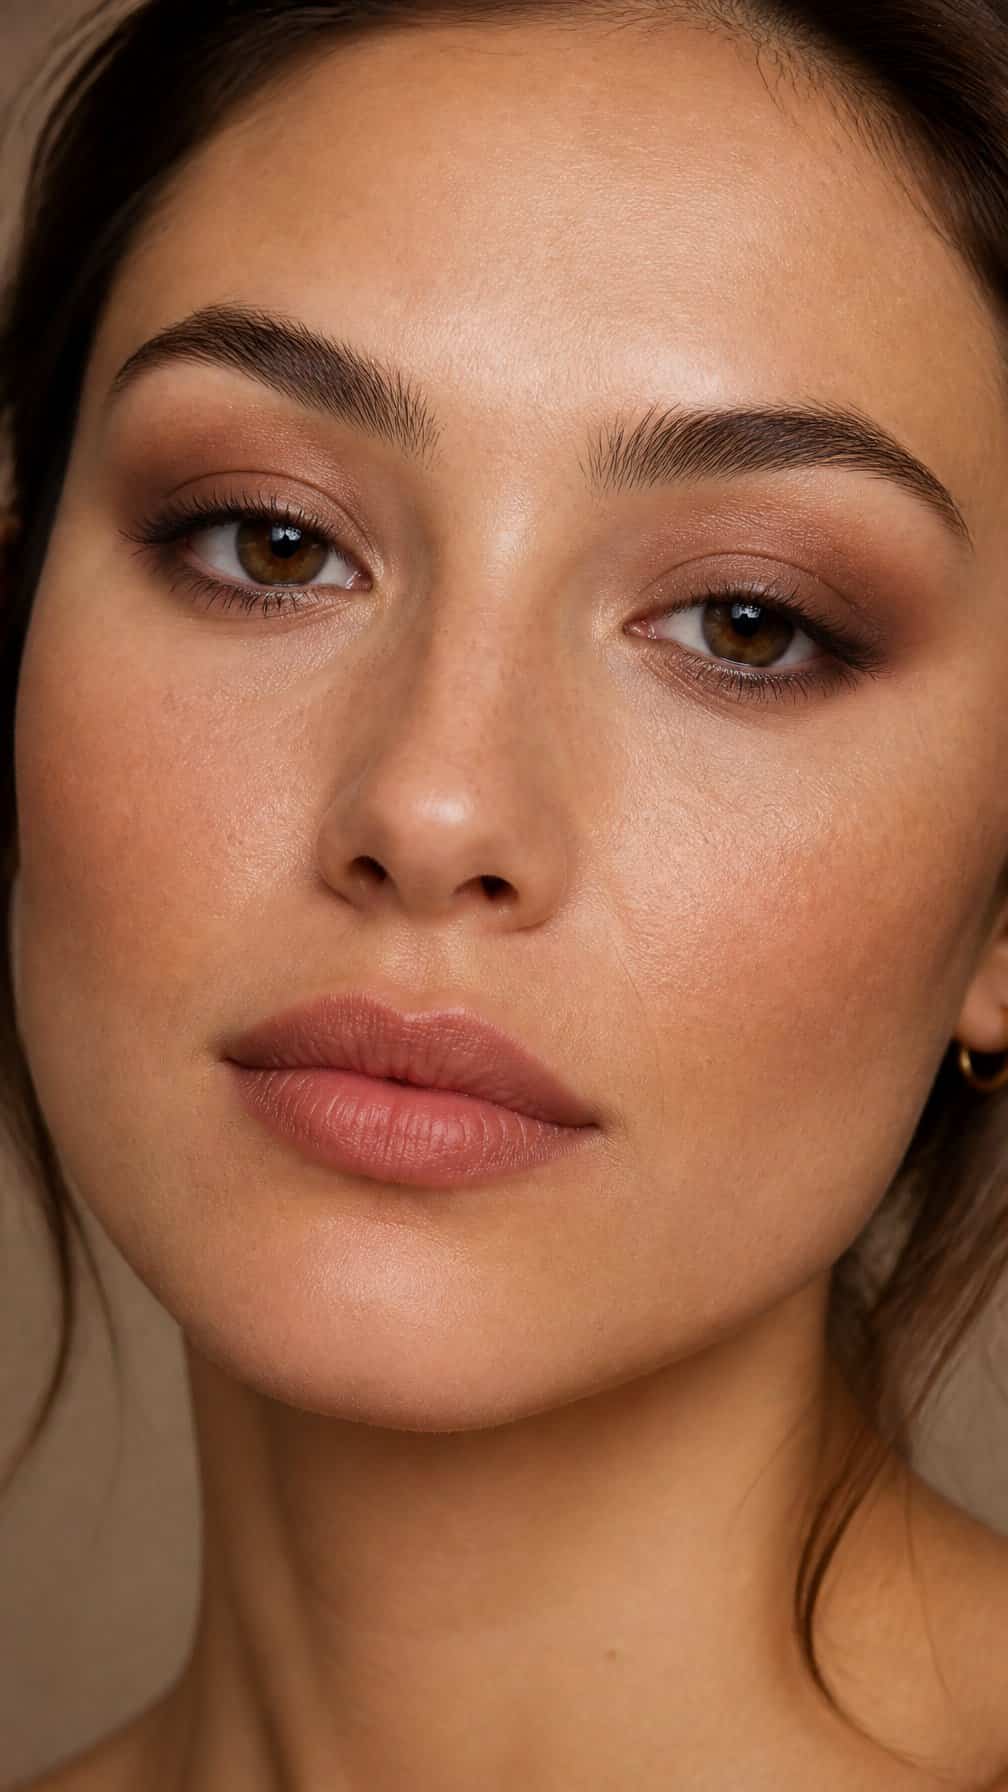
This soft smoky eye is a look I'd be willing to try. It adds definition without any harsh lines, and depending on the intensity of the shades, it's a look that can be worn both day and night.
Apply a light brown matte shade above the natural crease, blending it gently upward. Accent the outer corner with a medium chocolate shade, keeping the focus close to the lash line; otherwise, the dark shade will get lost in the fold.
Next, apply a taupe satin shade across the lid to add a soft sheen. Be sure to blend the edges of the shades together to avoid patchy areas.
Finish with a thin line of brow liner, curl your lashes, and apply mascara to add definition.
3) Bright Inner-Corner Hooded Eye Makeup
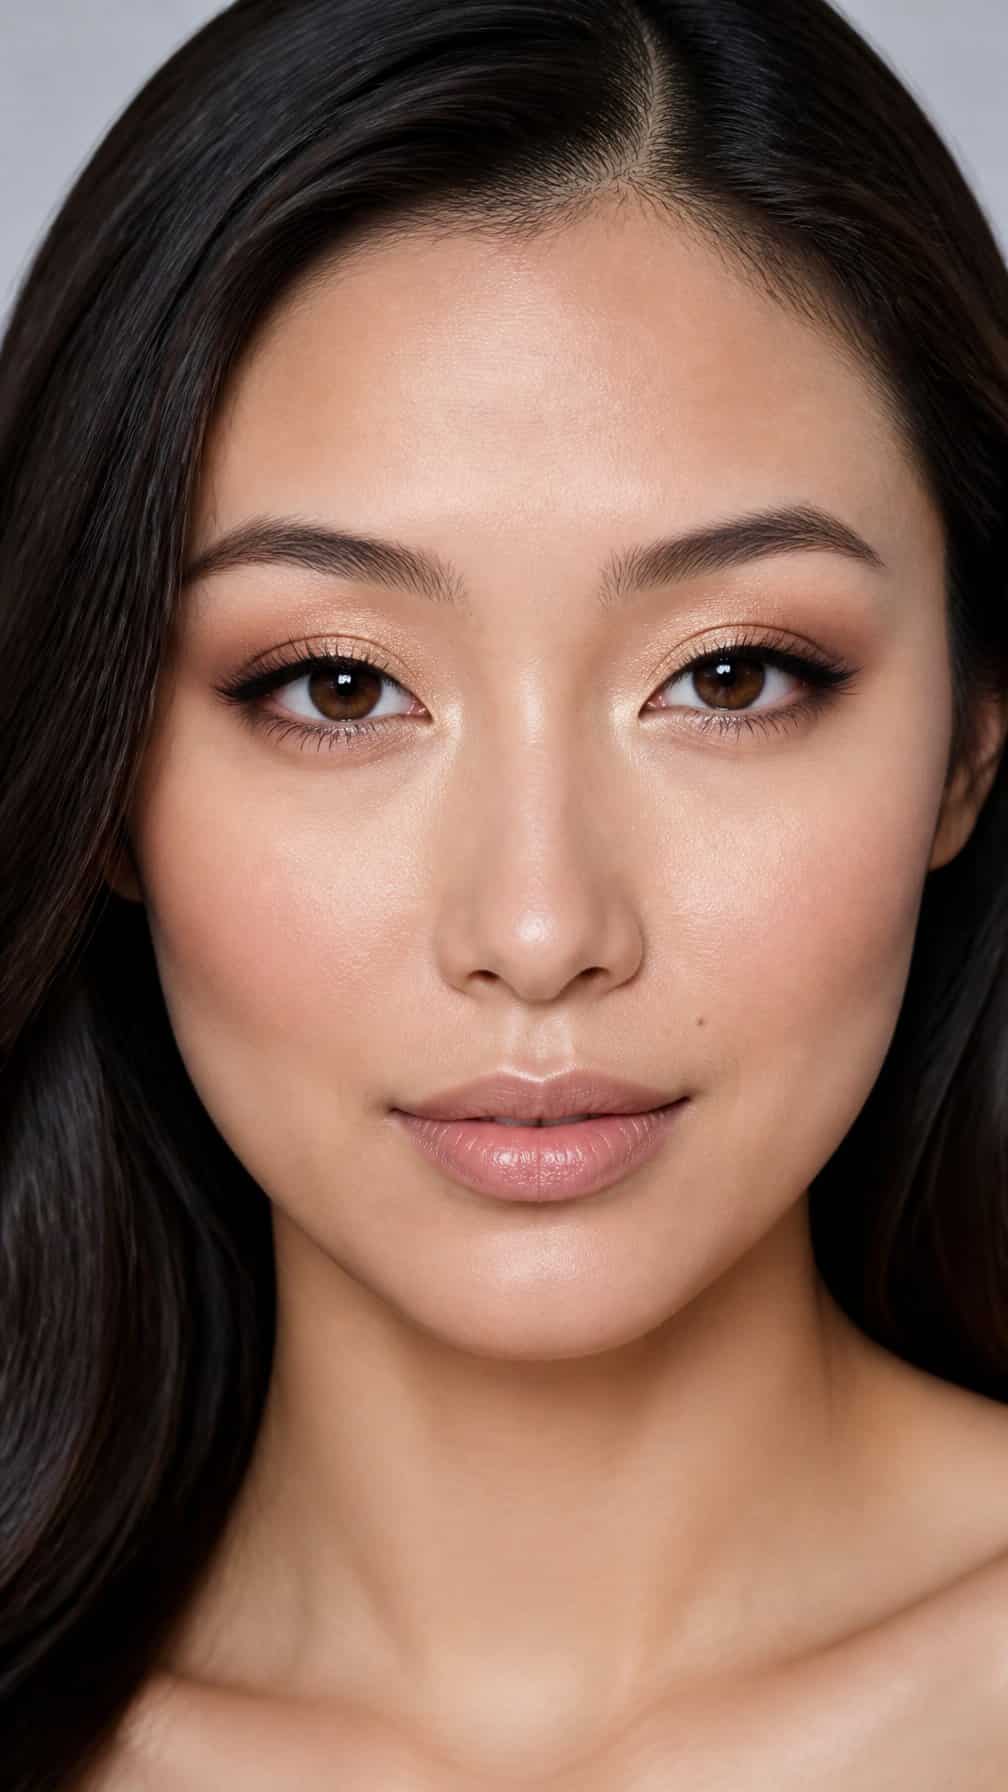
This gorgeous look emphasizes shimmer and soft definition, without being too flashy. It's a look I'd definitely try.
Apply a soft shimmer shade to the inner corner, focusing on the tear duct, and blend it into a matte transition shade above the natural crease.
To create balance, blend a thin line of dark shade along the lash line at the outer corner. Finish with a curl and mascara on the middle and outer lashes.
4) Siren Eye Makeup for Hooded Eyes
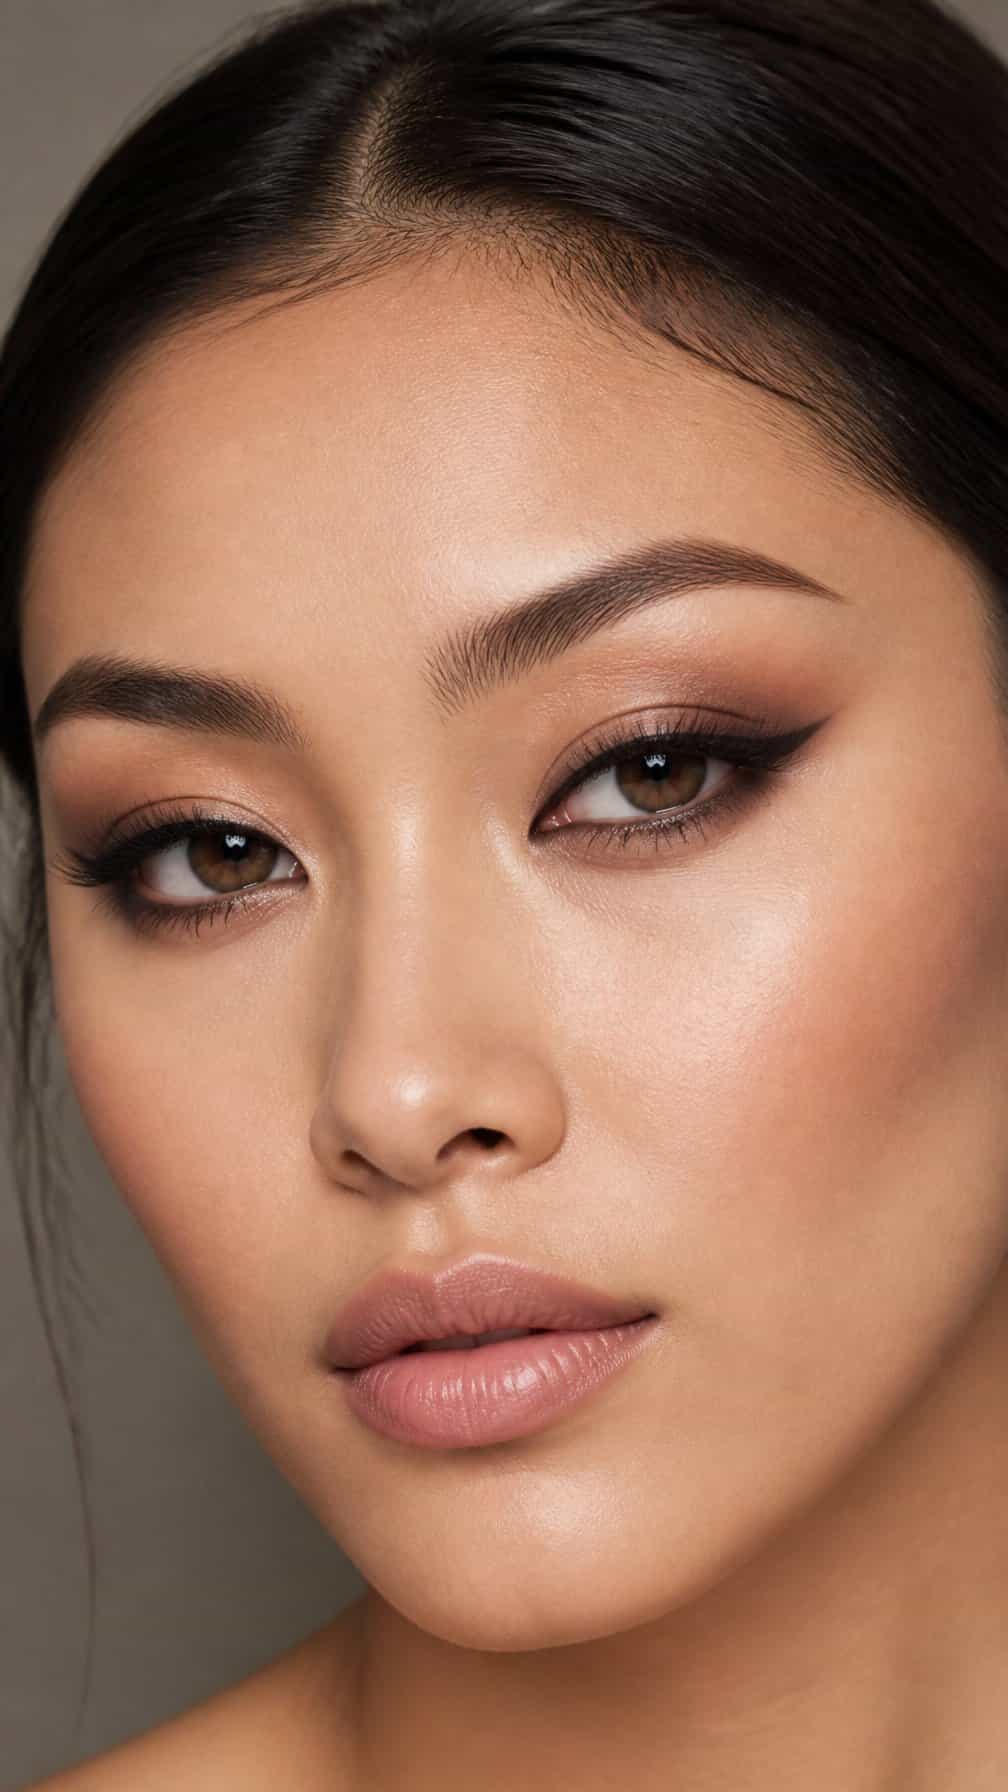
This look emphasizes the definition of the eyes and creates a lifting effect. It seems like the perfect look for a fun night out.
First, apply a matte taupe shade above the crease, then accentuate the outer corner with an angled shape. Apply a little shimmery shade to the inner corner or the center of the lid, avoiding the crease.
When applying liner, extend the wing slightly upward, above the natural crease. This prevents the fold from hiding the wing and distorting the siren eye look.
To finish, softly line the outer lower lash line and connect it to the wing. Curl your lashes and apply mascara, focusing especially on the outer lashes.
5) Half-Cut Crease with Shimmer
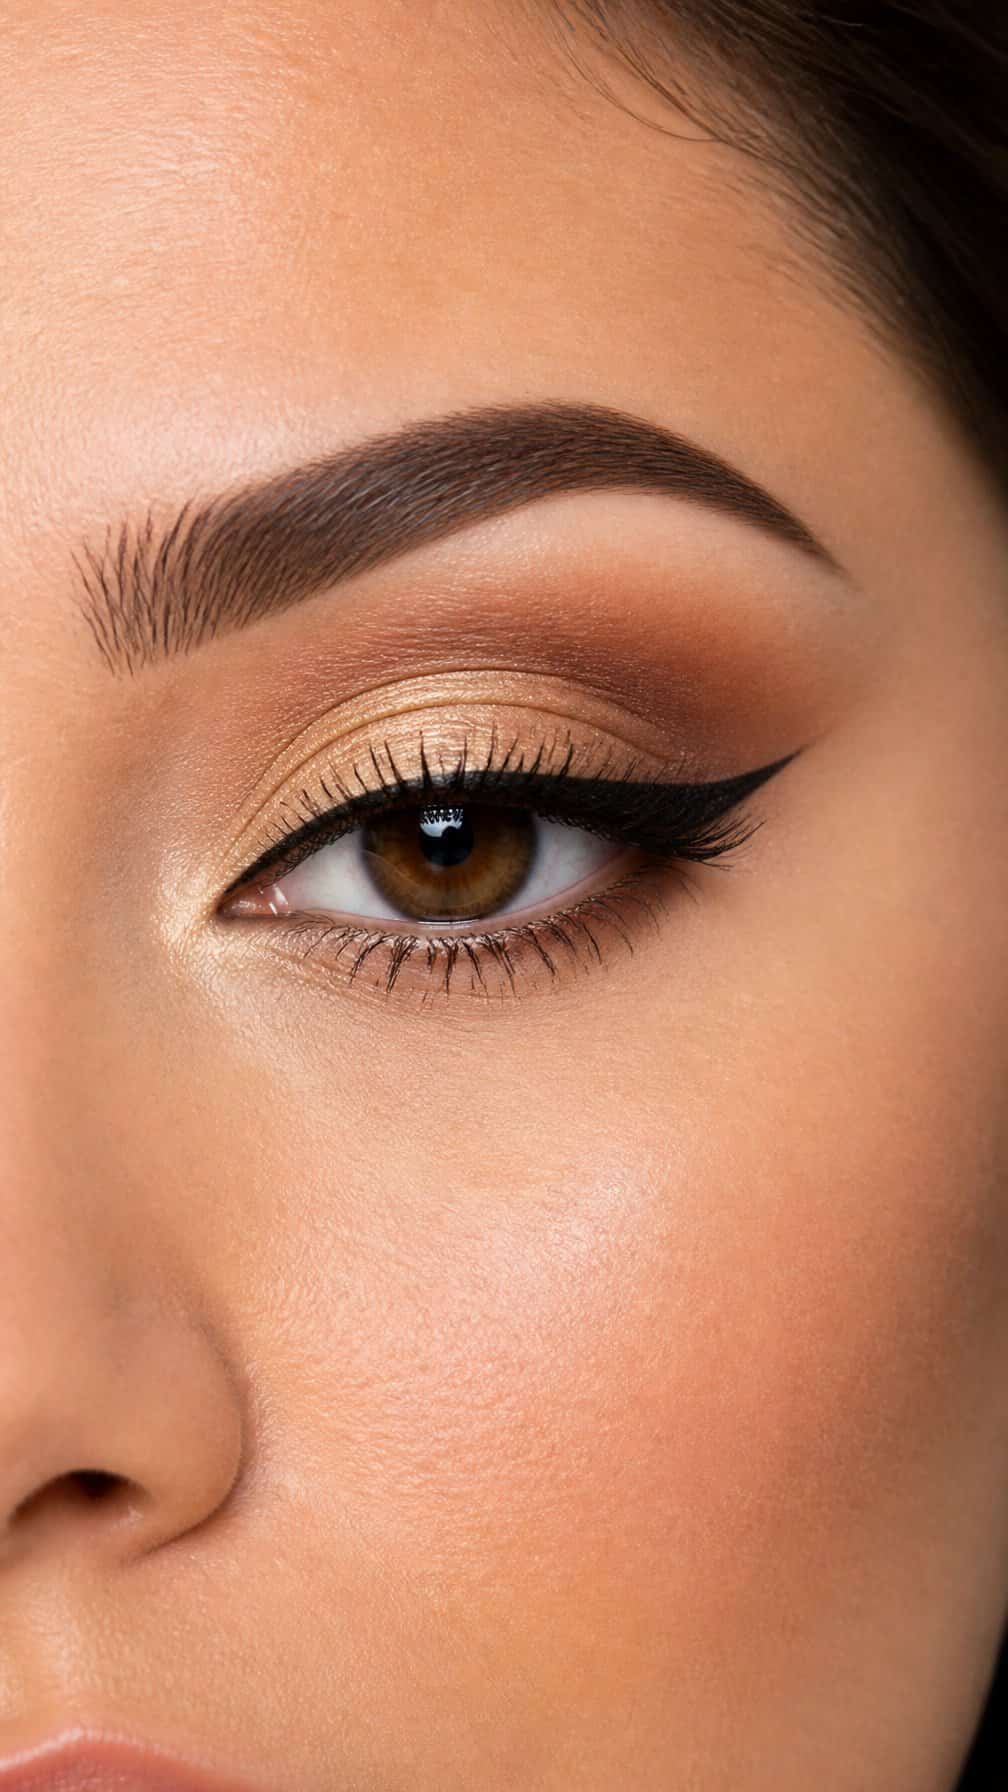
This look emphasizes definition and the contrast between matte and shimmer. It seems like a look for special occasions, such as parties or elegant events.
Apply a matte transition shade above the natural crease, then softly blend it upward so the color remains visible. Accent the outer corner with a darker shade to add structure, leaving the inner lid lighter for the next step.
Create a highlight in the inner half of the crease using a little concealer and a small flat brush. Apply a shimmery shade in light dabs to the area with concealer.
Finish this look by applying an upward winged liner, curling your lashes, and applying mascara.
6) Graphic Liner Above the Crease
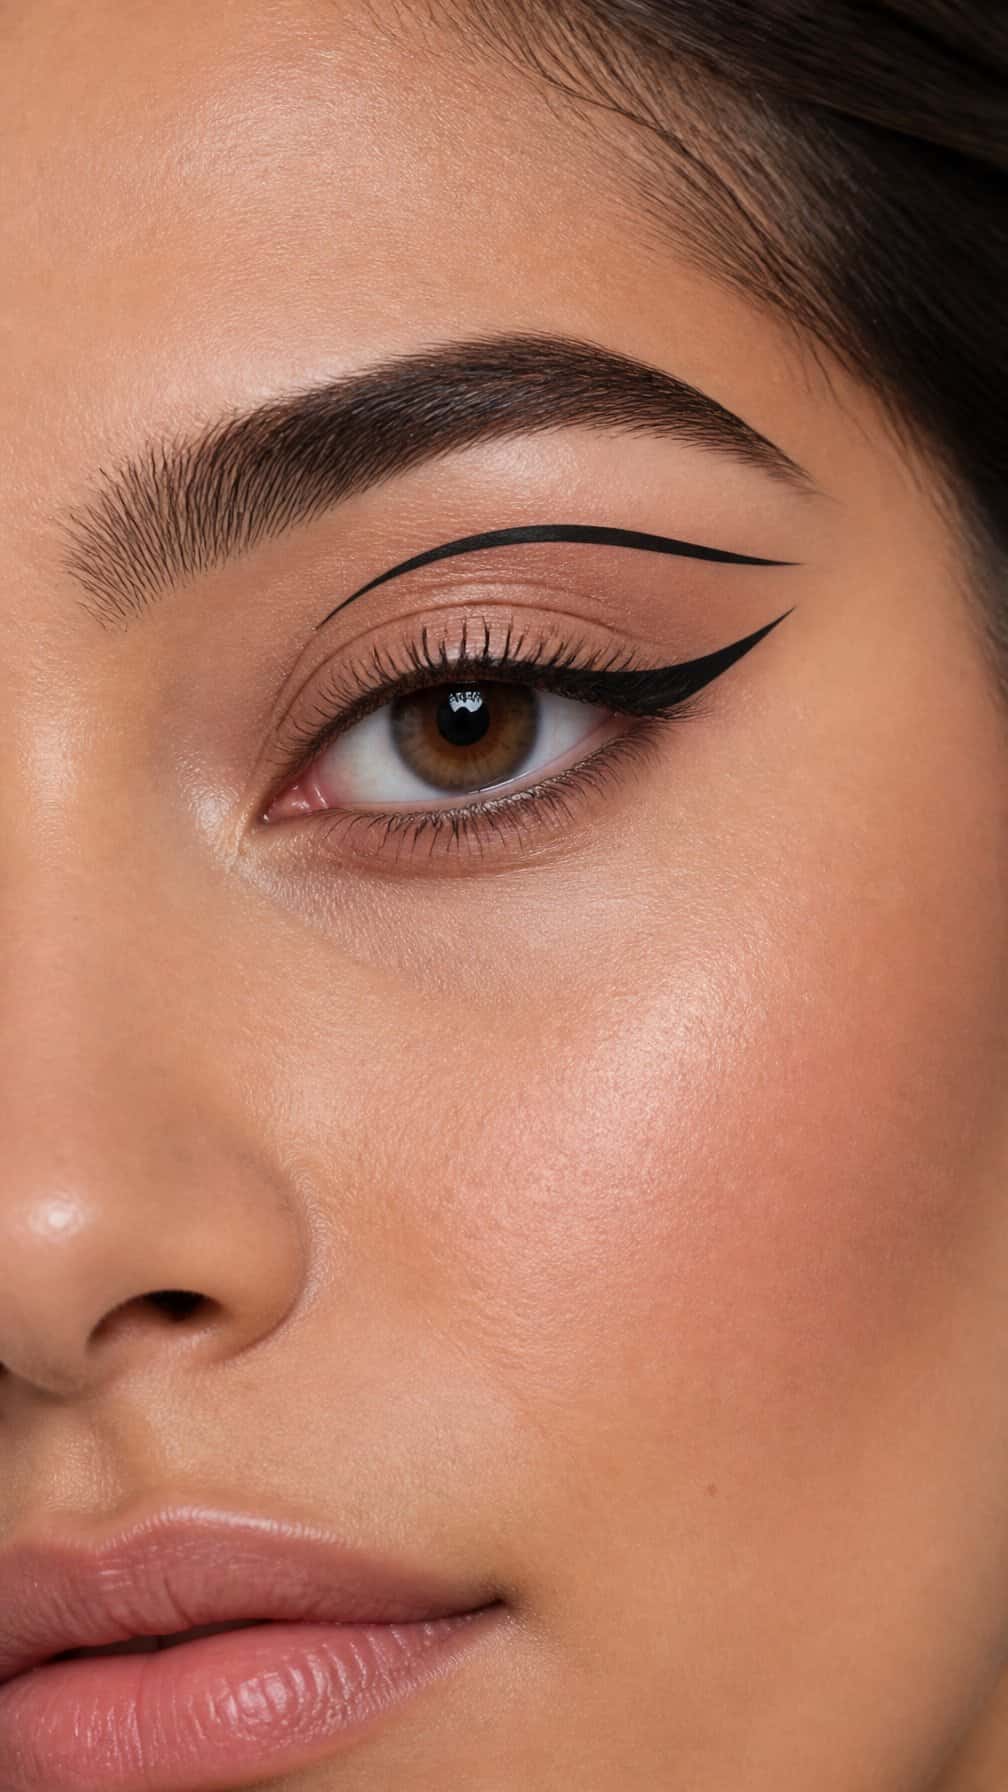
This modern look emphasizes graphic structure, with definition over color and a matte finish.
Start by applying a neutral matte shade all over the lid and a little above the crease to create an even base. Draw liner along the upper lash line and extend the wing upward.
Draw a graphic line above the natural crease, following the shape of the eye but without overwhelming the crease. Extend the edge toward the end of the wing, creating the illusion of connection.
Finish with a light line of liner along the lower lash line, curled lashes, and mascara.
7) Winged Liner with a Lifted Outer Corner
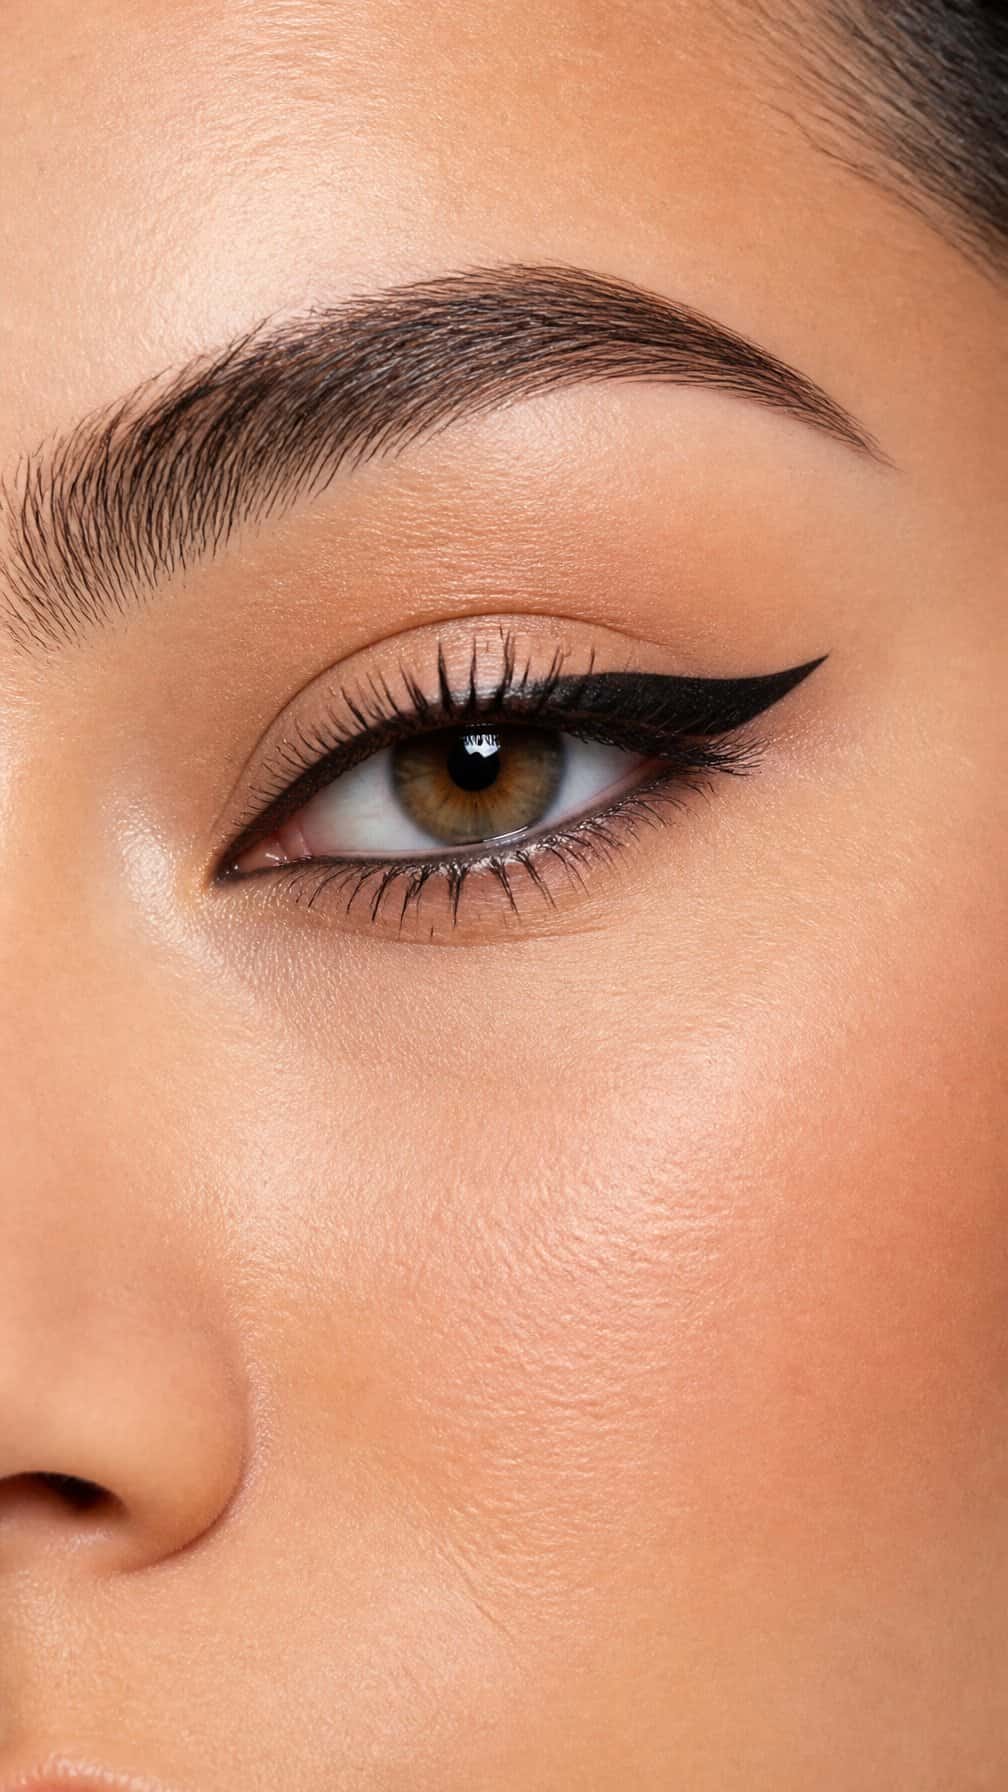
This is a way to line your eyes that works for people with overly hooded eyes, so the wing doesn't end up looking distorted.
To draw the wing, with your eyes open and looking straight ahead, mark the endpoint and draw a line connecting it back to your upper lash line.
The wing extends slightly above the natural crease, preventing it from being hidden. When connecting the wing, draw a thin line along the lash line.
8) Floating Crease Hooded Eye Look
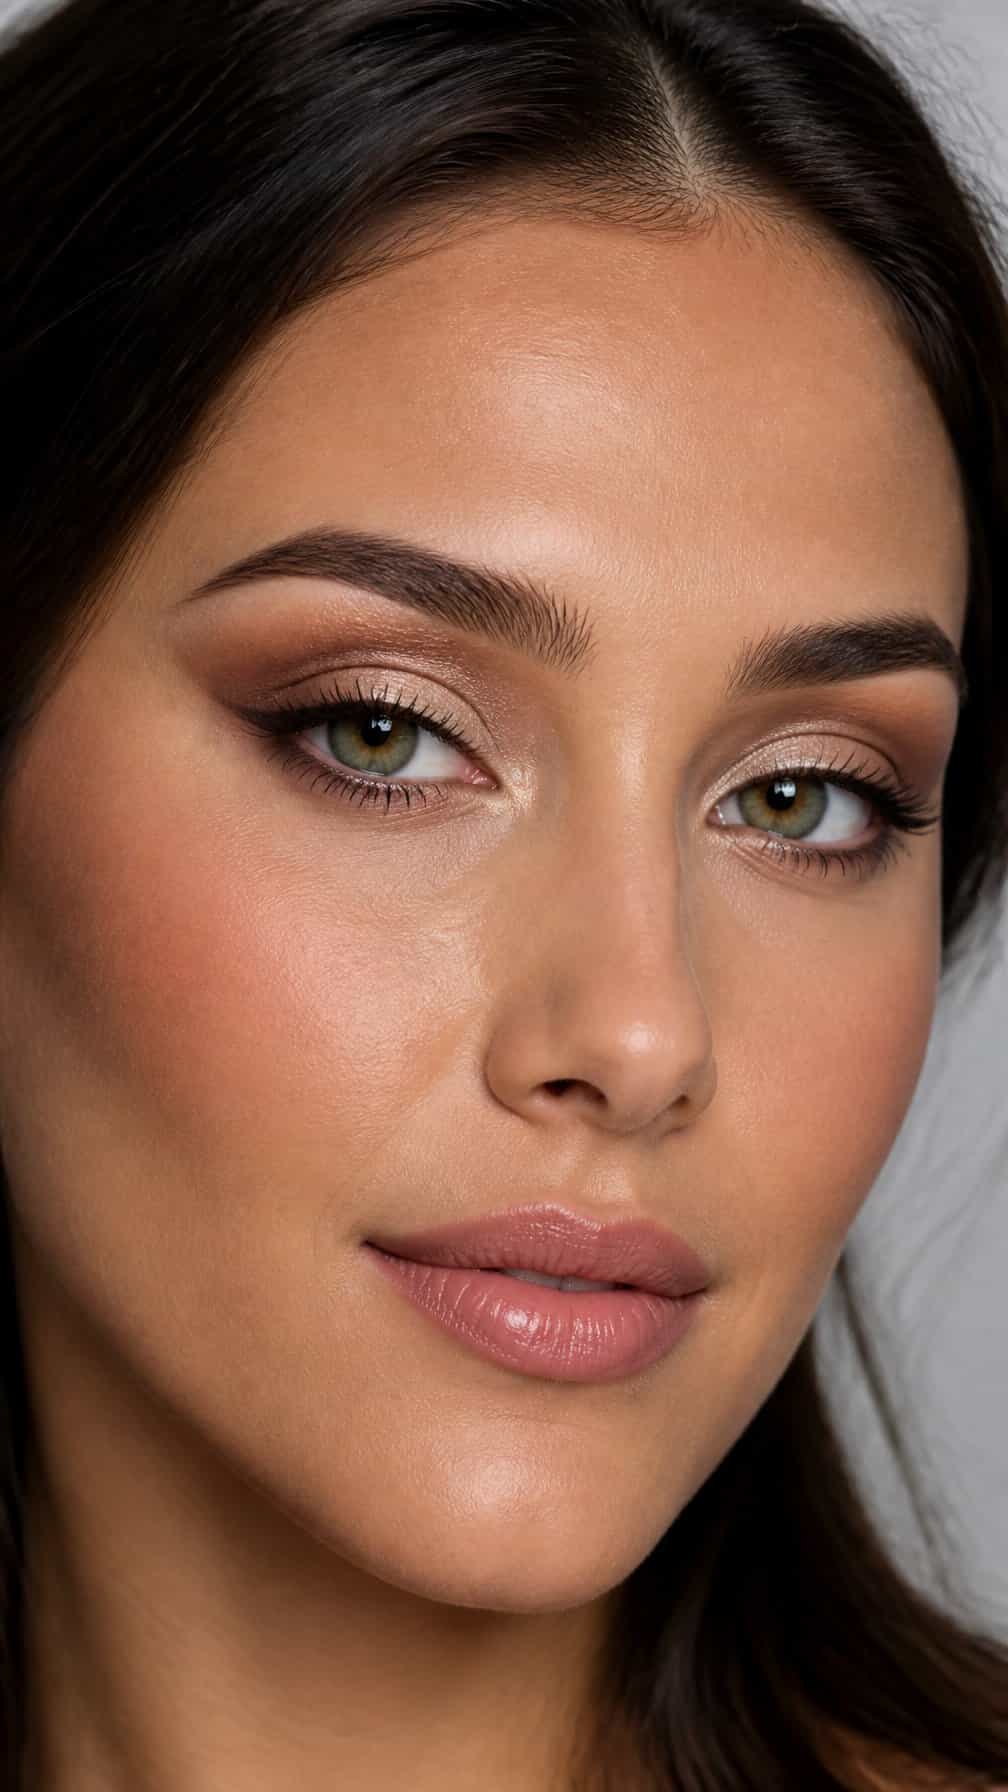
This look has the contrast and definition of a classic cut-crease, without the harshness of sharply defined lines.
Start by applying a matte shade to the natural crease, making sure to leave a clear space that remains visible when your eyes are open. This creates the space needed for the floating crease effect of this look.
Keep the lid light to highlight the contrast, while blending the edges of the transition shade. To add more dimension, apply a line of darker shade along the edge of the floating crease and a soft, shimmery shade across the mobile lid.
Finish the look with a soft line of dark shade or liner and a small wing, curled lashes, and a light coat of mascara.
9) Halo Eye Makeup for Hooded Eyes
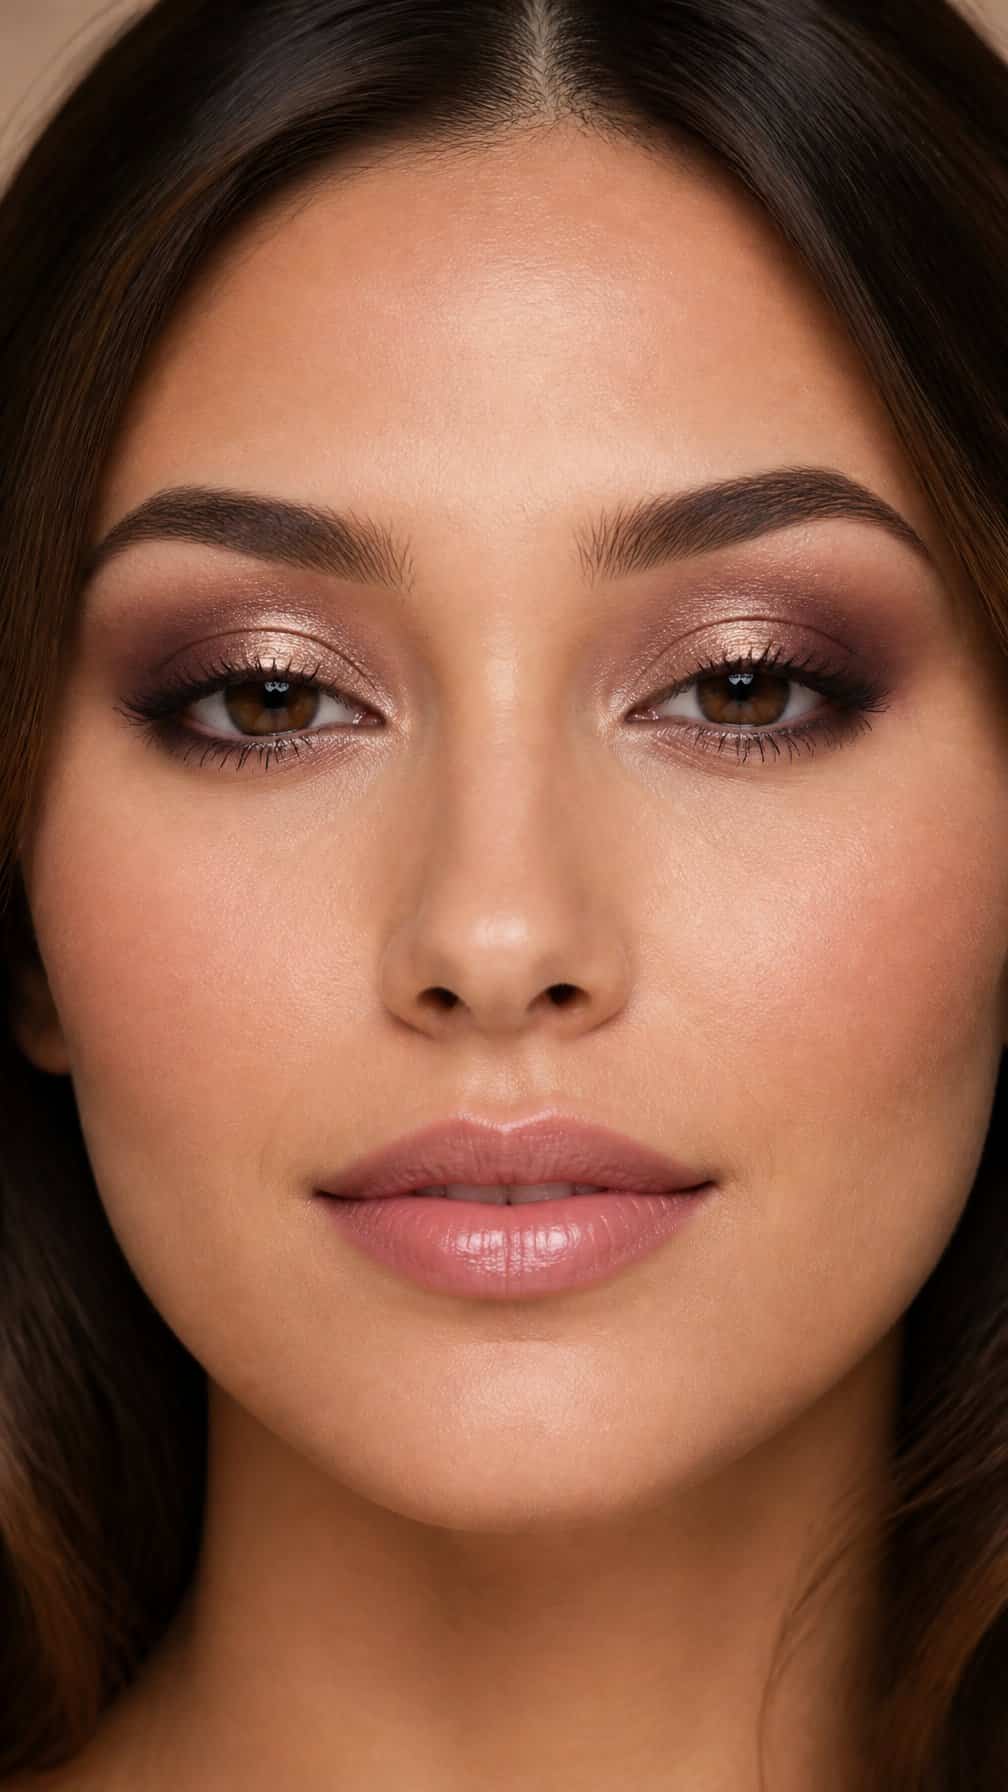
This look seems to focus on dimensionality and contrast between matte and shimmer. It's a look I'd like to try; it seems perfect for the end-of-year parties.
Apply a medium matte shade all over the natural crease, accentuating the inner and outer corners while leaving the center of the lid bare to create the halo effect.
Apply a shimmery or satin shade in light dabs to the center of the lid and slightly above the crease, so it doesn't disappear when you open your eyes. Be sure to softly blend the edges to create a smoky effect.
Apply a thin line of dark shade along the upper lash line to add definition without overloading the lid.
On the lower lashes, apply a line of medium-dark shade to the outer half and a thin line of satin shade to the inner half to connect and balance the entire look. Finish with curled lashes and mascara.
10) Smudged Lash-Line Smoky Eye
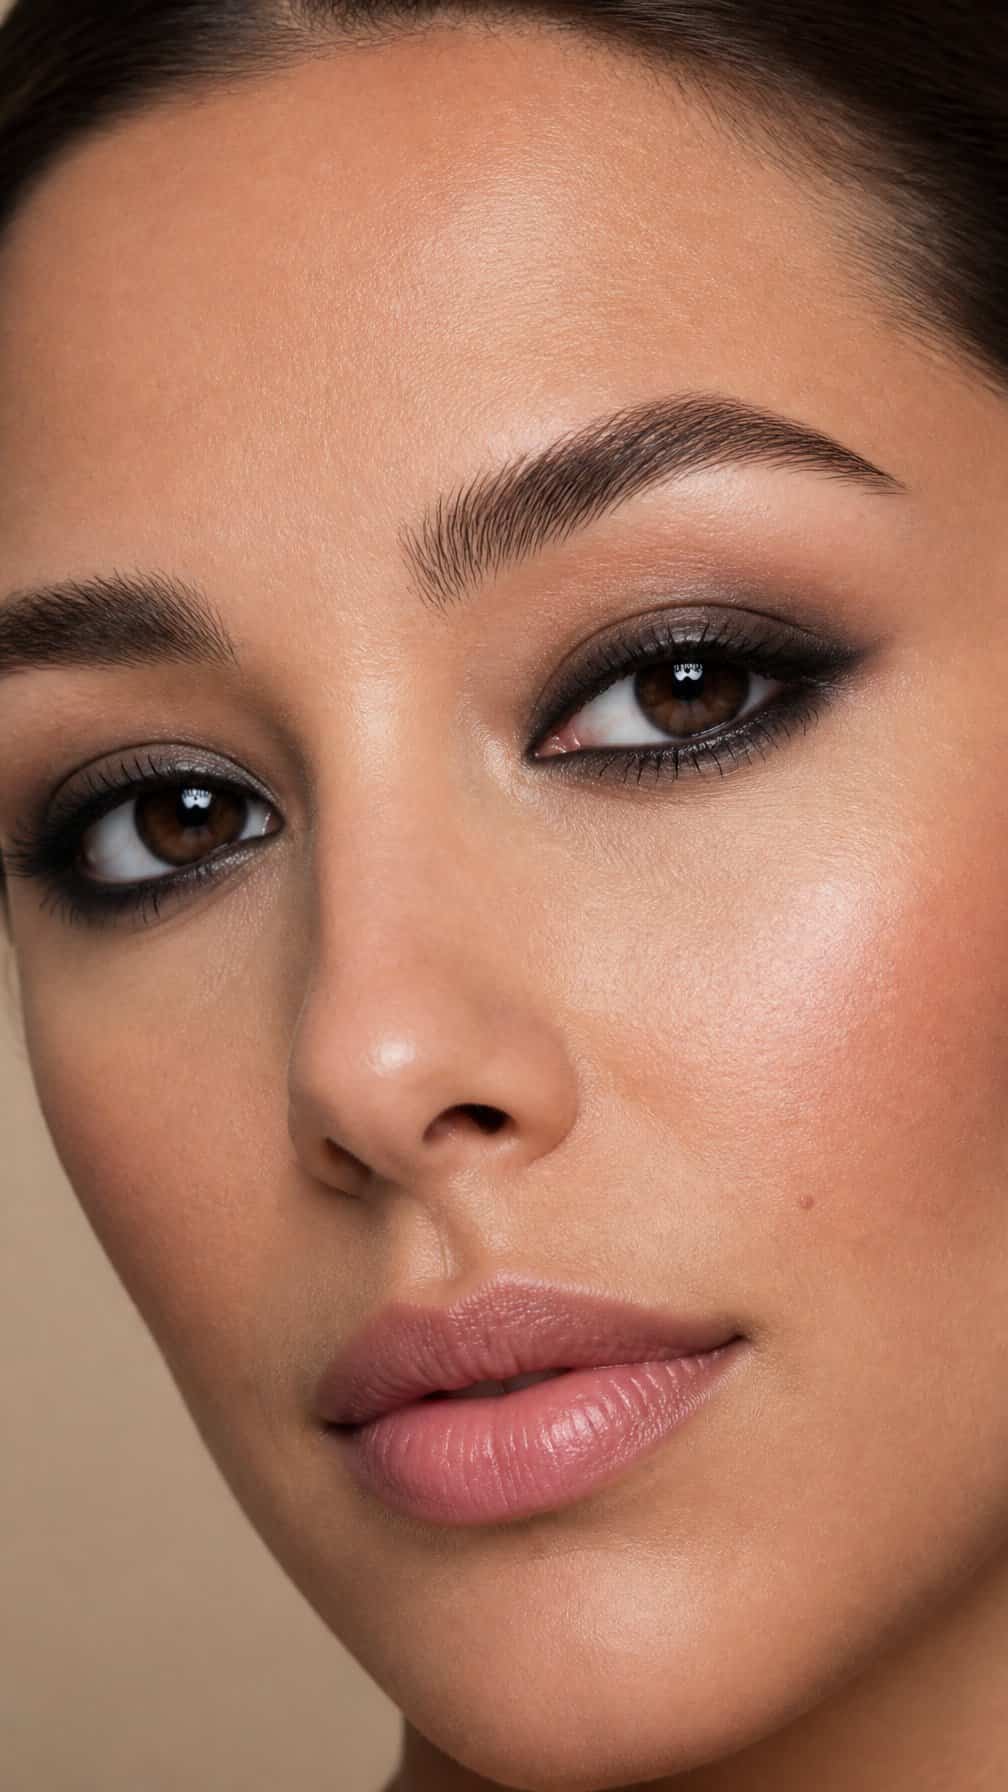
This look emphasizes the definition and intensity of the eyes. It's a smoky eye achieved by blending the liner along the lash lines.
To achieve this look, apply a dark matte shadow along the entire upper and lower lash lines, then softly blend the edges until you have a smoky effect without covering the entire lid.
When you're done, apply mascara, focusing on the roots, and if you'd like, you can add a thin line of liner for extra intensity.
11) Reverse Cat-Eye Hooded Eye Makeup
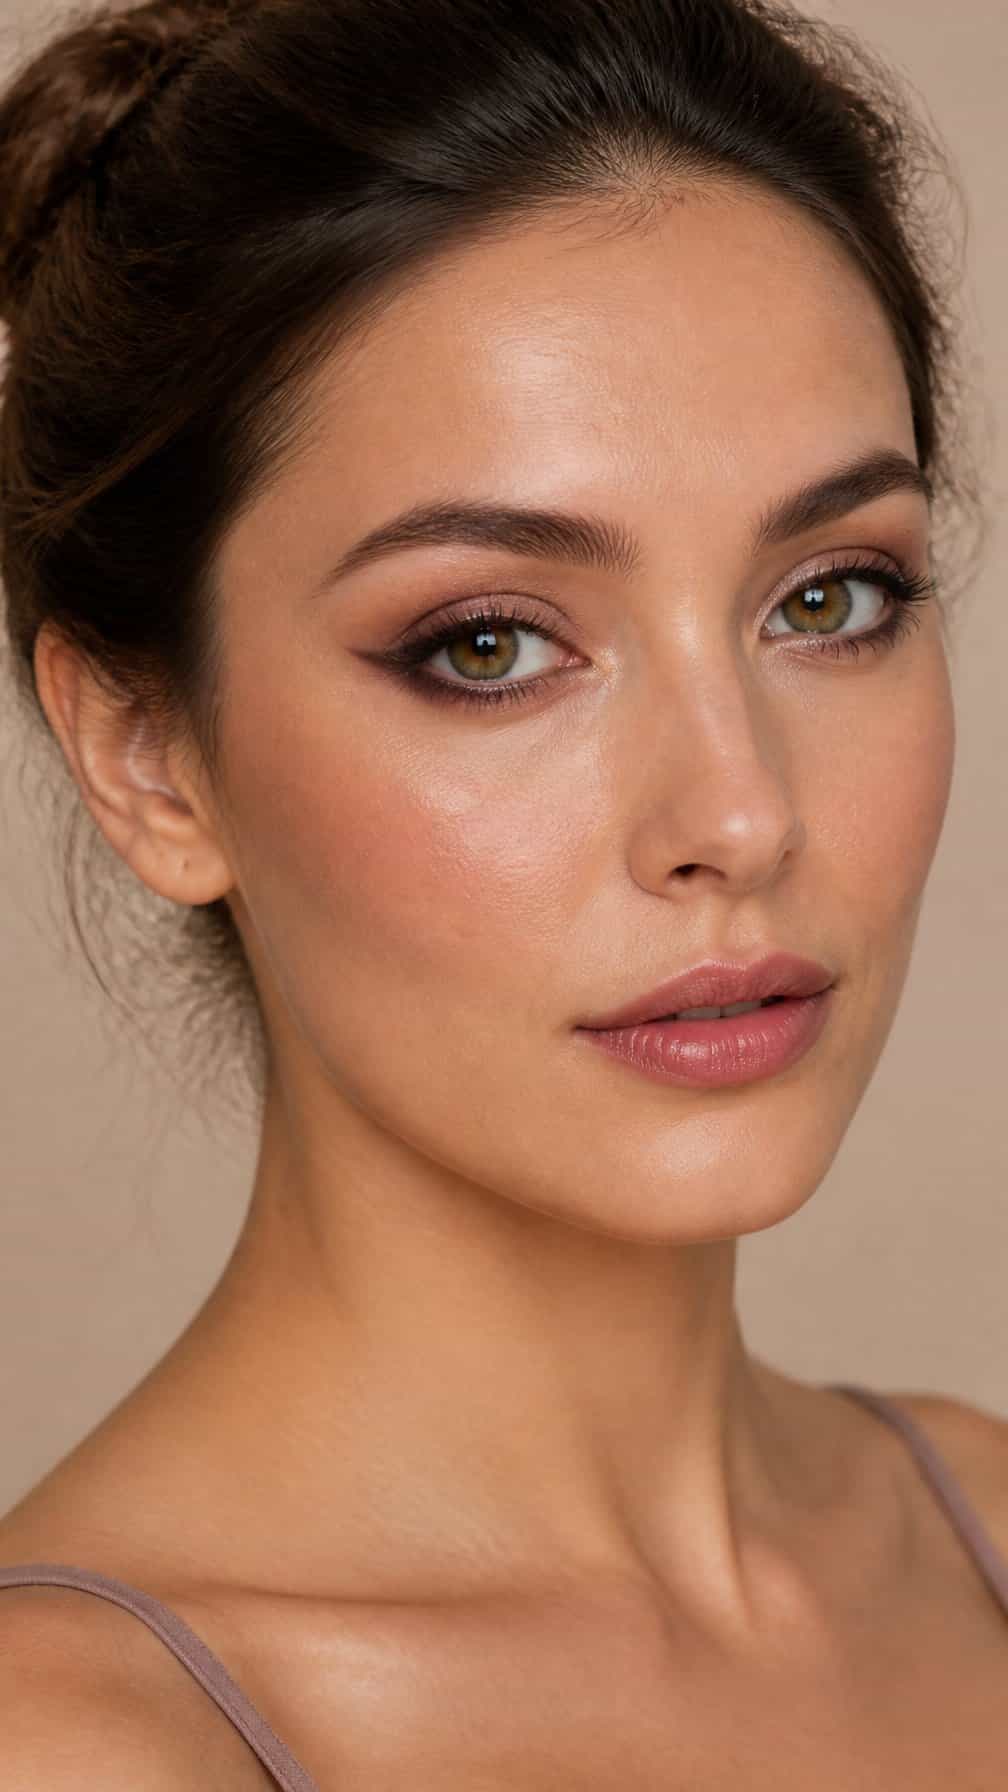
This seems like an everyday look I could try. I like how it softly accentuates and lifts the eyes.
Start by lining the lower lash line with a dark shade, beginning at the center and working toward the outer corner. On the upper lash line, draw a thinner line with a lighter-colored shade, taking care not to overload the lid.
Blend the liner upward at the outer corner, creating a defined wing that avoids the hooded crease. Connect the end of the upper liner to the wing to complete the line.
Gently blend the edges to soften the look, apply a light matte shade along the natural crease to balance the dark lower liner, and add mascara, especially to the outer lashes, to complete this look.
12) Monochromatic Rose Hooded Eye Look
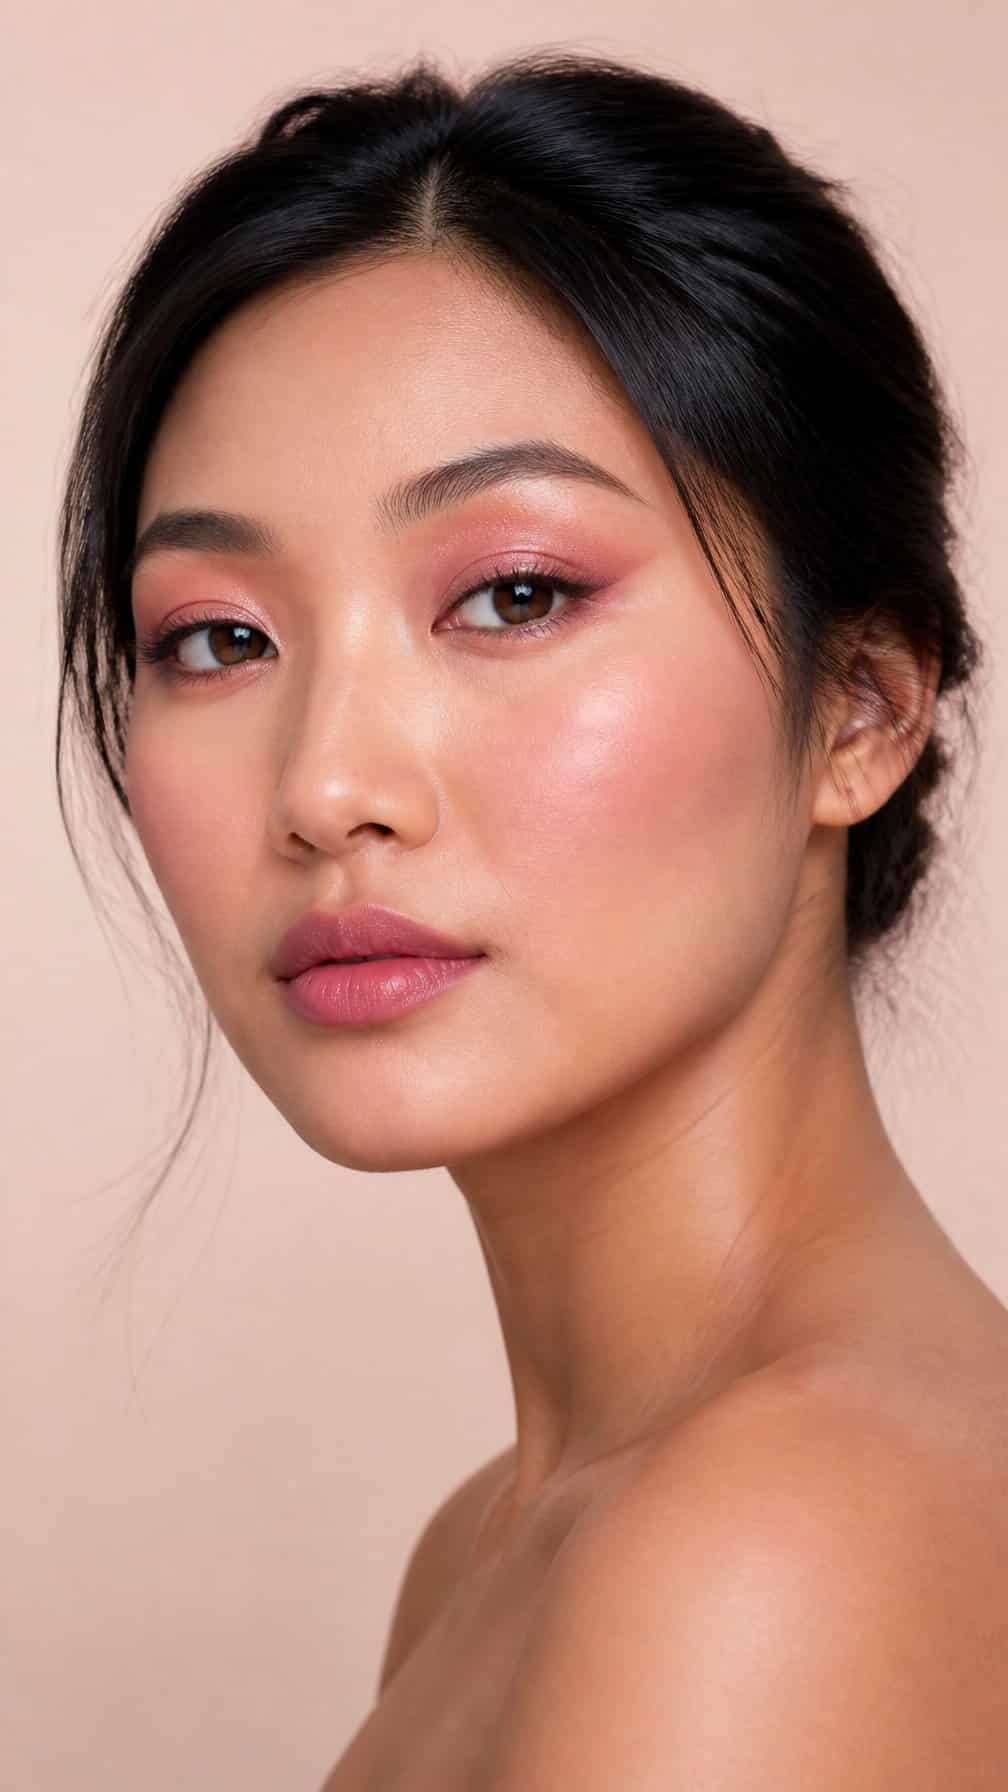
This monochromatic look seems easy to achieve. It gently accentuates the eyes and could work for everyday wear. It's a look I'd definitely try.
First, apply a dark pink shade above the natural crease. Then add a satin pink shade to the mobile lid and a light pink shade to the inner corner. Finish with a soft matte shade under the brow to add dimension.
Complete the look with a thin brown liner from the lower lash line to a subtle, upward-sweeping wing. Curl your lashes and apply mascara, focusing especially on the outer lashes.
13) Bronze Foiled Hooded Eye Makeup
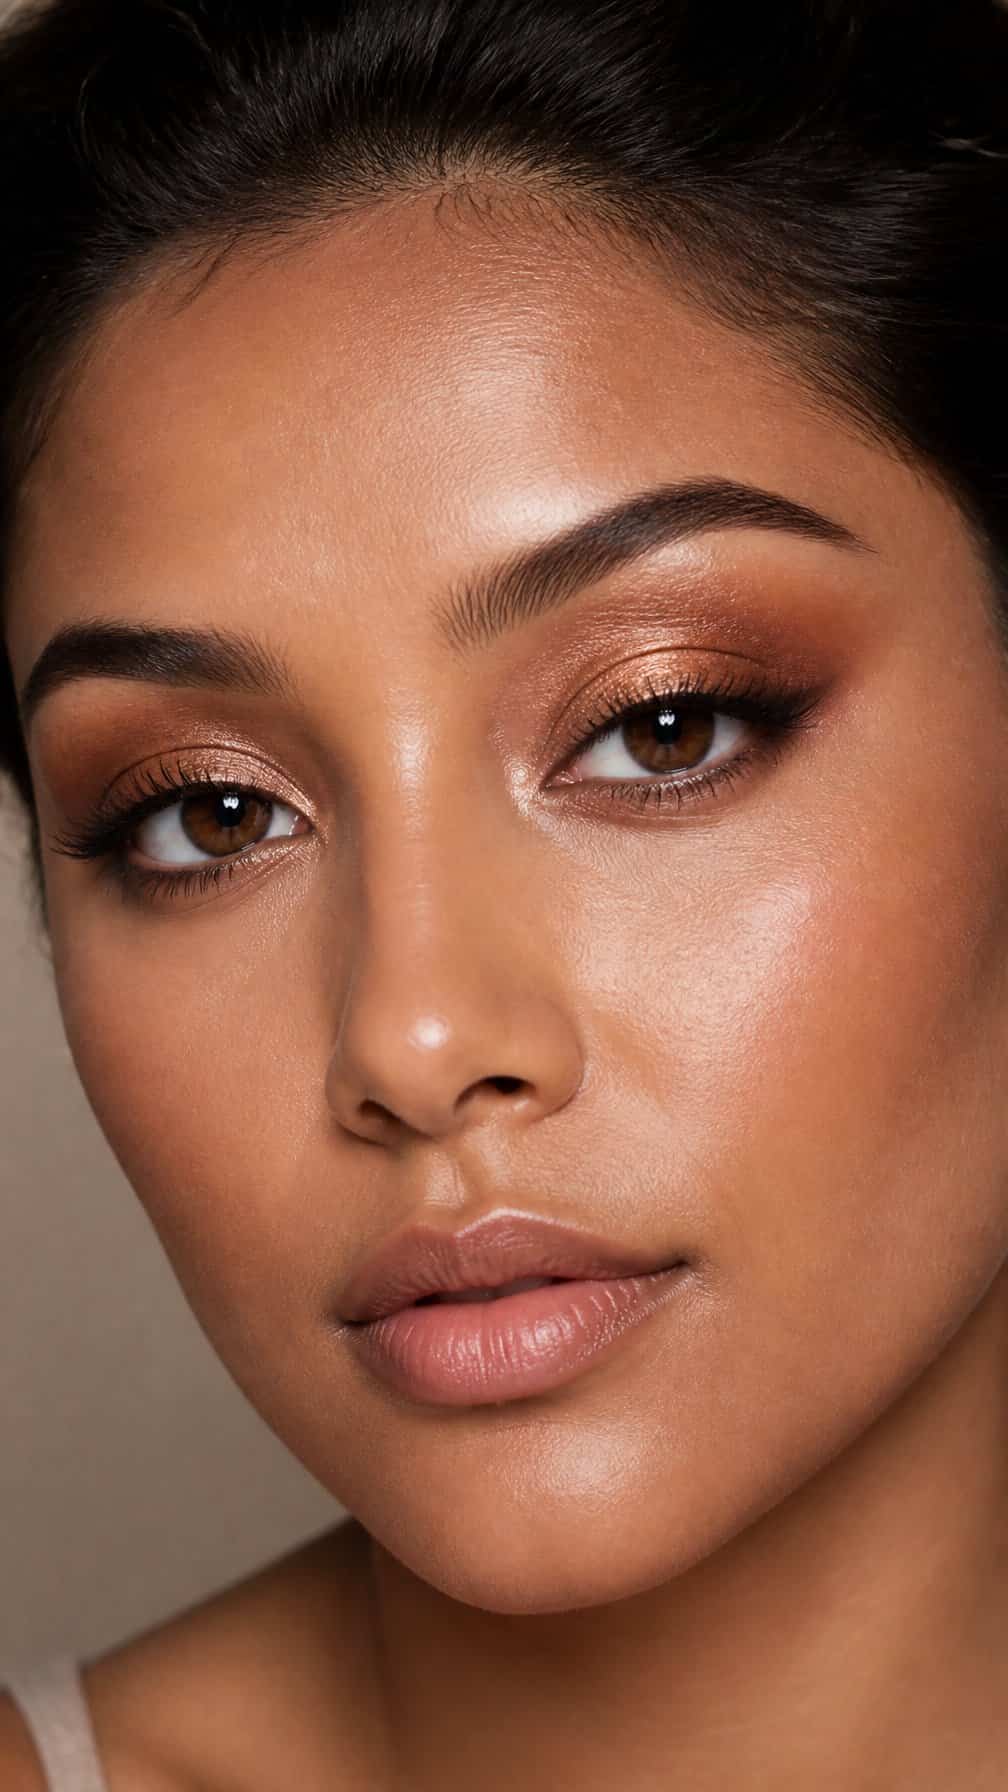
This bronze-toned look seems ideal for people with medium to dark skin. If you're going for this look but have very fair skin, you should opt for softer metallic shades.
Apply a shimmery bronze shade to the visible part of the eyelid, and if you'd like, blend it up past the natural crease, concentrating the most shimmer near the upper lash line.
Apply a dark brown shade to the outer corner and softly blend it with the shimmery shade without dulling it to add depth to your eyes.
14) Taupe Everyday Hooded Eye Look
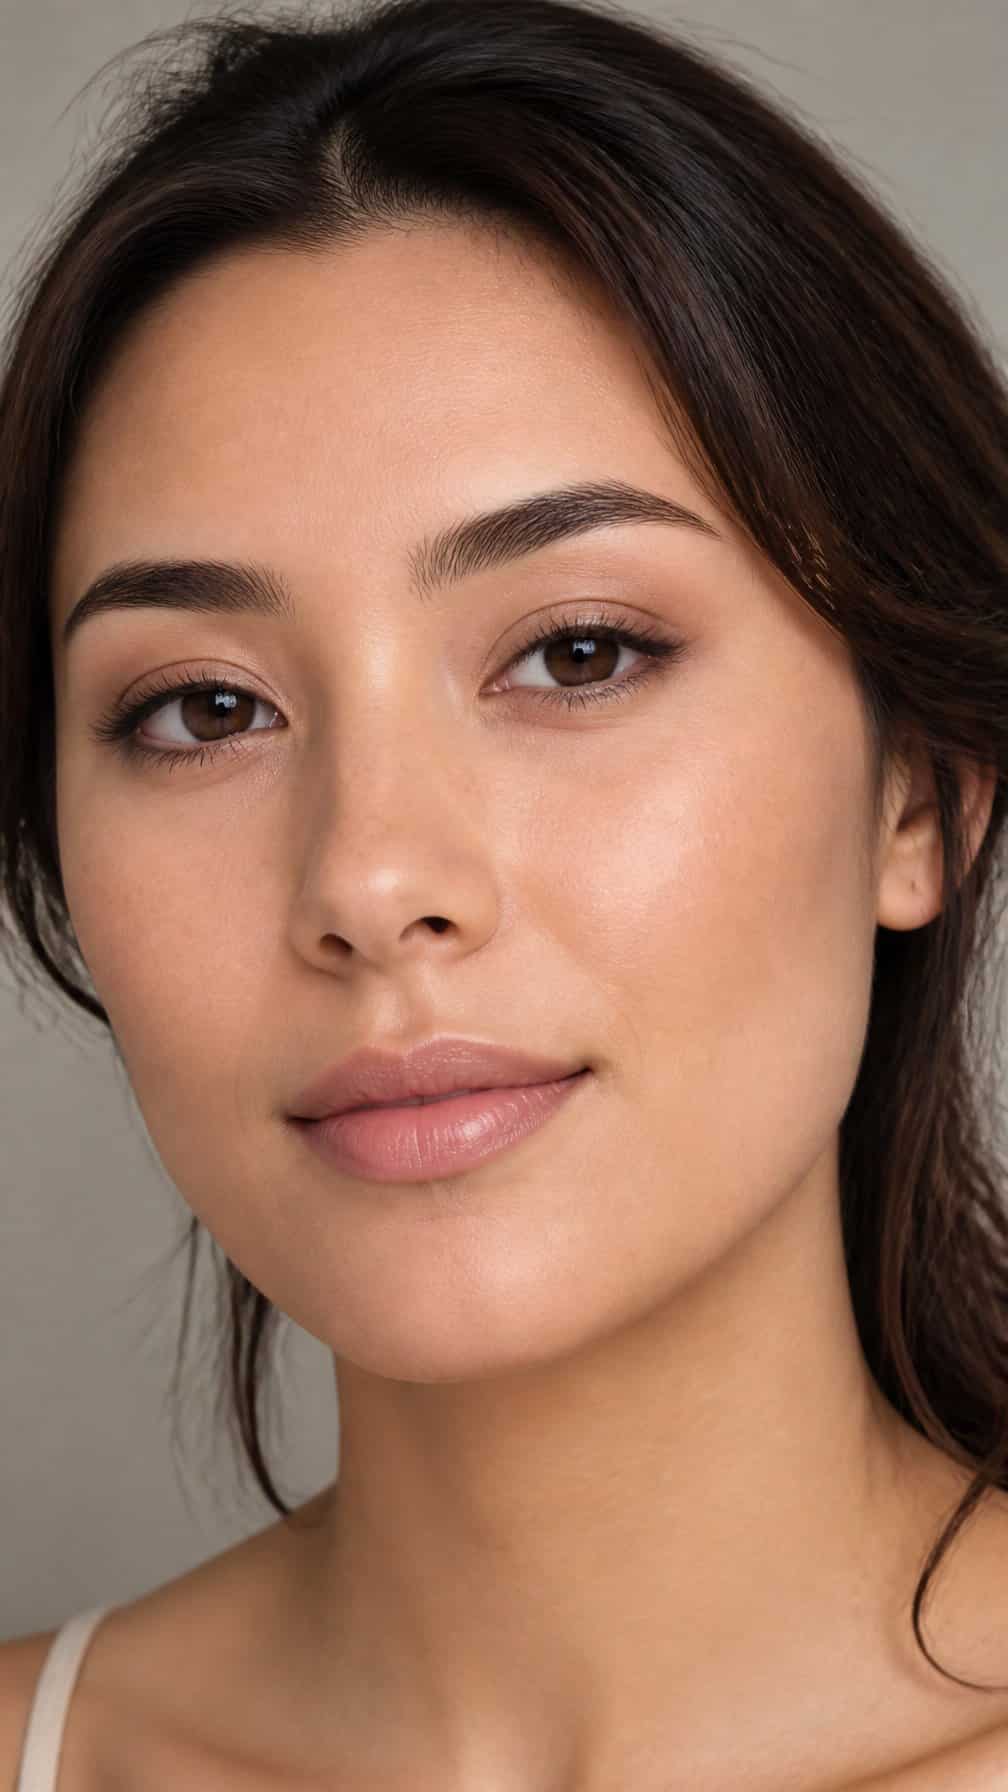
This is the look I'd try first if I were just starting out with hooded eye makeup.
Apply a matte taupe shade above the natural crease so it remains visible. Accent the shade at the outer corner while blending the edges of the color along the crease.
Add a light matte or satin shade to the center of the lid and near the inner corner to create subtle dimension. Then apply taupe shade to the lower lash line and blend it toward the outer corner. Using the brown shade, draw a thin line along the upper lash line and blend the end to add definition to the eyes.
15) Colorful Blue Hooded Eye Makeup
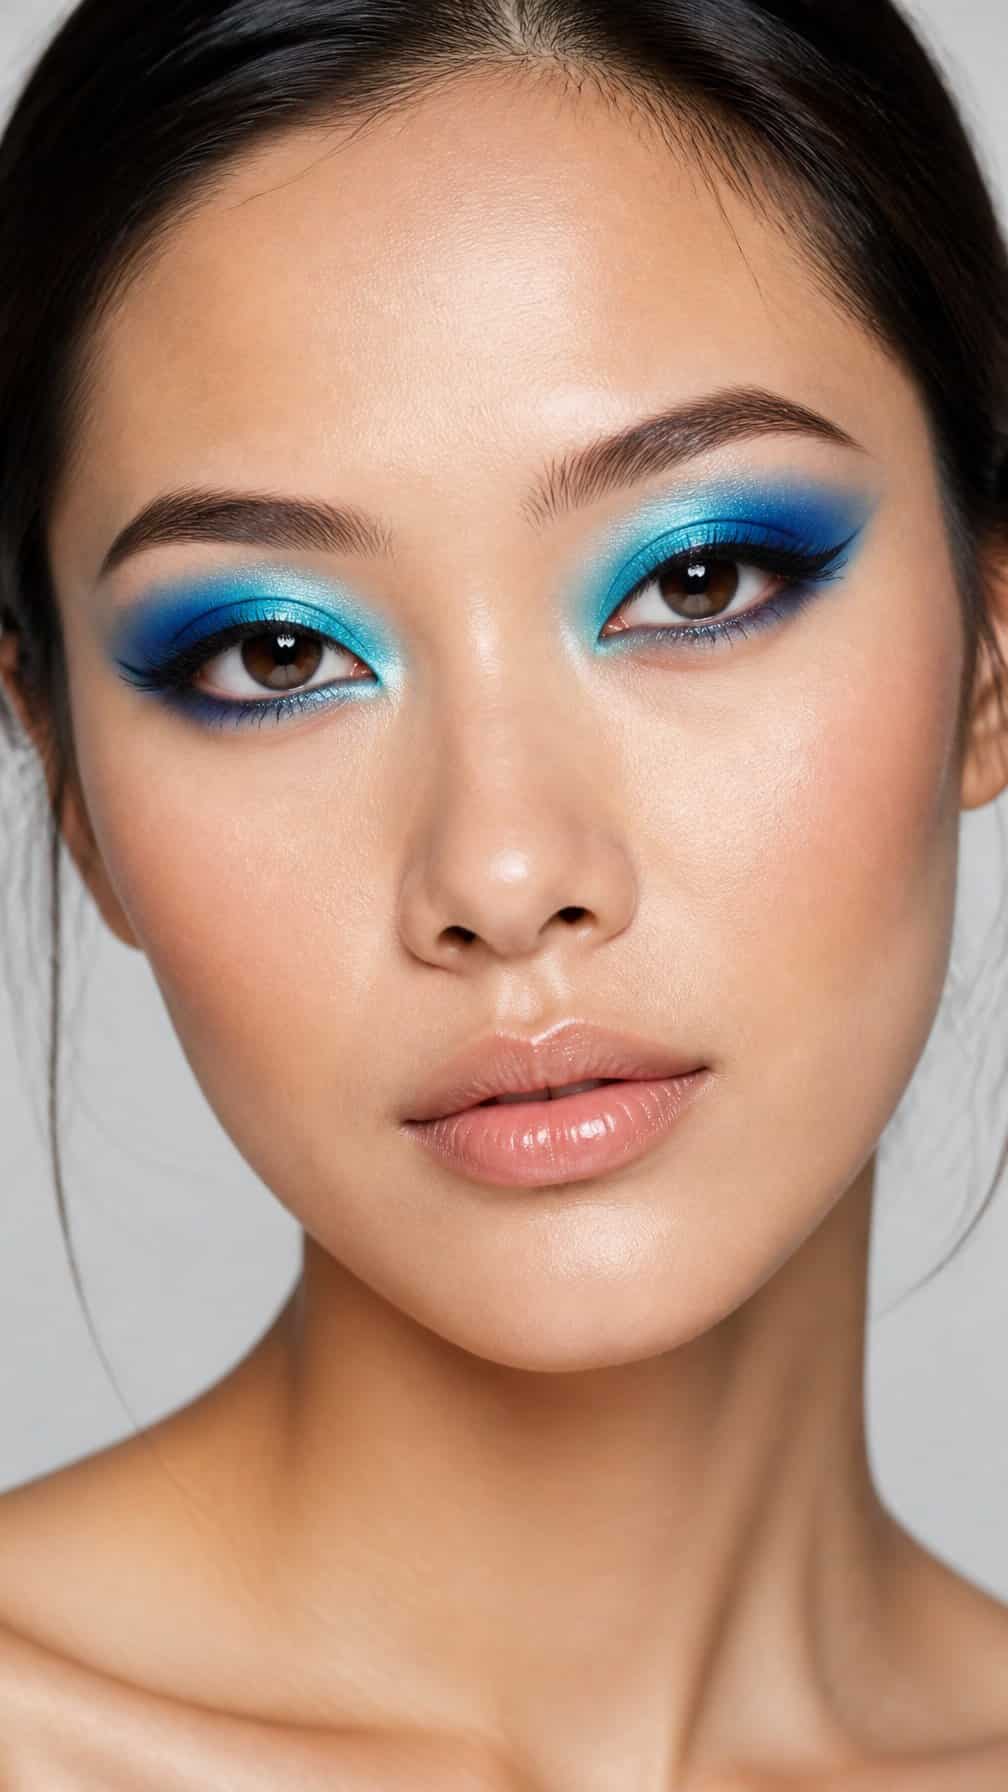
This makeup reminds me of the look worn by Agnetha Faltskog, one of the singers of ABBA.
Apply a vibrant blue shade above the natural crease, blending the edges near the brow. Accent the shade near the upper lash line at the outer corner to add dimension.
Apply a shimmery shade to the center of the lid and a little to the inner corner, then blend it with the vibrant blue shade to create a smooth transition.
16) Purple Smoky Hooded Eye Look
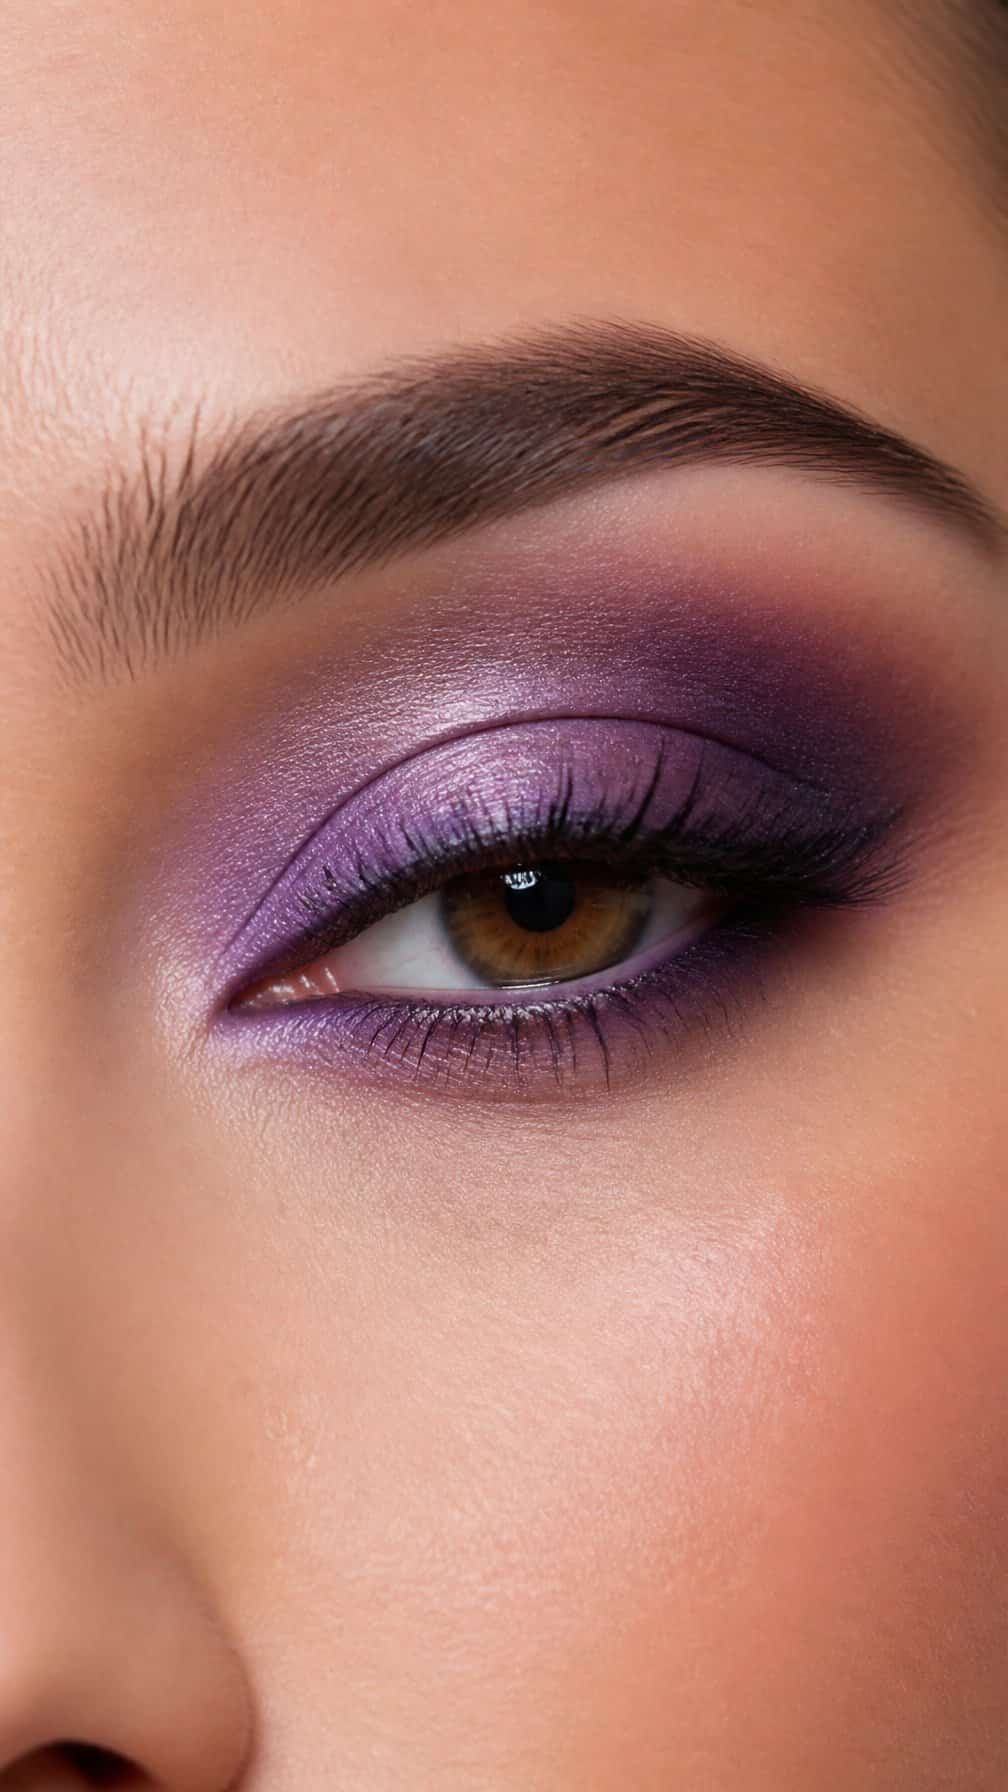
This look focuses on bold color, dimensionality, and the contrast between shimmer and matte.
Apply a matte plum shade above the natural crease so the color remains visible. Blend a dark violet shade along the upper lash line and outer corner to add depth.
Apply a satin lavender shade to the center of the lid to add shimmer and dimension, as well as a mauve shade along the lower lash line to tie the whole look together and balance it.
17) White Eyeliner Hooded Eye Makeup
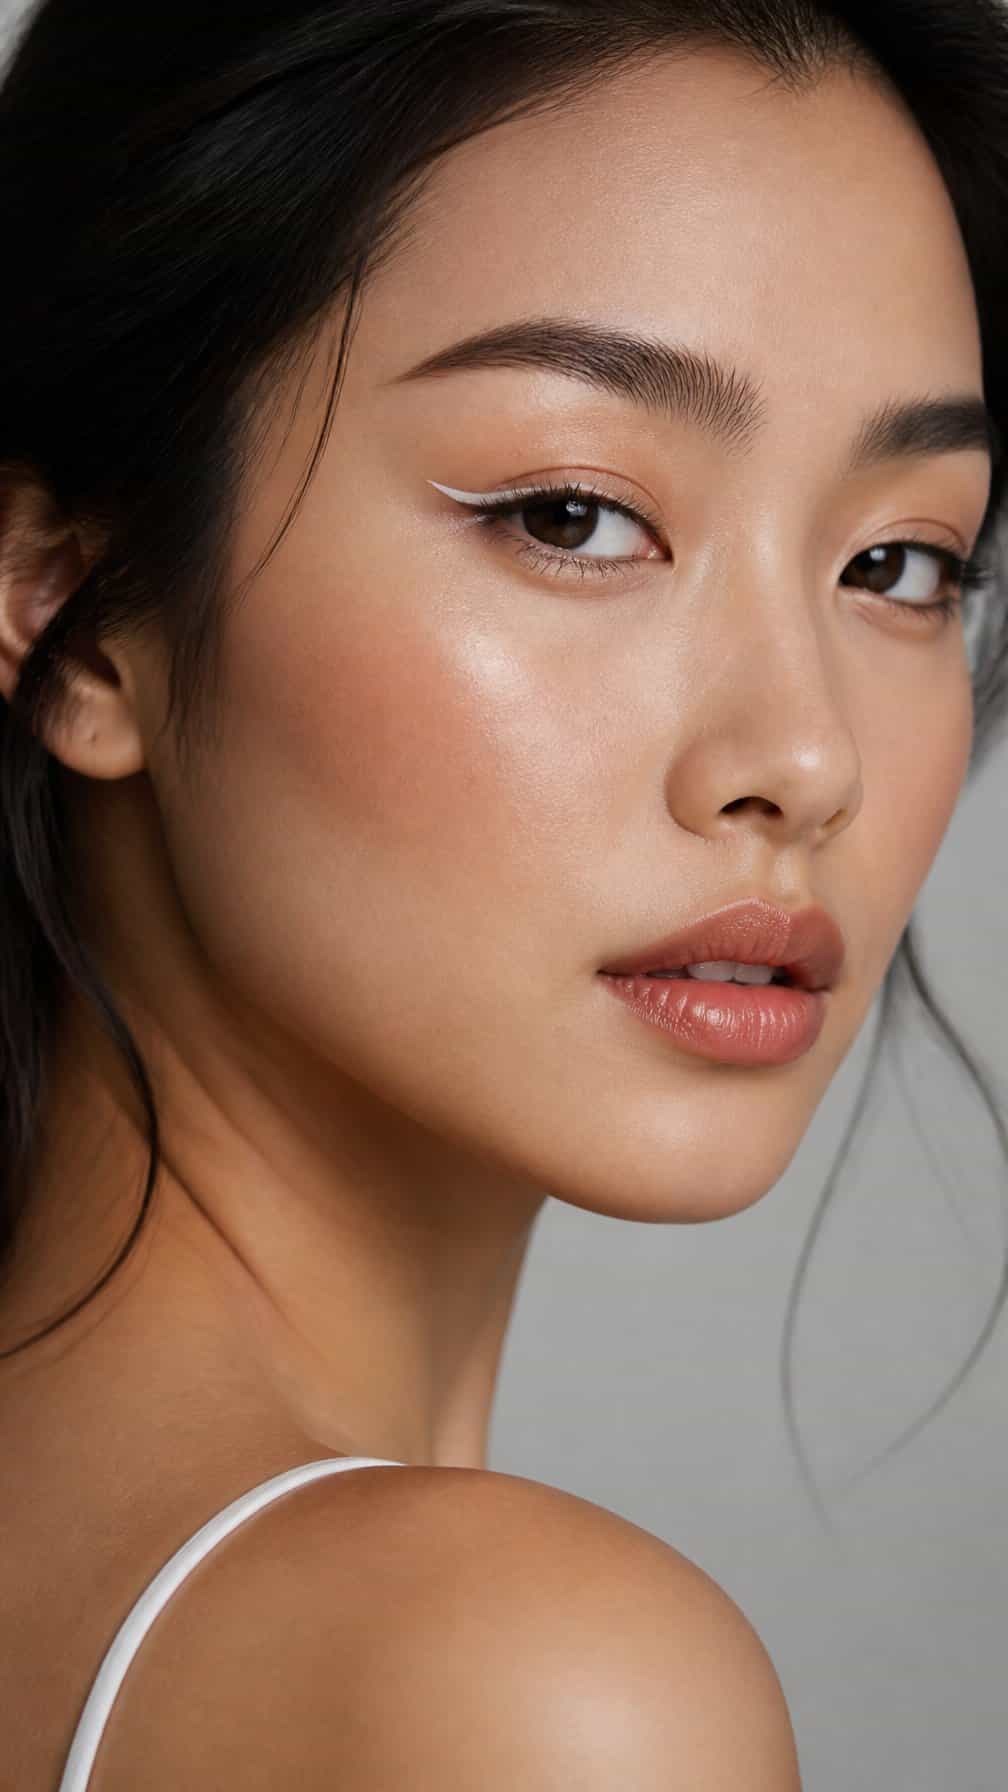
This look focuses on contrast and subtle definition. It's so simple yet elegant; you should give it a try.
Apply a thin line of white liner along your upper lash line, finishing with a small wing at the outer corner.
If you want more dimension, apply a soft brown shade to the crease, a little shimmer to the inner corner, and dark mascara focused on the outer lashes.
18) Negative-Space Liner Above the Crease
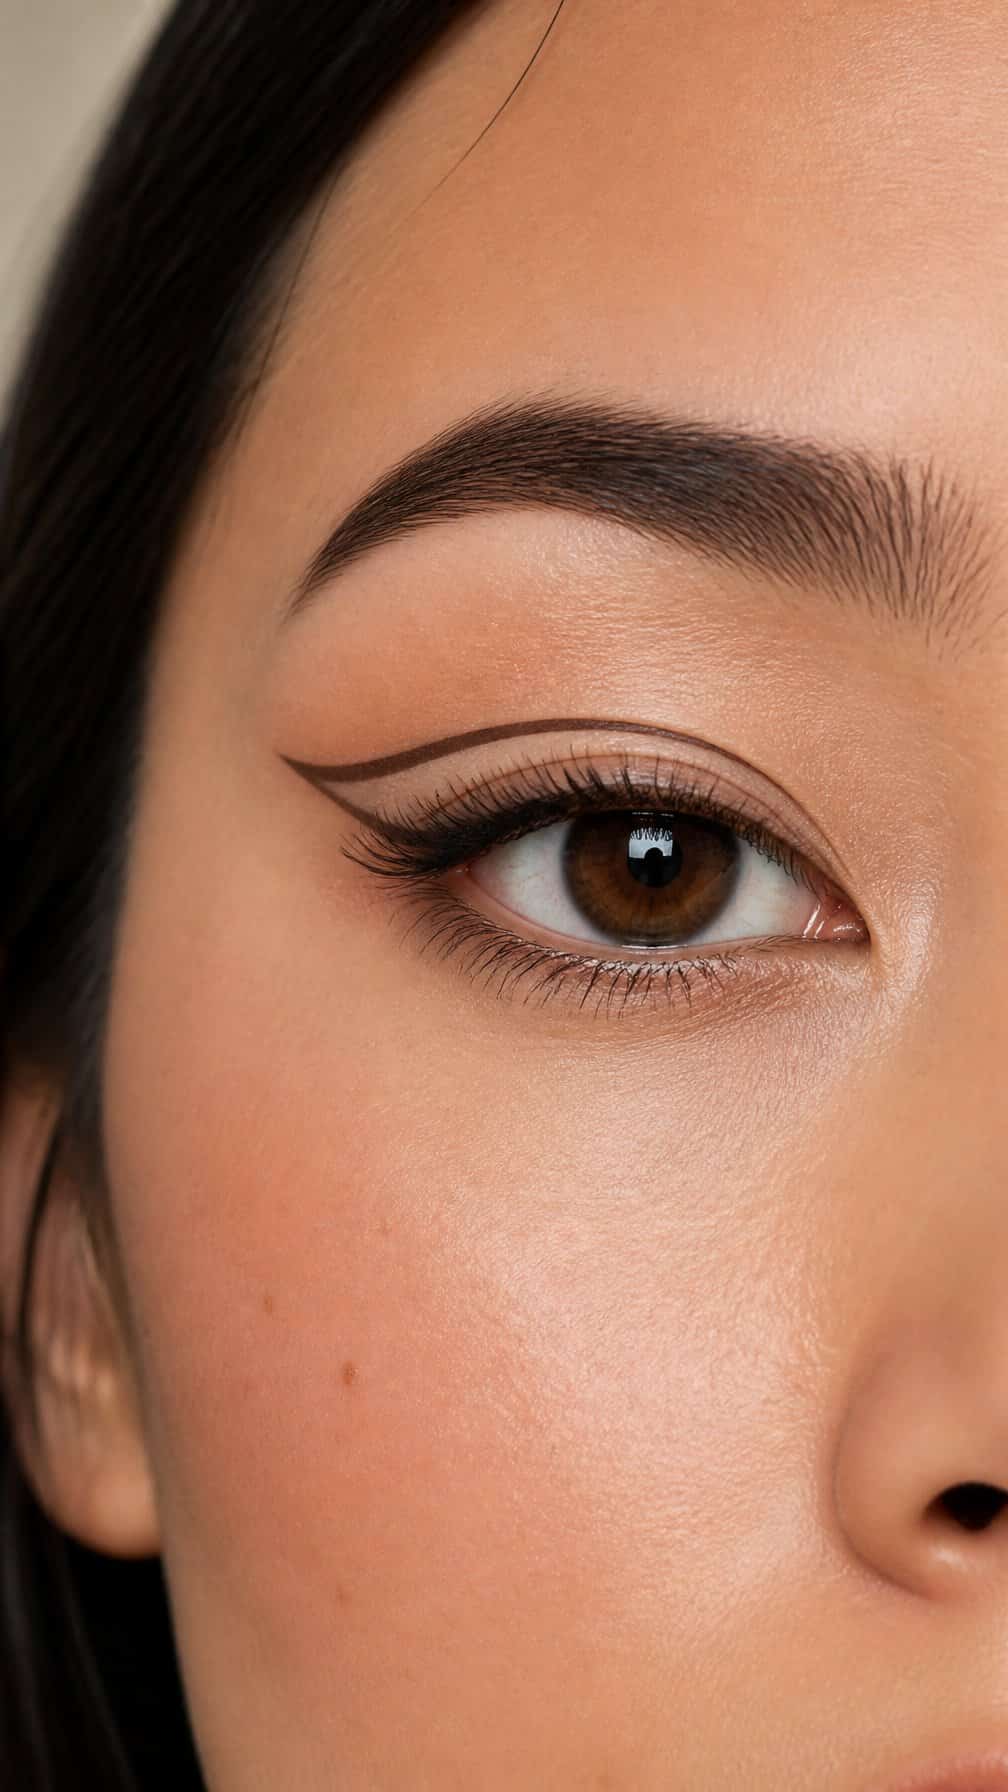
This subtle look emphasizes the graphic lines and the definition of the negative space.
Draw a thin line starting just before the inner corner and extending above the natural crease, leaving the lash line untouched.
Draw an outer wing starting from the outer corner and connect it with a curve to the end of the graphic shape.
19) Tightlined Hooded Eye Makeup with False Lashes
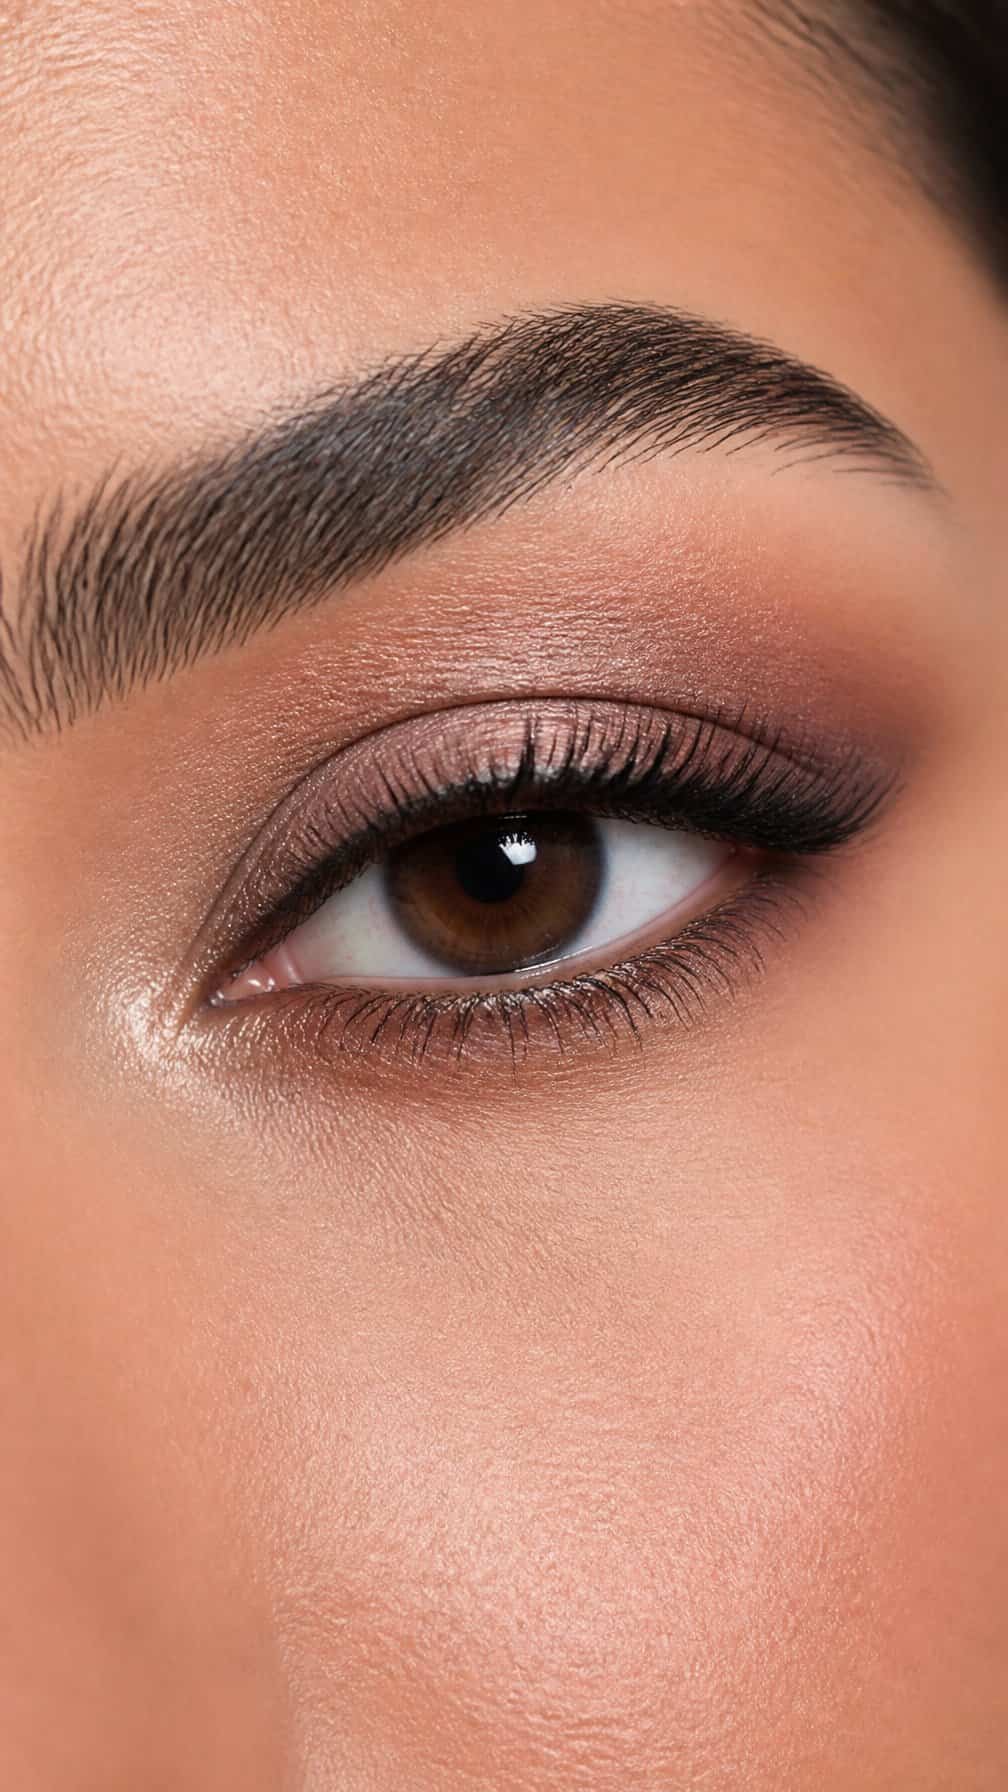
To achieve this look, apply dark liner to your upper lash line, then softly smudge the line at the outer corner for a soft finish.
Prepare the false lashes of your choice to place them along your natural lash line. Curl your natural lashes, apply a thin coat of mascara, and when the lash glue is tacky, place the false lashes in position.
You can apply a little matte shadow along the lash line to conceal the strip of false lashes.
20) Soft Glam Hooded Eye with Cluster Lashes
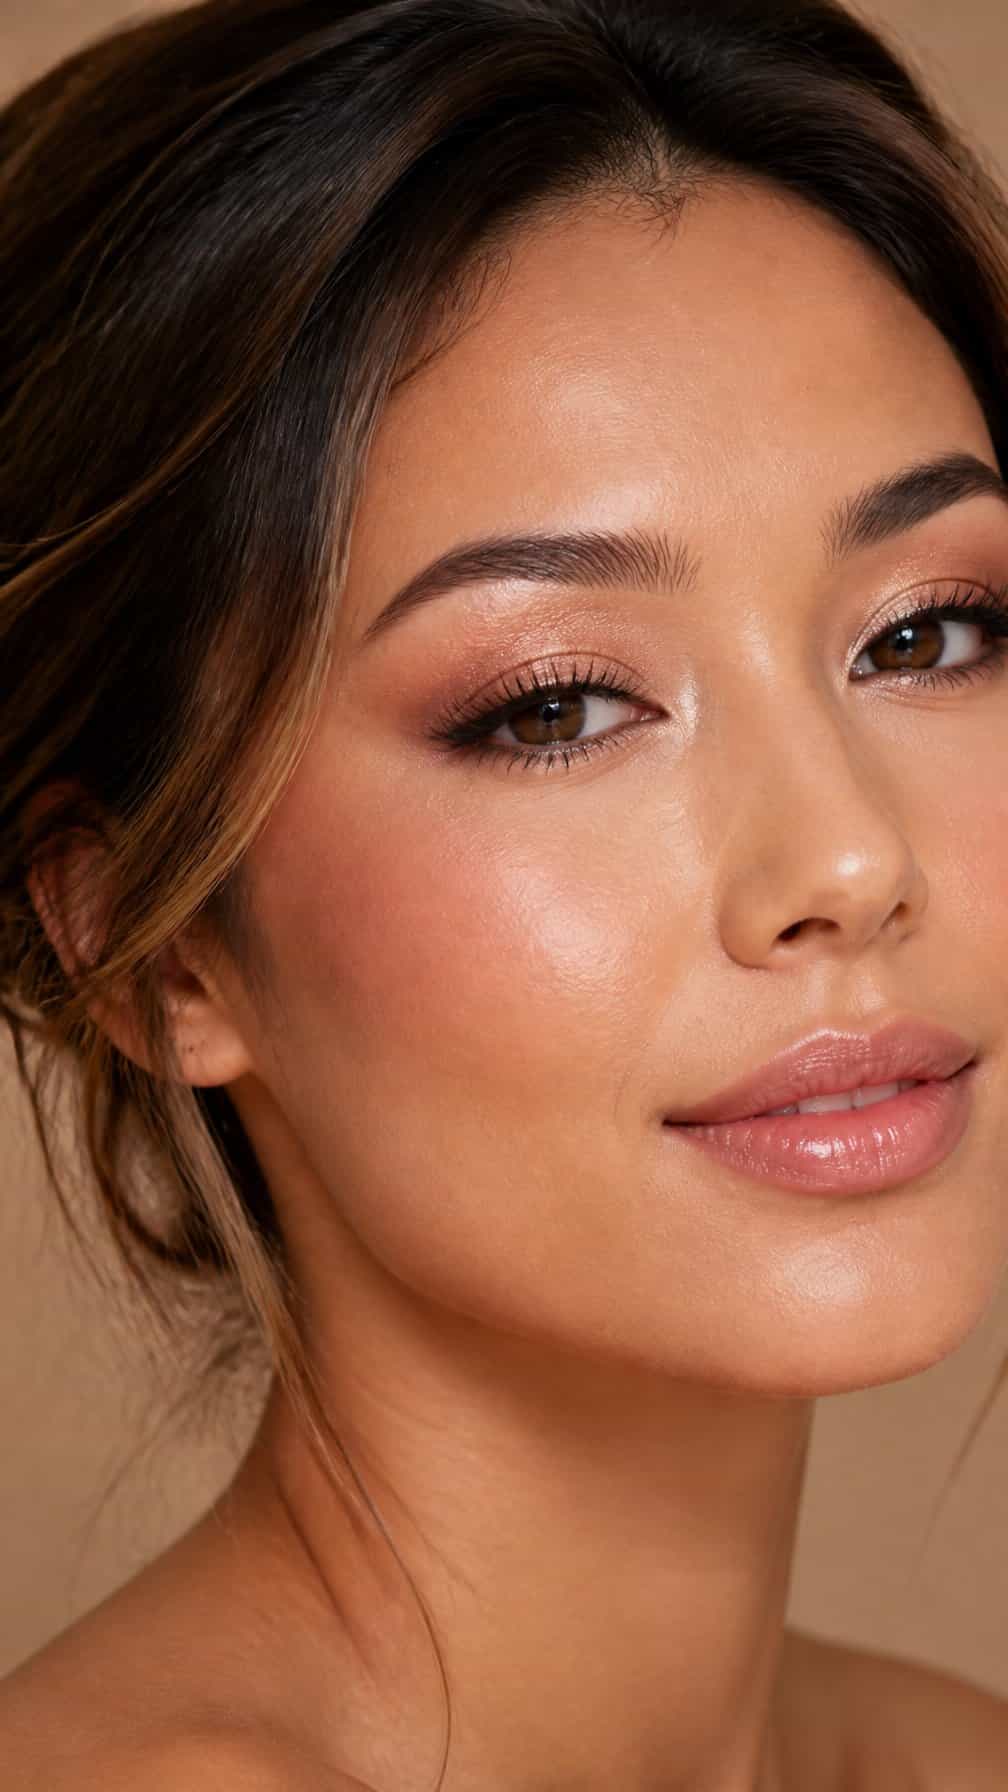
To achieve this look, apply light and medium-toned matte shades above the natural crease so it remains visible, blending the edges to soften the shape.
Apply a shimmery shade to the center of the lid and the inner corner, then apply a thin brown liner to the upper lash line.
Apply small clusters of false lashes evenly from the center toward the outer corner. Finish the look with mascara on your natural lashes and a little on the false ones, keeping them blended together.


