Busy mornings do not have to limit your hairstyle choices. You can create polished, playful, or relaxed looks in minutes with simple techniques that suit different hair lengths, textures, and occasions.
Save for later
Want to come back to this story? Save it with your email so it is easy to find again.
You can refresh your routine with 26 cute hairstyles that take under ten minutes, plus practical tips to help each style stay in place. I’ll guide you through quick braids, ponytails, buns, twists, and half-up looks while highlighting the tools and finishing steps that make fast styling easier.
Table of Contents
- 1 1) Messy Half-Up Knot
- 2 2) Classic French Braid
- 3 3) Low Twisted Ponytail
- 4 4) Double Dutch Braids
- 5 5) Sleek High Ponytail
- 6 6) Half-Up Bubble Ponytail
- 7 7) Textured Low Bun
- 8 8) Braided Crown
- 9 9) Side-Swept Fishtail Braid
- 10 10) Claw-Clip French Twist
- 11 11) Space Buns
- 12 12) Rope-Twist Ponytail
- 13 13) Half-Up Top Knot
- 14 14) Low Bubble Ponytail
- 15 15) Waterfall Braid
- 16 16) Scarf-Wrapped Ponytail
- 17 17) Braided Low Ponytail
- 18 18) Slicked-Back Ballet Bun
- 19 19) Mini Front Braids
- 20 20) Twisted Half-Updo
- 21 21) High Bubble Ponytail
- 22 22) Dutch Crown Braid
- 23 23) Loose Side Braid
- 24 24) Half-Up Hair Bow
- 25 25) Wrapped Low Ponytail
- 26 26) Three-Strand Headband Braid
- 27 Fast Styling Essentials
- 28 Prep Steps That Save Time
- 29 Tools And Products To Keep Handy
- 30 Making Quick Styles Last
- 31 Securing Hair Without Damage
- 32 Refreshing A Style Between Washes
1) Messy Half-Up Knot
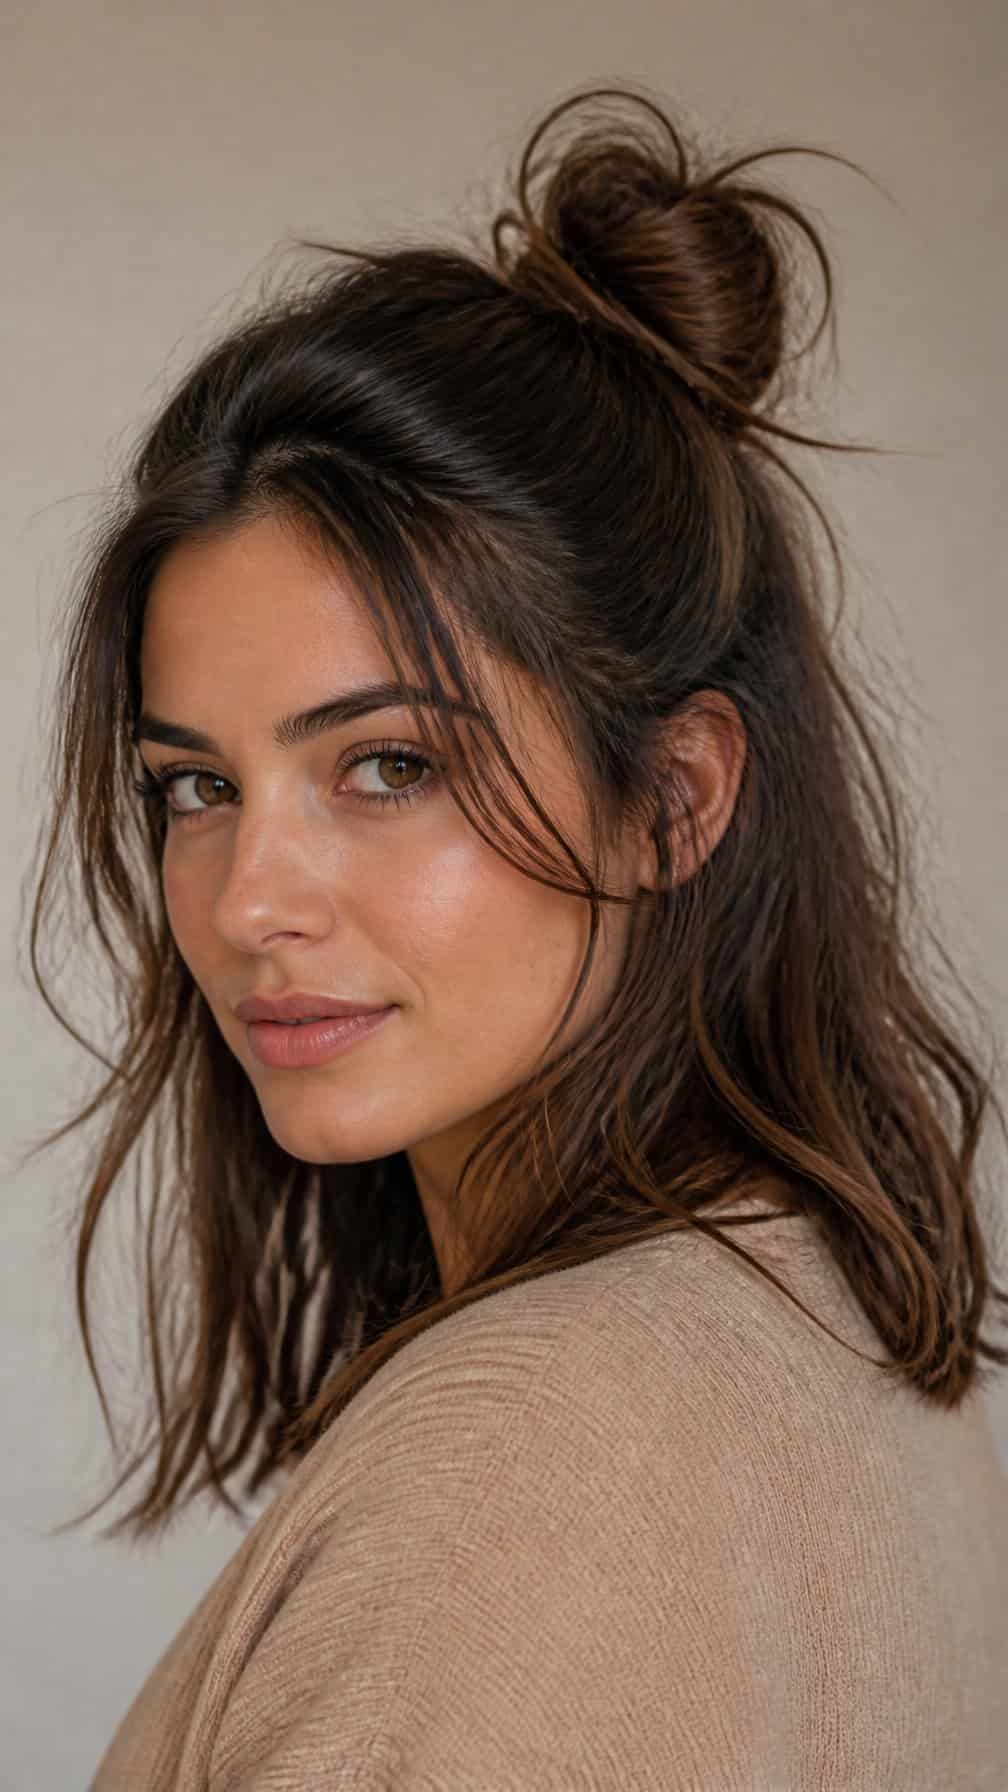
I gather the top half of my hair at the crown, leaving a few face-framing pieces loose. I twist the section into a relaxed knot and secure it with a small elastic or two bobby pins.
For texture, I work with second-day hair or add a light mist of dry shampoo before styling. I gently pull the knot outward so it looks fuller, then smooth flyaways with my fingertips. The finished style keeps my hair away from my face without looking too polished.
2) Classic French Braid
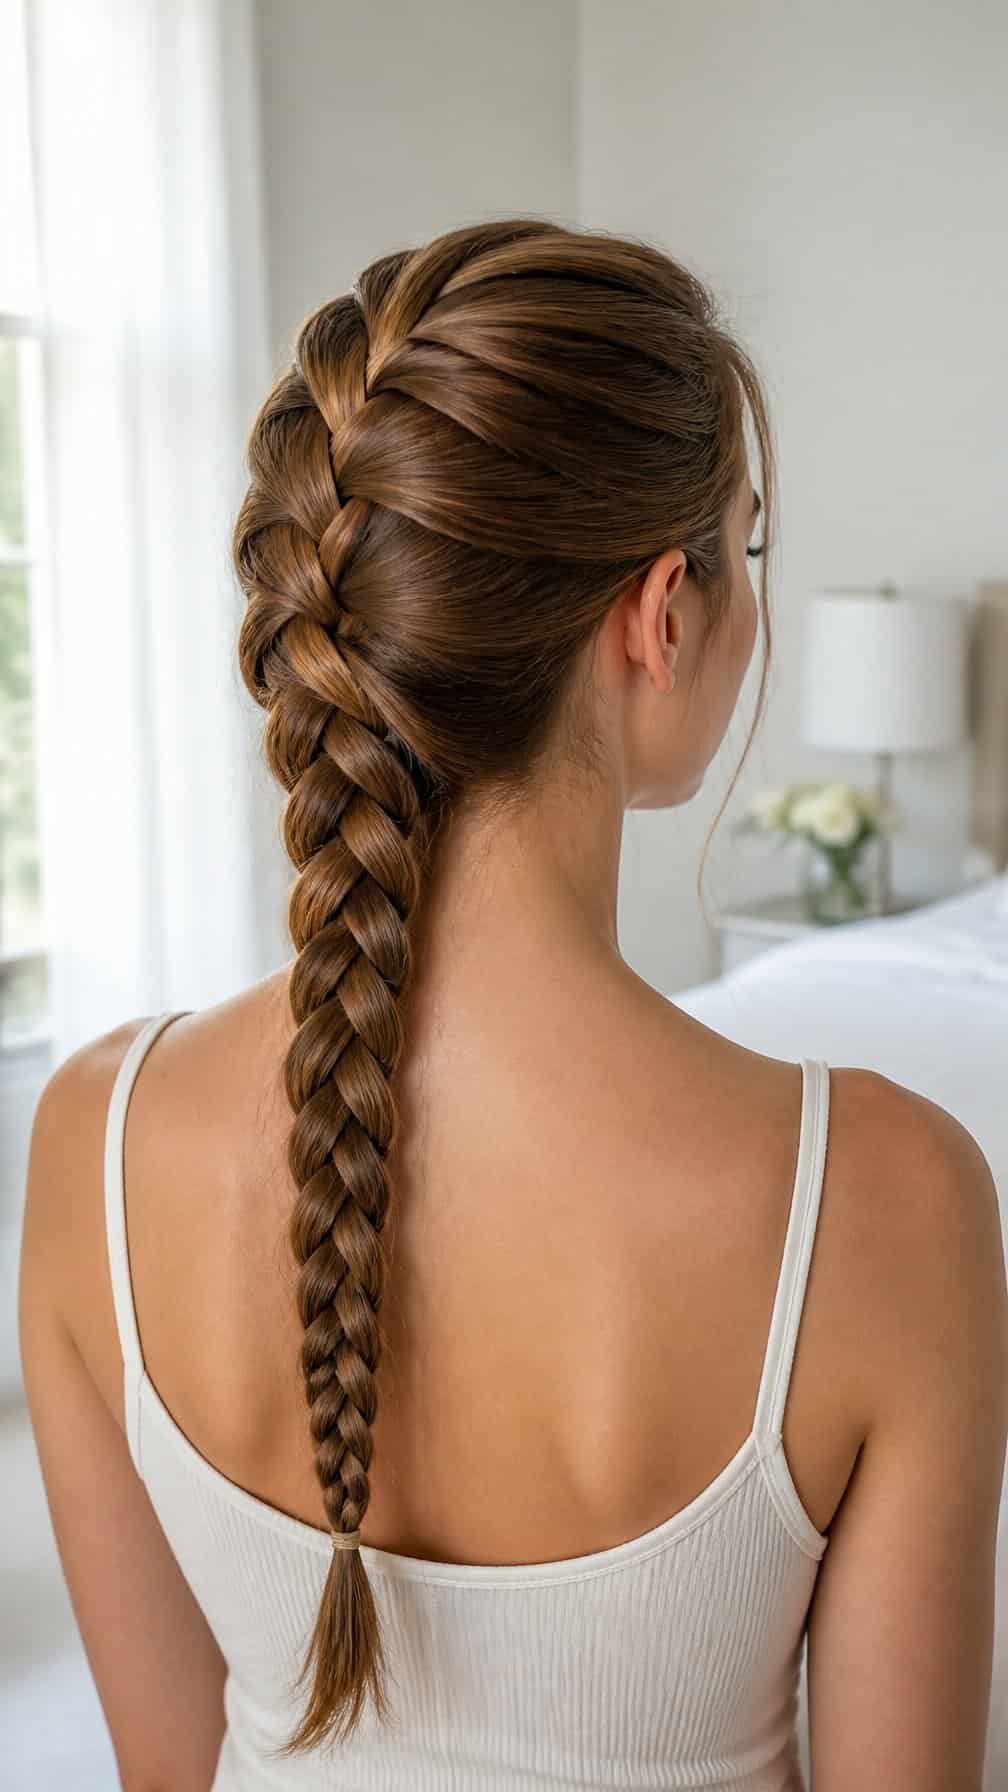
I start by brushing my hair back to remove tangles, then gather a small section at the crown. I divide it into three strands and cross the outer pieces over the center, adding a little hair to each strand before every crossing.
I keep the braid close to my head and maintain even tension without pulling tightly. Once I reach the nape, I finish with a regular three-strand braid and secure the end with a small elastic.
For a softer look, I gently loosen a few sections around my face and along the braid. This style works best on medium to long hair and usually takes about eight to ten minutes.
3) Low Twisted Ponytail
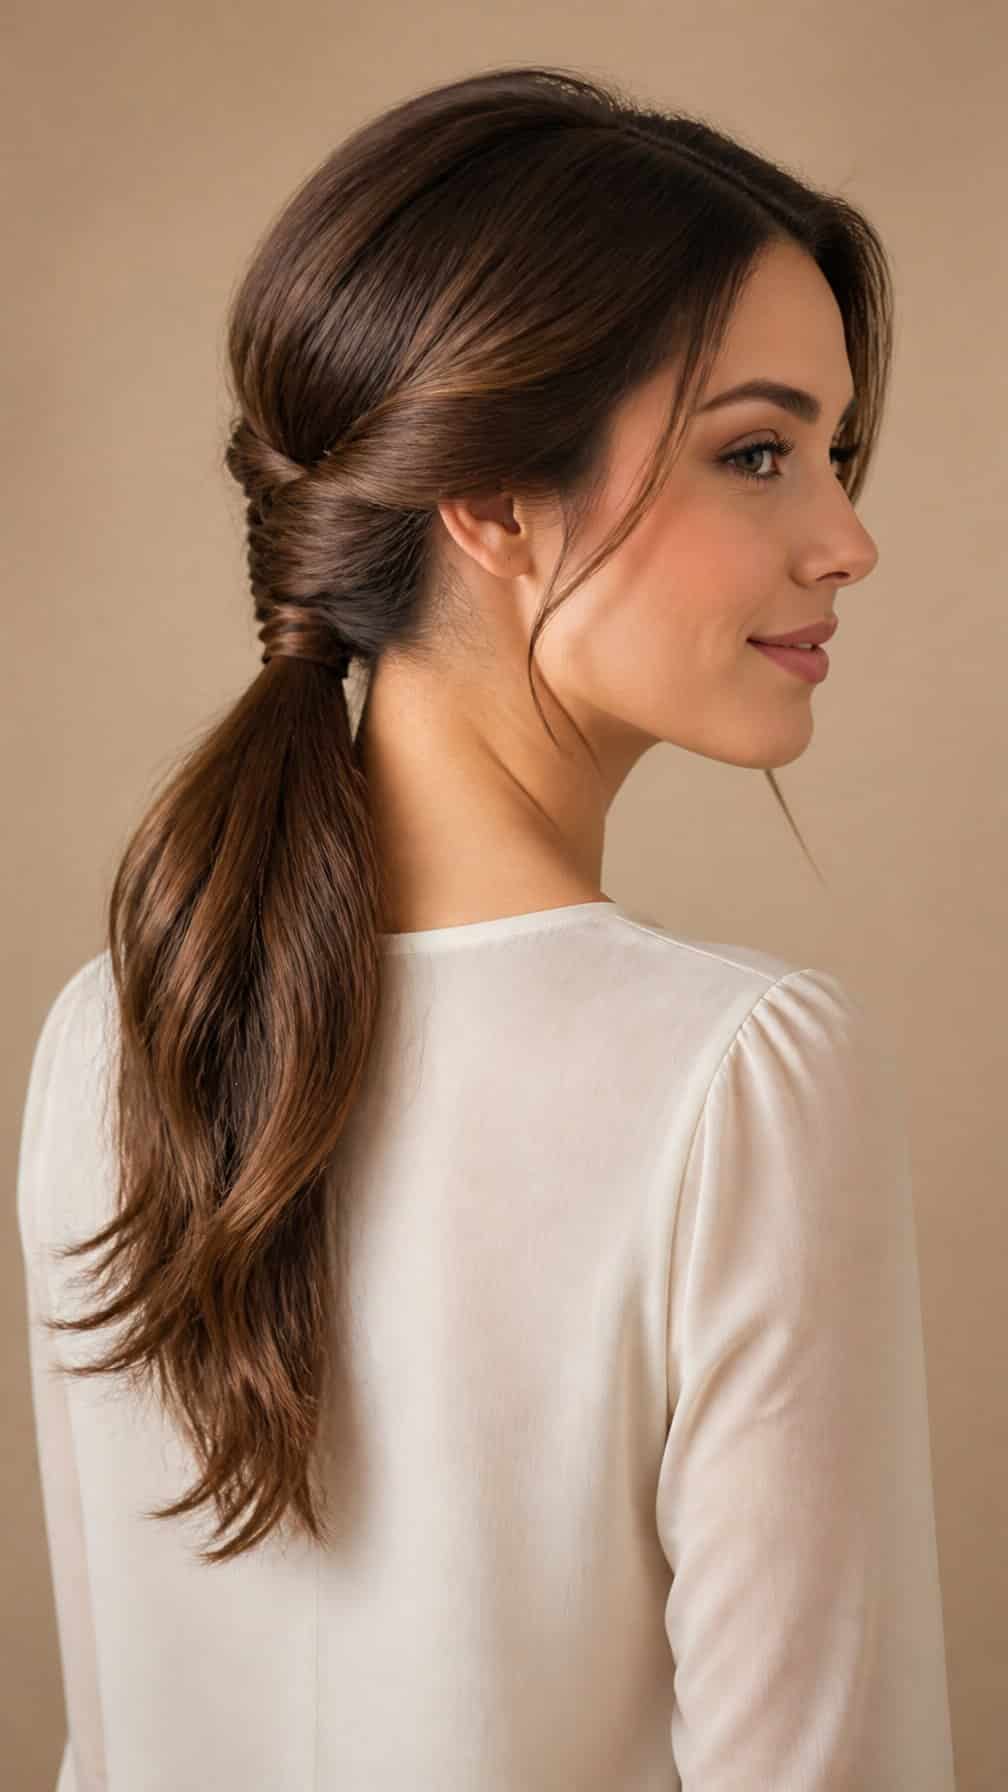
I gather my hair at the nape of my neck and secure it with a soft elastic. I split the hair above the elastic, create a small opening, and flip the ponytail through it for a polished twist.
For extra shape, I gently pull the twisted sections outward and loosen a few strands around my face. I finish with a light mist of hairspray or tuck the ends under the elastic for a cleaner look.
4) Double Dutch Braids
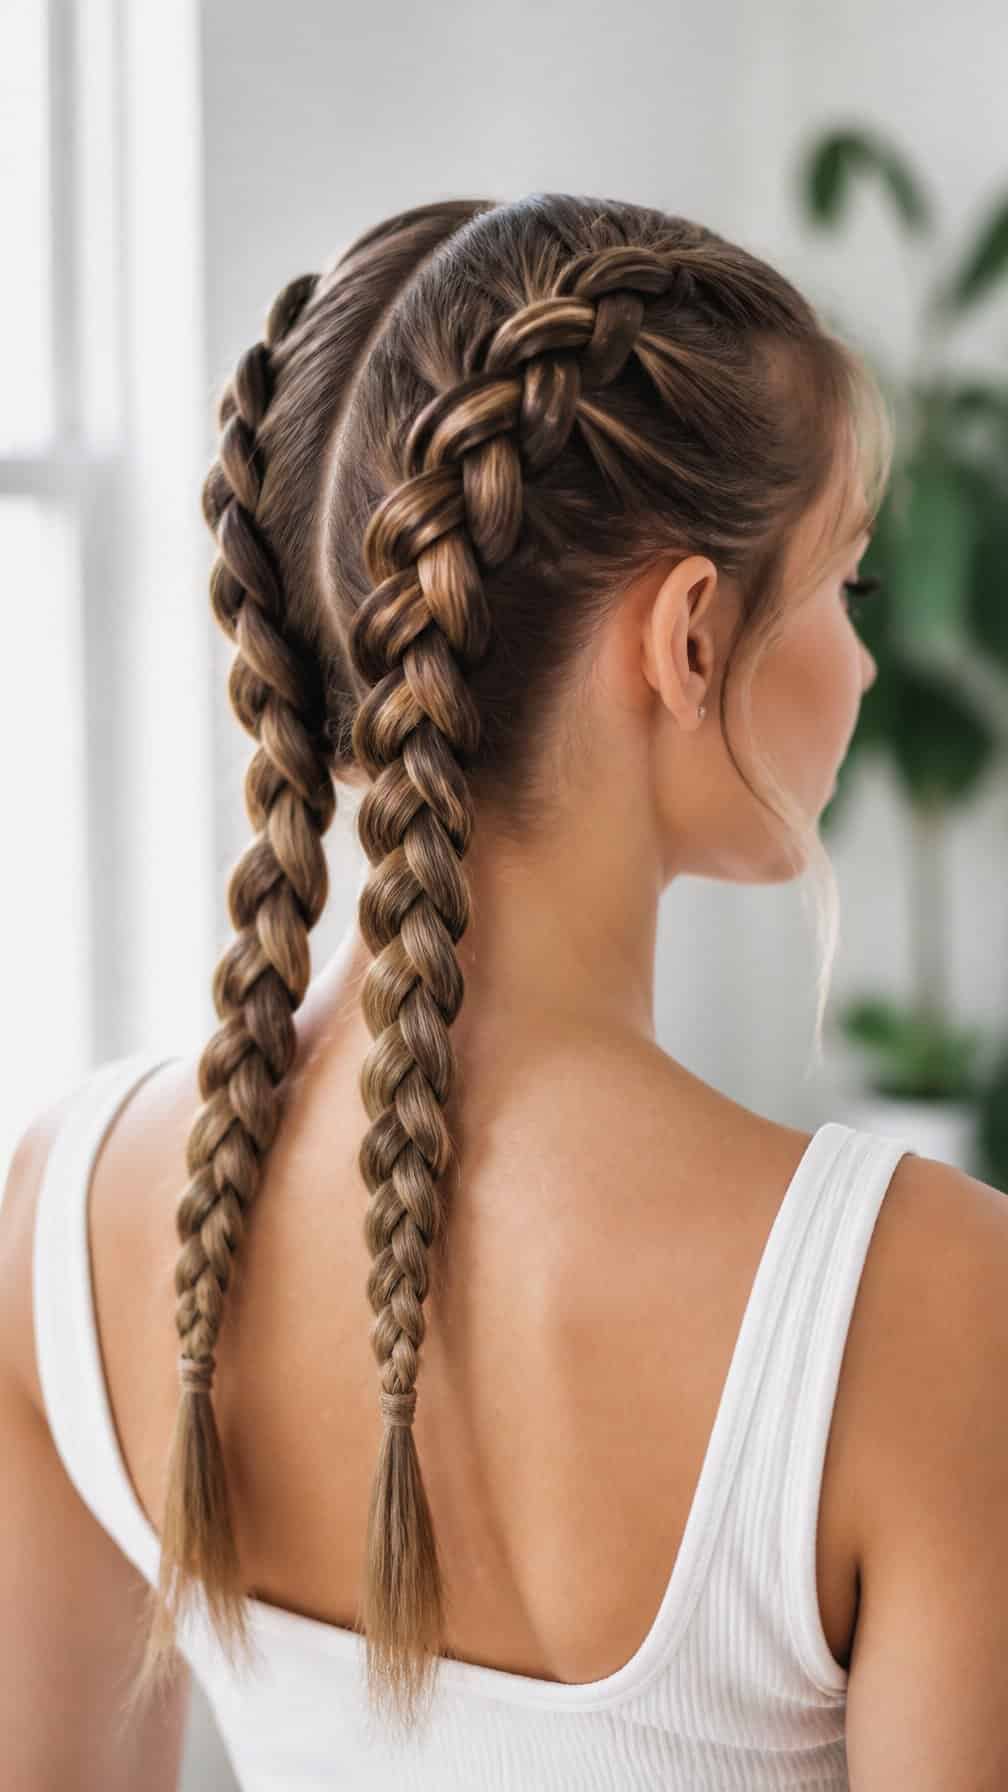
I part my hair down the center and create two Dutch braids, crossing each outer section under the middle strand. I add small pieces as I work toward the nape, keeping the tension even for a tidy finish.
Once I reach the ends, I secure each braid with a small elastic. I gently tug the loops to add fullness, then smooth flyaways with a little styling cream. This style keeps my hair controlled while giving it a polished, sporty look.
5) Sleek High Ponytail
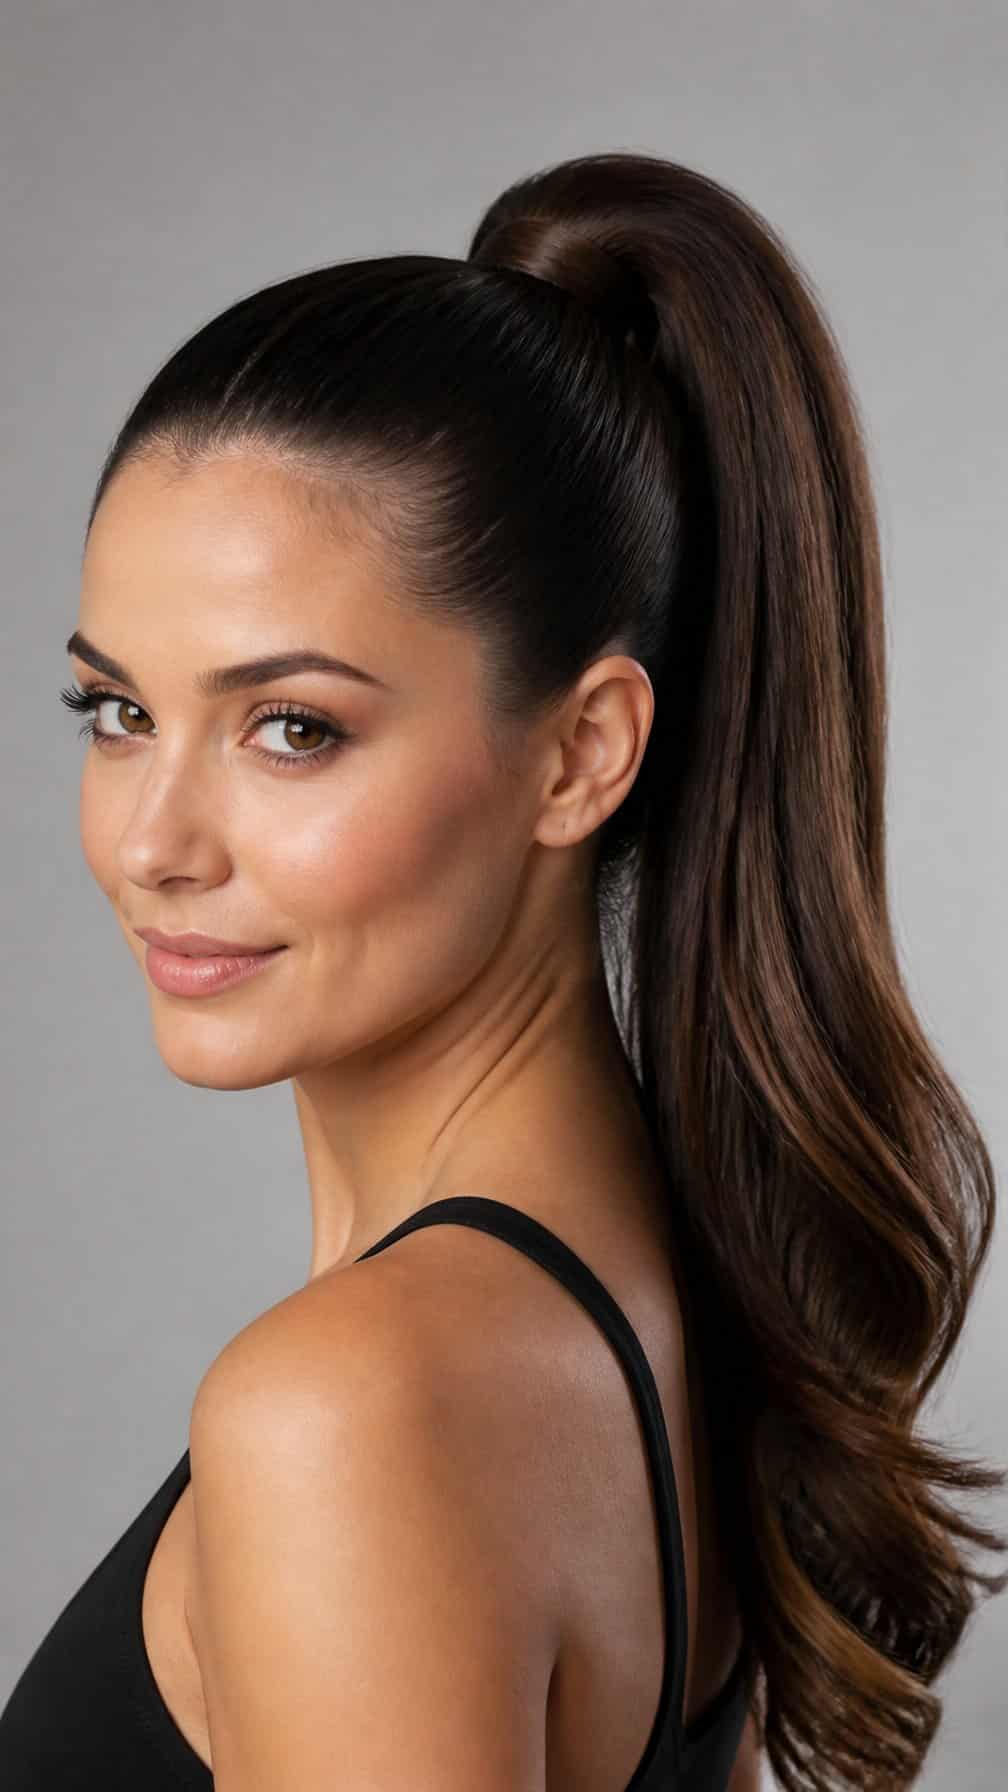
I smooth my hair back with a brush and secure it high on my crown, keeping the base firm and even. A small amount of styling gel or smoothing cream helps control flyaways without making the ponytail look stiff.
I wrap a thin strand of hair around the elastic and pin it underneath for a polished finish. When I want extra volume, I gently loosen the hair at the crown or add a slight bend to the ponytail with a curling iron.
6) Half-Up Bubble Ponytail
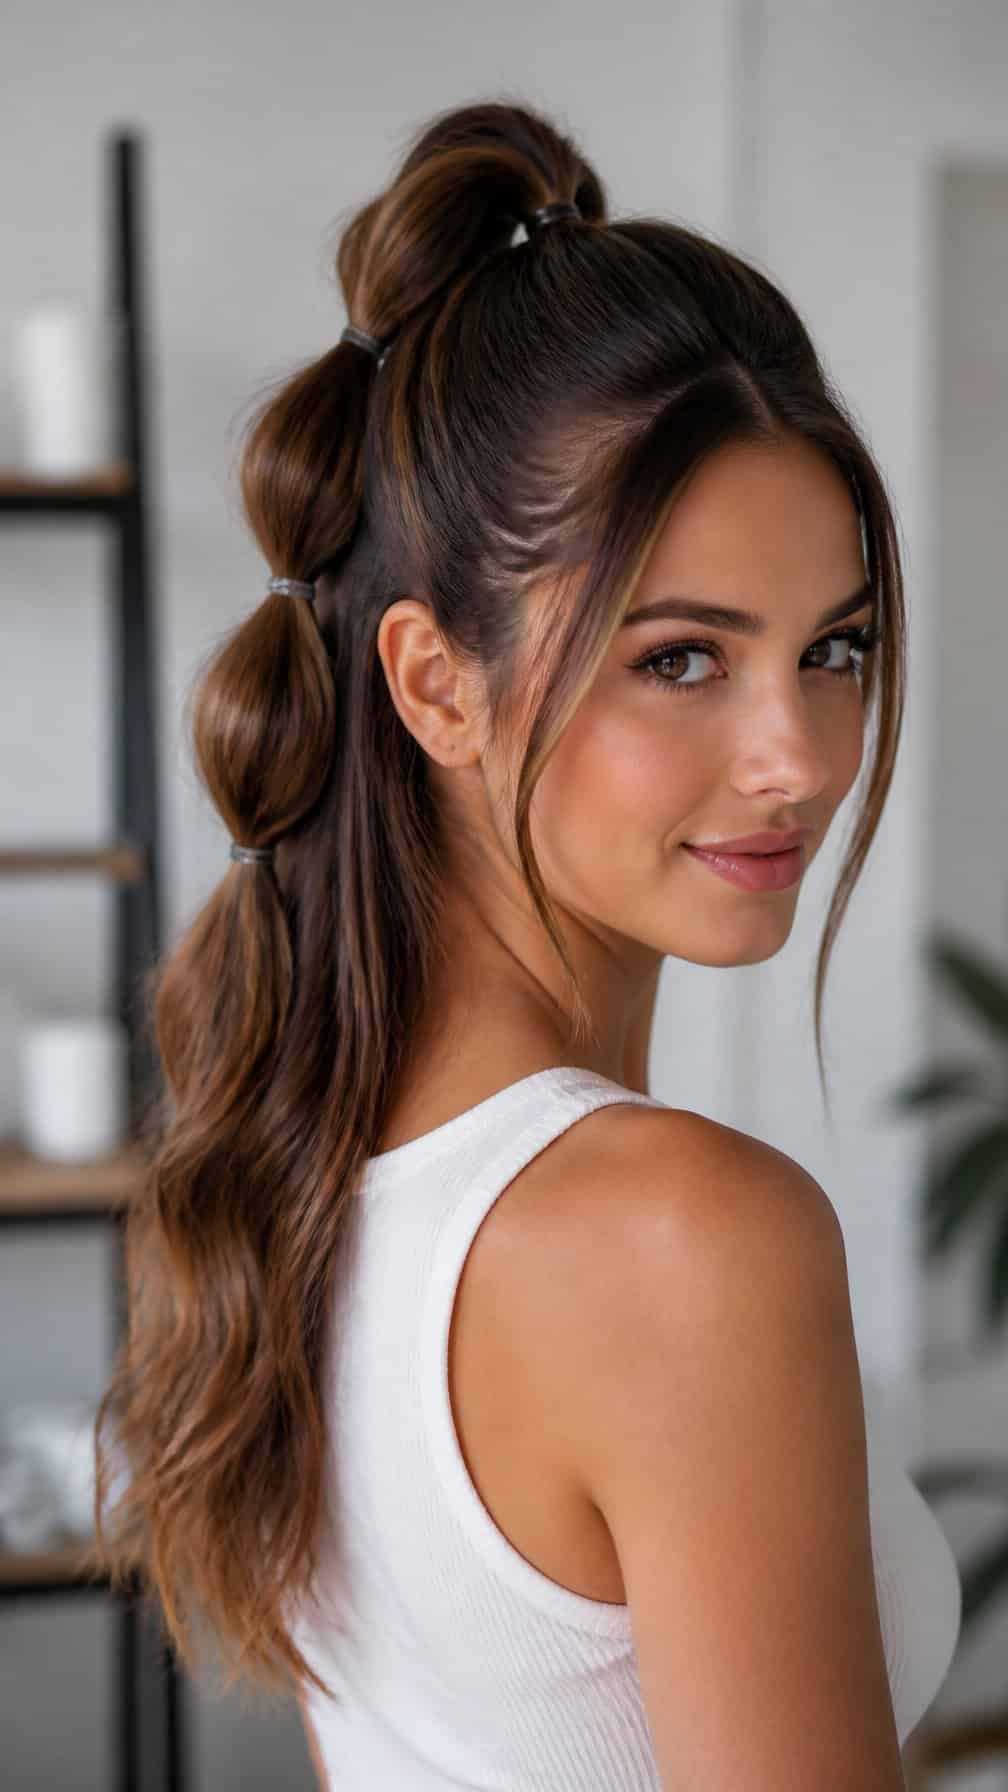
I gather the top half of my hair at the crown and secure it with a small elastic. I add another elastic a few inches below the first, then gently pull the section between them outward to create a rounded bubble.
I repeat the process down the length of the half-up ponytail, adjusting each bubble for an even shape. For a softer finish, I leave a few face-framing strands loose and wrap a small piece of hair around the first elastic.
7) Textured Low Bun
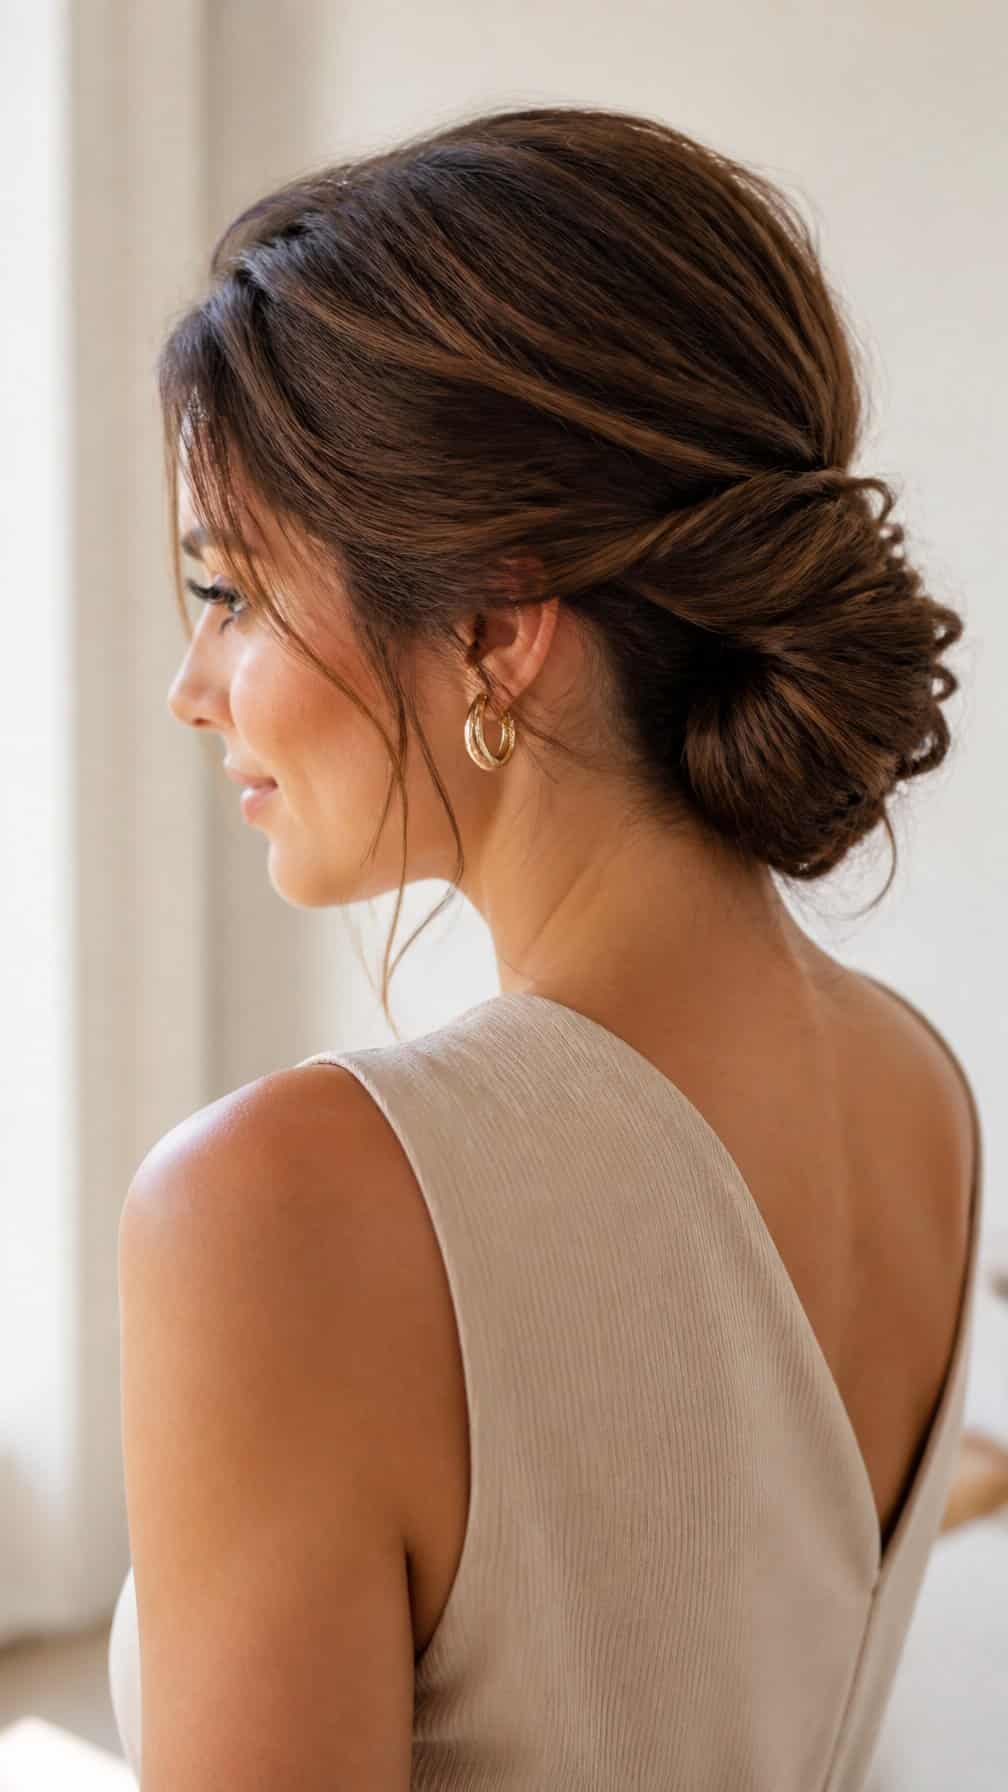
I add loose texture with a few waves or dry shampoo before gathering my hair at the nape. I twist the length into a relaxed bun and secure it with pins, leaving a few face-framing pieces free.
I gently tug the crown and bun to create shape without making the style look messy. A small amount of texturizing spray helps hold the pieces while keeping the finish soft. This style works well on second-day hair and usually takes about eight minutes.
8) Braided Crown
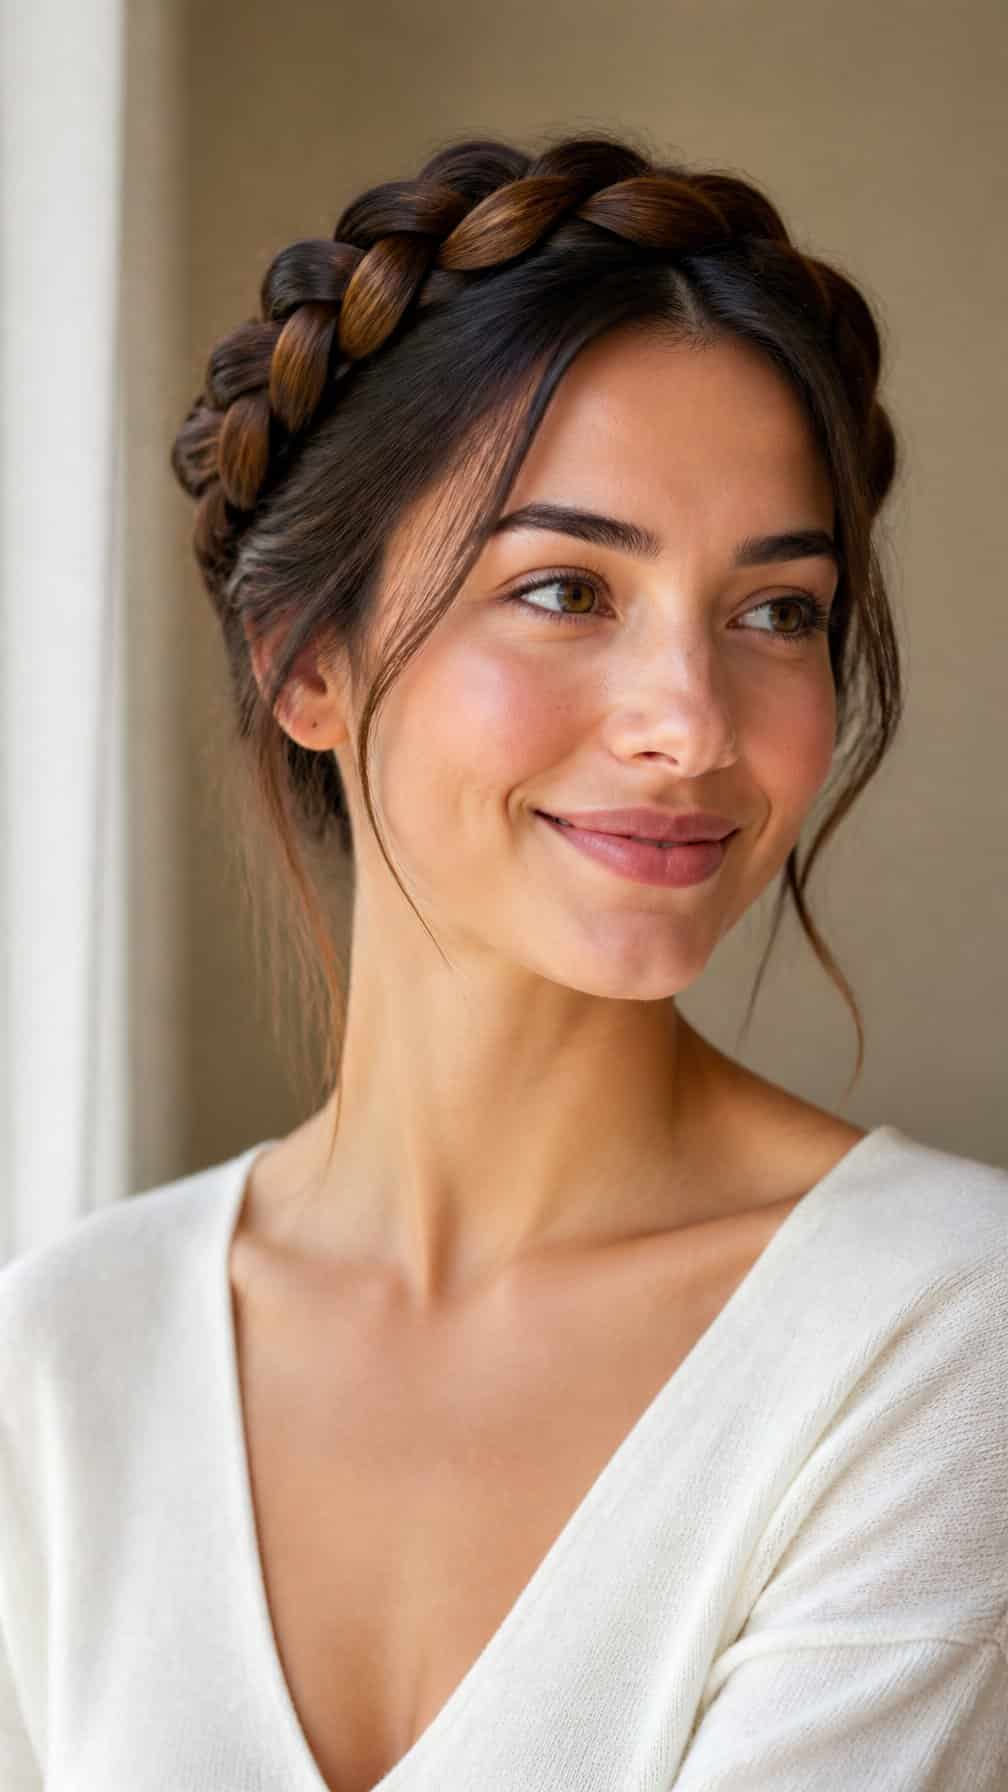
I part my hair down the middle and braid a small section from each side, starting near my temples. I secure each braid with a clear elastic, then pull gently on the edges to add a little width.
Next, I bring the braids across the back of my head and pin them just above my opposite ear. I tuck the ends beneath the crossed sections and add a few bobby pins where needed. Loose strands around my face keep the style relaxed rather than overly polished.
9) Side-Swept Fishtail Braid
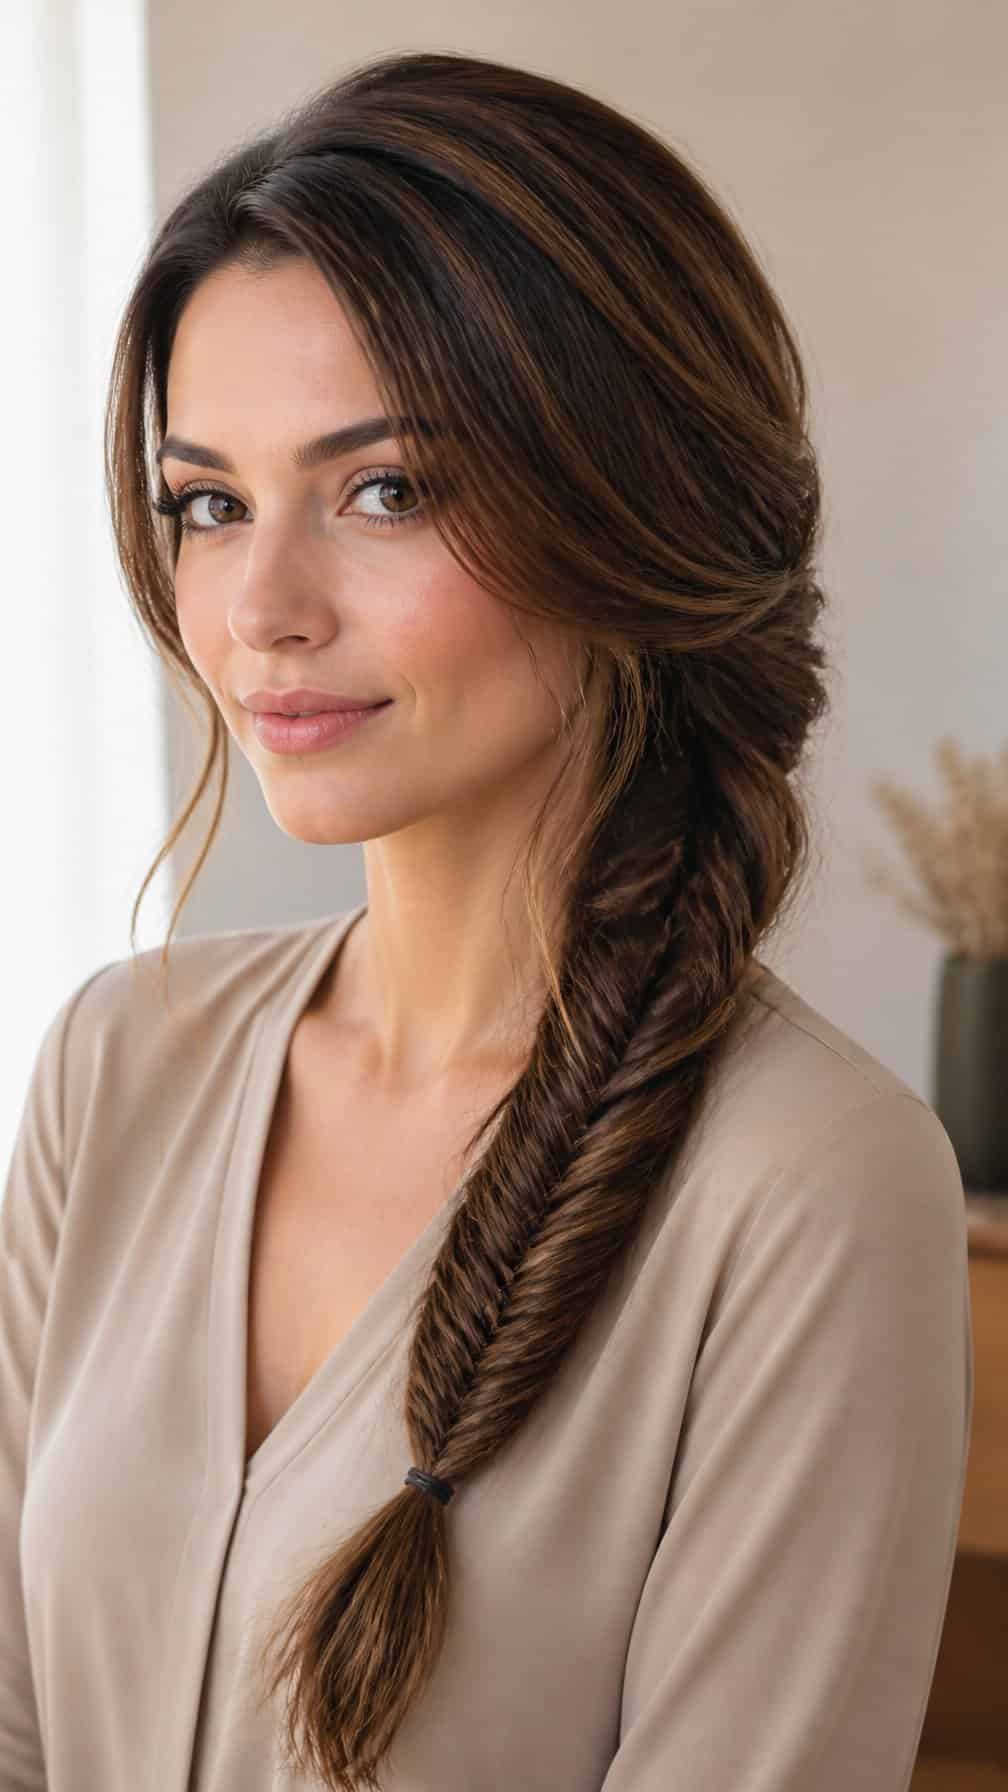
I gather my hair over one shoulder and divide it into two equal sections. I pull a small strand from the outside of the left section across the top, then add it beneath the right section. I repeat the motion on the opposite side, keeping the braid relaxed rather than tight.
After securing the end with a small elastic, I gently tug the woven sections to add width and soften the shape. I smooth flyaways with a small amount of styling cream, leaving a few strands loose around my face for a casual finish.
10) Claw-Clip French Twist
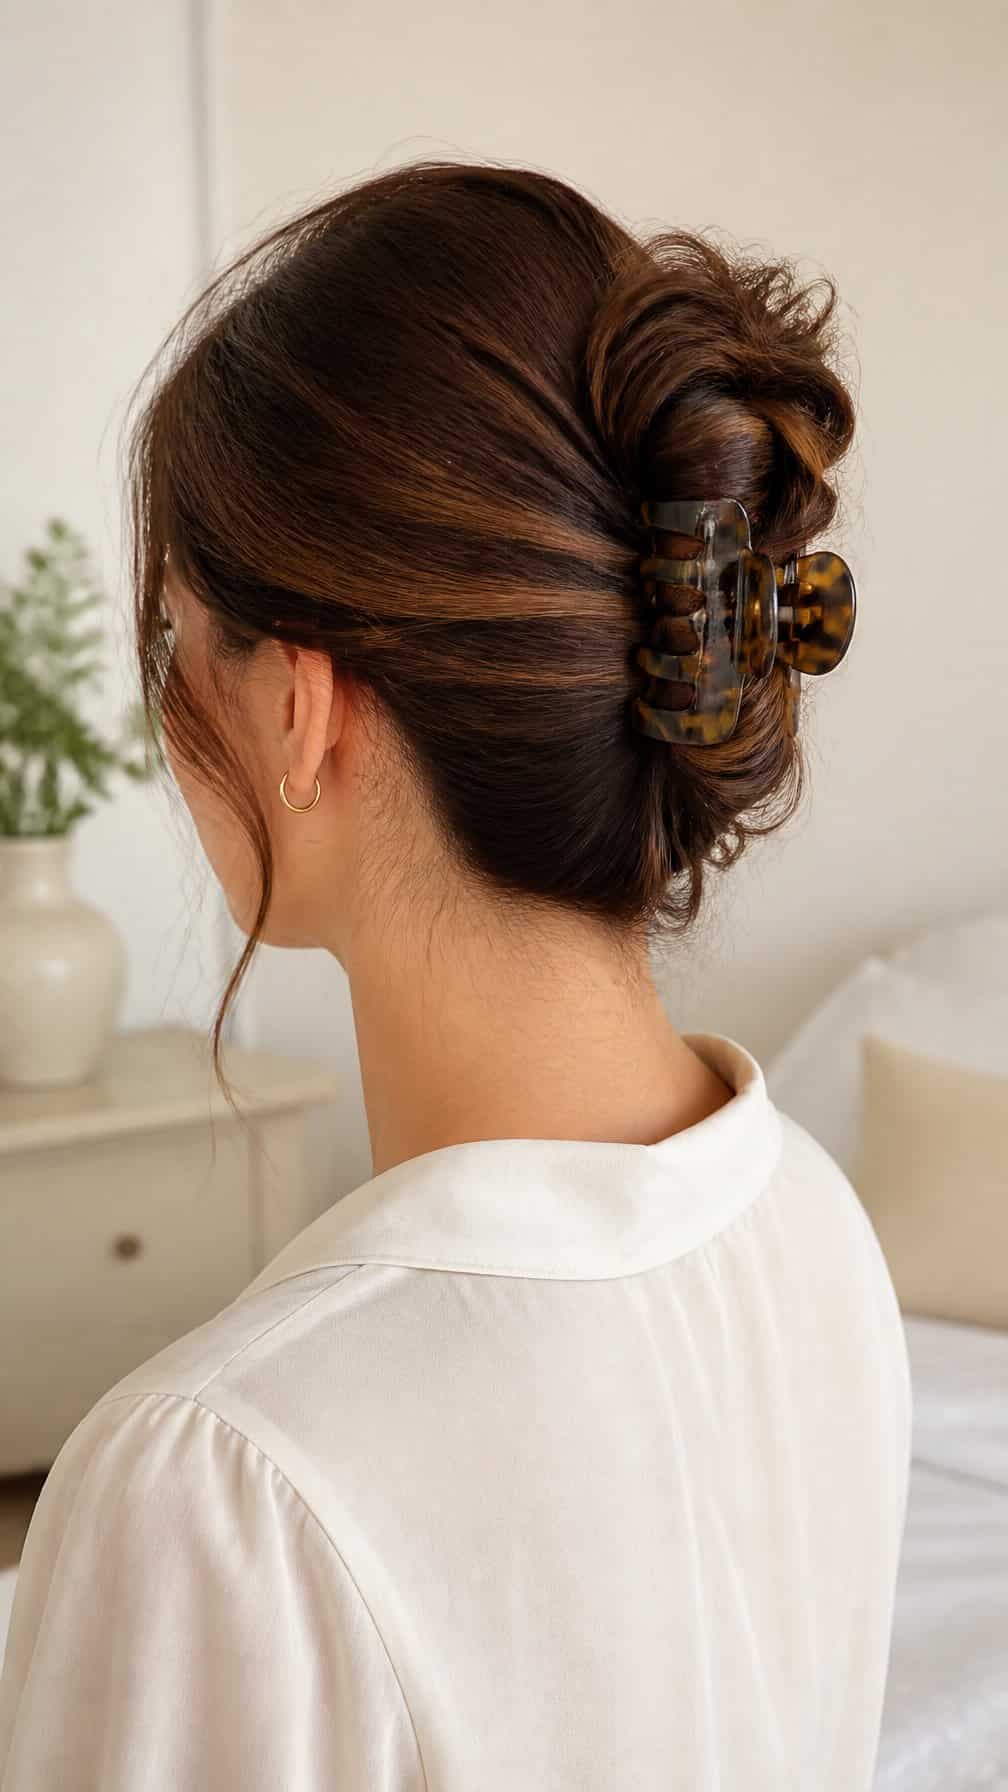
I gather my hair at the nape and twist it upward, keeping the ends tucked along the fold. A medium claw clip secures the twist vertically, while a few loose pieces around my face keep the style relaxed rather than stiff.
For a cleaner finish, I smooth the sides with my fingers before clipping. I choose a larger clip for thick hair and a smaller one for fine hair, placing it across the twist so it grips both the folded hair and the base.
11) Space Buns
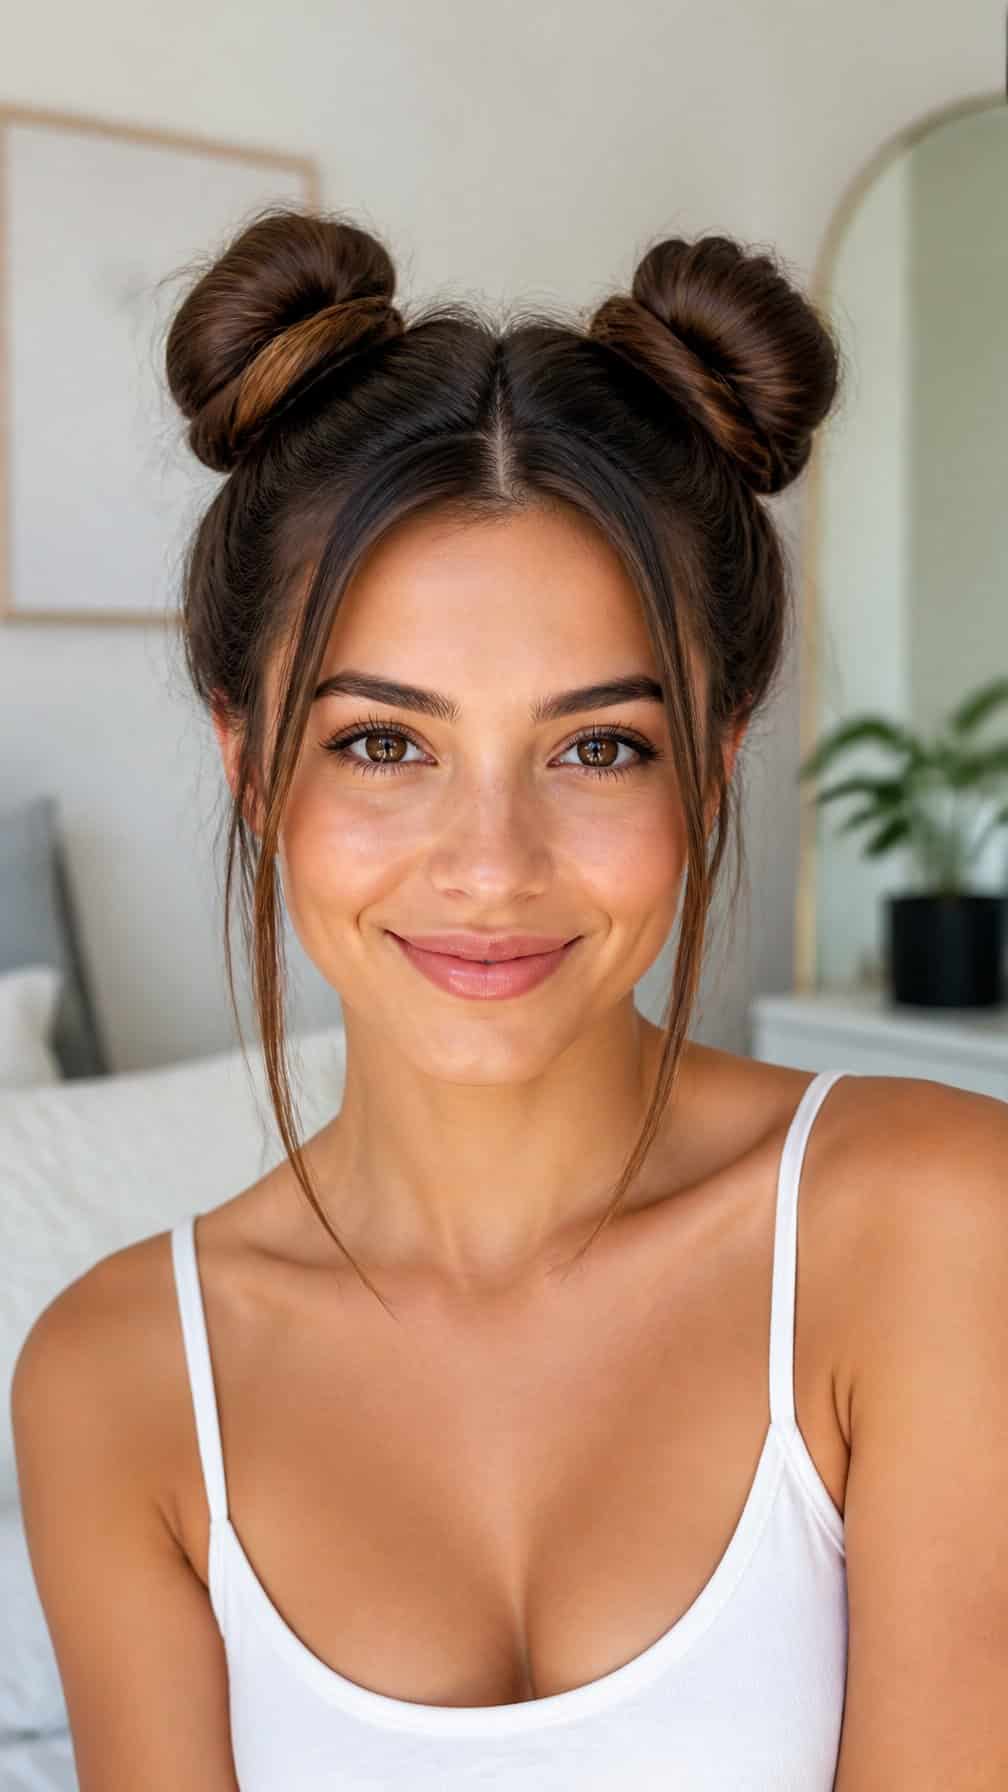
I part my hair down the middle and secure each side into a high pigtail. I twist each ponytail, wrap it around its base, and secure the bun with bobby pins or small elastics. Leaving a few face-framing strands loose keeps the style relaxed.
For a neater finish, I smooth flyaways with a small amount of styling cream before twisting. I can also loosen the wrapped hair slightly after pinning to create fuller, softer buns. The style works best on dry hair with enough texture to hold the shape.
12) Rope-Twist Ponytail
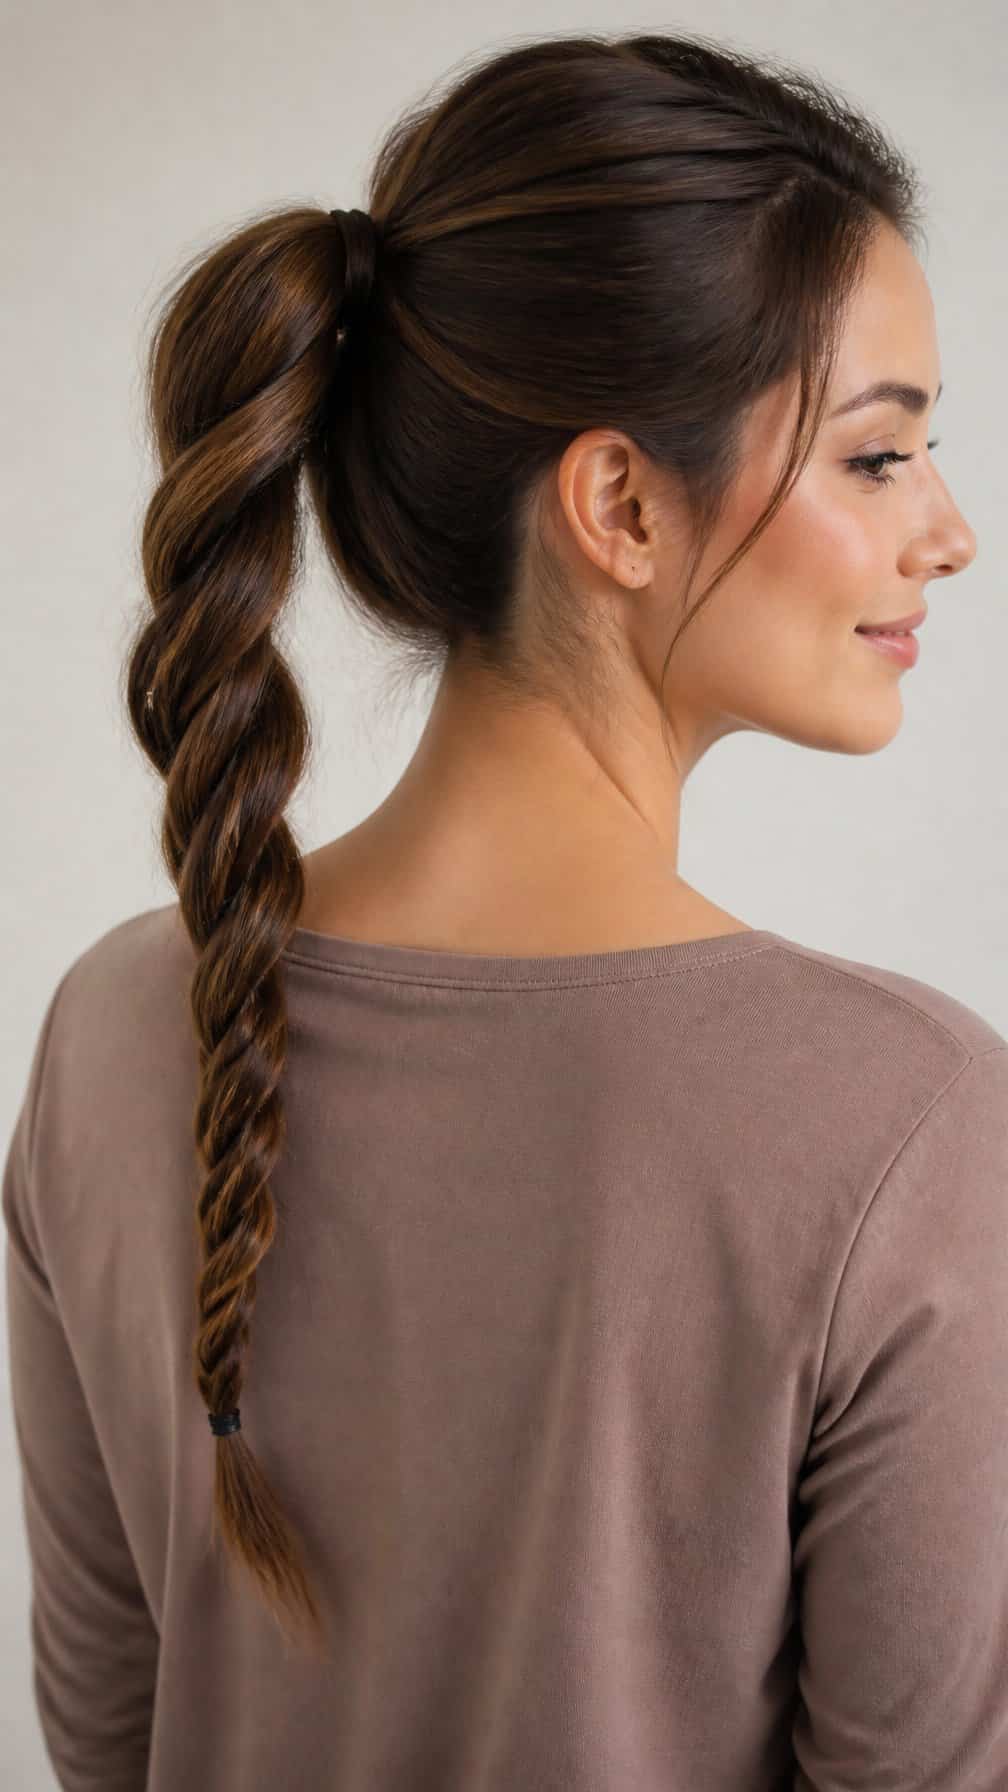
I gather my hair into a mid-height ponytail and secure it with an elastic. I divide the ponytail into two equal sections, then twist each section clockwise until the strands feel snug.
Next, I wrap the two twisted sections around each other in the opposite direction. I secure the end with a small elastic and gently loosen the twists for a softer finish. A light mist of hairspray helps control flyaways without making the style stiff.
13) Half-Up Top Knot
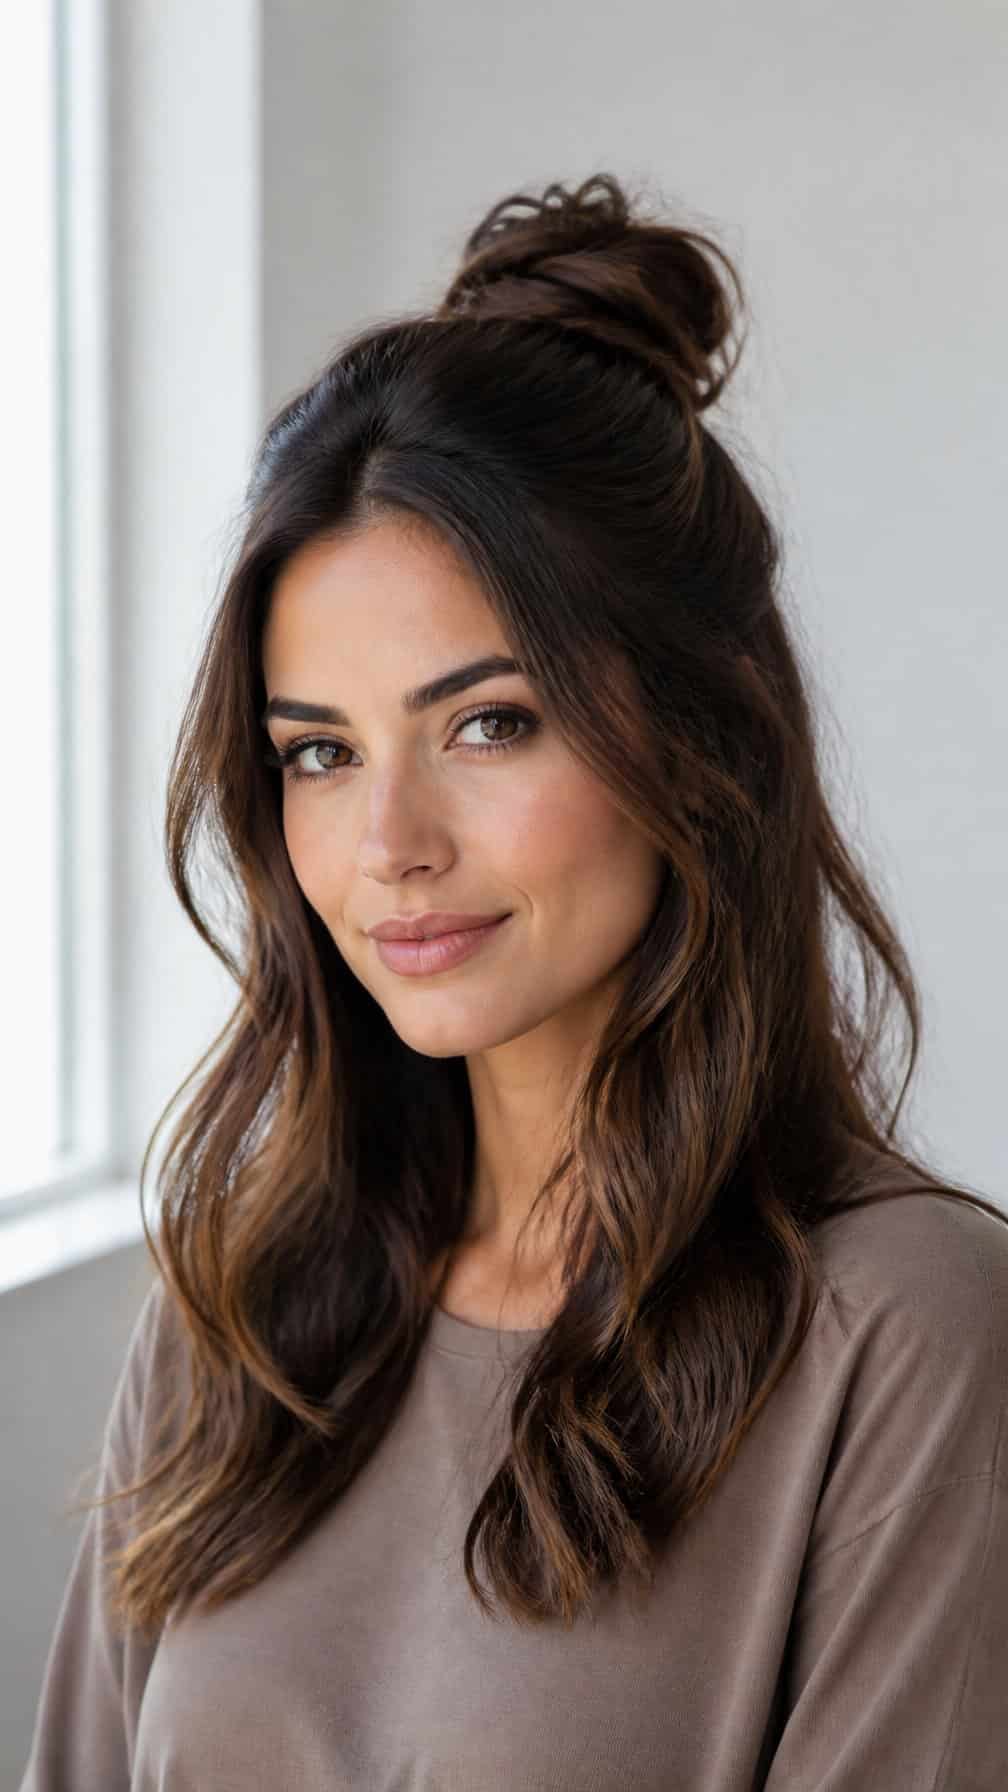
I gather the hair from my temples to the crown, leaving the lower section loose. After securing the upper portion with an elastic, I twist it into a compact bun and pin it in place.
I pull out a few small pieces near my face for a softer shape, then gently loosen the bun with my fingertips. A little dry shampoo at the roots adds grip, especially when my hair feels freshly washed. This style usually takes about five to eight minutes.
14) Low Bubble Ponytail
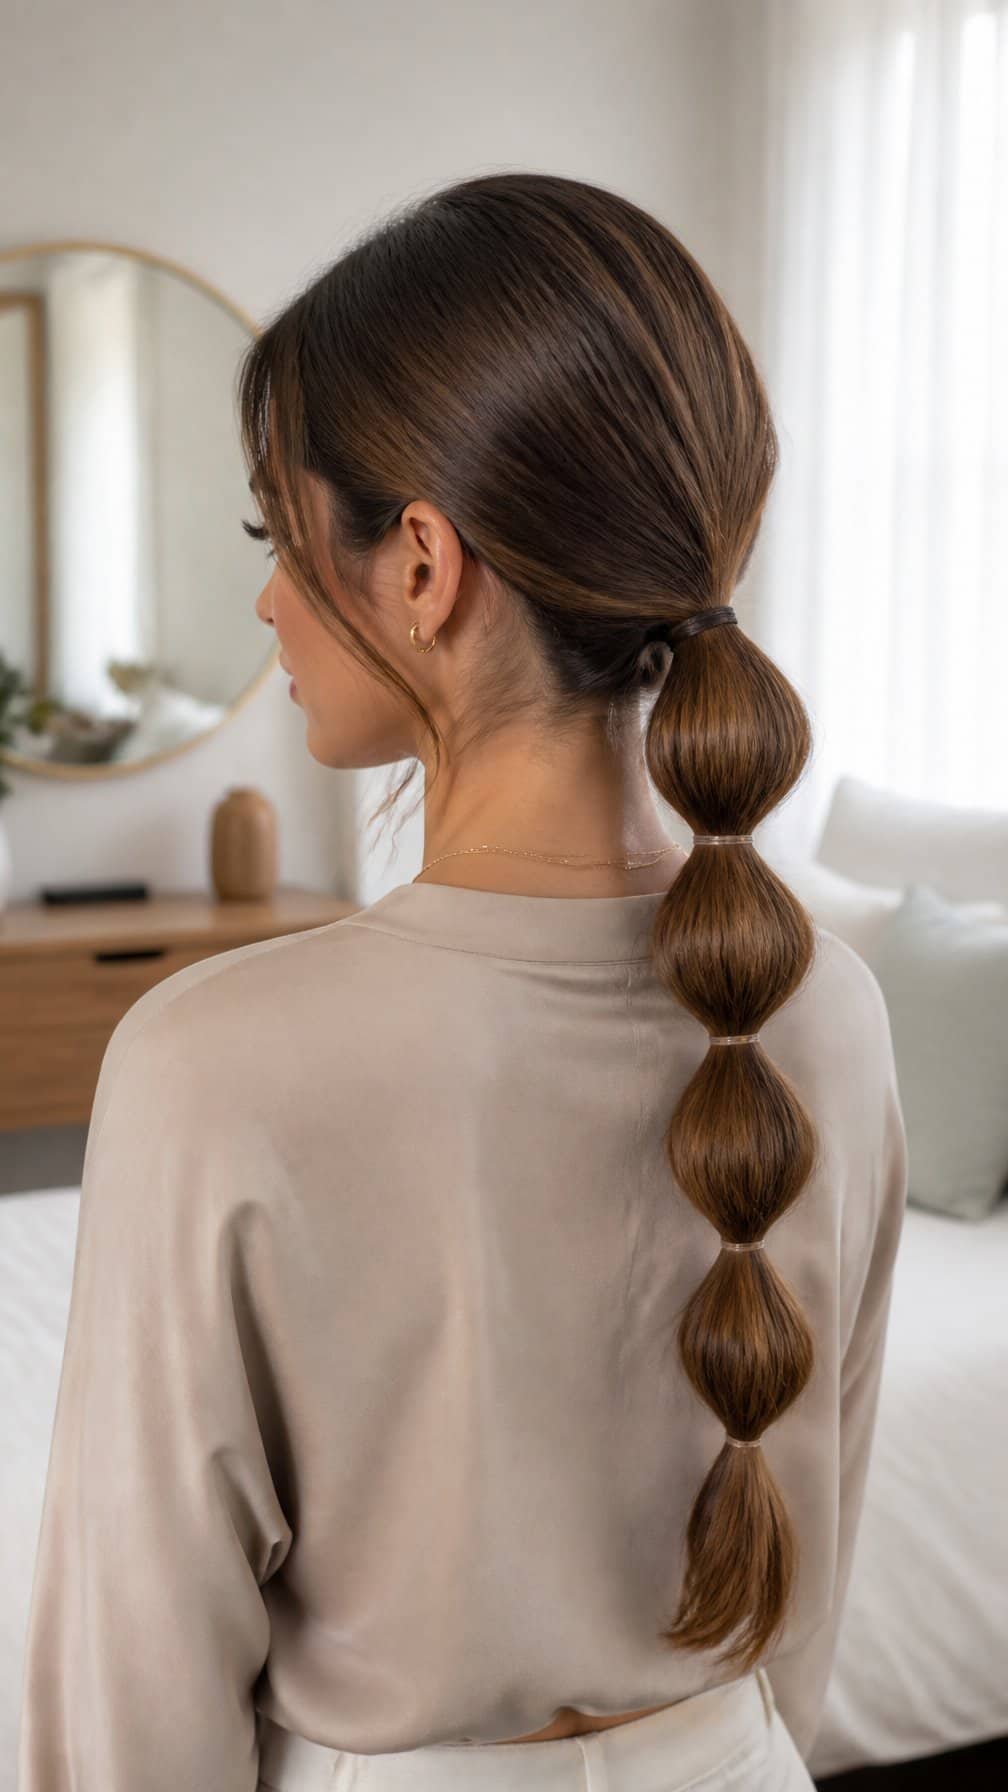
I start by gathering my hair into a low ponytail at the nape of my neck and securing it with an elastic. I add another elastic a few inches below the first, then gently pull the hair between them outward to create a rounded bubble.
I repeat this process down the length of the ponytail, spacing each elastic evenly. I lightly loosen the bubbles with my fingers for a softer shape, while leaving the ends sleek or slightly textured. A small strand wrapped around the first elastic conceals it neatly.
15) Waterfall Braid
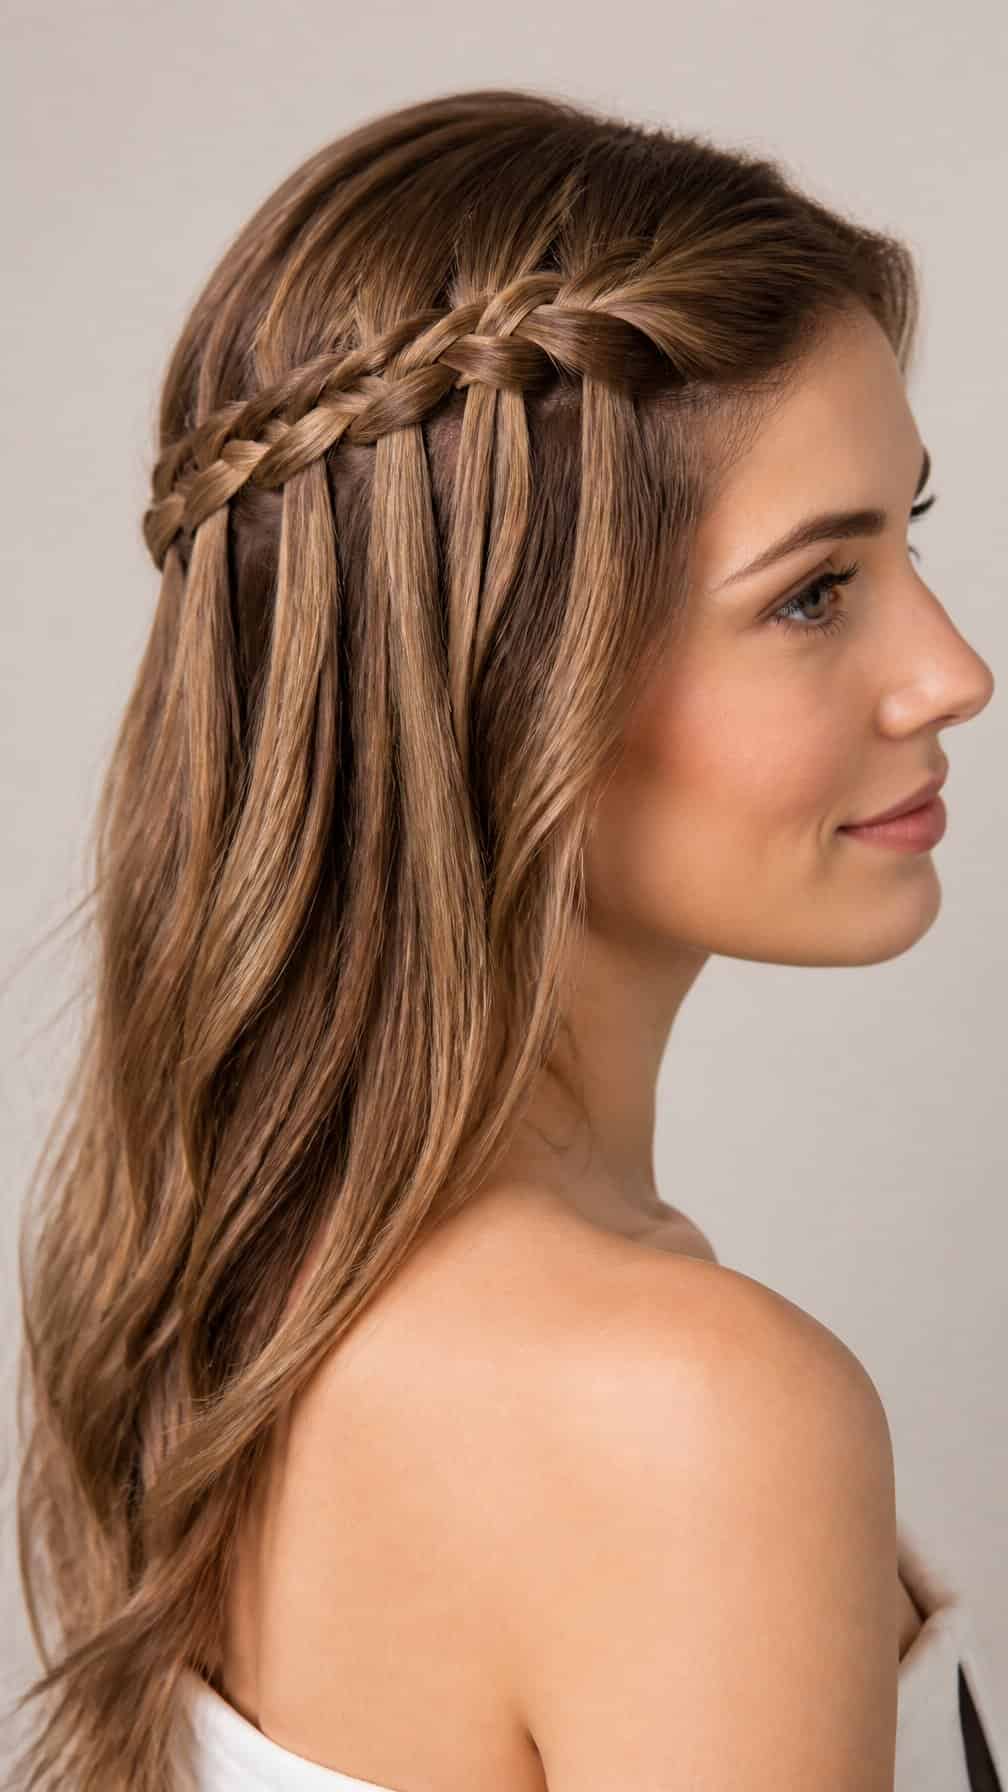
I create this style by taking a small section near my part and crossing it over a neighboring strand. I let the lower piece fall loose, then pick up a fresh section to replace it. Repeating this pattern along one side forms the cascading effect.
I secure the braid behind my ear with a discreet elastic or bobby pin. I keep the remaining hair straight, softly waved, or gathered into a low ponytail. The style usually takes about eight minutes, especially when I work with dry, detangled hair.
16) Scarf-Wrapped Ponytail
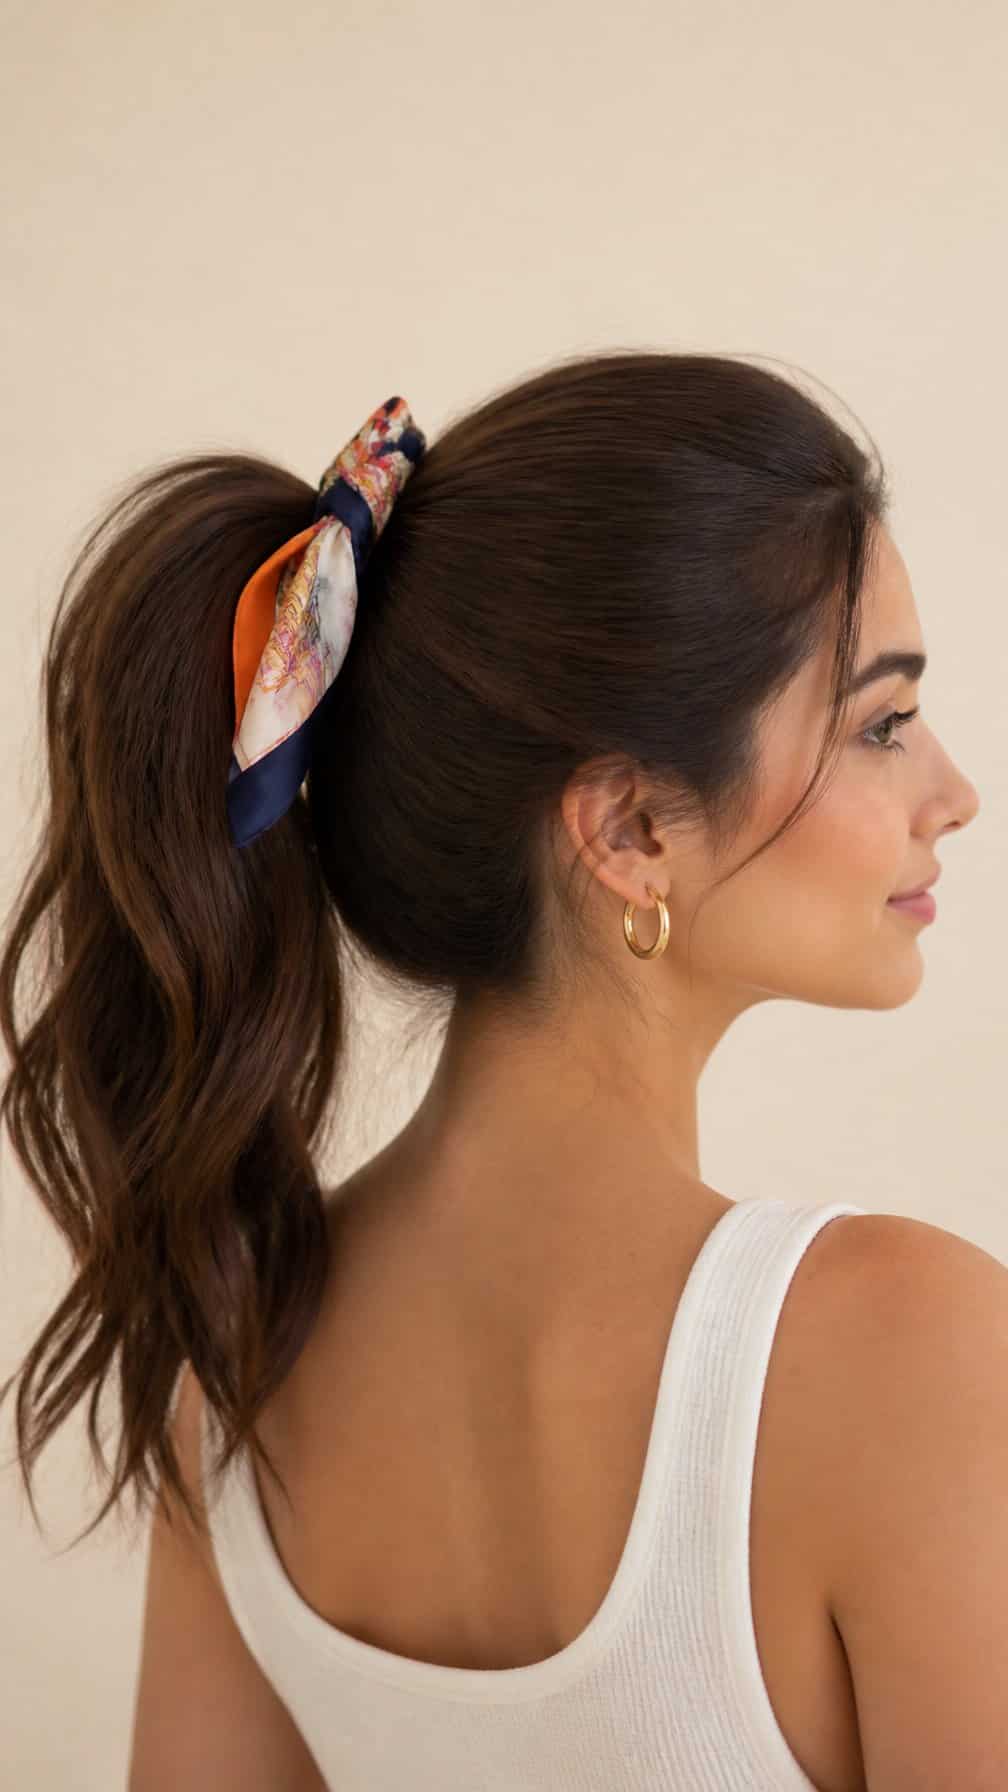
I gather my hair into a low or mid-height ponytail and secure it with an elastic. Then I fold a lightweight scarf into a narrow strip and tie it around the base, leaving the ends loose or knotting them into a small bow.
I use a scarf with a smooth texture to reduce snagging and keep the style comfortable. A few face-framing strands soften the look, while a touch of dry shampoo adds grip if my hair feels slippery.
17) Braided Low Ponytail
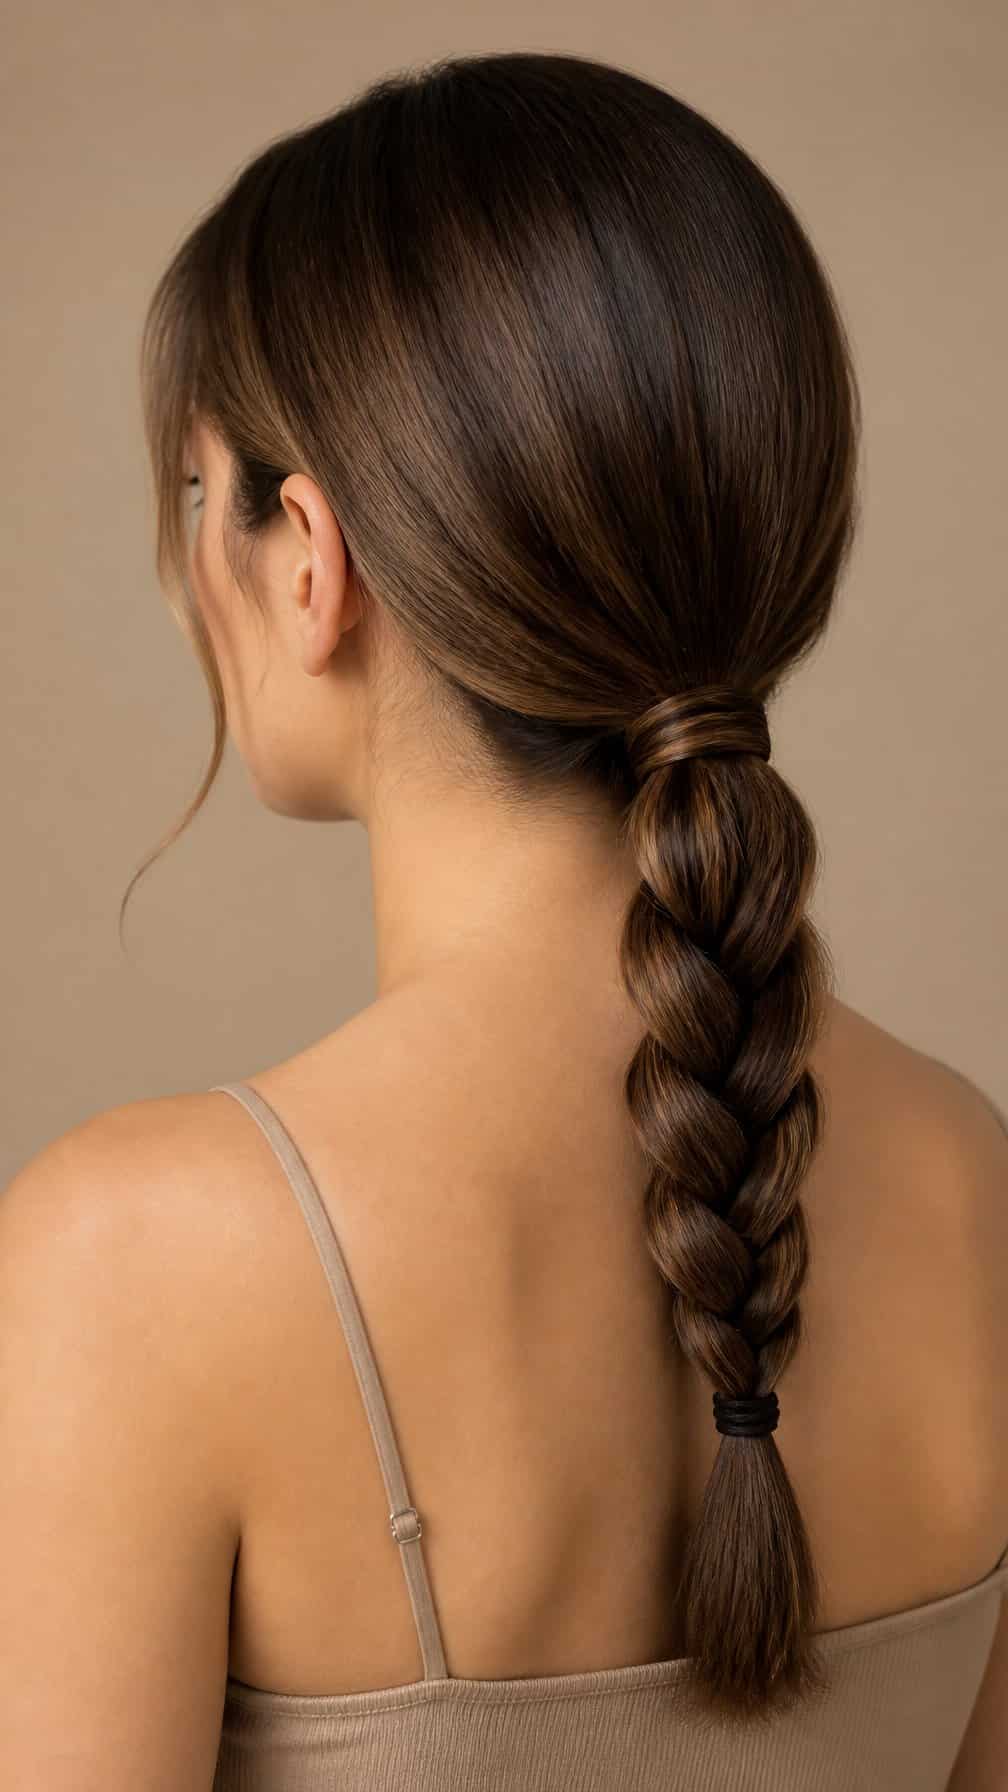
I gather my hair at the nape of my neck and secure it with a small elastic. Then I braid the ponytail loosely, fastening the end before gently tugging the braid to add texture.
For a polished finish, I wrap a thin strand of hair around both elastics and secure it underneath with a bobby pin. I leave a few face-framing pieces loose, or smooth them back with a little styling cream for a neater look.
18) Slicked-Back Ballet Bun
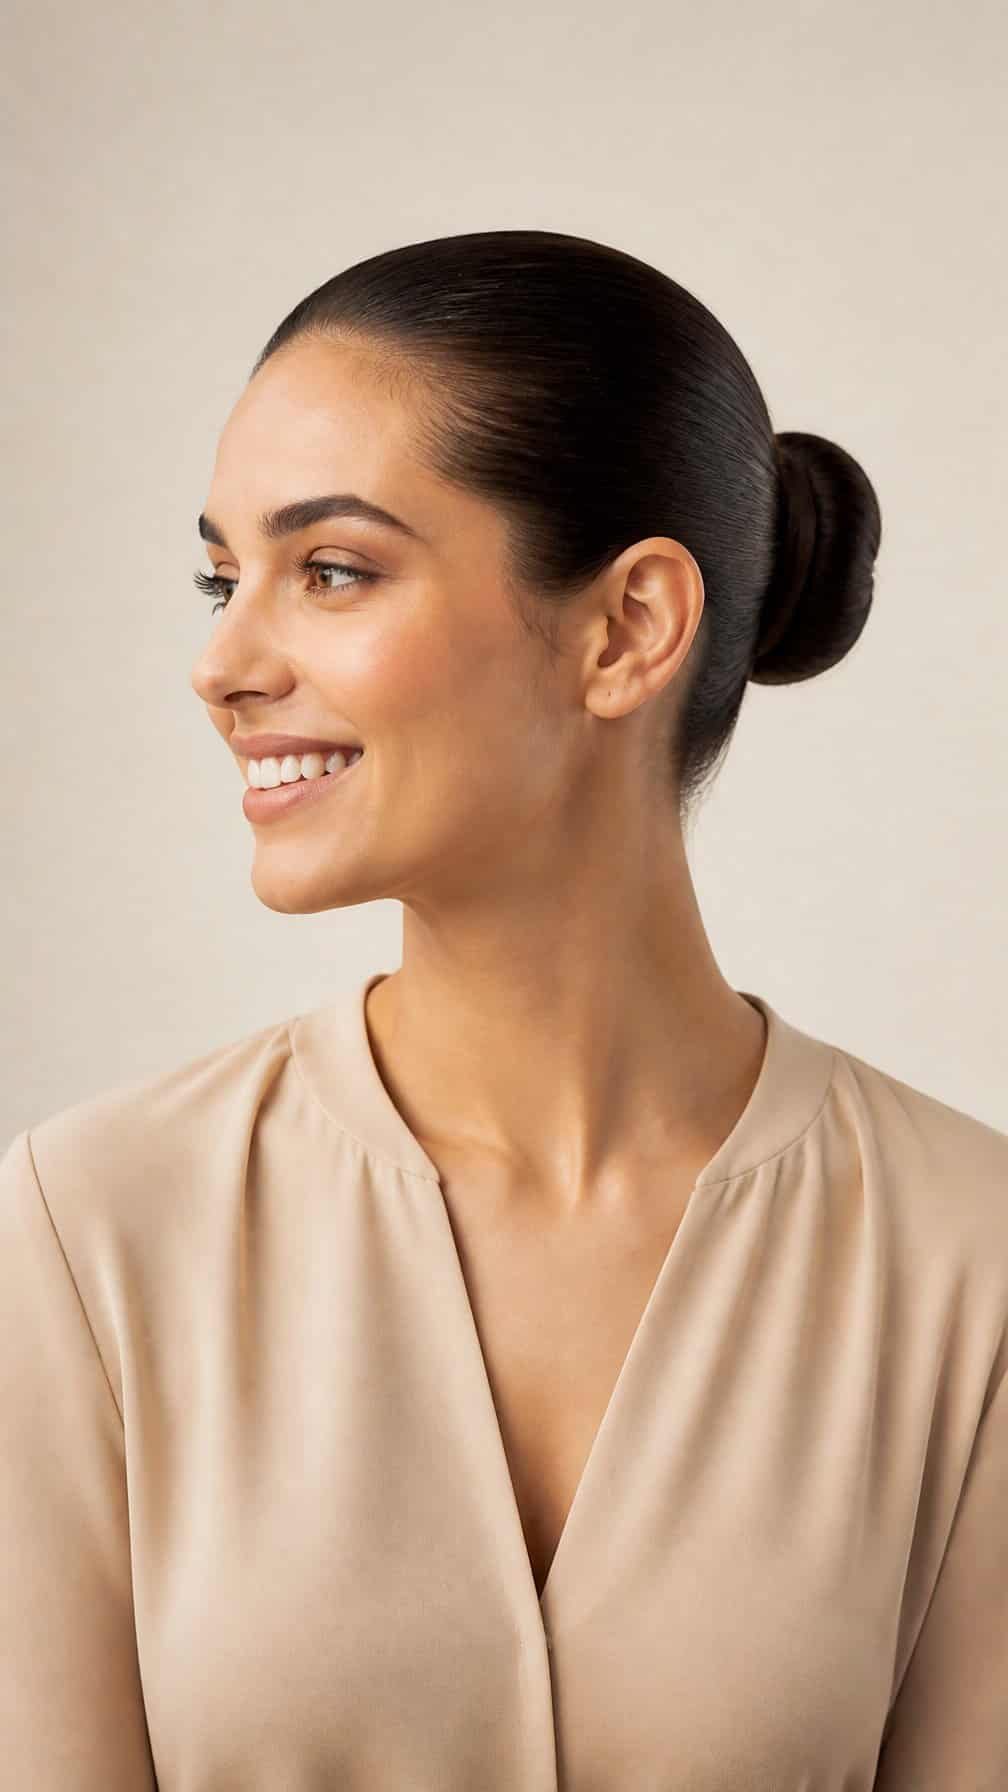
I smooth my hair into a low or mid-height ponytail, using a small amount of gel or styling cream to control flyaways. I twist the ponytail around its base, secure it with pins, and finish with a neat elastic or scrunchie.
I prefer this style on straight or wavy hair because the clean shape looks polished without much adjustment. For extra hold, I lightly mist the finished bun with hairspray and tuck loose ends beneath the coil.
19) Mini Front Braids
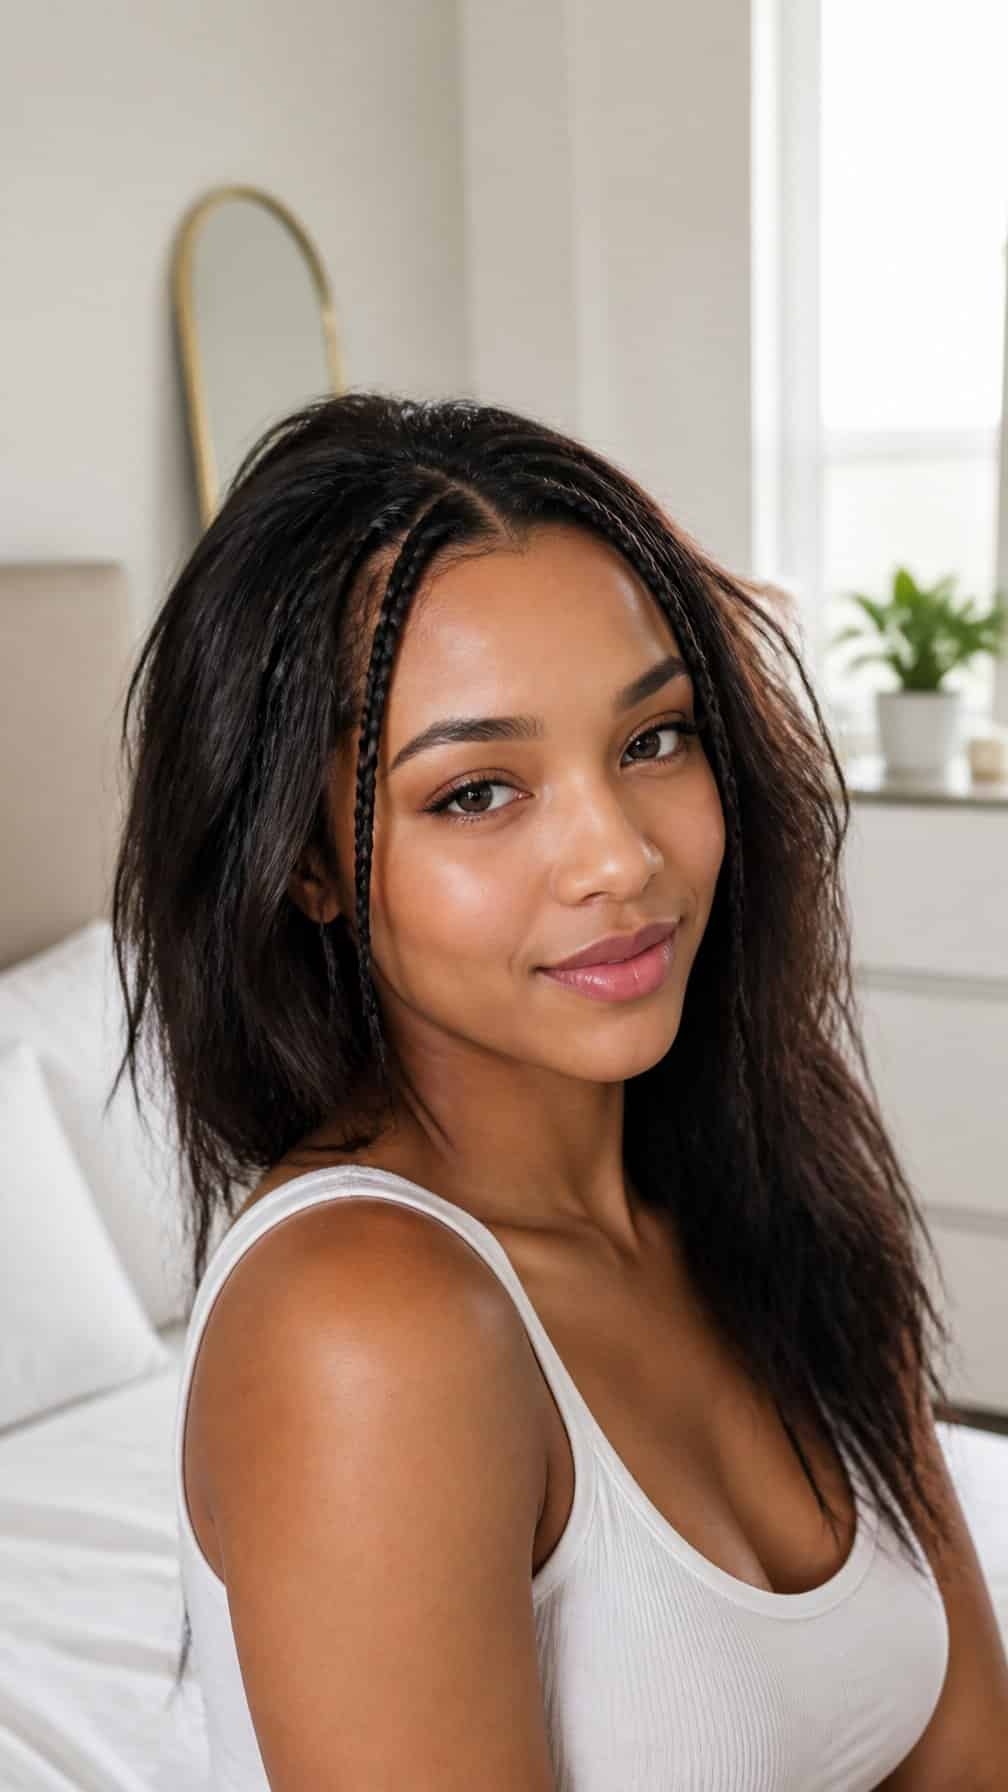
I part two small sections near my temples and braid each one tightly toward the back. I secure them with clear elastics, leaving the rest of my hair loose for a simple style that frames my face.
For a softer look, I gently loosen the braid loops and tuck the ends behind my ears. This works well on straight, wavy, or lightly textured hair, and I can finish it in under ten minutes.
20) Twisted Half-Updo
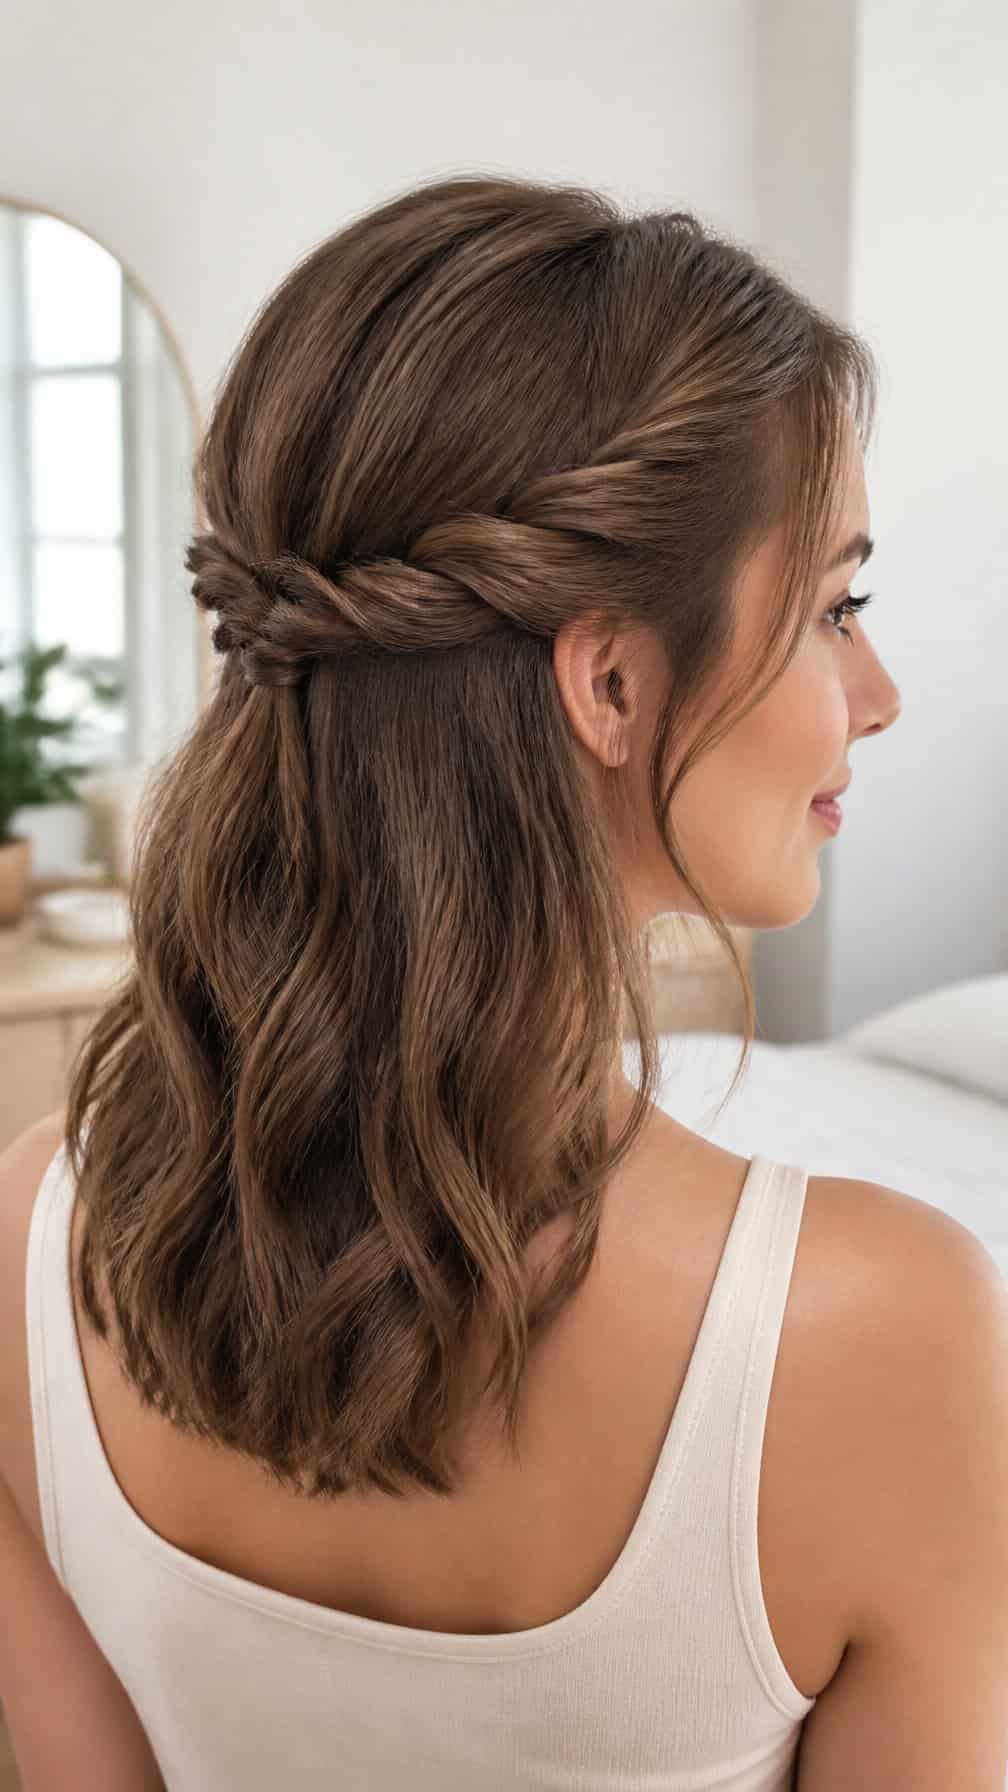
I start by taking two small sections from the front of my hair, then twist each section toward the back. I secure them together with a small elastic or two crossed bobby pins.
For a cleaner finish, I smooth the sides with my fingers before pinning. I gently loosen the twists near the crown to add soft volume while leaving the rest of my hair down. This style works especially well on second-day hair, when the added texture helps the twists hold.
21) High Bubble Ponytail
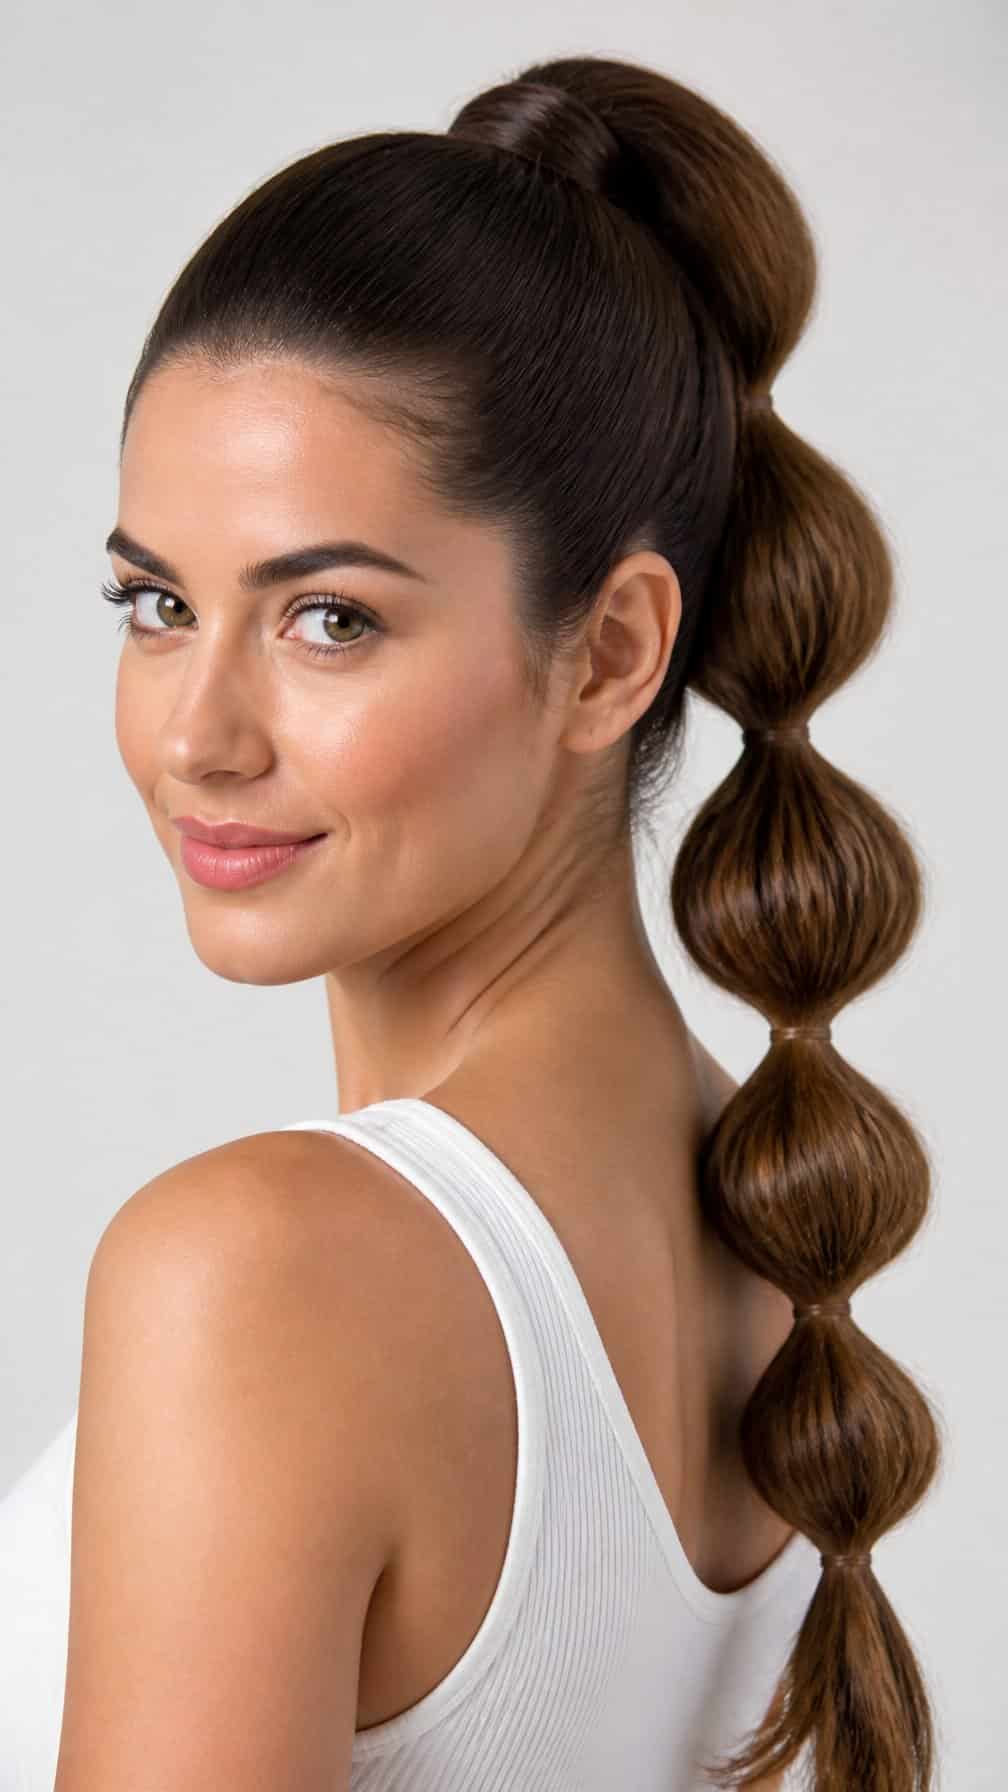
I start by gathering my hair into a high ponytail and securing it firmly with an elastic. I add more elastics down the length, spacing them about two inches apart.
I gently pull each section outward to create rounded bubbles, working from the top downward. A small amount of styling cream helps control flyaways and keeps the shape defined.
I use a clear elastic for a subtle finish or choose colorful bands for a playful look. The style works best on medium to long hair, though I can create smaller bubbles with shorter layers.
22) Dutch Crown Braid
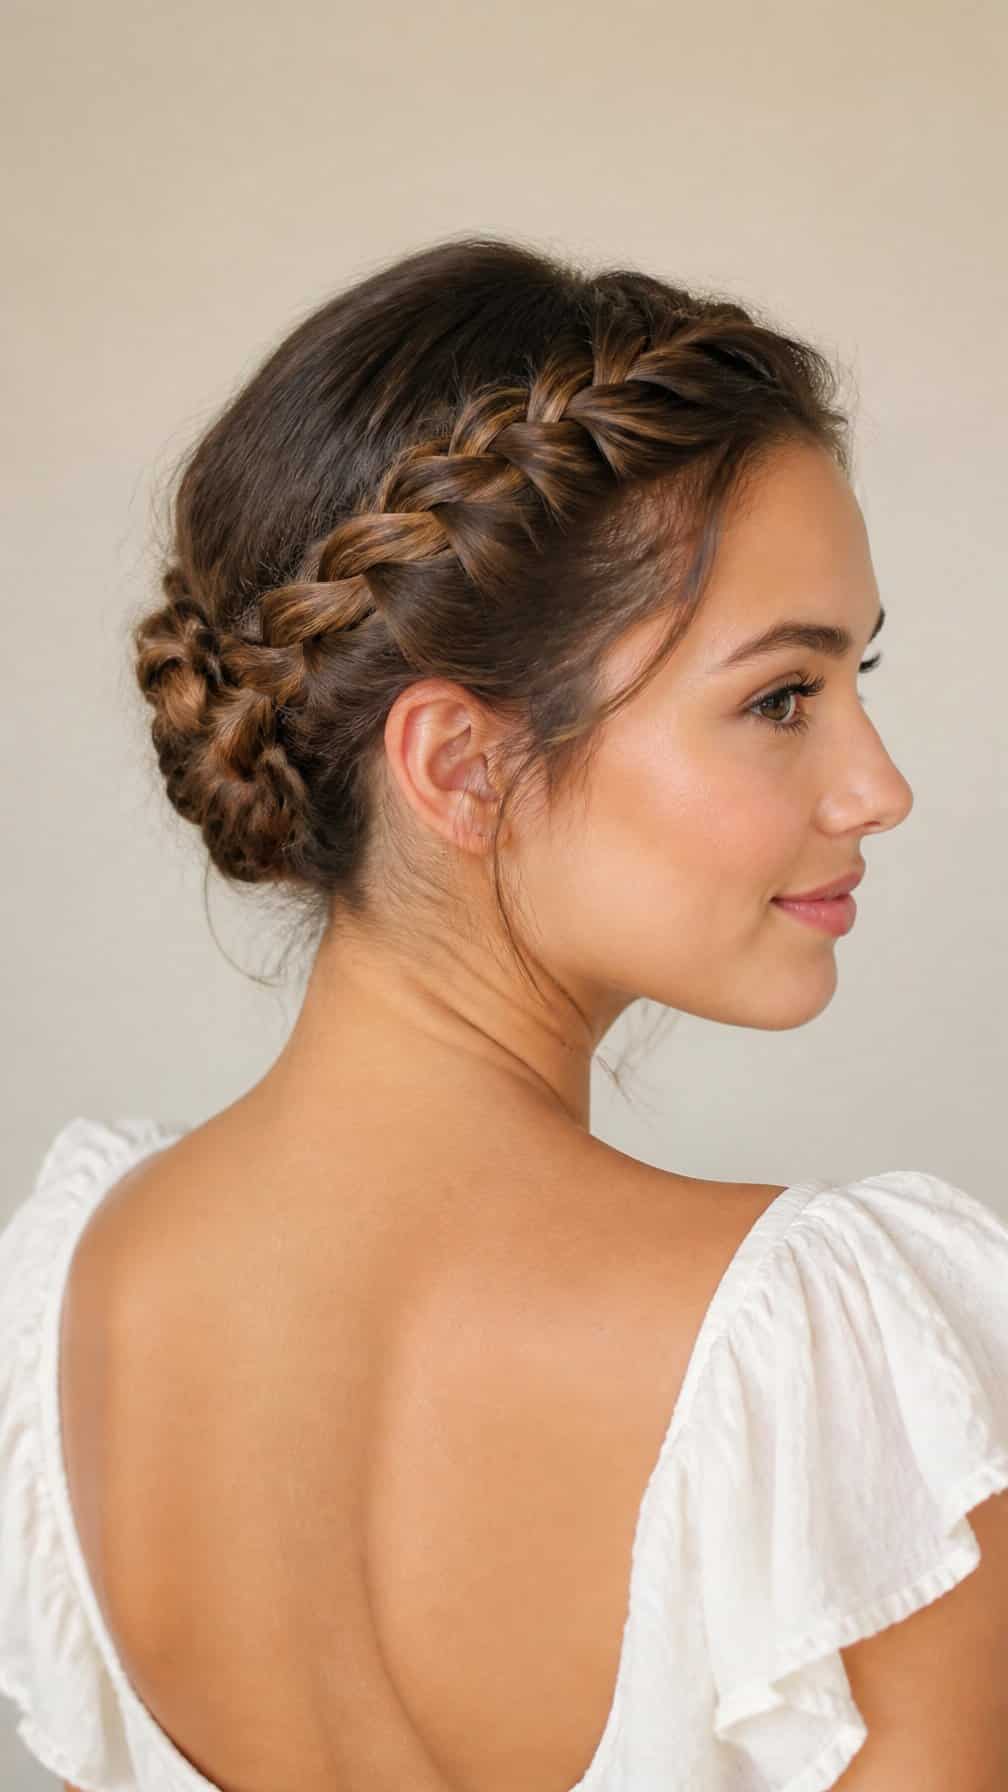
I part my hair slightly off-center and create a Dutch braid along one side, adding small sections as I move around my head. I keep the braid close to the hairline so it forms a neat crown without needing precise styling.
Once I reach the opposite side, I secure the braid with a small elastic and tuck the end beneath the braided section. I gently loosen a few loops for a softer finish, then pin any loose strands in place. A light mist of hairspray helps hold the shape.
23) Loose Side Braid
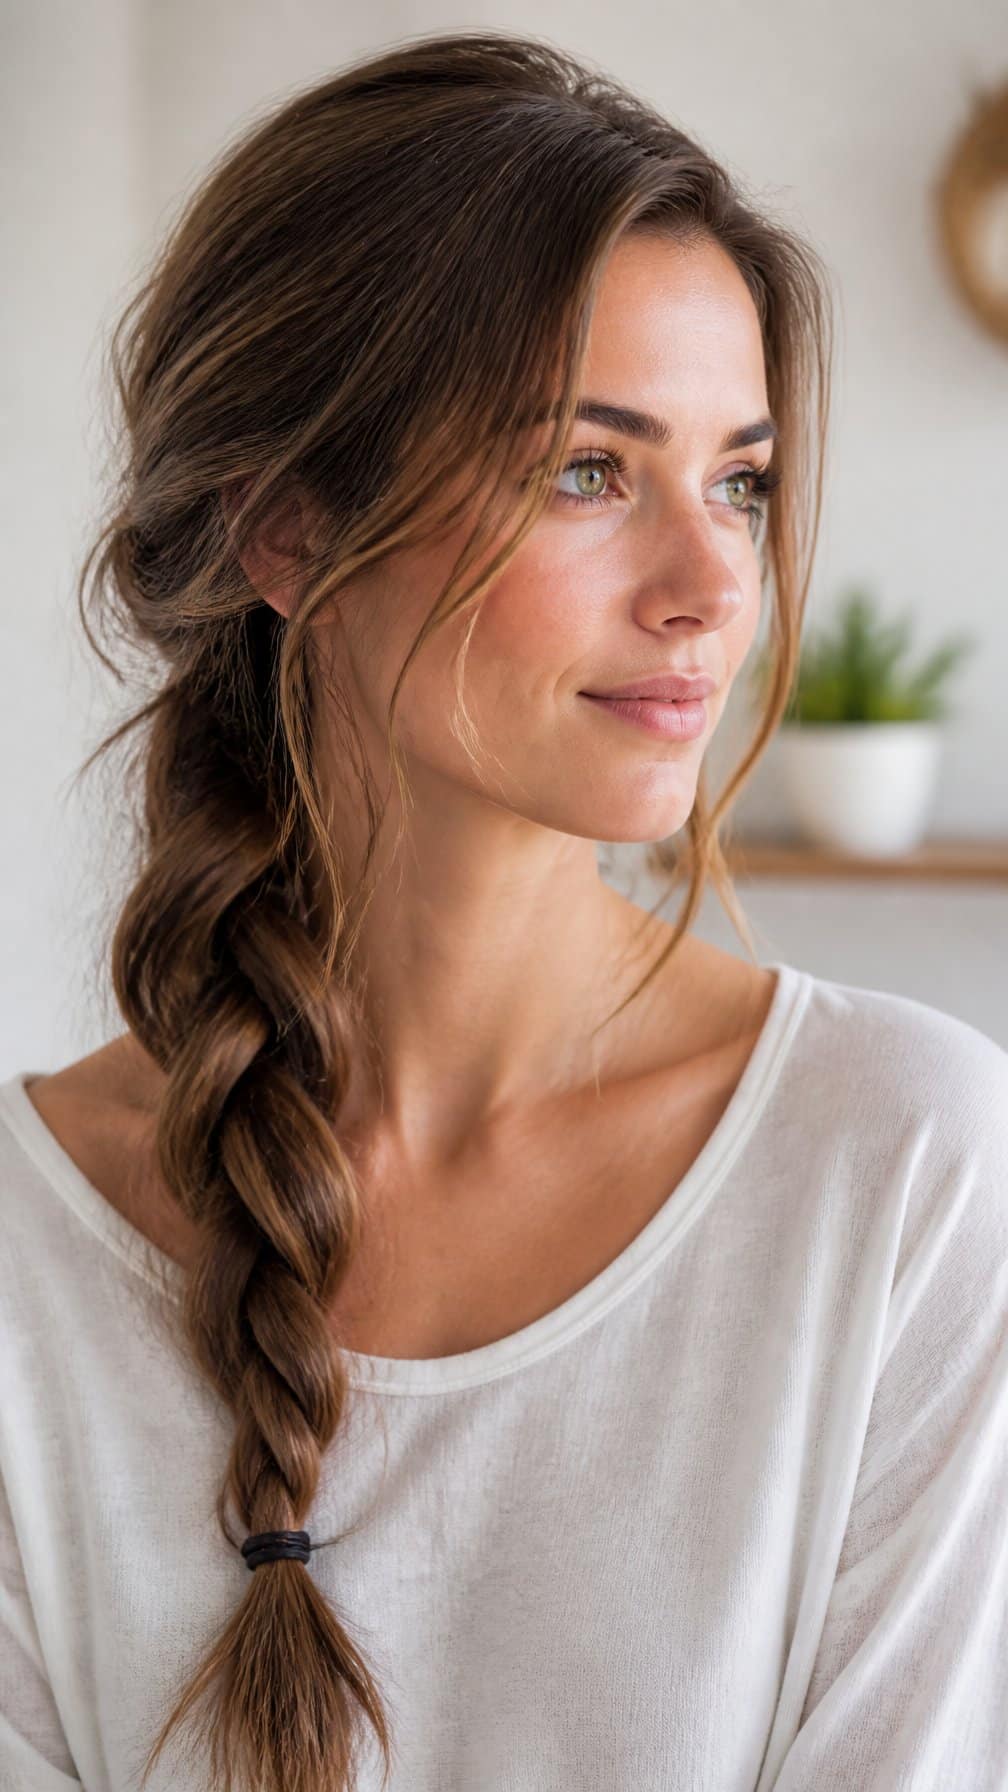
I gather my hair over one shoulder and divide it into three relaxed sections. I braid loosely from below the ear, keeping the tension soft so a few shorter strands can frame my face.
I secure the end with a small elastic, then gently tug each braid segment to add width and texture. A light mist of hairspray helps hold the style without making it stiff, while a ribbon or simple clip adds a personal touch.
24) Half-Up Hair Bow
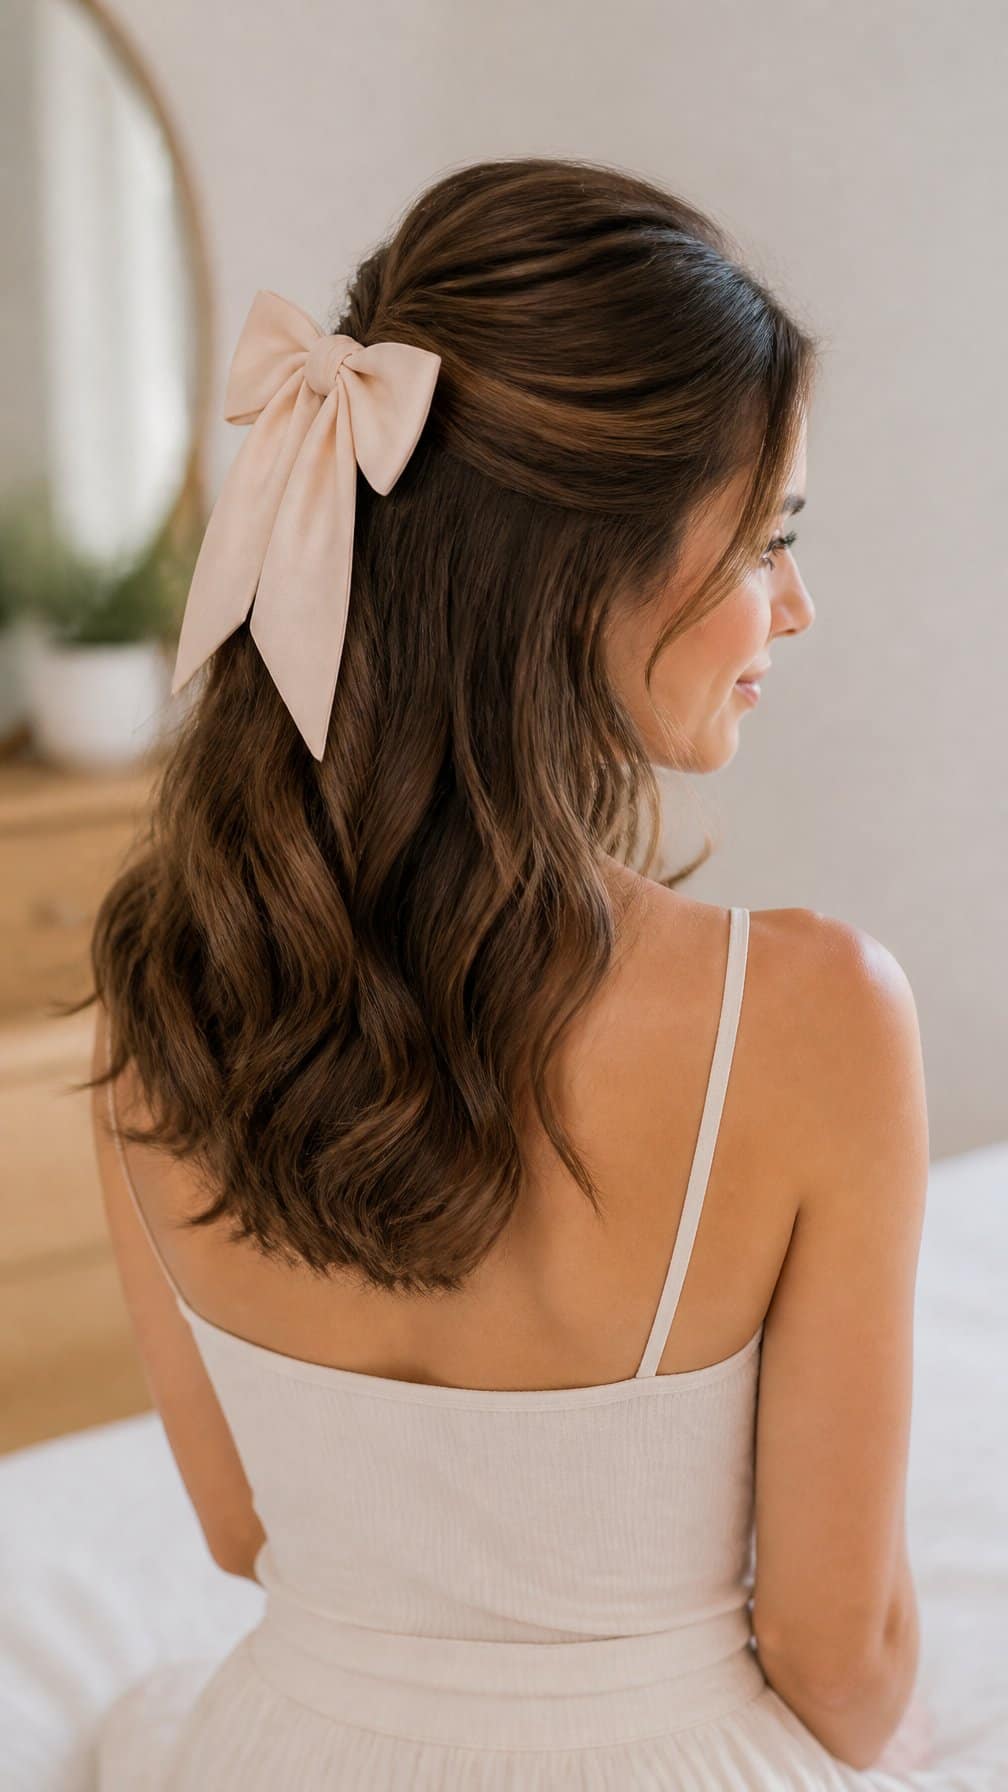
I gather the top section of my hair at the crown or just above the ears, then secure it with a small elastic. I split the secured section into two loops, shape each loop with my fingers, and wrap the loose center around the elastic to create the bow.
For a neater finish, I smooth flyaways with a little styling cream and pin the loops from underneath. I leave the lower hair straight or add loose waves, depending on the look I want. A ribbon-wrapped elastic can add color without changing the basic style.
25) Wrapped Low Ponytail
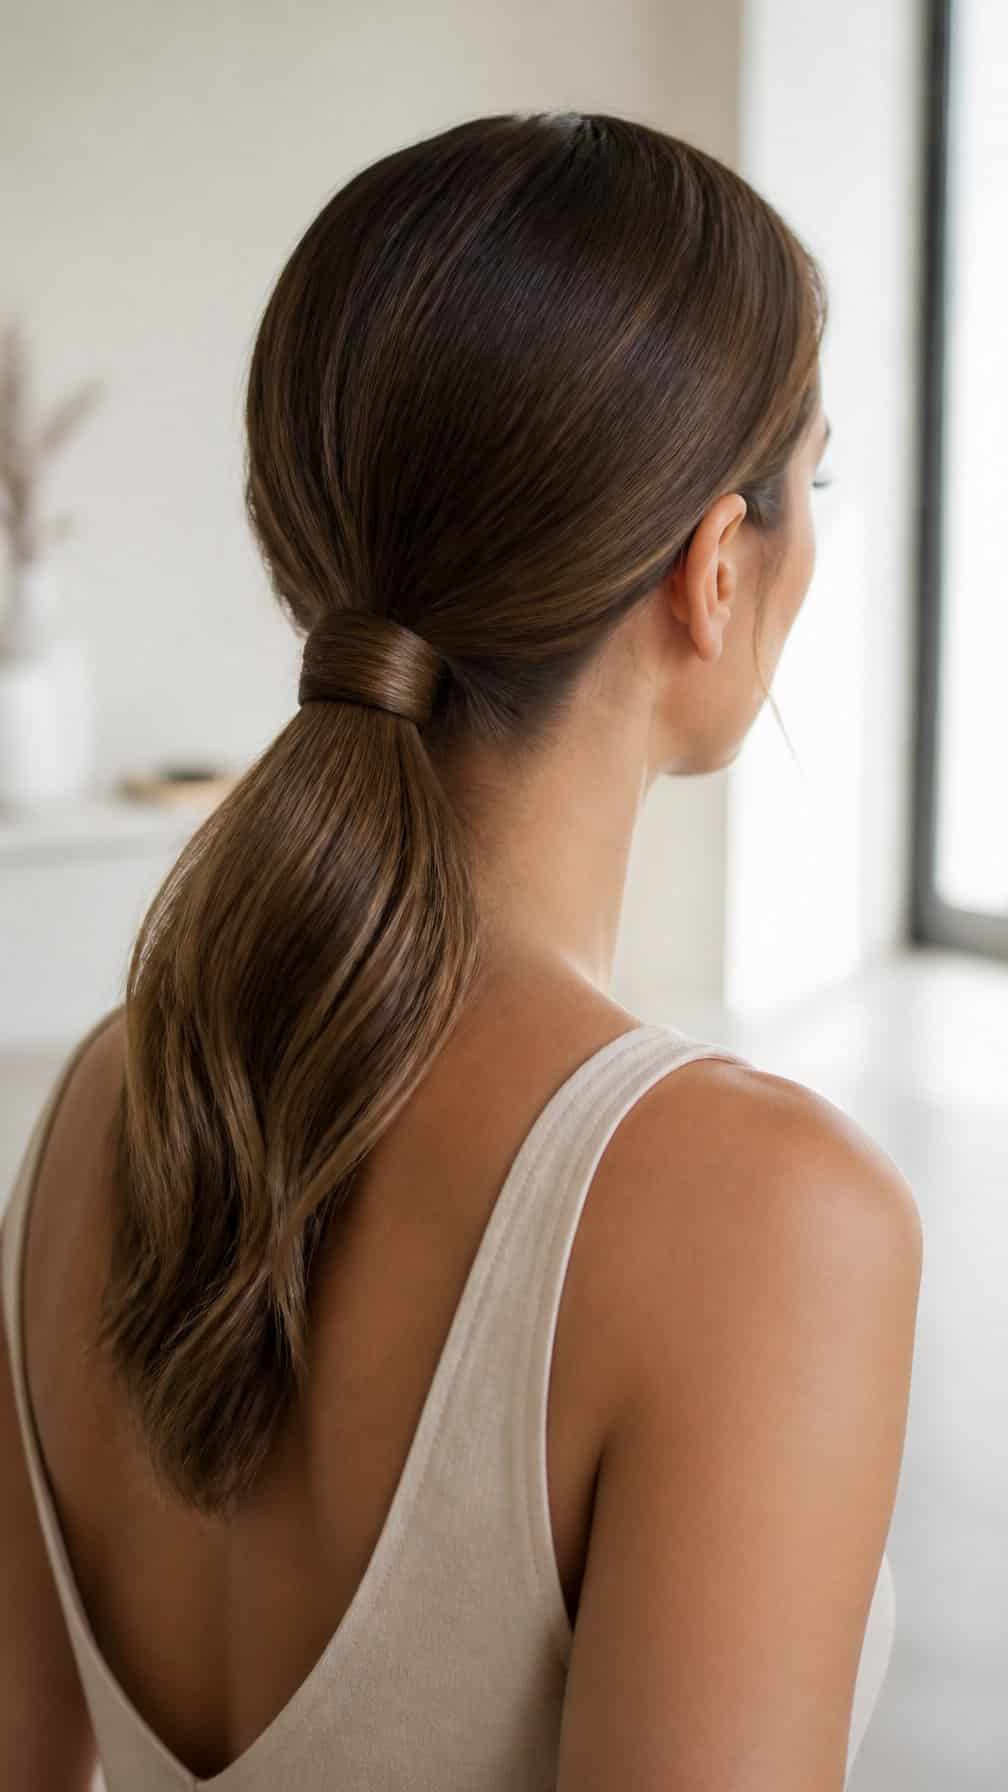
I gather my hair at the nape and secure it with a small elastic, keeping the ponytail smooth but not overly tight. I take a thin section from underneath, wrap it around the elastic, and tuck the end beneath the ponytail with a bobby pin.
For a softer finish, I leave a few face-framing strands loose and gently loosen the crown with my fingertips. I use a light mist of hairspray to hold the wrap in place without making the style stiff.
26) Three-Strand Headband Braid
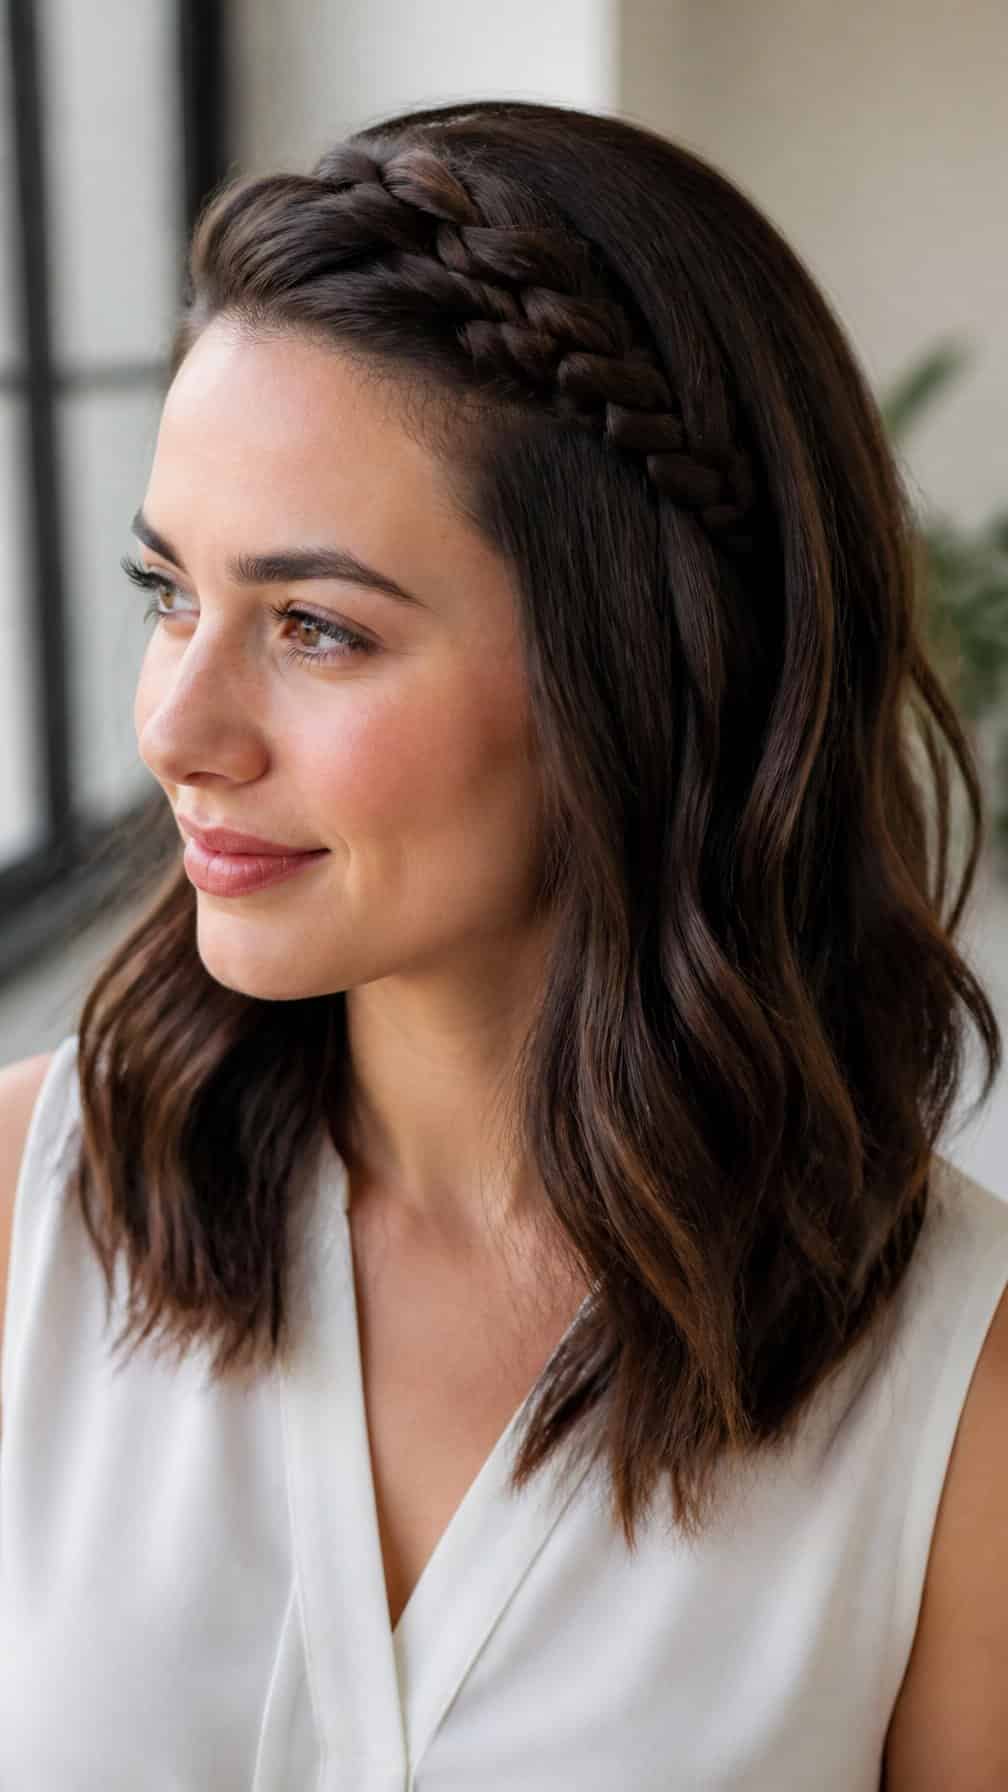
I start with a small section of hair near one temple and divide it into three even strands. I braid toward the opposite side, keeping the tension light so the band sits comfortably without flattening the roots.
Once the braid reaches the other temple, I secure it with a small elastic and tuck the end beneath nearby hair. I leave the rest loose for a soft look, or gather it into a low ponytail for a neater finish. The style usually takes about eight minutes.
Fast Styling Essentials
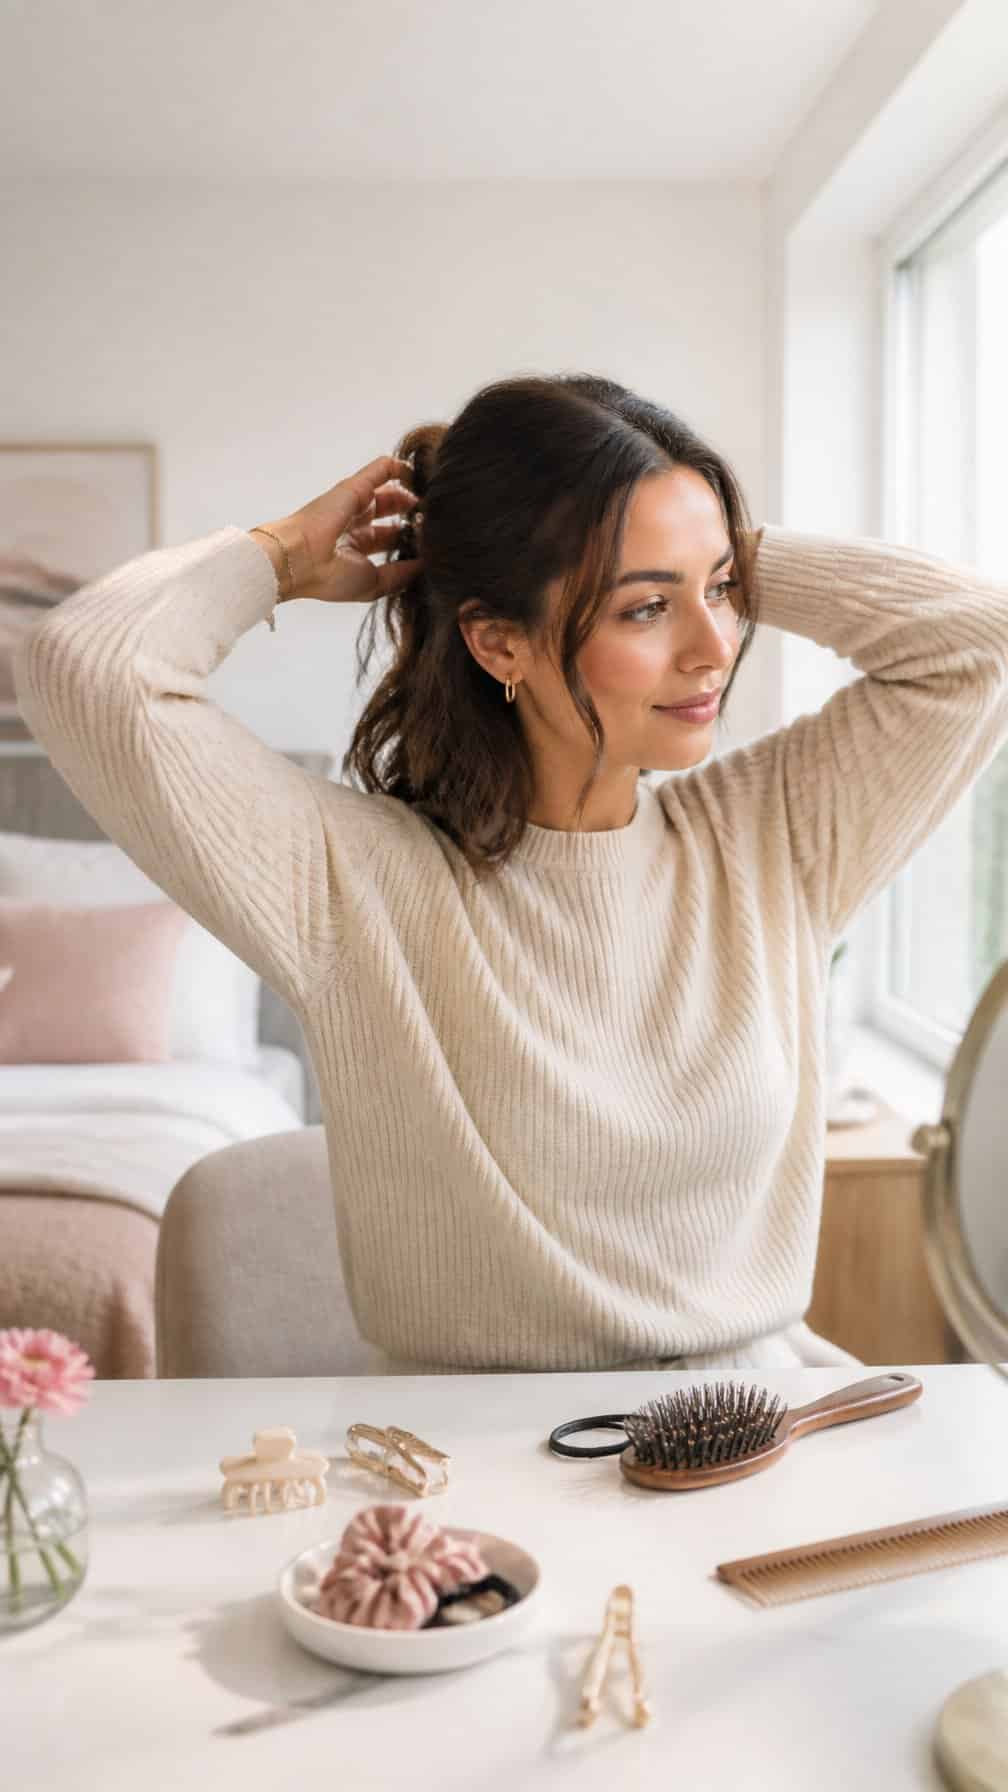
I save time by starting with dry, detangled hair and choosing a simple shape before I reach for a tool. A small set of reliable accessories, light-hold products, and quick prep steps keeps each style neat without adding extra work.
Prep Steps That Save Time
I begin by brushing from the ends upward to remove knots without creating extra frizz. If my roots look oily, I apply dry shampoo, wait one minute, then massage it in before styling. This gives the hair more grip and helps a ponytail or bun stay in place.
I part my hair before adding elastics or pins, since changing the part later can loosen the style. For smoother results, I warm a pea-sized amount of styling cream between my palms and run it over the mid-lengths and ends.
I also separate the supplies I need before I start. A quick plan—such as ponytail, braid, or half-up twist—keeps me from repeatedly restyling the same sections.
Tools And Products To Keep Handy
I keep a detangling brush, fine-tooth comb, clear elastics, strong hair ties, and several bobby pins in one container. I match the elastic to my hair thickness: thin elastics work for small sections, while fabric-covered ties reduce pulling on fuller hair.
A lightweight texturizing spray adds grip to clean, slippery strands. Smoothing cream controls flyaways, and a flexible hairspray helps hold loose styles without making them stiff. I use heat protectant whenever I apply a curling iron or flat iron.
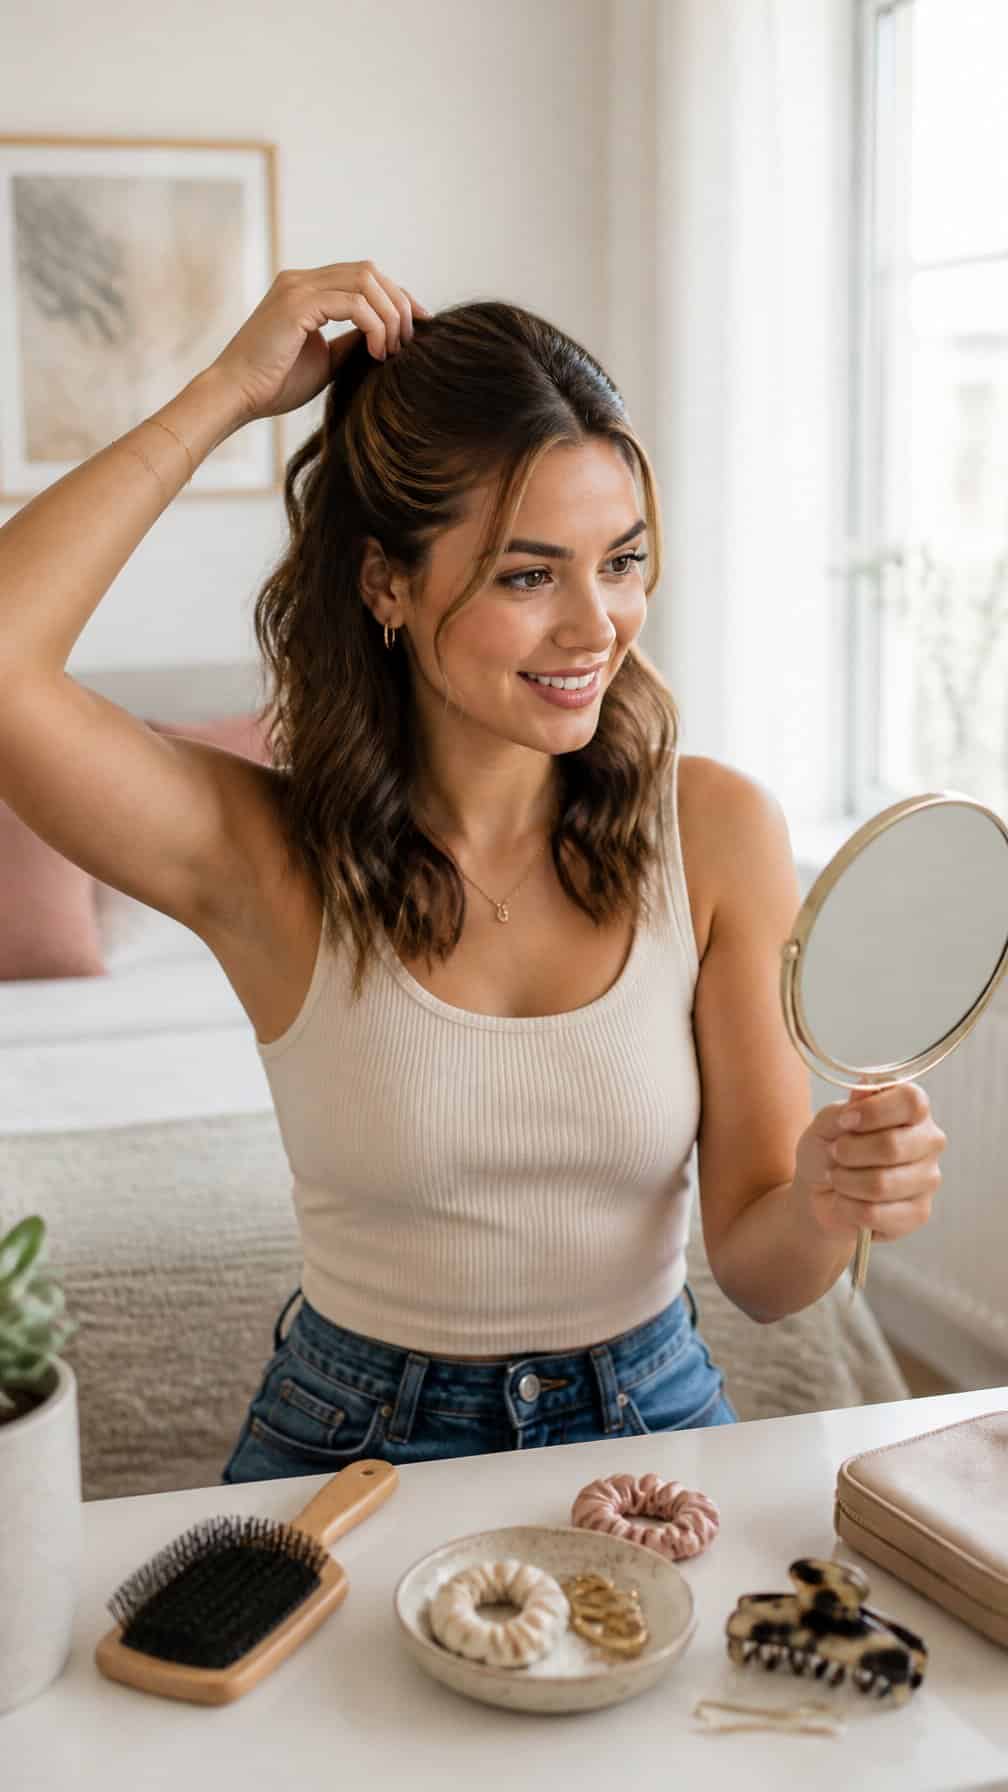
For quick finishing, I keep a compact mirror and a few accessories nearby. A claw clip, ribbon, or simple barrette can secure loose pieces while adding a finished detail in seconds.
Making Quick Styles Last
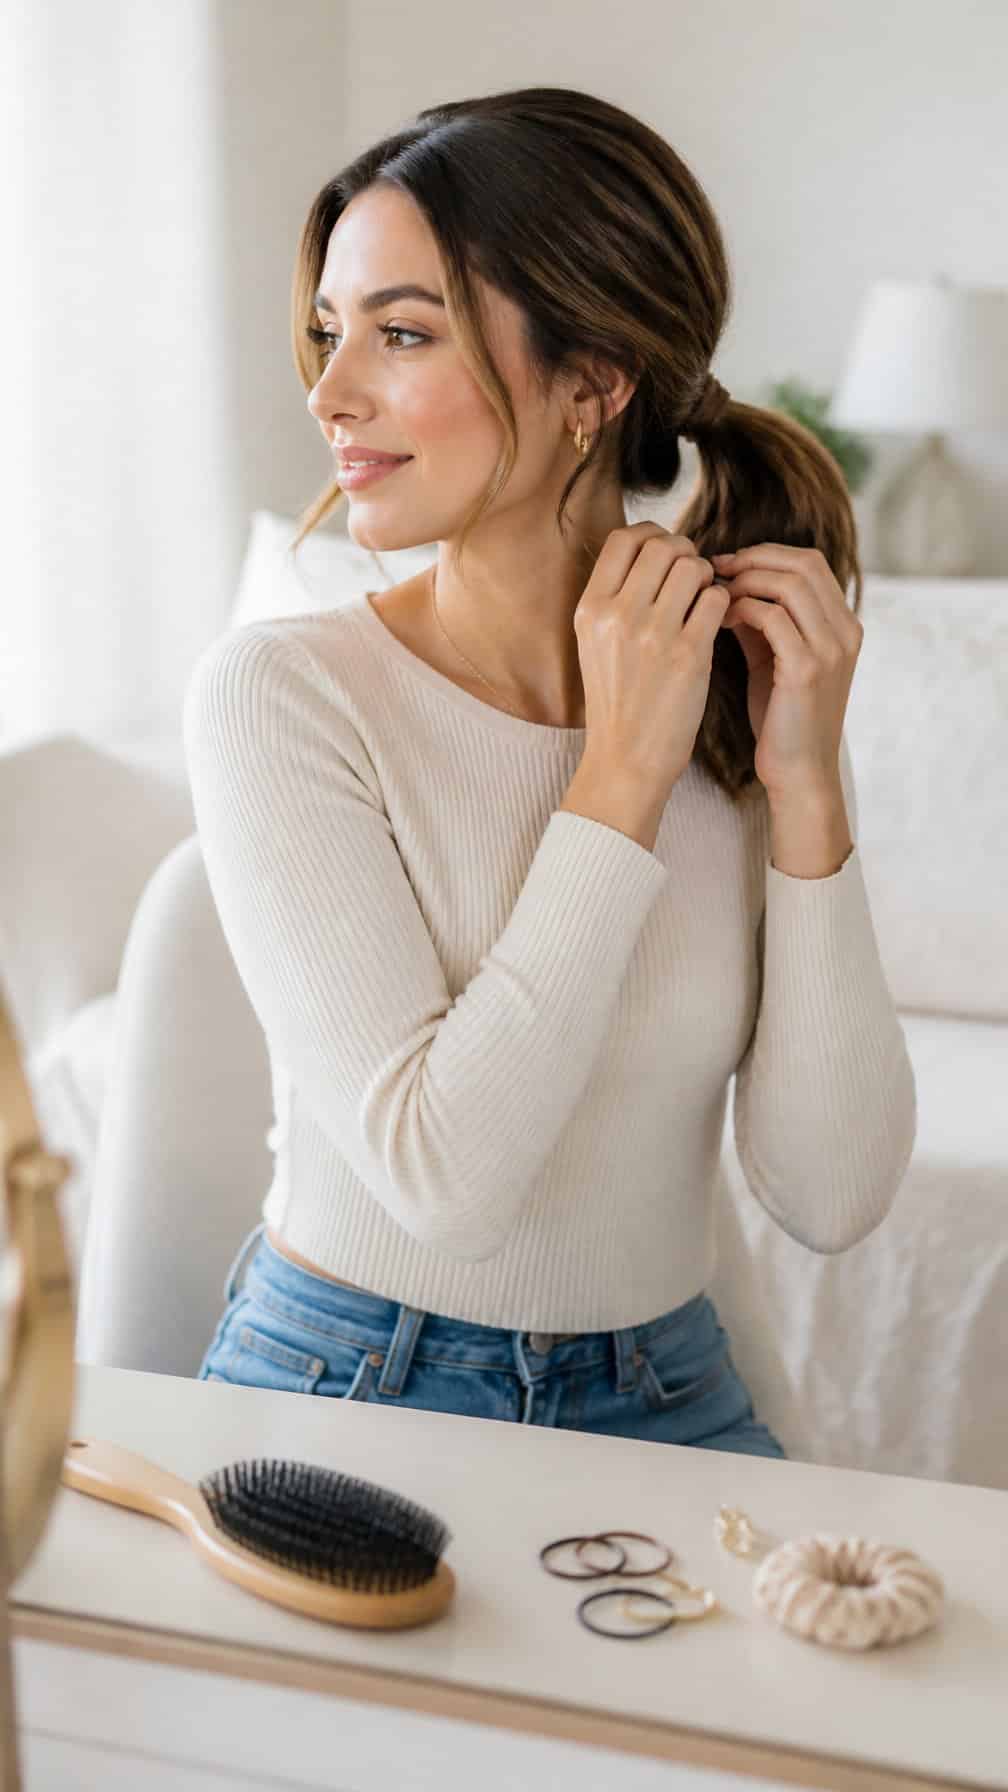
I keep fast hairstyles secure by choosing gentle tension, smooth accessories, and placement that supports the style. I also refresh roots and lengths selectively so the hair looks polished without adding unnecessary product or creating buildup.
Securing Hair Without Damage
I place elastics where they will not pull repeatedly on the same section. For ponytails and buns, I choose fabric-covered ties, spiral elastics, or snag-free bands, then wrap them firmly rather than tightening until my scalp feels strained. I slide pins into the base and weave them through the style instead of forcing them straight against the scalp.
Useful habits:
- I detangle the section before securing it to prevent knots.
- I use a wide-tooth comb on damp hair rather than brushing aggressively.
- I remove elastics by unwinding them or cutting an old band instead of dragging it through the ends.
- I switch the position of ponytails from day to day to reduce repeated pressure.
For fine hair, I anchor pins in a small crossed pair. For thick hair, I divide the style into two sections and secure each one separately.
Refreshing A Style Between Washes
I target oil at the roots instead of coating the entire hairstyle. I apply a small amount of dry shampoo to the part and hairline, wait several minutes, then massage it in with my fingertips before brushing lightly. This gives the product time to absorb oil and prevents visible powdery patches.
When the lengths look flat, I mist water onto my hands and reshape curls, waves, or flyaways rather than soaking the hair. I smooth a pea-sized amount of lightweight cream over dry ends, keeping it away from the roots.
I also use a clean scarf, headband, or claw clip to disguise flattened areas without adding more product. Before restyling, I check for buildup; if the hair feels waxy or stiff, I wash it instead of layering on another refresh product.